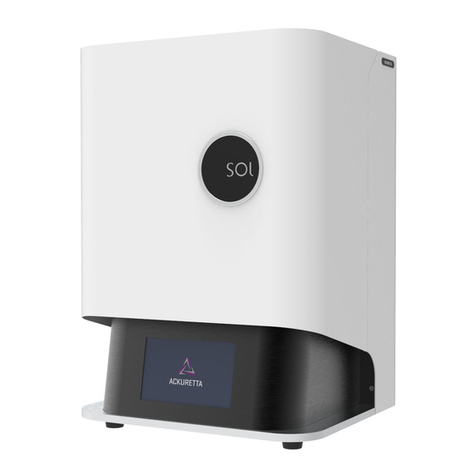
Ackuretta SOL User manual

2015


i
Legal
This product, this document, and any items associated with this
product or document are the express property of Ackuretta Tech-
nologies Pvt. Ltd. Replication or copying, in either partial or com-
plete form, of the product or the documentation without the
express written consent of Ackuretta Technologies Pvt. Ltd. is
strictly prohibited.
Ackuretta Technologies Pvt. Ltd. reserves the right to make
changes to this document and to the product described herein
without notice. Features of the product may change without mod-
ification of this document, and this document may not describe
every feature of the product.
SOL, the SOL logo, Alpha 3D, the Alpha 3D logo, Ackuretta, and
the Ackuretta logo are all trademarks of Ackuretta Technologies
Pvt. Ltd. Products or company names mentioned herein besides
Ackuretta-branded products are registered trademarks of their
owners.
Copyright © 2021, Ackuretta Technologies Pvt. Ltd. All rights
reserved.
Document Version: 1.0
Product Version: SOL (Firmware version *.*.*)
Release Date: Month Day, Year

ii

iii
Contents
Legal................................................................................................ i
1 About Your Printer....................................................................... 1
1.1 Specifications..............................................................................................1
1.2 Features.........................................................................................................2
1.3 Package contents......................................................................................2
1.4 Safety instructions ....................................................................................3
2 Getting Started ............................................................................. 5
2.1 Unboxing your printer............................................................................. 5
2.2 What you need...........................................................................................6
2.3 Connecting your printer to a network ..............................................8
2.4 User interface..............................................................................................8
2.4.1 Home Screen .............................................................................. 9
2.5 Print Screen ...............................................................................................10
2.6 Clean Vat Screen .....................................................................................11
2.7 Settings Screen ........................................................................................11
2.8 Web interface ...........................................................................................13
3 Setting up Your Printer.............................................................. 15
3.1 Setup environment.................................................................................15
3.1.1 Temperature: 18° - 25° C .....................................................15
3.1.2 UV-filtered lighting ................................................................15
3.1.3 Ventilation .................................................................................16
3.2 Connecting to a network .....................................................................16
3.2.1 Connecting to a wired network.........................................16
3.2.2 Connecting to a wireless network....................................17
3.2.3 Configuring a static IP address..........................................18
3.3 Attaching the vat.....................................................................................18
3.4 Adding resin to the vat .........................................................................19

iv
3.5 Attaching the build platform..............................................................19
4 Printing........................................................................................ 21
4.1 Starting the print process ....................................................................21
4.1.1 Printing via a USB device .....................................................21
4.1.2 Printing via the web console ..............................................22
4.2 The print process.....................................................................................24
5 Configuring your printer ........................................................... 27
5.1 Updating settings....................................................................................28
5.2 System settings........................................................................................30
5.2.1 Network settings.....................................................................32
5.2.2 System settings & information..........................................33
5.2.2.1 System information ...............................................35
5.2.2.2 Printer Name ............................................................35
5.2.2.3 Share Diagnostics...................................................36
5.2.3 Update ........................................................................................36
5.2.4 Language ...................................................................................36
5.2.5 Diagnostics................................................................................37
5.2.5.1 Logs .............................................................................37
5.2.5.2 Fan................................................................................38
5.2.5.3 Z-Axis ..........................................................................39
5.2.5.4 LCD...............................................................................39
5.2.5.5 Touch Panel ..............................................................40
5.2.5.6 Reset............................................................................41
5.2.5.7 Advanced...................................................................42
6 Maintaining your printer........................................................... 43
6.1 Using the Clean Vat function..............................................................43
6.2 Cleaning the vat.......................................................................................46
6.3 Updating printer firmware...................................................................48

1
About Your Printer
SOL is a highly precise chairside 3D printer designed to provide a
premium ownership experience for every type of user. Equipped
with auto-calibration and 100+ precalibrated materials, SOL offers
a simpler learning curve for beginners while providing the same
level of accuracy and consistency that professionals are looking
for. SOL is a networked device and must be connected to the inter-
net for operation.
1.1 Specifications
Table 1: Printer Specifications
3D printing technology Monochrome LCD Panel
Machine size 271 (L) x 292 (W) x 416 (H)
mm
Weight 15 Kg
Print size 128 x 80 x 140 mm
XY resolution 49 μm
Slice thickness 30 ~ 150 μm
Resin wavelength 385 ~ 405 nm
Power supply 110 ~ 240 V, 50 ~ 60 Hz

2
1.2 Features
•49-micron pixel size for super smooth finish
•High-speed printing up to 4.5 cm/hr
•Anti-drip LCD protection
•Automated cloud-based updates
•Replace most parts in under 15 minutes
•100+ Validated Materials
•Minimal learning curve
•2-year Warranty
•Designed for chairside and same-day digital dentistry
1.3 Package contents
•One extra print screen
•One extra vat
•One Ethernet cable
•Power cable
•Wi-Fi dongle
•2-year warranty

3
1.4 Safety instructions
Please note that this printer is to be used by trained personnel
only. You must read this manual and all notices, warnings and
safety instructions received with your printer before operating the
printer to ensure your safety.
To guard against injury, basic safety precautions should be
observed, including the following:
Personal Protective Equipment (PPE)
You must use personal protective equipment
(PPE) during the operation of this printer and
when handling 3D printing materials.
Ultraviolet Radiation
Avoid exposure to direct or reflected ultraviolet
rays. Ultraviolet rays are harmful to the eyes and
skin.
Ultraviolet light may break down plastic, rubber,
or other non-metallic materials, can fade colors,
and can be damaging to plant life. Shield all plas-
tic, rubber, or other non-metallic parts, plant life, etc. which may be
exposed to direct or reflected ultraviolet rays.
Electrical Shock Hazard

4
Always disconnect power to the printer and
unplug before performing any service or mainte-
nance.
Do not operate without proper electrical ground.
To prevent the risk of severe or fatal electrical
shock, special precautions must be taken. Equipment should be
plugged into an approved Ground Fault Circuit Interrupt (GFCI)
receptacle.
Do not operate equipment if the power cord and/or plug are dam-
aged, or if any other damage to the unit is visible or suspected.
Other
Do not alter the construction or design. Do not remove safety
devices, i.e. the acrylic hood.
Do not use equipment for other than its intended purpose, as
described in this user manual.
This printer is intended for indoor use only.

5
Getting Started
2.1 Unboxing your printer
Step 1 Open the printer box. The top of your printer is visi-
ble with handles on both sides. There are three
smaller accessory boxes packed behind the printer.
Step 2 Remove the accessory boxes from the main box.
Step 3 Remove the contents of the four accessory boxes
and put them in a safe place.
Step 4 Lift the printer out of the box by the handles.
Step 5 Put the printer on the floor adjacent to the box.
Step 6 Move the handles away from the printer.
Step 7 Lift the printer out of the internal packaging and put
it on a table.
Tip: When mov-
ing the printer,
always hold the
bottom of the
printer.
•Keep the printer in a vertical position and avoid
tilting it backwards to avoid bending or displac-
ing critical components.
Step 8 Remove the plastic wrap and the Quick Start Guide.
Step 9 Raise the hood and make sure the Vat and Build Plat-
form are in place.

6
2.2 What you need
In addition to the contents of the package, you must have several
other items in order to use your printer effectively and make a
complete print. This section outlines the items that you must
acquire in addition to the items shipped with the printer.
•Computer – You must have a computer that meets the follow-
ing minimum requirements in order to run the Alpha 3D soft-
ware which is necessary for creating the print file.
•Resin – Your printer is tested with all Ackuretta CURO- resins,
but is designed to have an open materials system so you can
use any 385-405 nm resin.
•Safety equipment – You should always wear chemical-resistant
gloves when handling photopolymer resins. Ackuretta also
strongly recommends wearing a respirator or face mask when
handling resins, and wearing UV-protective glasses when work-
ing with the internal components of the printer. Wear cut-resis-
Table 1: Computer specifications
Minimum Recommended
Intel i3 2.0 GHz dual-core CPU or
AMD Athalon 2.0 GHz dual-core
CPU
Intel i7 2.6 GHz quad-core CPU
or AMD Phenom II X4/ X6 at 2.6
GHz quad-core CPU
Dedicated GPU with 1 GB RAM NVidia GeForce 830 or AMD
Radeon R7 M340
4 GM RAM 8 GB RAM
1 GB disk space 2 GB of disk space
Windows 7 SP1, 8.1, or 10 Windows 7 SP1, 8.1, or 10
1600 × 900 display resolution 1920 × 1080 display resolution

7
tant gloves when removing prints from a build platform, just in
case your knife slips.
•Washer – A bath to remove the bulk of the residue may be cov-
ering the piece immediately when the print process is com-
plete.
•Cleaning alcohol – Most resins require either isopropyl alcohol
(99% solution) or ethyl alcohol (95% solution) for cleaning.
Please contact your resin distributor or refer to the related doc-
umentation for information about the proper cleaning alcohol
to use. You can also add the cleaning alcohol to a washer or
bath.
•Spray bottle for cleaning alcohol – Use the spray bottle to clean
the part, your equipment, or workspace.
•Alcohol wipes (Isopropyl alcohol 75%) – Another method for
cleaning your prints and workspace.
•Air blower or compressed air – Use the compressed air to
remove alcohol and to clean the part, your equipment, or work-
space.
•Rubber or silicone spatula – Use this to move or mix the resin in
the vat.
•Scraper or knife – A sharp blade is useful for removing the part
from the build platform. Dull scrapers can damage the build
platform.
•UV box – Ackuretta resins are all tested with the Ackuretta UV
oven. Other resin suppliers usually recommend different UV
boxes for curing.
•Rubber mallet – A mallet is useful for removing the part from
the build platform.
•Microfiber cloth – Cleaning the LCD print screen

8
•Polishing kit – Polishing the surface of your print to produce the
desired finish.
Make sure you have a safe and legal place and method for remov-
ing unused resin.
2.3 Connecting your printer to a network
Connect your printer to a network so that you can get access to
the web console and start the print process from an Internet
browser.
There are two options for connecting your printer to your network:
•A wired connection (i.e. LAN/Ethernet); and
•a wireless connection (i.e. Wi-Fi).
Please refer to “Connecting to a network” on page 16 for more
information.
2.4 User interface
When you turn on your printer, the machine takes a moment to
load and then shows the Home screen. The Home screen shows
icons that indicate Wi-Fi signal strength (if you are connected to a
wireless network), the printer IP address, and whether there are
any notifications.

9
You access the main functions and settings via the buttons on the
left side of Home screen.
You also have the option to operate your printer via a networked
computer (i.e. web console). Please refer to * for more information.
2.4.1 Home Screen
There are three buttons on the left side of the Home screen. From
top to bottom, they are the Print, Clean Vat, and Settings but-
tons.
Table 2: Home Screen Buttons
Button Description
Print The Print screen is the primary
screen for uploading files and
starting the print process.
There are three tabs on the
Print screen: Queue; History;
and USB.

10
2.5 Print Screen
Press the Print button to show the Queue, History, and USB tabs
at the top of the screen. You load your print files from these tabs.
Clean Vat Use the Clean Vat function
whenever the print fails so that
you can easily remove pieces
of prints that did not stick to
the build platform during the
print process.
Settings All of the settings to configure,
control, and customize your
printer are accessible via the
Settings button.
Table 2: Home Screen Buttons
Button Description
Table 3: Print Screen Tabs
Tab Description
Queue A list of print files that are
loaded on the printer and
ready to print.

11
2.6 Clean Vat Screen
You can use the Clean Vat function to remove pieces of print that
did not securely attach to the build platform during the print pro-
cess. Please refer to “Using the Clean Vat function” on page 43 for
more information.
2.7 Settings Screen
The Settings screen gives you access to system-wide settings and
information.
History A list of print files for com-
pleted print jobs.
USB The file directory of an
attached USB device. You can
select a print file on this tab
and add it to the Queue
Table 3: Print Screen Tabs
Tab Description

12
All the same functionality and information is also available via a
web browser when a computer and your printer are connected to
the same network.
Table 4: System Settings
Settings Description
Network Connect to either a wired or
wireless network. For instruc-
tions on how to set up a net-
work connection, see
“Connecting to a network” on
page 16.
System View system information,
change your printer’s name,
and choose whether to share
diagnostic information with
Ackuretta.

13
2.8 Web interface
The web console is essentially the same as the machine console
but with the functions arranged in a browser-friendly format. To
get access to the web console, you must connect your printer to a
network and key the printer’s IP address into a browser on a con-
nected computer.
Update Update the printer firmware
and material settings. Please
refer to ““Updating settings”
on page 28.
Language Select your preferred language
for the user interface.
Diagnostics Use the Diagnostics functions
to determine the source of any
printer issue.
Table 4: System Settings
Settings Description

14
Other manuals for SOL
3
Table of contents
Other Ackuretta 3D Printer manuals

Ackuretta
Ackuretta FreeShape 120 User manual

Ackuretta
Ackuretta Diplo User manual

Ackuretta
Ackuretta DENTIQ User manual

Ackuretta
Ackuretta DENTIQ User manual

Ackuretta
Ackuretta SOL User manual

Ackuretta
Ackuretta FreeShape 120 User manual

Ackuretta
Ackuretta SOL User manual

Ackuretta
Ackuretta SOL User manual

Ackuretta
Ackuretta DENTIQ User manual

Ackuretta
Ackuretta FreeShape 120 User manual