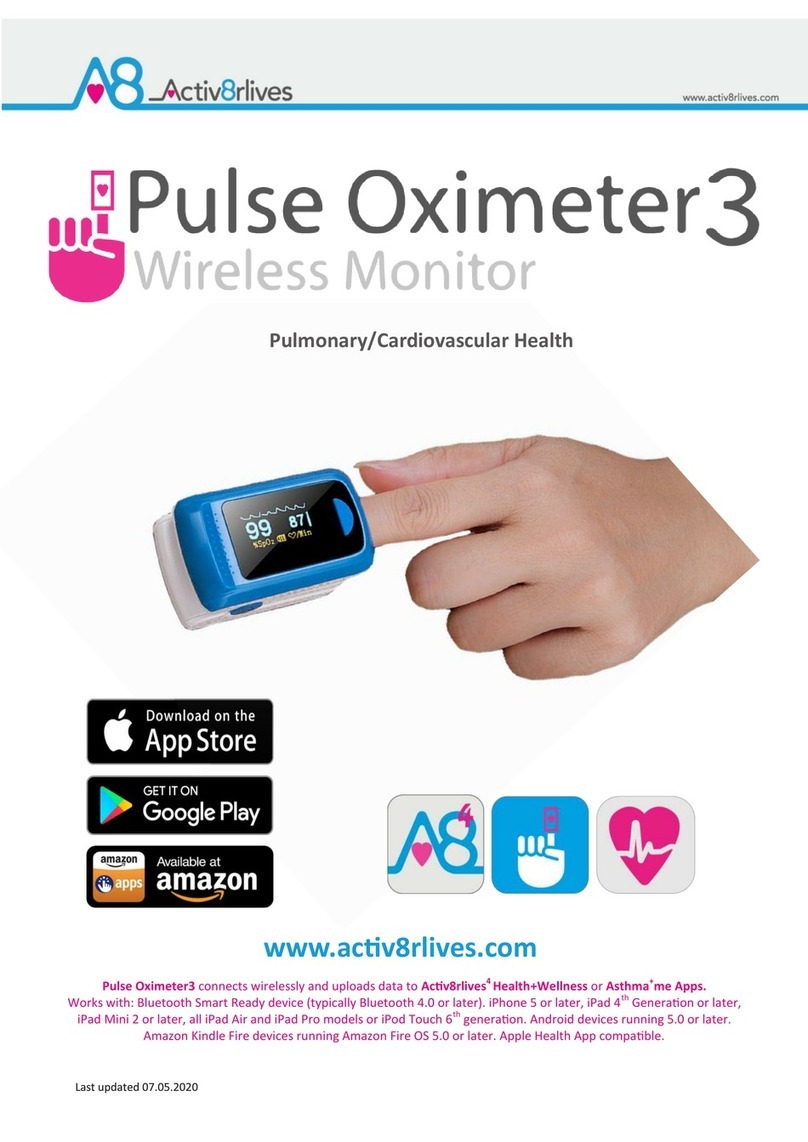
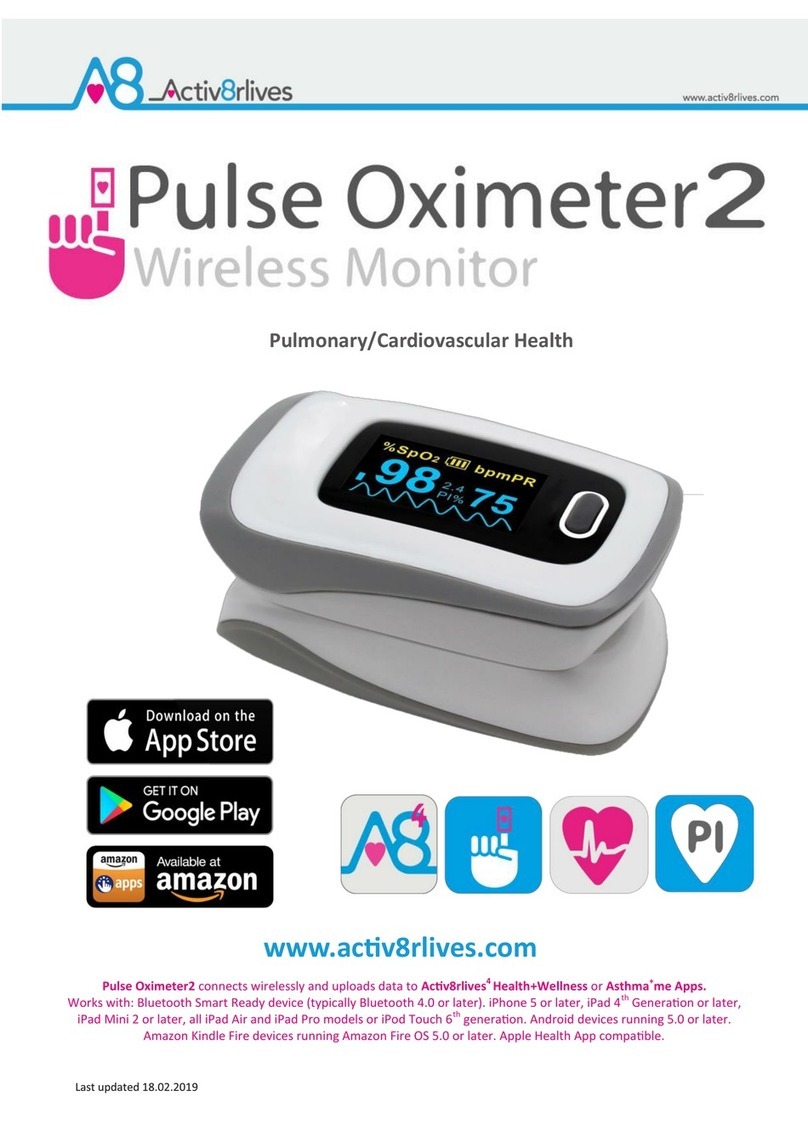
Activ8rlives Pulse Oximeter2 Bluetooth User manual

Pulse Oximeter2 connects via Bluetooth 4.0 (Smart)
& upload data to Activ8rlives.
FREE App that works with: iOS 10 and above (iPhone 5s or later & iPad 4 or later)
and select Android devices running Android 5.0 and above.
Apple Health App compatible.
www.activ8rlives.com
Pulmonary/Cardiovascular Health

2
Contents
Getting started 4
Your Pulse Oximeter2 5-6
Health and Safety Notices 7
Charging your device 8
How does the device work? 9-10
Correct placement of finger 11
Installing Activ8rlves App 12
Let’s get started 12-13
Register for Activ8rlives account 14-15
Start-up Screens 16-17
Connecting by Bluetooth 18
Taking a Reading 19
Viewing Data 20
Sending data to cloud 21
Manual Settings 22-25
Viewing data on PC or Mac 27
Apple Health Integration 28
Trouble shooting 29-30
Manual data entry and Custom trackers 31
Case Study 32
Specifications 34
Warranty 35
Website 36
Groups and Adventures 37
Rewards and Medals 38
Food Diary 39

3
We are a healthcare company. Our mission is to empower you to take care of
your health and that of your family by self-management through self-
monitoring.
From tracking levels of physical activity, weight, food intake, cardiovascular and lung
function, to a new generation of at-home testing for long-term lung disease, we provide
the devices and web-based tools to help you be active, eat well and stay healthy. Learn
more at www.activ8rlives.com

4
Need Help Setting-Up?
Call us 7 days a week, between 9:00—18:00
UK +44 (0)1480 352 821

5
Your Activ8rlives Pulse Oximeter2
Please read this manual carefully before you use your new device so that you do not injure
yourself or others, or cause damage to your new device through improper use.
The Activ8rlives Pulse Oximeter2 is a simple electronic device which allows you to monitor
aspects of your cardiovascular and pulmonary function—especially if you have Asthma,
Chronic Obstructive Pulmonary Disease (COPD), Cystic Fibrosis (CF) and Bronchiectasis (NCFB)
and need to track your oxygen saturation levels and pulse rate.
It sends information to your free Activ8rlives account via your Bluetooth 4.0 enabled
Smartphone or Tablet (not included) so that you can see how well you are doing and keep
track of your health and wellbeing. You can stay committed to your goals by forming groups
with other members of your family, club, school or by joining our online communities. By working
together in groups, we are more successful in achieving our health goals. Activ8rlives is
designed to help you achieve this.
The Activ8rlives Pulse Oximeter2 helps you understand how your cardiovascular and pulmonary
functions can change throughout the week, during periods of ill health or as you change your
weight and activity levels. It measures your oxygen saturation levels of your blood and your
pulse rate using non-invasive wireless monitoring technology. Population tables for values at rest
for SpO2 and heart rate are shown in the table on Page 10 and these use the traffic light systems
of colours to indicate if the readings are within or outside the normal range and the equivalent
NEWS score.
Included is the latest free Activ8rlives4Wellness and Diary App, tracking your food intake via our
photo-based Food Diary and these images are sent directly to your Activ8rlives account. This
latest addition allows users to record data from Activ8rlives‘ growing range of consumer-
focused health monitors and store these data in both the Activ8rlives web-servers and Apple’s
Health App (HealthKit) on iPhones to share data from other health-related Apps.
When you view your data with either the Activ8rlives website or App, this device will help you to
work out how close to your target values you are at any given time. This manual shows you how
to quickly set-up your Activ8rlives Pulse Oximeter2 —it will take just 5-10 minutes if you follow this
guide through.
If in any doubt about your health, please consult your medical team first and follow their advice
closely.

6
Your Activ8rlives Pulse Oximeter2
Your Activ8rlives Pulse Oximeter2 has several parts, the OLED Display, the On/Off Button, and the
Battery Compartment. It is also supplied with a storage bag, Quick Guide and Product Manual.
The OLED Display has many parts: Oxygen saturation or SpO2, Perfusion Index PI, Pulse Rate
bpm, Battery symbol, Bluetooth 4.0 symbol, Pulse Rate Bar graph and the Pulse Rate Waveform
Display or Plethsymogram.
Your Activ8rlives Pulse Oximeter2 also has a finger size adjustment, which can accommodate
small and large circumference fingers to be measured. See page 11 for full instructions on the
correct finger placement.

7
Health and Safety Notices
WARNINGS: The Activ8rlives Pulse Oximeter2 is NOT waterproof. Do not submerge it in
water.
PLEASE seek medical advice before undertaking strenuous exercise or weight loss
programmes. Seek advice from your Doctor about any long-term condition. This device
should not be used to make a primary diagnosis.
This device is not a toy. It is not calibrated for newborn babies.
Do not expose your eyes to the light-emitting component of the Oximeter, as this could
cause harm to your eyes.
Finger nail polish, fake finger nails and tattoos on the finger may cause incorrect
readings.
Do not wash it in water. Use a soft, microfiber cloth for cleaning. Don’t use harsh
cleaning products as these will cause damage to your Activ8rlives Pulse Oximeter2.
Don’t allow sharp objects to scratch the screen of the OLED Display as this may
damage it.
Do not allow your Activ8rlives Pulse Oximeter2 to be subjected to excessive forces,
shocks, dust, temperature changes or humidity over the range specified. Harsh physical
treatment may stop your Activ8rlives Pulse Oximeter2 from working properly. Don’t
expose your Activ8rlives Pulse Oximeter2 to direct sunlight for long periods of time.
Don’t remove the back cover and tamper with the internal components. If you do, you
will invalidate your warranty and may cause irreparable damage. Other than the
replacement of the batteries, there are no user serviceable parts.
Take precautions when handling all battery types and dispose of batteries properly.
Remove the batteries if you are planning to store the device for a long period of time.
We hope you use your device for many years of course, but long periods of storage
with the batteries in place may damage the device and will cause the batteries to
discharge. Only use the battery type recommended in this manual. Do not touch the
exposed electronic circuits, as there is a danger of electric shock.
When disposing of this product, ensure that it is collected separately for special
treatment and not as normal household waste.
The measurement functions built into the Activ8rlives Pulse Oximeter2 are not meant to
substitute professional measurement or industrial precision devices. Values produced by
the unit should be considered as reasonable representations only.
The technical specifications for this product and the contents of the Instruction Manual
are subject to change without notice.
Contact Activ8rlives if your Activ8rlives Pulse Oximeter2 does not work properly.
Call us 7 days a week, between 9:00-18:00
t: +44 (0)1480 352 821 or support@aseptika.com

8
Charging Your Activ8rlives Pulse Oximeter2
Note: Do not tamper or attempt to open the unit in which the non-rechargeable
batteries are housed, your warranty will be invalidated. Substances contained within
the battery may damage the environment or human health if handled and is a risk of
electrical shock or burns. When disposing of this product and its batteries, ensure that it
is collected separately for special treatment and not as normal household waste.
Your Activ8rlives Pulse Oximeter2 uses two AAA
1.5V alkaline batteries, which are supplied. These
are non-rechargeable batteries and no attempt
should be made to recharge these.
Remove the back cover and add the 2 x
AAA 1.5 V alkaline batteries in the direction
indicated.
Replace the cover. The OLED Display should
light up now when you press the On/Off
Button.
If not used, it will power off after about 10
seconds to save battery power. A faulty
operation would make it power off also.
Remove the batteries if you are planning to
store the device for a long period of time.
We hope you use your device for many
years of course, but long periods of storage
with the batteries in place may damage
the device and will cause the batteries to
discharge.
Replace the set of batteries (2 x AAA) in the right
direction when the battery symbol on the OLED
Display is shown an empty or low battery
symbol.
+
_

9
How Does the Activ8rlives Pulse Oximeter2 Work?
The Activ8rlives Pulse Oximeter2 is a non-invasive wireless method allowing the monitoring of
the saturation of haemoglobin in your blood.
A sensor is placed on a thin part of your body, usually a fingertip or earlobe (separate adapter
required).
Light of two wavelengths is passed through the finger (or earlobe) to a photodetector. The
changing absorbance at each of the two wavelengths (red 660nm and infrared 905nm) is
measured, allowing determination of the absorbances due to the pulsing arterial blood alone
(the blood flowing from the heart and lungs), and excludes venous blood (the blood returning
to the heart and lungs), skin, bone, muscle, fat, and finger nails.
A blood-oxygen monitor displays the percentage of arterial haemaglobin (Hb) in the
oxyhaemoglobin (HbO2) configuration. Acceptable normal ranges for patients without COPD
with a hypoxic drive problem are from 95-99 percent (%), in those with a hypoxic drive problem
would expect values between 88-94%. Values of 100% can indicate carbon monoxide
poisoning. For a patient breathing room air at sea level, an estimate of arterial oxygen
saturation levels (pO2) can be made from the blood-oxygen monitor SpO2 reading.
The monitored signal fluctuates in time with the heart beat because the arterial blood vessels
expand and contract with each heart beat. By examining only the varying part of the
absorption spectrum (essentially subtracting minimum absorption from peak absorption), a
monitor can ignore other tissues or nail polish (though black nail polish tends to distort readings)
and discern only the absorption caused by arterial blood. Detecting a pulse is therefore
essential to the operation of the Activ8rlives Pulse Oximeter2 and it will not function if there isn’t
one.
Your Activ8rlives Pulse Oximeter2 will give you two important pieces of information: your
oxygen saturation levels (SpO2) and your pulse rate in beats per minute (bpm).
If in doubt about your health, please consult your medical team first and follow their advice
closely.

10
SpO2and Heart Rate Values at Rest
These values have been created from population tables of the normal distribution of oxygen
saturation and Heart Rate values within the general population. The colour coding by traffic
light colours are a good indicator if the reading is Normal or Fair (Green zone), Poor or Concern
(Amber zone) or Alert (Red zone).
NEWS
The National Early Warning Score (NEWS), like many existing Early Warning Score systems, is
based on a simple scoring system in which a number is allocated to physiological measure-
ments (Vital Signs) already routinely measured in hospital and recorded on the patient clinical
chart. The six simple physiological parameters form the basis of the scoring system:
1. respiratory rate;
2. oxygen saturations;
3. temperature;
4. systolic blood pressure;
5. heart rate; and
6. level of consciousness.
A score is allocated to each of these Vital
Signs as they are measured and aggre-
gated, and the magnitude of the score
reflects how extreme the parameter varies
from the norm.
The Royal College of Physicians
(RCP) advocates standardising the use of
a NEWS system across the NHS in order to
drive the ‘step change’ required in the as-
sessment and response to acute illness.

11
Perfusion Index
The perfusion index (PI) is the ratio of the pulsatile blood flow to the non-pulsatile or static blood
in peripheral tissue. Perfusion Index thus represents a non-invasive measure of peripheral perfu-
sion that can be continuously and non-invasively obtained from the Activ8rlives Pulse Oximeter2.
To make informed patient management decisions, clinicians often need to be aware of chang-
es in peripheral perfusion and circulatory status.
Optimal pulse oximetry monitoring accuracy is dependent on the selection of a monitoring
site (e.g. fingertip, hand, toe, foot, forehead, ear) characterised by good perfusion with oxygen-
ated blood. The Activ8rlives Pulse Oximeter2 now records the PI to ensure that a good reading is
taken. Once the Plethsymogram (pulse rate waveform) has become stable it is then time to take
your reading. See Page 19 for more details but keeping still, calming your heart rate and breath-
ing, and having warmer hands helps get a more accurate pulse oximeter reading.

12
1 Install the Activ8rlives4Wellness and Diary App to your iOS or Android
Smartphone or Tablet;
How to operate, use and take care of your Activ8rlives Pulse Oximeter2
and connect to your Smartphone or Tablet; and
How to take routine readings and upload directly to your Activ8rlives
account.
2
3
If you follow these directions sequentially, it will take you about 5-10 minutes to learn how to
measure your saturated blood oxygen and perfusion index and connect to the Activ8rlives4
Wellness and Diary App.
Help Videos in App, follow this ?
Website www.Activ8rlives.com
YouTube http://bit.ly/Activ8rlives
OK, let’s get started with the Setup
This guide will instruct you how to:
The Activ8rlives Pulse Oximeter2 is programmed by and uploads information directly to and
from your Activ8rlives account each time your Bluetooth Smart (also known as 4.0 or Bluetooth
Low Energy BLE) Smartphone or Tablet is connected to it (not included).

13
1
Installing the Activ8rlives App on Your Smartphone or Tablet
requires Bluetooth 4.0 Enabled Devices
Download the Activ8rlives4Wellness and Diary App from the App Store appropriate to your
device. Search for Activ8rlives in the search bar of your App Store or scan the QR code below
and it will take you to the appropriate App Store for your device.
iOS 10 or above (iPhone 5s or later, iPad 4 or later, all iPad minis, Airs and
Pros). Earlier versions do not support Bluetooth Smart (also known as Blue-
tooth 4.0).
Select Android devices running Android 5.0 or later. Devices must support
Bluetooth Smart (4.0).
Amazon App Store for Android 5.0 or later is now available for devices
that support Bluetooth Smart (4.0).
IMPORTANT NOTE: Please adjust the screen lock function on your
Smartphone or Table to be longer than 2 minutes to allow the Activ8rlives
Pulse Oximeter2 time to sync with your device.
Short times of less than 2 minutes cause frequent loss of connectivity.
Compatible Bluetooth 4.0 Smartphones or Tablets

14
1
Register for Activ8rlives Account
Once you have installed the Activ8rlives4Wellness
and Diary App, open the App making sure your
Smartphone or Tablet is connected to the internet
with Bluetooth switched on.
If you have already Registered, you can Login to
your Activ8rlives account. Click the Login icon and
enter your Username and Password.
If you have not previously Registered for your
Activ8rlives account, then click the Register icon
of the App screen.
Completing Your Registration
To complete the Registration for your Activ8rlives
Account, add the correct details for yourself by
following the instructions on the App and selecting
Next at the bottom of each page.
As you complete the information, your Activ8rlives
account begins to learn more about you and your
health. These data are used to help you with your
self-care through self-monitoring. You can always
edit these data later if you make an error, but
please try to be accurate in entering your weight,
your height, your age and gender. These are
important data.

15
1
Completed Registration
Once you have completed your
Registration you will automatically be
directed to your Dashboard and a
summary of your activity and weight
targets are set into this Simple Dashboard.
To add other health parameters to your
Dashboard, change and select either the
Advanced or Expert Dashboard, that
include increasing number of trackers.
Remember your Username (email) and
Password details associated with your
account and keep these safe. You use
the same Username and Password to
access your account via the web:
www.activ8rlives.com.
How to Videos on App
A Quick Tour showing what the
Activ8rlives4Wellness and Diary App can
do is available from the App. Scroll down
to see a quick overview of what you can
do with this App.
Also access available Help Videos from
this page.

16
2
Start-up Screen moves to Main Menu automatically.
Make sure that Bluetooth on your Smartphone or Tablet is switched on.

17
2
From the Main Menu, select Upload Devices.
Make sure you have also set your Screen lock to longer than 2 minutes.

18
2
Connecting to the Activ8rlives App
by Bluetooth
Ensure that Bluetooth is switched on, on your
Smartphone or Tablet. Open the Activ8rlives4
Wellness and Diary App on your Smartphone or
Tablet.
Select Upload Devices from the Menu and touch
the image of the Activ8rlives Pulse Oximeter2,
which then takes you through easy steps to
prepare your device for connecting by Bluetooth.
Turn on the Activ8rlives Pulse Oximeter2
Now insert your index finger into the device so that
the fleshy tip of your finger overlies the reading
window on the inside of the finger cuff and the light
shines through your finger nail.
Inserting your finger too far into the Activ8rlives
Pulse Oximeter2 will give a slightly lower reading,
see Page 11 for more details on correct placement
of your finger.
Follow the instructions on the Activ8rlives4Wellness
and Diary App and press the On/Off Button on the
Activ8rlives Pulse Oximeter2 to wake it up. Tap Next
on the App screen.

19
Waiting to Start the Test
You will need to wait for the traceline or
plethysmogram to become stable with a regular
pattern and you need to remain still throughout.
Sometimes if your hands are cold the Perfusion
Index (PI) will be lower. If you rest and relax for a
few minutes and get your breath steady the PI will
improve enough for you to take a reading but
remember not to touch the Start button on the
App with the hand you have the Activ8rlives Pulse
Oximeter2 attached to.
Ready to Take a Measurement
When you feel that the traceline or plethysmogram
is stable and has a uniform wave size and the PI%
had risen, press Start with your other hand.
The Activ8rlives4Wellness and Diary App will give
you a countdown from 15 seconds to the time
when the reading will be completed. Continue to
remain still throughout.
2

20
3
Today’s Reading
After taking a reading your data will display on the
Activ8rlives4Wellness and Diary App .
The example shown here gives:
Oxygen Saturation 92.0% Amber NEWS = 2
Heart Rate 65bpm Normal NEWS = 0
Refer to the Blood Oxygen Chart on Page 10 to see
where your reading falls in the population table.
You will also see your last 3 readings.
Colour coding of parameters within normal
(Green), alert (Amber) and out of parameter
readings (Red) are easily seen on these graphs.
Note: If your Activ8rlives Pulse Oximeter2 is NOT
connected to your Smartphone or Tablet via
Bluetooth, the data will NOT be stored on the
Activ8rlives Pulse Oximeter2.
Viewing Data on App
Detailed data Charts can be viewed from the
Activ8rlives4Wellness and Diary App by selecting
Health Data from the Main Menu.
Select and deselect the Settings Cog which data
you want to show in this graph. Also change the
timeframe from the bottom blue selector. Within this
section you can start to see trends of what affects
your other health parameters, and you begin to
learn good behaviours or detect declining health.
The data displaying here shows the individuals
Oxygen Saturation and Pulse Rate over a period of
90 days. You can scroll the Chart left and right to
change the timeframe.
Table of contents
Other Activ8rlives Medical Equipment manuals
Popular Medical Equipment manuals by other brands
stemoscope
stemoscope PRO LITE STEMO500 instruction manual
Bayer HealthCare
Bayer HealthCare Breelib Instructions for use
Braun
Braun Aesculap ELAN 4 Instructions for use/Technical description

Orliman
Orliman LUMBITEC FX-215 INSTRUCTIONS FOR USE AND PRESERVATION
Otto Bock
Otto Bock 4X860 Series Instructions for use

Advantech
Advantech AMiS-72 reference guide
