Adventure Kings AKLL-9ODLPM 01 User manual

1V1.0
USER MANUAL
SKU’S: AKLL-9ODLPM_01 & AKLL-7ODLPM_01
LETHAL DRIVING LIGHTS


3V1.0
1. SAFETY INFORMATION
• Use warm soapy water to wash your lights, gently rinse the lights with plain water after washing.
Never use solvent-based cleaners as you may damage the lens and/or wiring.
• Never a use high pressure washer near the spotlight body. Observe a minimum distance of 300mm
(12in) when using a high pressure washer.
• Regularly check all fasteners to ensure they are secured and properly fixed.
1.1 GENERAL CARE TIPS
• Keep this user manual for future reference.
• Never remove warning or information labels from the product.
• Never block air breather bolt (i.e. vented screw).
• Make sure the wiring kit is never crimped, nicked, or damaged in any way.
• Always use a suitable fuse on the positive terminal, as close as possible to the battery.
• Always disconnect the negative battery terminal first.
• Do not install the product anywhere that may block, impair, or blind a driver’s vision.
• For outdoor use only.
• Ensure no flammable materials are close to the unit before testing and operation.
• In the event of a malfunction or problem with any part of the product, stop using the product
immediately, and return it to the place of purchase. Never try to repair the product by yourself.
• After installation, test the product to ensure it is operating correctly.
• Install the product so that it fully complies with local vehicle registration body requirements or National
Vehicle Standards Bulletins as applicable (for road registerable vehicles).
• The user is responsible for correctly installing, positioning, and using the product. The manufacturer
and retailer will not accept any liability for damages or penalties resulting from incorrect installation,
positioning, or use of this product.
• The manufacturer and retailer will not accept any liability for damages or penalties resulting from non-
compliance with information provided in this user manual.
• The manufacturer and retailer will not accept any liability for damages or penalties resulting from
modification of the product.
4V1.0
2. INSTALLATION
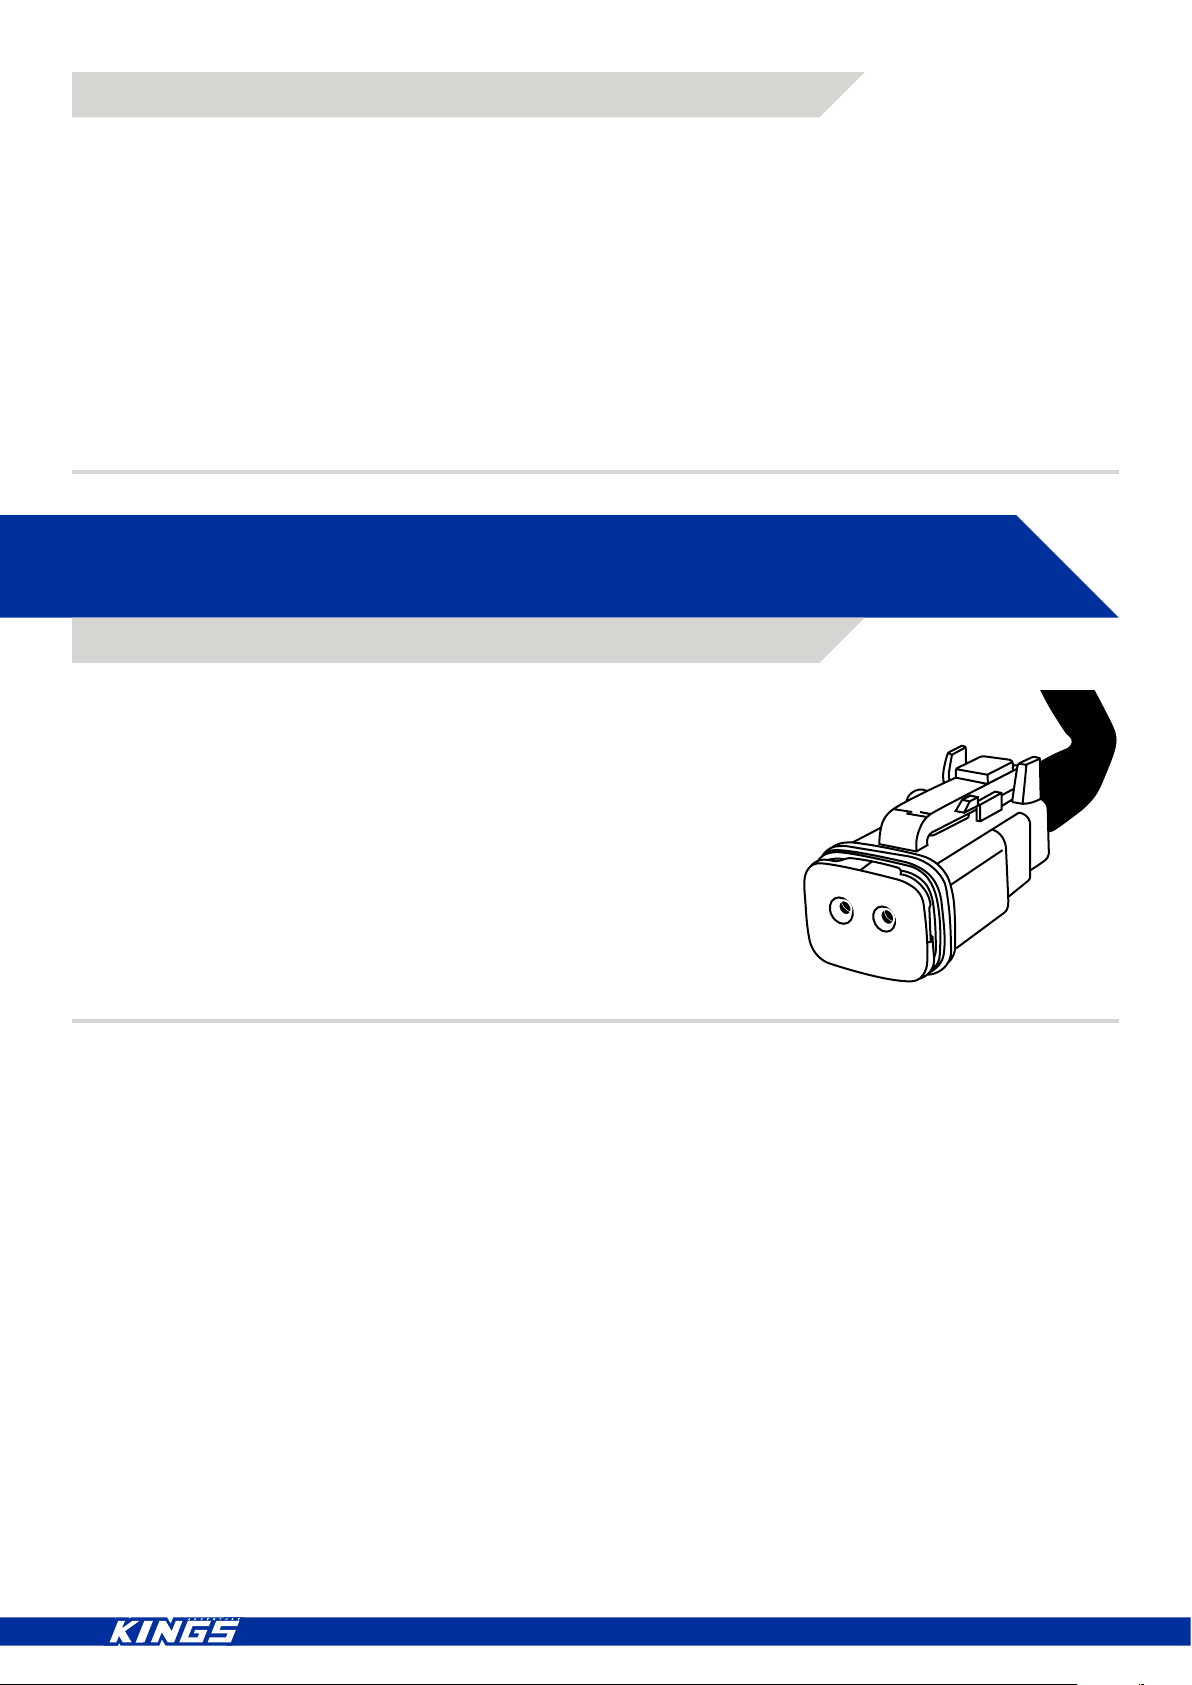
The Adventure Kings Driving Light range features a Deutsch style
socket. When connecting a Deutsch plug, wait for an audible click and
then gently pull back on the plug to confirm that it is locked in.
• Warning! Do not install and/or operate this product until you have read and understood the
information in this user manual.
• Warning! Do not look at or stare into the light source when the light is switched on. Looking or staring
at the light while it is on may result in serious eye injury or blindness.
• Warning! Light systems and outer housing get hot during operation. Disconnect any power sources
from the light system and allow the system to cool down before handling any components.
• Warning! A light system is a high current system. Always disconnect any power source during wiring
and installation. Otherwise, electric shock or injury may occur.
• Caution! When drilling into any vehicle surface, make sure the surface is free from any electrical wires,
fuel lines, vehicle upholstery, etc. that could be damaged.
1.2 WARNINGS
2.1 CONNECTING

5V1.0
Adventure Kings Driving Lights use a tough 3-bolt
mounting system, we recommend using all 3 bolts to
ensure your Driving Light is secure.
2.2 MOUNTING
Attach your driving light onto the surface of choice and secure it in place with the bolts then followed by the
washer, split washer and nut.
BOLT WASHER SPLIT WASHER NUT

6V1.0
STEP
3
STEP
4
STEP
5
STEP
6
STEP
7
Aiming your Driving Lights will ensure you are getting the best possible performance.
YOU WILL NEED:
• A tape measure.
• A marker, chalk, or tape (to provide reference lines).
• A vertical wall with a level surface in-front of it with at least 30 meters of room.
METHOD
Measure the distance from the centre of your Driving
Lights to the ground.
Next, measure the distance between the centres of the
two Driving Lights.
Face your vehicle perpendicular to the wall, so the centre
of your vehicle aligns with the centre of your markings.
The vehicle should be between 25 and 30 meters from
the wall.
NOTE: Lifting, increased load and tyre pressure changes can
affect the aim of the Driving Lights.
3. AIMING THE DRIVING LIGHTS
STEP
1
STEP
2
Replicate these measurements on the flat 90° wall.
Turn your Driving Lights on and take note of where the
light is most intense on the wall.
Move each light so the most intense area of light is at the
top left and top right wall markings respectably.
Tighten the bolts and your Driving Lights are now set-up
for your vehicle. Re-check the above every 12 Months
and adjust as required.

7V1.0
4. WARRANTY
WARRANTY PERIOD:
Full 24 month warranty from date of purchase against all manufacturing defects.
WHAT DOES THE WARRANTY COVER?
Under normal usage conditions, this warranty covers:
a. Any defect in design or manufacture which results in the product failing to perform substantially as described
in authorised advertising or literature.
b. We will either repair or replace the product at our discretion providing that the fault is found to have been
caused by a design or manufacturing defect and not misuse or tampering.
Our goods come with guarantees that cannot be excludedunder the Australian ConsumerLaw. You are
entitled to a replacement or refund for a major failure and for compensation for any other reasonably
foreseeable loss or damage. You are also entitled to have the goods repaired or replaced if the goods fail to be
of acceptable quality and the failure does not amount to a majorfailure. The benetsprovided to you as the
consumer by this warranty are in addition to other rights and remedies available to you under the law.
THE WARRANTY DOES NOT COVER:
a. Any damage resulting from improper use
b.
c. The cost of removing and reinstalling the product
d. Travel and /or other expenses due to customer’s remote location
e. Transport charges and damage in transit. It is your responsibility to deliver and pick up your product,
including any costs associated with the postage of your repair or replacement product. If you do freight your
product we recommend that you insure against loss or damage.
f. Any loss directly or indirectly associated with the product failing to operate.
g. Damage caused by mould, insects, animals, misuse, incorrect operation, adverse weather, accidents
and fair wear and tear
TO MAKE A CLAIM, PLEASE ENSURE YOU RETAIN YOUR SALES RECEIPT OF PURCHASE
1800 88 39 64
24 MONTH LIMITED
WARRANTY
OUTDOOR SUPACENTRE PTY LTD
Level 1, Building A, 6 Figtree Drive,
Sydney Olympic Park, NSW 2127, Australia
PHONE: 1800 88 39 64
www.4wdsupacentre.com.au
Faulty installation or modication made during installation
This manual suits for next models
1
Table of contents
Other Adventure Kings Automobile Accessories manuals


Popular Automobile Accessories manuals by other brands

Prime Design
Prime Design DEPLOYPRO LOCK N GO Assembly instructions

Cruz
Cruz Modul-Rack Alu L 11-120 Aassembly Instructions

Motoalliance
Motoalliance VIPER MA11922 Install instructions

Havis-Shields
Havis-Shields Flip Down Rear Step Option KK-ST-FLIP Install instructions

Automotive
Automotive B-339FD03 installation guide

Over Armour Offroad
Over Armour Offroad KAW-3010TRANS-FC01 Instructions for Installation and Care


