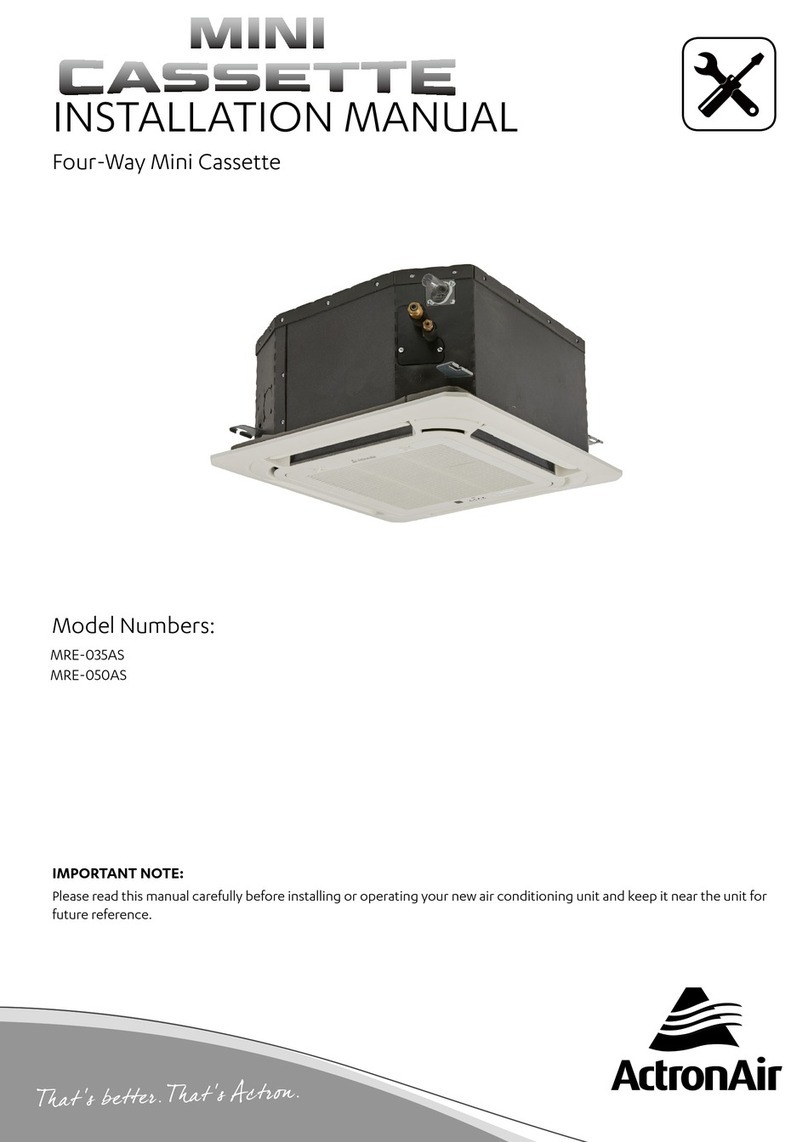
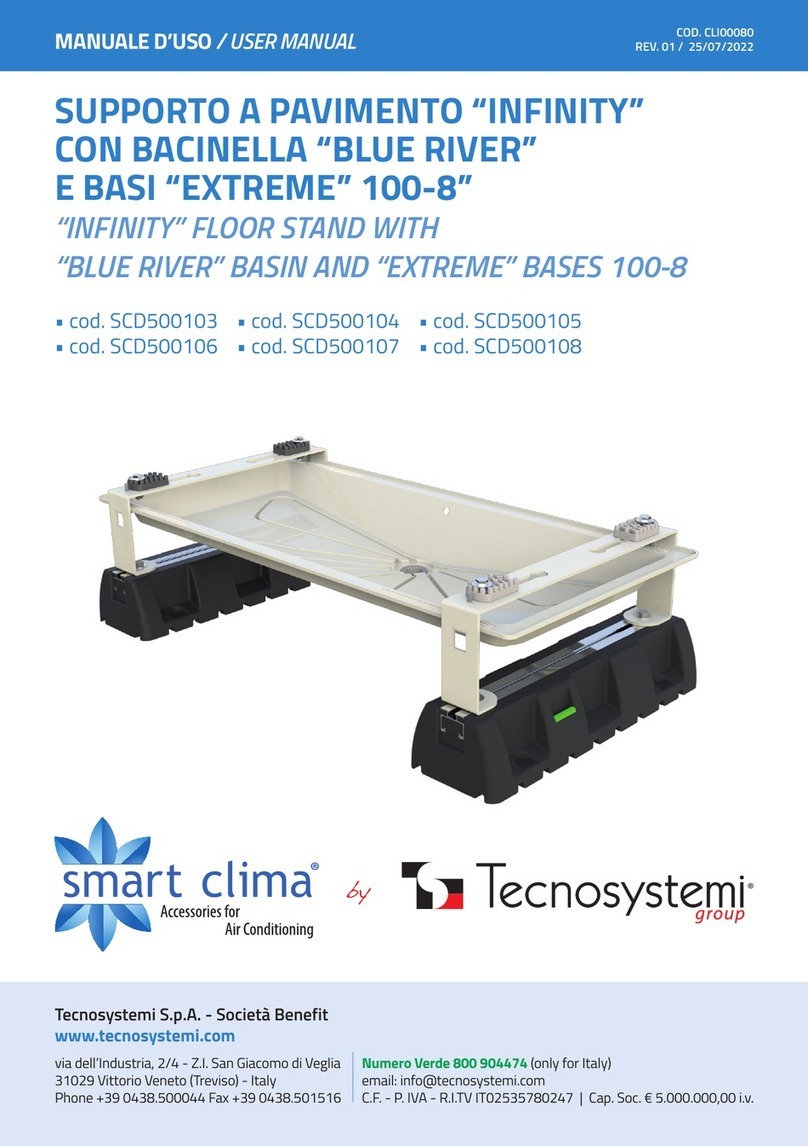
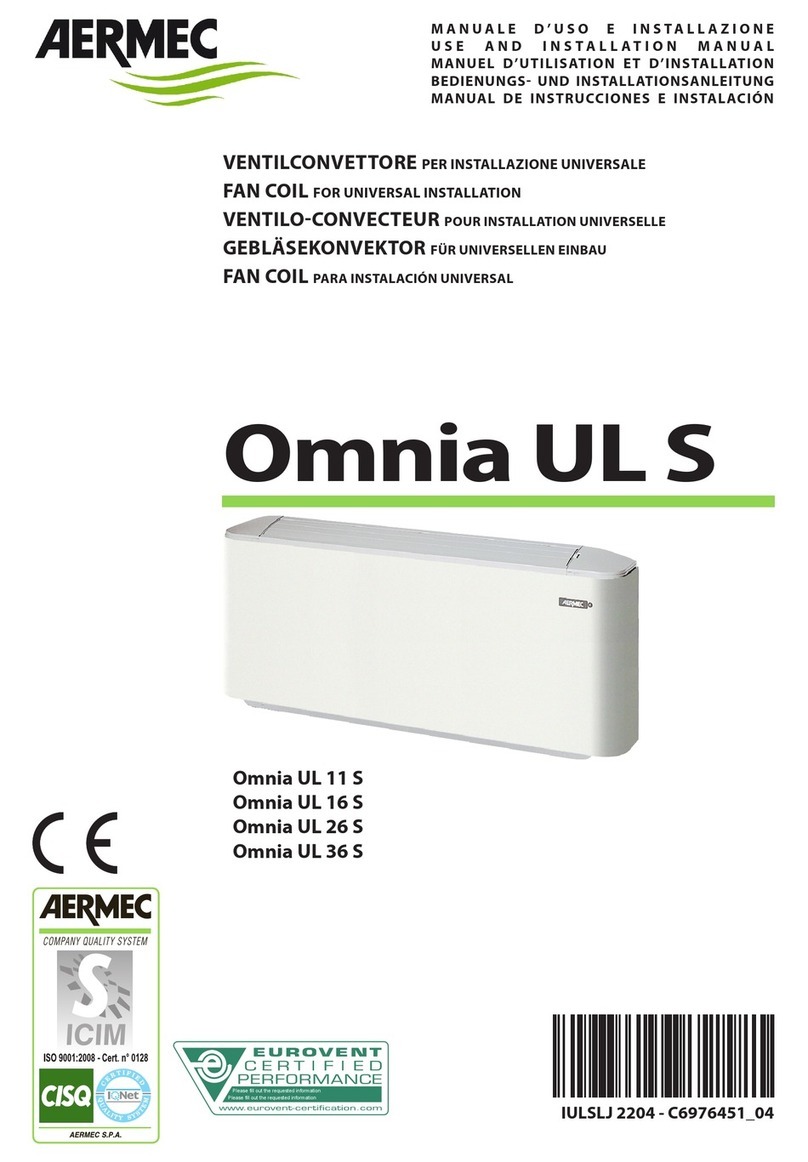
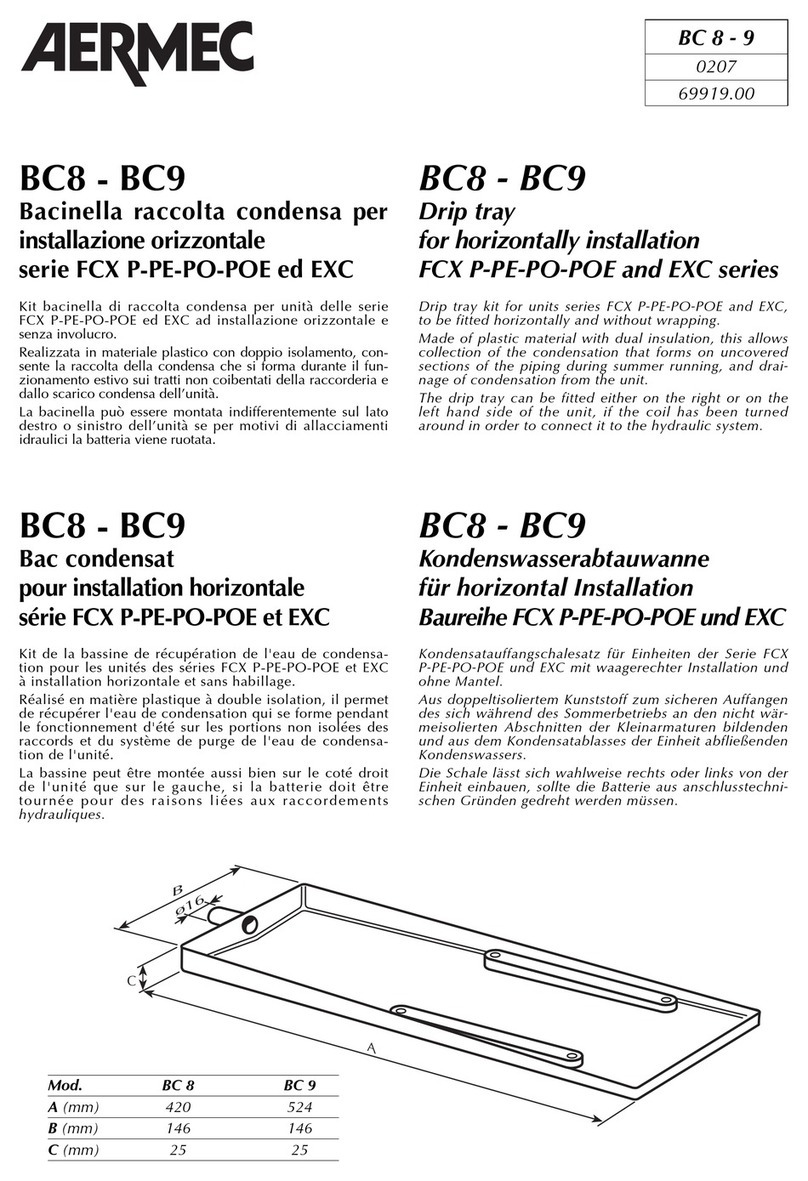
AERMEC GLL10 User manual

MANUALE INSTALLAZIONE
INSTALLATION MANUAL
MANUEL D'INSTALLATION
INSTALLATIONSHANDBUCH
MANUAL INSTALACIÓN
CORNICE DI MANDATA E D’ASPIRAZIONE
DELIVERY AND INTAKE FRAME
GRILLE DE SOUFFLAGE ET D'ASPIRATION
AUSBLAS- UND ANSAUGGITTER
PLAFON DE ENVÍO Y DE ASPIRACIÓN
AGLLIJ 1012 - 4528550_03
GLL10
GLL20
Sostituisce il • Replace • Remplace le n° • Ersetzt • Sustituye a: 4528550_02 / 0907
GLL10
FCL 32 (600x600)
FCL 36 (600x600)
FCL 42 (600x600)
FCL 62 (600x600)
FCL 34 (600x600)
FCL 38 (600x600)
FCL 44 (600x600)
FCL 64 (600x600)
GLL20
FCL 82 (840x840)
FCL 102 (840x840)
FCL 122 (840x840)
FCL 84 (840x840)
FCL 104 (840x840)
FCL 124 (840x840)

2AGLLIJ 0907 - 4528550_03
Conservare i manuali in luogo asciutto, per evitare il deterio-
ramento, per almeno 10 anni per eventuali riferimenti futuri.
Leggere attentamente e completamente tutte le informazio-
ni contenute in questo manuale. Prestare particolarmente
attenzione alle norme d’uso accompagnate dalle scritte
“PERICOLO” o “ATTENZIONE” in quanto, se non osservate,
possono causare danno alla macchina e/o a persone e cose.
Per anomalie non contemplate da questo manuale, interpellare
tempestivamente il Servizio Assistenza di zona.
L'apparecchio deve essere installato in maniera tale da rende-
re possibili operazioni di manutenzione e/o riparazione.
La garanzia dell'apparecchio non copre in ogni caso i costi
dovuti ad autoscale, ponteggi o altri sistemi di elevazione che
si rendesero necessari per effettuare gli interventi in garanzia.
AERMEC S.p.A. declina ogni responsabilità per qualsiasi
danno dovuto ad un uso improprio della macchina, ad una
lettura parziale o superficiale delle informazioni contenute in
questo manuale.
Alcune immagini potrebbero illustrare particolari forniti come
accessori a pagamento.
Il numero di pagine di questo manuale è: 48
OSSERVAZIONI
Store the manuals in a dry location to avoid deterioration, as
they must be kept for at least 10 years for any future reference.
All the information in this manual must be carefully read and
understood. Pay particular attention to the operating stan-
dards with “DANGER” or “WARNING” signals as failure to
comply with them can cause damage to the machine and/or
persons or objects.
If any malfunctions are not included in this manual, contact
the local After-sales Service immediately.
The apparatus must be installed in such a way that mainte-
nance and/or repair operations are possible.
The apparatus's warranty does not in any case cover costs due
to automatic ladders, scaffolding or other lifting systems neces-
sary for carrying out repairs under guarantee.
AERMEC S.p.A. declines all responsibility for any damage
whatsoever caused by improper use of the machine, and a par-
tial or superficial acquaintance with the information contained
in this manual.
The number of pages in this manual is : 48
REMARKS
Conserver les manuels dans un endroit sec, afin d’éviter leur
détérioration, pendant au moins 10 ans, pour toutes éventuel-
les consultations futures.
Lire attentivement et entièrement toutes les informations con-
tenues dans ce manuel. Prêter une attention particulière aux
normes d’utilisation signalées par les inscriptions “DANGER”
ou “ATTENTION”, car leur non observance pourrait causer
un dommage à l’appareil et/ou aux personnes et objets.
Pour toute anomalie non mentionnée dans ce manuel, con-
tacter aussitôt le service après-vente de votre secteur.
Lors de l'installation de l'appareil, il faut prévoir l'espace
nécessaire pour les opérations d'entretien et/ou de répara-
tion.
La garantie de l'appareil ne couvre pas les coûts dérivant de
l'utilisation de voitures avec échelle mécanique, d'échafauda-
ges ou d'autres systèmes de levée employés pour effectuer des
interventions en garantie.
AERMEC S.p.A. décline toute responsabilité pour tout domma-
ge dû à une utilisation impropre de l’appareil et à une lecture
partielle ou superficielle des informations contenues dans ce
manuel.
Ce manuel se compose de pages: 48
REMARQUES
Guarde los manuales en un lugar seco para evitar su deterioro,
al menos durante 10 años, por si fuera posible consultarlos en
el futuro.
Leer atenta y completamente todas las informaciones con-
tenidas en este manual. Preste particular atención a las nor-
mas de uso acompañadas de las indicaciones “PELIGRO” o
“ATENCIÓN” puesto que, si no se cumplen, pueden causar el
deterioro de la máquina y/o daños personales y materiales.
En caso de anomalías no contempladas en este manual, con-
tacte inmediatamente con el Servicio de Asistencia de su zona.
El aparato debe ser instalado de manera que haga posibles las
operaciones de mantenimiento y/o reparación.
En cualquier caso, la garantía del aparato no cubre los costes
derivados del uso de escaleras automáticas, andamios u otros
sistemas de elevación necesarios para efectuar las intervencio-
nes en garantía.
AERMEC S.p.A. declina cualquier responsabilidad por cual-
quier daño debido a un uso impropio de la máquina, o bien a
una lectura parcial o superficial de las informaciones conteni-
das en este manual.
Número de páginas de este manual:48
OBSERVACIONES
Bewahren Sie die Gebrauchsanleitungen min-
destens 10 Jahre für eventuelles zukünfti-
ges Nachschlagen an einem trockenen Ort auf.
Alle in diesem Handbuch enthaltenen Informationen
aufmerksam und vollständig lesen. Insbesondere auf die
Benutzungsanweisungen mit den Hinweisen "VORSICHT"
oder "ACHTUNG" achten, da deren Nichtbeachtung Schäden
am Gerät bzw. Sach- und Personenschäden zur Folge haben
kann.
Bei Betriebsstörungen, die in dieser Gebrauchsanweisung nicht
aufgeführt sind, wenden Sie sich umgehend an die zuständige
Kundendienststelle.
Das Gerät so aufstellen, dass Instandhaltungs- und/oder
Reparaturarbeiten durchgeführt werden können.
Die Garantie des Gerätes deckt in keinem Fall Kosten für
Feuerwehrleitern, Gerüste oder andere Hebesysteme ab, die
sich für die Garantiearbeiten als erforderlich erweisen sollten.
Die AERMEC S.p.A. übernimmt keine Haftung für Schäden aus
dem unsachgemäßen Gebrauch des Gerätes und der teilweisen
oder oberflächlichen Lektüre der in diesem Handbuch enthal-
tenen Informationen.
Die Seitenanzahl diese Handbuches ist: Nr. 48 Seiten
HINWEISE
3
AGLLIJ 0907 - 4528550_03
INDICE
4
5
6
14
22
30
38
DICHIARAZIONE DI CONFORMITÀ
DECLARATION OF CONFORMITY
DÉCLARATION DE CONFORMITÉ
KONFORMITÄTSERKLÄRUNG
DECLARACIÓN DE CONFORMIDAD
Trasporto • Simboli di sicurezza
Transport • Safety symbols
Transport • Symboles de sécurité
Transport • Sicherheitssymbole
Transporte • Símbolos de seguridad
Italiano
English
Français
Deutsche
Español

4AGLLIJ 0907 - 4528550_03
GLL10
GLL20
AERMEC S.p.A.
I-37040 Bevilacqua (VR) Italia – Via Roma, 996
Tel. (+39) 0442 633111
Telefax (+39) 0442 93730 – (+39) 0442 93566
Bevilacqua, 02/12/2010 La Direzione Commerciale – Sales and Marketing Director
Luigi Zucchi
Le présent produit doit être installé, exclusivement, associé avec les
unités FCL de notre production.
La certification suivante est valable uniquement si ces associations
sont respectées:
CERTIFICAT DE CONFORMITÉ
Nous soussignés déclarons sous notre exclusive responsabilité que le
produit:
ACCESSOIRES série GLL
auquel cette déclaration fait référence, est conforme aux normes
harmonisées suivantes:
Dieses Produkt darf ausschließlich in Verbindung mit den von
AERMEC hergestellten FCL -Inheiten installiert werden. Nachstehende
Bescheinigung ist nur dann gültig, wenn folgende kombinationen vor-
kommen:
KONFORMITÄTSERKLÄRUNG
Wir, die hier Unterzeichnenden, erklären auf unsere ausschließlich
Verantwortung, dass das Produkt:
ZUBEHÖR der Serie GLL
auf das sich diese Erklärung bezieht, den folgenden harmonisierten
Normen entspricht:
al que esta declaración se refiere, está en conformidad a las siguientes
normas armonizadas:
- Directiva de Baja de Tensión: LVD 2006/95/CE
- Directiva Compatibilidad Clectromagnétic: EMC 2004/108/CE
con accesorios no suministrados por Aermec.
- CEI EN 60335-2-40
- - CEI EN 61000-6-1
- CEI EN 61000-6-2
- CEI EN 61000-6-3
- CEI EN 61000-6-4
I presenti prodotti devono essere installati, esclusivamente, in abbina-
mento con le unità FCL. Solo rispettando tali abbinamenti è valida la
seguente dichiarazione:
DICHIARAZIONE DI CONFORMITÀ
Noi, firmatari della presente, dichiariamo sotto la nostra esclusiva
responsabilità, che gli accessori:
serie GLL
al quale questa dichiarazione si riferisce sono conformi alle seguenti nor-
me armonizzate:
The above equipments must be used with AERMEC units FCL series only.
Following declaration applIes to the combinations as above stated only:
CONFORMITY DECLARATION
We the undersigned declare, under our own exclusive responsibility,
that the product:
ACCESSORIES GLL series
to which this declaration refers, complies with the following standardised
regulations:
soddisfando così i requisiti essenziali delle seguenti direttive:
- Direttiva Bassa Tensione: LVD 2006/95/CE
- Direttiva Compatibilità Elettromagnetica: EMC 2004/108/CE
thus meeting the essential requisites of the following directives:
- Low Voltage Directive: LVD 2006/95/EC
- Electromagnetic Compatibility Directive: EMC 2004/108/EC
- EN 60335-2-40
- - EN 61000-6-1
- EN 61000-6-2
- EN 61000-6-3
- EN 61000-6-4
- EN 60335-2-40
- - EN 61000-6-1
- EN 61000-6-2
- EN 61000-6-3
- EN 61000-6-4
satisfaisant ainsi aux conditions essentielles des directives suivantes:
- Directive Basse Tension: LVD 2006/95/CE
- Directive compatibilité électromagnétique: EMC 2004/108/CE
womit die grundlegenden Anforderungen folgender Richtlinien erfüllt werden:
- Niederspannungsrichtlinie: LVD 2006/95/EG
- Richtlinie zur elektromagnetischen Verträglichkeit: EMC 2004/108/EG
- EN 60335-2-40
- - EN 61000-6-1
- EN 61000-6-2
- EN 61000-6-3
- EN 61000-6-4
- EN 60335-2-40
- - EN 61000-6-1
- EN 61000-6-2
- EN 61000-6-3
- EN 61000-6-4
El presente producto debe ser instalado exclusivamente en combina-
ción con las unidades FCL de nuestra producción.
Sólo respetando dichas combinaciones será válida la siguiente decla-
ración:
DECLARACIÓN DE CONFORMIDAD
Los que suscriben la presente declaran bajo la propia y exclusiva
responsabilidad que el conjunto en objeto, definido como sigue:
ACCESORIOS serie GLL
al que esta declaración se refiere, está en conformidad a las siguientes
normas armonizadas:

5
AGLLIJ 0907 - 4528550_03
TRASPORTO • TRANSPORT • TRANSPORT • TRANSPORT • TRANSPORTE
NON bagnare. Tenere al
riparo dalla pioggia.
KEEP DRY. Keep out of
the rain.
NE PAS mouiller. Tenir à
l’abri de la pluie.
NICHT nass machen.
Vor Regen geschützt
anbringen
NO mojar. Conservar
protegido de la lluvia.
NON calpestare. DO NOT step on unit. NE PAS marcher sur
l’appareil. NICHT betreten . NO pisar.
N
Sovrapponibilità: con-
trollare sull’imballo per
conoscere il numero di
macchine impilabili.
Stackability: check the
package to know the
number of stackable
machines.
Empilement : vérifier sur
l’emballage le nombre
d’appareils empilables.
Stapelbarkeit: Auf der
Verpackung nachsehen,
wie die Anzahl der sta-
pelbaren Geräte lautet.
Superponibilidad:
observar en el embalaje
la cantidad de máquinas
que pueden apilarse.
>25Kg
NON trasportare la
macchina da soli se il
suo peso supera i 25Kg.
DO NOT carry the
equipment alone if
weight exceeds 25Kg.
NE PAS faire transporter
l’appareil par une seule
personne si son poids
est supérieur à 25kg.
NICHT das Gerät allein
transportieren, wenn
sein Gewicht die 25kg
übersteigt.
NO transportar la
máquina solos si su peso
es superior a los 25Kg.
NON lasciare gli imballi
sciolti durante il
trasporto.
Non rovesciare.
DO NOT leave boxes
unsecured during
transportation.
Do not overturn.
NE PAS laisser les
emballages sans
attaches durant le
transport.
Ne pas renverser.
NICHT die
Verpackungen während
des Transports geöffnet
lassen.
Nicht stürzen.
NO dejar los embalajes
sin sujetar durante el
transporte.
No invertir.
Fragile, maneggiare con
cura.
Fragile, handle with
care.
Fragile, manipuler avec
soin.
Zerbrechlich, sorgfältig
handhaben.
Frágil, manipular con
cuidado.
SIMBOLI DI SICUREZZA • SAFETY SYMBOL • SIMBOIES DE SECURITE
SICHERHEITSSYMBOLEOLE • SÍMBOLOS DE SEGURIDAD
Pericolo:
Tensione
Danger:
Power supply
Danger:
Tension
Gefahr !
Spannung
Peligro:
Tensión
Pericolo:
Organi in movimento
Danger:
Movings parts
Danger:
Organes en mouvement
Gefahr !
Rotierende Teile
Peligro:
Elementos en
movimiento
Pericolo!!! Danger!!! Danger!!! Gefahr!!! Peligro!!!

6
Italiano
AGLLIJ 0907 - 4528550_03
INDICE
6
7
8
9
11
13
46
Descrizione • Funzionamento
Posizione alette
Informazioni per l'installazione
Installazione e sostituzione del filtro GLL10
Installazione e sostituzione del filtro GLL20
Collegamenti elettrici
Dimensioni
FUNZIONAMENTO
Lo stesso gruppo griglia GLL può essere
abbinato a più pannelli comandi
(accessori) che determinano dimersi
modi di funzionamento.
Le informazioni particolareggiate
circa l'uso sono fornite nel
"MANUALE D'USO" dei pannelli
comandi .
DESCRIZIONE
Le unità FCL sono disponibili in due
dimensioni fondamentali che chiamen-
remo:
"Modulo 600" per le unità integra-
bili nelle pannellature standard
600x600mm da controsoffitto.
"Modulo 840" per le versioni più potenti,
è dimensionato per essere alloggiato in
un vano 840x840mm.
GRUPPO GRIGLIA DI ASPIRAZIONE E
MANDATA
(Accessori serie GLL)
Il ventilconvettore FCL tipo cassette
si completa solo se abbinato ad una
griglia della serie GLL, accessorio
obbligatorio per il funzionamento del
ventilconvettore. Gli accessori griglia
serie GLL oltre all'aspirazione con filtro
e le alette di mandata dell'aria, com-
prendono la scatola elettrica dedicata,
la cui connessione viene realizzata con
innesto a baionetta al connettore vin-
colato alla struttura portante dell'unità.
Il profilo e l'apertura delle alette di man-
data è stato studiato in modo da avere
la migliore distribuzione possibile
dell'aria, sia nel funzionamento inver-
nale che estivo.
L’aspirazione avviene attraverso la griglia
centrale, la mandata attraverso le fessu-
re perimetrali orientabili. In materiale
plastico di colore RAL 9010, alloggia al
suo interno il filtro dell’aria, facilmente
estraibile per la pulizia.
La stessa unità base FCL può essere con-
figurata in più versioni semplicemente
abbinandola ai diversi gruppi griglie
della serie GLL (accessori obbligatori)
che ne determinano i modi di funzio-
namento.
SEZIONE FILTRANTE
Il filtro dell'aria è inserito nella griglia di
aspirazione.
Filtro dell'aria meccanico con telaio in
ABS.
Filtro con classe di filtrazione G1,
autoestinguenza Classe V0 (UL94).
Facilmente estraibile e costruito con
materiali rigenerabili, può essere pulito
mediante lavaggio.

7
Italiano
AGLLIJ 0907 - 4528550_03
20°
10°
Posizione delle alette nel funzionamento in raffrescamento
apertura 10°
Posizione delle alette nel funzionamento in riscaldamento
apertura 20°
Con le alette chiuse la ventilazione è consentita
Nel funzionamento in riscaldamento
si consiglia una apertura delle alet-
te di 20°, indicata con una linea in
rilievo sulle alette (vedi figure).
Nel funzionamento in raffrescamento
si consiglia una apertura delle alet-
te di 10°, indicata con una linea in
rilievo sulle alette (vedi figure).
Con le alette chiuse la ventilazione è
consentita.
Posizione alette (GLL10)
50%
Posizione delle alette nel funzionamento in raffrescamento
apertura a metà
Posizione delle alette nel funzionamento in riscaldamento
completamente aperte
Con le alette chiuse la ventilazione è consentita
Nel funzionamento in riscaldamen-
to si consiglia l'apertura completa
delle alette (vedi figure).
Nel funzionamento in raffrescamento
si consiglia una apertura delle alet-
te del 50% (vedi figure).
Con le alette chiuse la ventilazione è
consentita.
Posizione alette (GLL20)

3
Italiano
AGLLIJ 0907 - 4528550_03
ATTENZIONE: prima di effettuare qual-
siasi intervento, assicurarsi che l’ali-
mentazione elettrica sia disinserita.
ATTENZIONE: prima di effettuare qual-
siasi intervento munirsi di opportuni
dispositivi di protezione individuale.
ATTENZIONE: L'apparecchio deve esse-
re installato conformemente alle rego-
le impiantistiche nazionali.
ATTENZIONE: i collegamenti elettri-
ci, l'installazione dei ventilconvettori
e dei loro accessori devono essere
eseguiti solo da soggetti in possesso
dei requisiti tecnico-professionali di
abilitazione all'installazione, alla tra-
sformazione, all'ampliamento e alla
manutenzione degli impianti ed in
grado di verificare gli stessi ai fini
della sicurezza e della funzionalità (in
questo manuale saranno indicati con
il termine generico “personale provvi-
sto di specifica competenza tecnica”).
In particolare per i collegamenti elettri-
ci si richiedono le verifiche relative a :
- Misura della resistenza di isolamento
dell'impianto elettrico.
- Prova della continuità dei conduttori
di protezione.
ATTENZIONE: Installare un dispositivo,
interruttore generale o spina elettrica
che consenta di interrompere com-
pletamente l'alimentazione elettrica
dall'apparecchio.
Vengono qui riportate le indicazioni
essenziali per una corretta installazione
delle apparecchiature.
Si lascia comunque all'esperienza
dell'installatore il perfezionamento di
tutte le operazioni a seconda delle esi-
genze specifiche.
Consultare anche il manuale di installa-
zione dell'unità FCL ed il manuale di
uso fornito con il gruppo griglia.
Generalmente la posizione ottima-
le delle alette è quella che consente,
nel funzionamento a freddo, il lancio
dell'aria aderente al soffitto per effetto
Coanda.
Sulla sezione laterale dei deflettori
(GLL10) sono indicate le posizioni di
apertura per un corretto funzionamento
a caldo (apertura 20°) e a freddo (aper-
tura 10°) della macchina.
Per le unità con griglie GLL20 si consi-
glia di aprire completamente il defletto-
re nel funzionamento a caldo, nel fun-
zionamento a freddo ruotare il defletto-
re a metà corsa.
In funzione delle esigenze dell'utente
è possibile posizionare le alette nelle
posizioni intermedie o di completa
chiusura. Grazie alla particolare forma
delle alette la macchina può funziona-
re anche con i deflettori completamen-
te chiusi.
Non installare ad un’altezza superiore
ai 3 metri.
L’unità FCL è predisposta per i collega-
menti con canalizzazioni per l’aria di
rinnovo e per la mandata dell’aria trat-
tata in un locale attiguo.
INSTALLAZIONE
• InstallazIone In prossImItà dI una parete

4
Italiano
AGLLIJ 0907 - 4528550_03
INSTALLAZIONE "GLL10"
- Aprire l'imballo dell'accessorio assie-
me cornice di mandata e griglia d’aspi-
razione, togliere la griglia dall'imballo
e controllare che non sia stata danneg-
giata durante il trasporto.
- Aprire il coperchio della morsettiera
sulla scatola elettrica, per sbloccare i
ganci a pressione usare un utensile.
- Collegare i cavi di alimentazione alla
morsettiera come indicato nello sche-
ma elettrico.
- Fissare tutti i cavi con il bloccacavo.
- Richiudere il coperchio della morset-
tiera elettrica.
- Inserire la scatola elettrica nella guida
dell'unità FCL ed assicurarsi che i con-
nettori siano ben collegati.
- La scatola elettrica va fissata all'unità
FCL con due viti, la vite dal lato attac-
chi serve anche per fissare il cavo di
sicurezza fornito a corredo.
ATTENZIONE: fissare il cavetto di
sicurezza alla vite di fissaggio della
scatola elettrica posta al lato degli
attacchi idraulici. Il moschettone del
cavetto di sicurezza dovrà poi essere
agganciato al telaio griglia.
- Togliere la griglia di aspirazione agen-
do sui 2 nottolini ad un ¼ di giro.
- Per facilitare il fissaggio della cornice
al ventilconvettore inserire i due ganci
di sostegno agli appositi appigli sul
convogliatore.
-Appendere la cornice ai due ganci di
sostegno, fare attenzione alla posizio-
ne di montaggio, l'angolo della corni-
ce il vetrino con il logo AERMEC deve
coincidere con l'angolo della scatola
elettrica dell'unità FCL.
- ATTENZIONE: fissare il cavo di sicu-
rezza alla cornice.
- Collegare il cavo di collegamento del
ricevitore al connettore sulla scatola
della scheda elettronica.
- Fissare la cornice all’unità tramite le 4
viti a corredo.
ATTENZIONE!! avvitare le viti con
una coppia di serraggio massima di
0,45 Nm, si consiglia di utilizzare un
cacciavite, non usare avvitatori non
tarati. Una eccessiva coppia di ser-
raggio provoca danni irreversibili alla
bacinella.
La cornice garantisce la tenuta tra aspi-
razione e mandata dell’aria, pertanto
deve essere fissata correttamente all’u-
nità senza subire deformazioni.
- Assicurare la griglia di aspirazione al
cavetto di sicurezza.
- Montare la griglia di aspirazione
agganciandola alla cerniera sulla cor-
nice.
- Richiudere la griglia di aspirazione e
avvitare i due nottolini (sul lato oppo-
sto alla cerniera) di un ¼ di giro.
- Registrare la posizione dell’unità dalla
staffa di supporto mediante i dadi, in
modo che l’unità sia in bolla e la cor-
nice appoggi leggermente nel contro-
soffitto.
- Avviare il ventilconvettore ed eseguire
una prova di funzionamento.

5
Italiano
AGLLIJ 0907 - 4528550_03
INSTALLAZIONE E SOSTITUZIONE DEL FILTRO "GLL10"
PERICOLO: Togliere tensione prima d’iniziare le operazioni di pulizia del filtro e/o dell’unità.
DANGER: Switch off power supply before cleaning filter and/or unit.
DANGER: Couper la tension avant de commencer les opérations de nettoyage du filtre et/ou de l'unité.
GEFAHR: Vor der Reinigung des Filters und/oder des Gerätes die Stromversorgung abschalten.
PELIGRO: Quitar la tensión antes de iniciar las operaciones de limpieza del filtro o de la unidad.

6
Italiano
AGLLIJ 0907 - 4528550_03
INSTALLAZIONE DELL'UNITÀ "GLL20"
- Aprire l'imballo dell'accessorio assie-
me cornice di mandata e griglia d’aspi-
razione, togliere la griglia dall'imballo
e controllare che non sia stata danneg-
giata durante il trasporto.
- Aprire il coperchio della morsettiera
sulla scatola elettrica, per sbloccare i
ganci a pressione usare un utensile.
- Collegare i cavi di alimentazione alla
morsettiera come indicato nello sche-
ma elettrico.
- Fissare tutti i cavi con il bloccacavo.
- Richiudere il coperchio della morset-
tiera elettrica.
- Inserire la scatola elettrica nella guida
dell'unità FCL ed assicurarsi che i con-
nettori siano ben collegati.
- La scatola elettrica va fissata all'unità
FCL con due viti.
- Togliere la griglia di aspirazione agen-
do sui 2 nottolini ad un ¼ di giro
- Appendere la cornice ai due ganci di
sostegno, fare attenzione alla posizio-
ne di montaggio, l'angolo della corni-
ce il vetrino con il logo AERMEC deve
coincidere con l'angolo della scatola
elettrica dell'unità FCL.
- ATTENZIONE: fissare un moschetto-
ne del cavetto di sicurezza al tela-
io griglia e l'altro moschettone alla
griglia di protezione del ventilatore.
- Fissare la cornice all’unità tramite le 4
viti a corredo.
ATTENZIONE!! avvitare le viti con
una coppia di serraggio massima di
0,45 Nm, si consiglia di utilizzare un
cacciavite, non usare avvitatori non
tarati. Una eccessiva coppia di ser-
raggio provoca danni irreversibili alla
bacinella.
La cornice garantisce la tenuta tra aspi-
razione e mandata dell’aria, pertanto
deve essere fissata correttamente all’u-
nità senza subire deformazioni.
- Assicurare la griglia di aspirazione al
cavetto di sicurezza.
- Montare la griglia di aspirazione
agganciandola alla cerniera sulla cor-
nice.
- Richiudere la griglia di aspirazione e
avvitare i due nottolini (sul lato oppo-
sto alla cerniera) di un ¼ di giro.
- Registrare la posizione dell’unità dalla
staffa di supporto mediante i dadi, in
modo che l’unità sia in bolla e la cor-
nice appoggi leggermente nel contro-
soffitto.
- Avviare il ventilconvettore ed eseguire
una prova di funzionamento.
Manutenzione scatola elettrica
In caso si rendesse necessario accedere
alla scatola elettrica per manutenzioni,
seguire le seguenti indicazioni:
- Aprire la griglia filtro (ruotare i 2 notto-
lini di un ¼ di giro).
- Togliere la vite di bloccaggio dello
sportello d'angolo con il logo Aermec.
- Togliere le 2 viti di bloccaggio della
scatola elettrica.
- Sfilare verso il basso la scatola elettri-
ca.
- Eseguire le manutenzioni necessarie.
- Rimontare il tutto seguendo la proce-
dura inversa allo smontaggio.
• Smontaggio per manutenzione
- Prima di eseguire qualsiasi operazione
sull'unità è obbligatorio interrompere
l'alimentazione elettrica.
- Per accedere all'interno dell'unità
rimuovere i due traversini fissati con
le viti al telaio. Sarà quindi possibile
rimuovere la griglia di protezione del
ventilatore e la bacinella in polistirolo.
(vedi figura)
- PERICOLO!!. Prima di ridare tensione
all'unità è obbligatorio aver rimontato
correttamente tutti i componenti ed in
paticolare la griglia di protezione.

7
Italiano
AGLLIJ 0907 - 4528550_03
INSTALLAZIONE E SOSTITUZIONE DEL FILTRO "GLL20"
PERICOLO: Togliere tensione prima d’iniziare le operazioni di pulizia del filtro e/o dell’unità.
DANGER: Switch off power supply before cleaning filter and/or unit.
DANGER: Couper la tension avant de commencer les opérations de nettoyage du filtre et/ou de l'unité.
GEFAHR: Vor der Reinigung des Filters und/oder des Gerätes die Stromversorgung abschalten.
PELIGRO: Quitar la tensión antes de iniciar las operaciones de limpieza del filtro o de la unidad.

13
Italiano
AGLLIJ 0907 - 4528550_03
COLLEGAMENTI ELETTRICI
L’unità deve essere collegata direttamen-
te ad un attacco elettrico o ad un circu-
ito indipendente.
I ventilconvettori cassette FCL vanno
alimentati con corrente 230V ~ 50Hz
e collegamento a terra, la tensione di
linea deve comunque rimanere entro
la tolleranza di ±10% rispetto al valore
nominale.
Per proteggere l’unità contro i
cortocircuiti, montare sulla linea
di alimentazione un interruttore
onnipolare magnetotermico max. 2A
250V (IG) con distanza minima di
apertura dei contatti di 3mm.
Il cavo elettrico di alimentazione deve
essere del tipo H07 V-K oppure N07
V-K con isolamento 450/750V se incas-
sato in tubo o canaletta. Per installa-
zioni con cavo in vista usare cavi con
doppio isolamento di tipo H5VV-F.
Fare riferimento agli schemi elettrici
dell’apparecchio e del pannello
comandi.
230VAC
VHL1/VHL2
VHL20/VHL22
VHL1/VHL2
VHL20/VHL22
VHL1/ VHL2
VHL20/ VHL22
VHL1/ VHL2
VHL20/ VHL22
- L - N
> 650mm
230VAC

14
English
AGLLIJ 0907 - 4528550_03
INDEX
14
15
16
17
19
21
46
Description • Functioning
Louvered fin position
Information regarding installation
Installation and replacement of the GLL10 filter
Installation and replacement of the GLL20 filter
Electric connections
Dimensions
DESCRIPTION
The FCL units are available in two fun-
damental dimensions, which will be
called:
"Module 600" for units that can be inte-
grated in the standard 600x600mm
suspended ceiling panelling.
"Module 840" for more powerful ver-
sions, dimensioned to be housed in a
compartment measuring 840x840mm.
INTAKE AND FLOW GRID UNIT
(GLL range accessories)
The FCL cassette type fan coil is only
completed if coupled to a GLL series
grid; a mandatory accessory for fan
coil functioning. The GLL series grid
accessories, as well as intake with filter
and the air flow louvered fins, inclu-
de a dedicated electric box, which is
connected using bayonet joints to the
connector, fixed to the unit support
structure.
The form and opening of the flow lou-
vered fins were developed in order to
have the best possible distribution of
the air, both when functioning in win-
ter and summer modes.
Intake takes place through the central
grid, flow through the adjustable peri-
meter slots. In RAL 9010 plastic, it hou-
ses the air filter, which can be easily
extracted for cleaning.
The same basic FCL unit can be configu-
red in several versions by simply cou-
pling it to different grid units of the GLL
series (mandatory accessory), which
determine the functioning modes.
FILTERING SECTION
The air filter is inserted in the intake grid.
Mechanical air filter with ABS frame.
Filter with G1 filtering class, self-extin-
guishing class V0 (UL94).
Easy to remove and built with rege-
nerable materials and which can be
washed.
FUNCTIONING
The same GLL grid unit can be
coupled to several control panels
(accessories) that determine
different functioning modes.
The particular information
regarding use is supplied in the
"USER MANUAL" of the control
panels.

15
English
AGLLIJ 0907 - 4528550_03
In heating functioning mode,
a louvered fin opening of 20° is
recommended, indicated with a
raised line on the louvered fins (see
figure).
In cooling functioning mode,
a louvered fin opening of 10° is
recommended, indicated with a
raised line on the louvered fins (see
figure).
Ventilation is allowed with the
louvered fins closed.
20°
10°
Position of the louvered fins in cooling mode
10° opening
Position of the louvered fins in heating mode
20° opening
Ventilation is allowed with the louvered fins closed
Louvered fin position (GLL10)
50%
Position of the louvered fins in cooling mode
half-way opening
Position of the louvered fins in heating mode
completely open
Ventilation is allowed with the louvered fins closed
Complete louvered fin opening is
recommended in heating functio-
ning mode (see figure).
In cooling functioning mode louve-
red fin opening of 50% is recom-
mended (see figure).
Ventilation is allowed with the lou-
vered fins closed.
Louvered fin position (GLL20)

16
English
AGLLIJ 0907 - 4528550_03
ATTENTION: before carrying out any
intervention, make sure that the elec-
tric power supply has been discon-
nected.
CAUTION: before carrying out any
work, wear the appropriate individual
protection devices.
ATTENTION: The appliance must be
installed in compliance with national
regulations on this subject.
ATTENTION: the electric connections,
the installation of the fan coils and
their accessories must only be perfor-
med by subjects with the technical-
professional requisites for enabling
and installation, transformation, exten-
sion and maintenance of the systems
and able to check the same for safe-
ty and functionality purposes (in this
manual they will be indicated by the
generic term "staff with specific tech-
nical skill").
In particular, for the electric connec-
tions, checks relative to the following
are requested:
- Measurement of the electric plant iso-
lation resistance.
- Continuity test of the protection wires.
ATTENTION: Install a device, master
switch or electric plug that allows to
completely interrupt the appliance’s
electric power supply.
Here find the essential indications for
correct installation of the appliance.
The completion of all operations, accor-
ding to specific requirements, is left to
the experience of the installer.
Also consult the FCL installation manual
and the user manual supplied with the
grid unit.
Generally the best position of the louve-
red fins is that that allows the launch of
the air adhering to the ceiling for the
coined effect, during cold functioning.
The side section of the deflectors
(GLL10) shows the opening positions
for proper warm functioning (opening
20°) and cold functioning (opening
10°) of the machine.
For the units with GLL20 grids, it is
recommended to completely open the
deflector in heating mode. In cooling
mode, rotate the deflector to half way.
Depending on the user's requirements, it
is possible to position the louvered fins
in the intermediate of complete closure
positions. Thanks to the special shapes
of the louvered fins the machine can
also function with the deflectors com-
pletely closed.
Do not install at height of above three
metres.
The FCL unit is set for connection with
fresh air ducts and for the flow of the
treated air in an adjacent room.
INSTALLATION
In caso di installazione in prossimità
di una parete è possibile chiudere la
corrispondente bocchetta di mandata
con la guarnizione fornita a corredo.
If installed in proximity of a wall it is
possible to close the corresponding
flow inlet using the gasket supplied.
• InstallatIon In proXImItY oF a Wall

17
English
AGLLIJ 0907 - 4528550_03
"GLL10" INSTALLATION
- Open the packaging of the accessory,
flow frame and intake grid unit, remo-
ve the grid from the packaging and
check that it has not been damaged
during transport.
- Open the cover of the terminal board
on the electric box. Use a tool to relea-
se the pressurised hooks.
- Connect the power supply cables to
the terminal board as indicated in the
wiring diagram.
- Fix all cables using the cable gland.
- Close the cover of the electric terminal
board.
- Insert the electric box into the FCL unit
guide and make sure that the connec-
tors are well attached.
- The electric box must be fixed to the
FCL unit using two screws. The screw
on the attachment side is also used to
fix the supplied safety cable.
ATTENTION: fix the safety cable to
the electric box screw fastener posi-
tioned at the side of the hydraulic
connections. The safety cable snap
hook must then be attached to the
grid frame.
- Remove the intake grid by acting on
the 2 ratchets by ¼ of a turn.
- To make fixing of the frame to the fan
coil easier, insert two support hooks to
the relevant pegs on the conveyor.
-Hang the frame on the two support
hooks, pay attention to the assembly
position, the corner of the frame with
the AERMEC logo holder must coin-
cide with the corner of the FCL unit
electric box.
- ATTENTION: fix the safety cable to
the frame.
- Connect the receiver connection cable
to the connector on the circuit board
box.
- Fix the frame to the unit using the 4
screws supplied.
CAUTION!! tighten the screws with
maximum coupling torque of 0.45
Nm. It is advised to use a screwdri-
ver, do not use non calibrated electric
screwdrivers. An excessive coupling
torque will damage the tray irrepara-
bly.
The frame guarantees sealing between
air intake and flow, therefore, it must
be fixed correctly to the unit without
undergoing deformations.
- Fix the intake grill to the safety cable.
- Mount the intake grid, hooking it to the
hinge on the frame.
- Close the intake grid and tighten the
two ratchets (on the side opposite the
hinge) by ¼ of a turn.
- Adjust the position of the unit by the
support bracket by means of the nuts,
in a way that the unit is level and the
frame rests slightly in the suspended
ceiling.
- Start the fan coil and carry out a fun-
ctioning test.

18
English
AGLLIJ 0907 - 4528550_03
INSTALLATION AND REPLACEMENT OF THE "GLL10" FILTER
PERICOLO: Togliere tensione prima d’iniziare le operazioni di pulizia del filtro e/o dell’unità.
DANGER: Switch off power supply before cleaning filter and/or unit.
DANGER: Couper la tension avant de commencer les opérations de nettoyage du filtre et/ou de l'unité.
GEFAHR: Vor der Reinigung des Filters und/oder des Gerätes die Stromversorgung abschalten.
PELIGRO: Quitar la tensión antes de iniciar las operaciones de limpieza del filtro o de la unidad.

19
English
AGLLIJ 0907 - 4528550_03
INSTALLATION OF THE "GLL20" UNIT
- Open the packaging of the accessory,
flow frame and intake grid unit, remo-
ve the grid from the packaging and
check that it has not been damaged
during transport.
- Open the cover of the terminal board
on the electric box. Use a tool to relea-
se the pressurised hooks.
- Connect the power supply cables to
the terminal board as indicated in the
wiring diagram.
- Fix all cables using the cable gland.
- Close the cover of the electric terminal
board.
- Insert the electric box into the FCL unit
guide and make sure that the connec-
tors are well attached.
- The electric box must be fixed to the
FCL unit using two screws.
- Remove the intake grid by acting on
the 2 ratchets by ¼ of a turn.
-Hang the frame on the two support
hooks, pay attention to the assembly
position, the corner of the frame with
the AERMEC logo holder must coin-
cide with the corner of the FCL unit
electric box.
- ATTENTION: fix a safety cable snap
hook must then be attached to the
grid frame and the other snap hook to
the fan protection grid.
- Fix the frame to the unit using the 4
screws supplied.
CAUTION!! tighten the screws with
maximum coupling torque of 0.45
Nm. It is advised to use a screwdri-
ver, do not use non calibrated electric
screwdrivers. An excessive coupling
torque will damage the tray irrepara-
bly.
The frame guarantees sealing between
air intake and flow, therefore, it must
be fixed correctly to the unit without
undergoing deformations.
- Fix the intake grill to the safety cable.
- Mount the intake grid, hooking it to the
hinge on the frame.
- Close the intake grid and tighten the
two ratchets (on the side opposite the
hinge) by ¼ of a turn.
- Adjust the position of the unit by the
support bracket by means of the nuts,
in a way that the unit is level and the
frame rests slightly in the suspended
ceiling.
- Start the fan coil and carry out a fun-
ctioning test.
Electric box maintenance
If the electric box must be accessed for
maintenance, follow the indications
below:
- Open the filter grid (turn the two
ratchets by ¼ of a turn).
- Remove the lock screw on the corner
door with the Aermec logo.
- Remove the 2 lock screws from the
electric box.
- Slide the electric box downwards.
- Carry out the necessary maintenance.
- Re-mount everything performing the
disassembly procedure in reverse
order.
• Disassembly for maintenance
- Before performing any operation on
the unit, the electric power supply
must be interrupted.
- To access the inside of the unit,
remove the two cross-members fixed
to the frame with the screws. It is now
possible to remove the fan protection
grid and the polystyrene basin. (see
figure)
- DANGER!! Before re-applying voltage
to the unit, all components, especially
the protection grid, must have been
re-mounted correctly.

20
English
AGLLIJ 0907 - 4528550_03
INSTALLATION AND REPLACEMENT OF THE "GLL20" FILTER
PERICOLO: Togliere tensione prima d’iniziare le operazioni di pulizia del filtro e/o dell’unità.
DANGER: Switch off power supply before cleaning filter and/or unit.
DANGER: Couper la tension avant de commencer les opérations de nettoyage du filtre et/ou de l'unité.
GEFAHR: Vor der Reinigung des Filters und/oder des Gerätes die Stromversorgung abschalten.
PELIGRO: Quitar la tensión antes de iniciar las operaciones de limpieza del filtro o de la unidad.
This manual suits for next models
1
Table of contents
Languages:
Other AERMEC Air Conditioner Accessories manuals