76
• Manual Mode
1. Set the laser over a start point. Turn the laser so that X on the
top of the head protection faces the direction of the slope
(and X’ faces away). Sight along the X and X’ marks to roughly
align the X axis of the laser to the second point.
2. After turning the laser on and allowing it to self-level, press
the MAN key (5). The LED next to it (6) will blink, indicating you’re
in manual mode and can match slope in the X axis. The head will
start rotating.
3. Press ^ (8) on the keypad to match a positive slope in X
and v (9) to set a negative slope.
4. To switch to the Y axis, press the H.I. key. Both LEDs (4 and 6)
will blink, indicating you’re in manual mode and can match slope
in the Y axis.
Note: The Y axis grade will be at a 90 degree angle
from the X axis grade output.
5. Press ^ (8) on the keypad to match a positive slope in Y and
v (9) to set a negative slope.
6. Press the MAN key to return to automatic mode.
CAUTION: In manual mode, the beam rotates, even if
the laser is not leveled. The H.I. Alert function is not
available when the unit is in manual mode.
When battery power is low, the laser head will stop rotating and
the low battery LED next to the On/Off key will stay on.
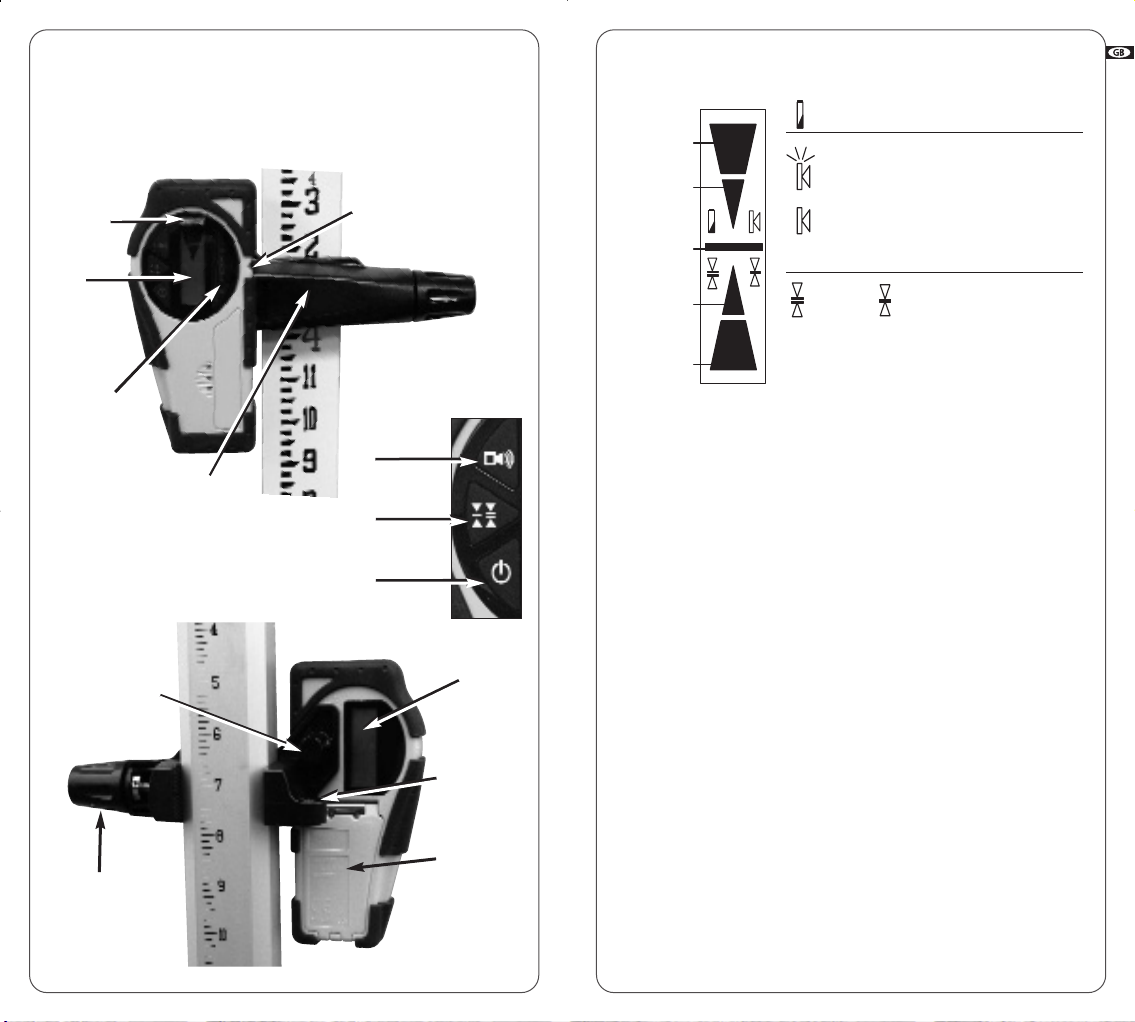
3.1 Installing alkaline batteries
1. Use a coin or a screwdriver to remove the cover of the battery
compartment at the back of the laser.
2. Insert two alkaline batteries (D size or LR20), following the
polarities indicated at the bottom of the battery compartment.
(The + contact is rounded and raised). When replacing the
batteries, change both at the same time.
3. Replace the compartment and tighten with a coin or screwdriver.
About 30 seconds after the head starts to rotate, the LED will blink
slowly, indicating the H.I. Alert is activated.
If the laser is disturbed while in H.I. Alert mode, the head will stop
rotating, the beam will turn off, the LED indicator will be on continu-
ously, and an alarm will sound for 30 seconds.
Turn the laser off and turn it on again. Check to see if the beam ele-
vation has changed from its original benchmark position.
The laser is no longer in H.I. Alert mode. Press H.I. to return to H.I. Alert.
It is very important to check while you are using the
laser that it has not been moved and that your setting
is still accurate.
2.3 Rotation speed
There are 3 rotation speeds: 0, 90 and 600 rpm (the default speed).
To change to 90 rpm, press (7). Press again to stop rotation.
The laser beam is more visible at the slower speed. It’s also possible
to stop the rotation and use the beam as a point to view at a
greater distance.
2.4 Slope Match
The laser can be used to match manual slope on both X and Y
axes. Two modes are available:
• Complete manual mode: X and Y axis will be both manual
• Semi-automatic mode: X in automatic / Y in manual
• Semi-automatic mode
1. Set the laser over a start point. Turn the laser so that Y on the
top of the head protection faces the direction of the slope
(and Y’ faces away). Sight along the Y and Y’ marks to roughly
align the Y axis of the laser to the second point.
2. After turning the laser on and allowing it to self-level, hold the
MAN key (5) for a few seconds until the LED next to it (6) is lit
continually. The laser is in manual mode in Y axis and automatic
self-leveling mode in X axis.
3. Press ^ (8) on the keypad to match a positive slope in Y and
v (9) to set a negative slope; the X axis will stay level.
4. Press twice on the MAN key to return to the automatic mode.
3. Power
GAT220-08-2007 12/01/08 19:12 Page 6