4.1 Lap Times
CHAPTER 4
08 09
MXK10 calculates and shows lap times. This can be made
in two ways:
n Manually pushing “Lap”on the bike left keyboard
n Automatically using GPS Module you find in the kit; the
Module includes most of the world tracks.
n When you switch the bike on near a track the Module
automatically recognizes it, loads the start/finish coordi-
nates and calculates lap times when these coordinates are
crossed.
If your track is not in the database you may always create
and load it in the database using Race Studio 3 software,
freely downloadable from AiM website at:
https://www.aim-sportline.com/en/sw-fw-download.htm
As said MXK10 features two working modes: road and
track. In track mode the lap pushbutton can be disabled
(see paragraph X.X.X) to avoid confusion
between GPS signal and Lap button one while in road
mode Lap button is always enabled and GPS Module is
always disabled.
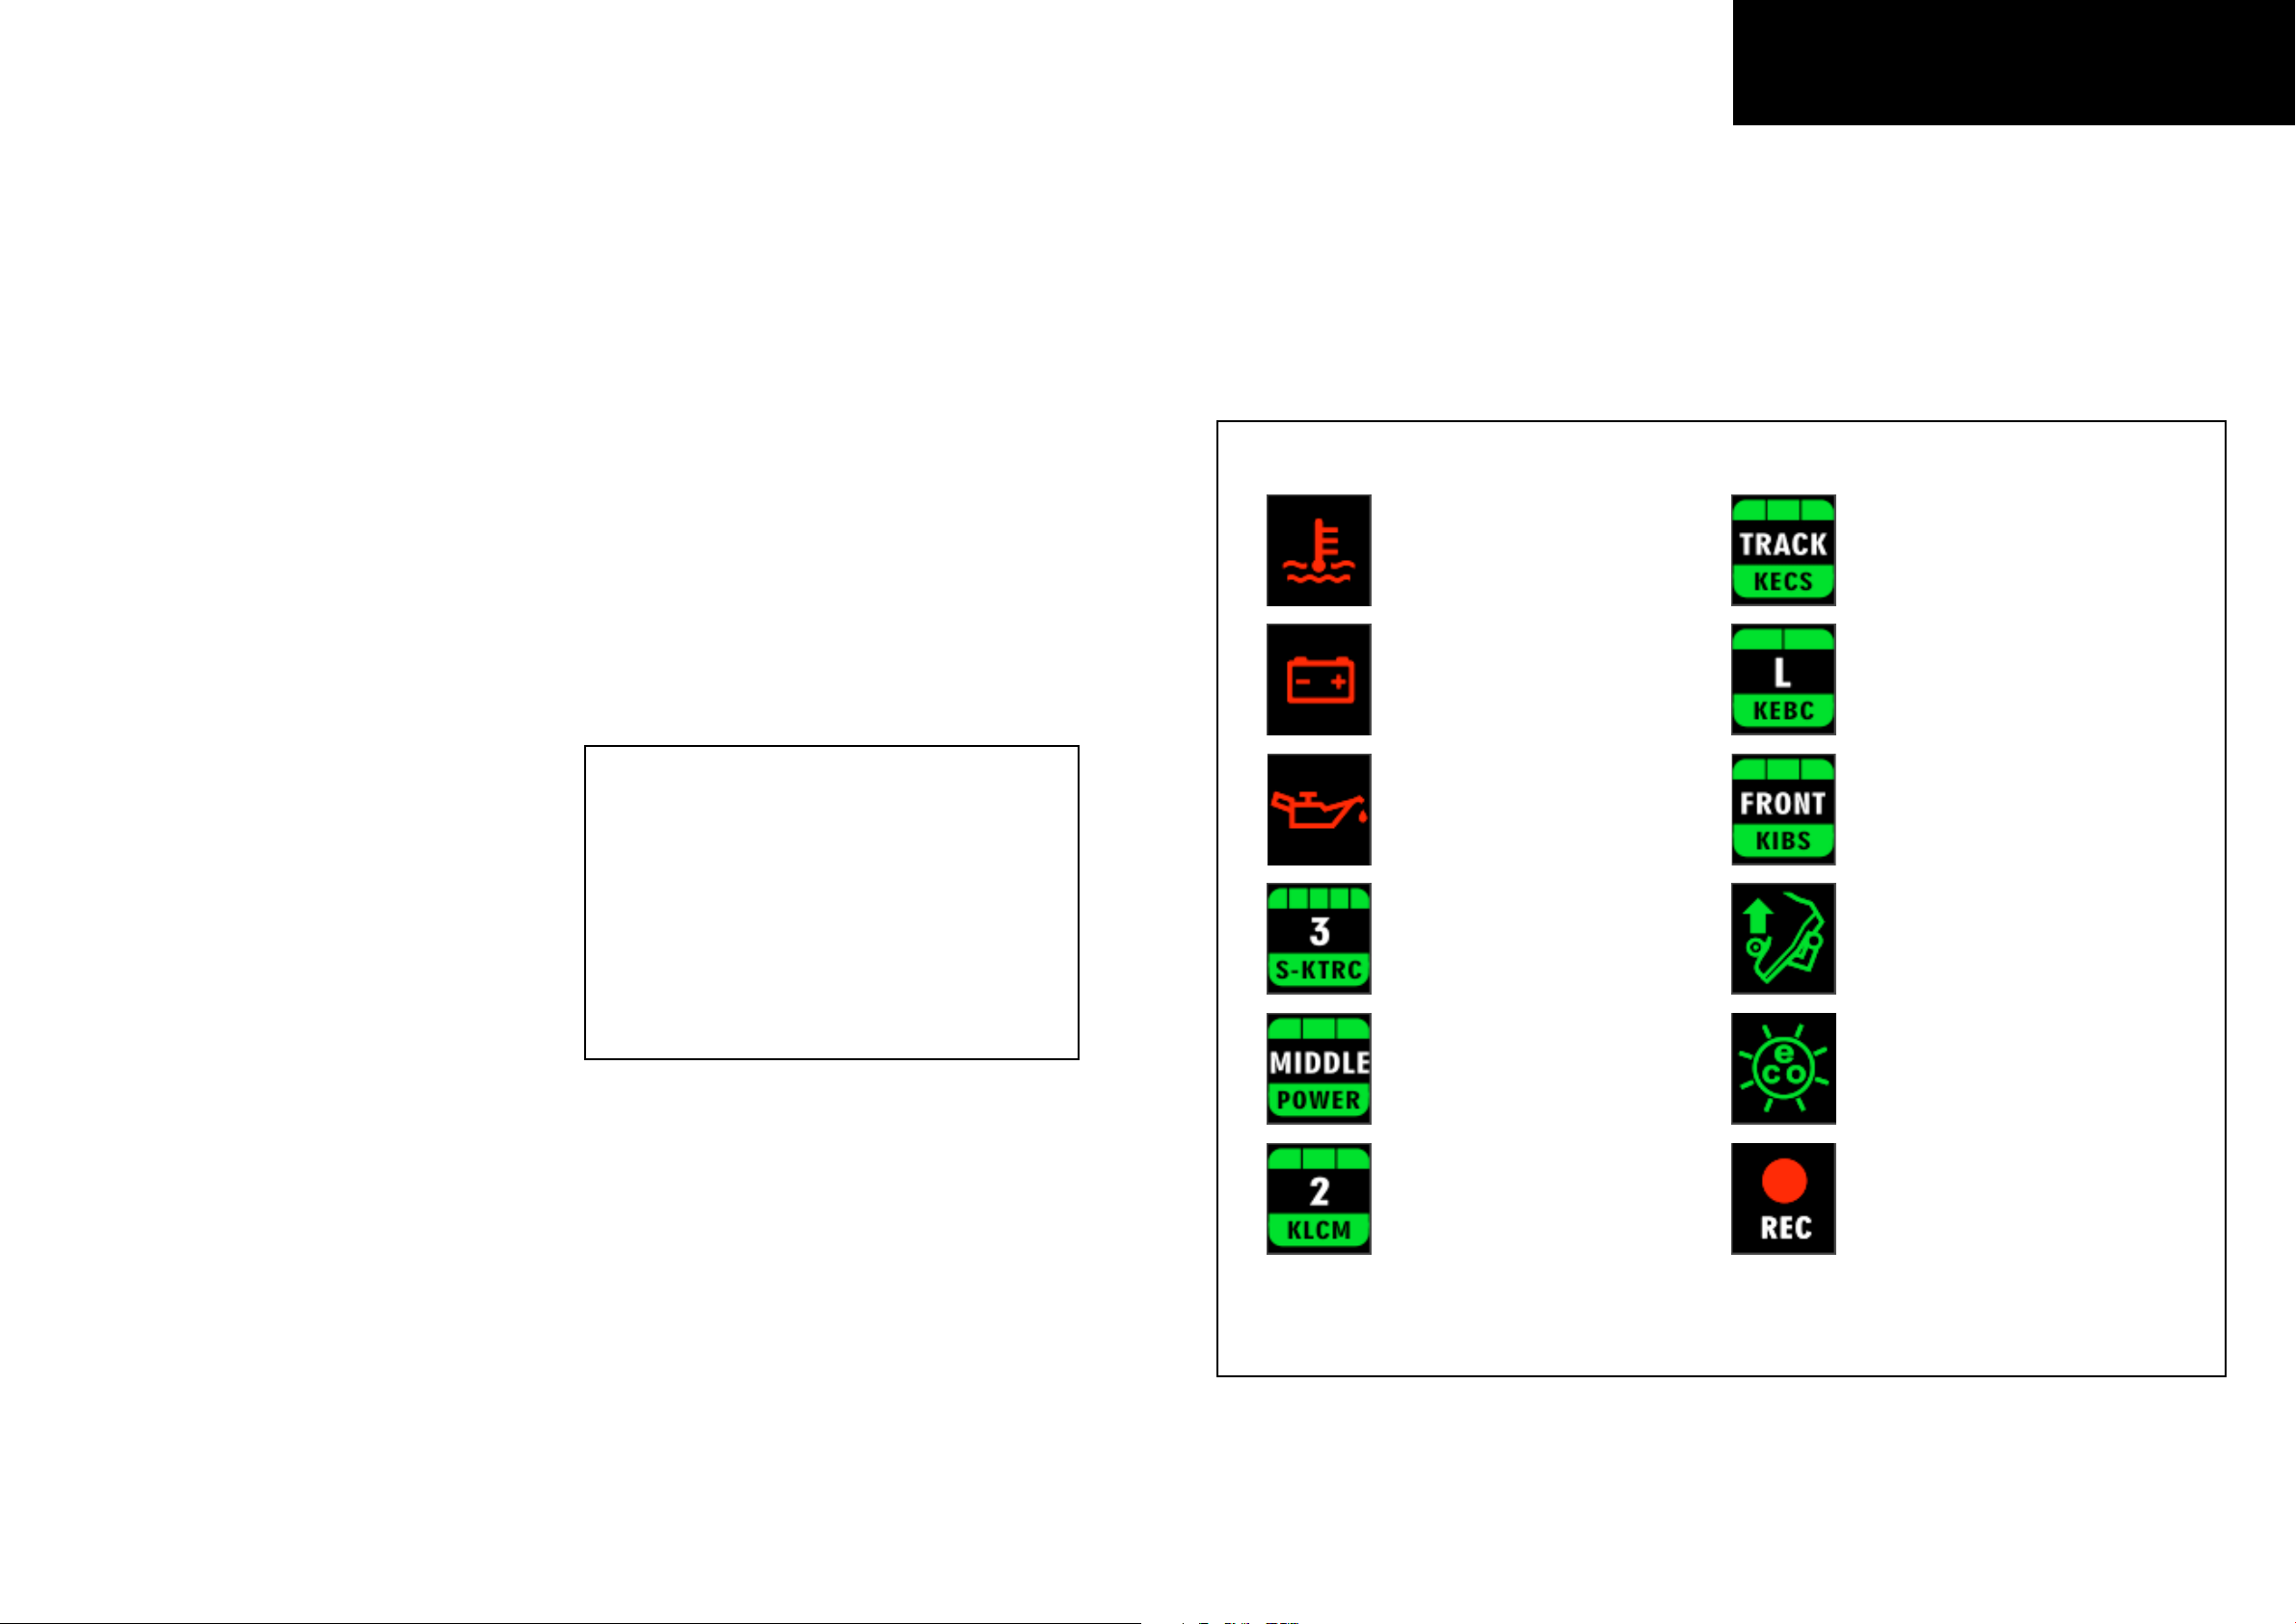
4.2 Icons
Thanks to the wide number of icons available on its display, the dash logger shows a good amount of information. Here
follow explanation of their meaning and working mode.
Water Temperature
It turns on when water temperature gets
to 110°C
Battery
It turns on when:
n battery voltage < 10V
n battery voltage > 16V
Oil pressure
It turns on when the bike engine detects a
problem with oil pressure.
Traction control (S-KTRC)
Working range: 0 (OFF)-5 (Max)
Power Mode
Working range: Low-Middle-Full
Launch Control Level
Working range: from 1-(min) to 3 (max)
Electronic suspensions (KECS)
Working modes: Manual, Road Track
Engine Brake (KEBC)
Available options: Low, OFF
Intelligent Braking System (KIBS)
Levels: ON, FRONT/REAR, OFF
Quick Shift
Available levels: Up (shown here on the
left), Down, Up&Down, OFF
Economy
It turns ON when: RPM is lower than 6500
and throttle position is <5%
REC
It turns on when the dash logger is recor-
ding.