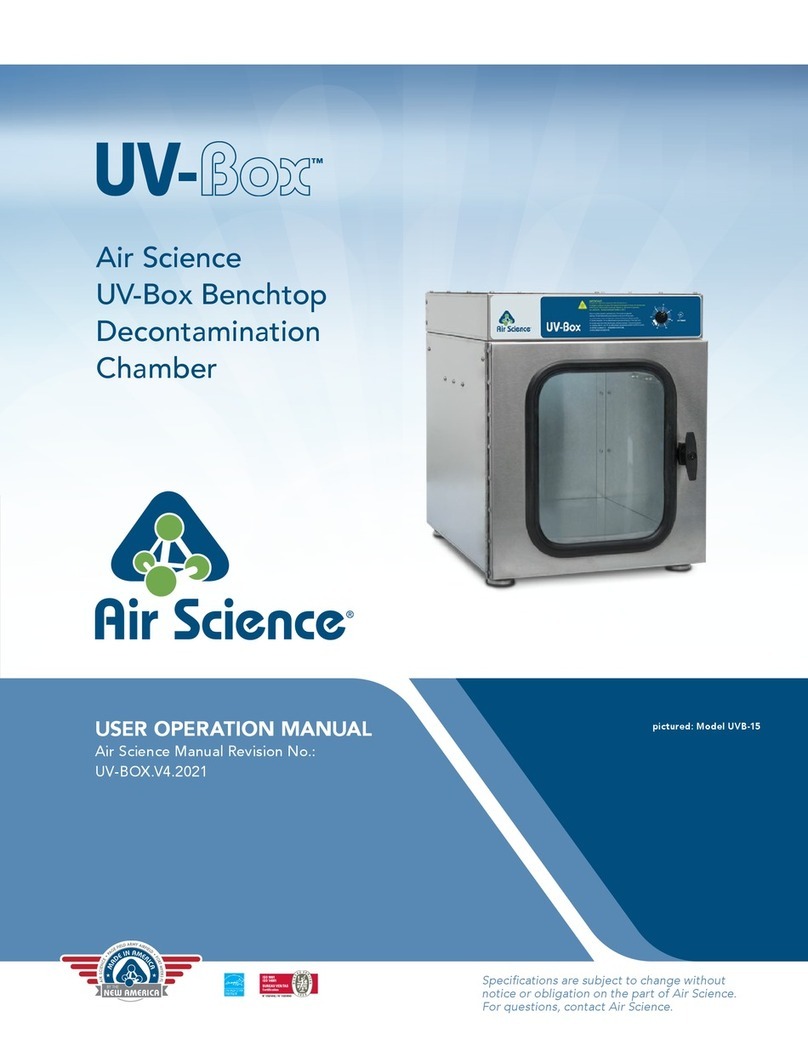
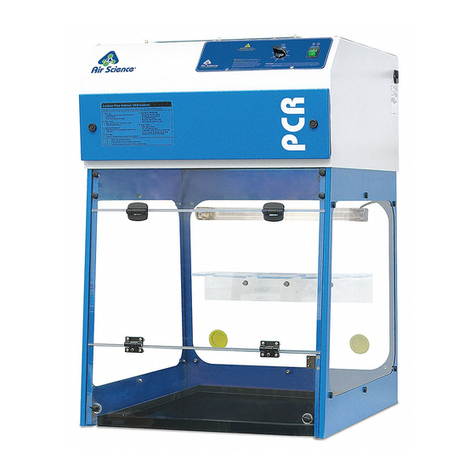
Air Science UV-BOX UVB-15 Mounting instructions

AIR SCIENCE®
U
V-BOX™
USER OPERATION
MANUAL
Air Science Manual Revision No. PURAIR-UV-BOX.V3.2012
Specifications subject to change without notice.
DOMINIQUE DUTSCHER SAS

120 6th Street, Fort Myers, Florida, 33907 USA, www.Airscience.com, Tel: 239-489-0024, Fax: 239-489-0922
- 1 -
TABLE OF CONTENTS
Table of Contents 1
Safety Warnings 2
Limitations of Liability 2
European Union Directive on WEEE and RoHS 2
Symbols 3
Freight Claim Information 4
Warranty Terms and Conditions 5
I. Basic Product Information 6
II. Unpacking Your Cabinet 7
III. Installing Your Cabinet. 9
IV. Operating Your Cabinet 11
V. Monitoring 12
VI. Maintenance 13
Copyright Information 14
DOMINIQUE DUTSCHER SAS

120 6th Street, Fort Myers, Florida, 33907 USA, www.Airscience.com, Tel: 239-489-0024, Fax: 239-489-0922
- 2 -
SAFETY WARNINGS
This cabinet does not offer product and/or sample protection.
Read all instructions before proceeding and observe the installation procedure and
environmental/electrical requirements
Anyone working with, on or around this equipment should read this manual. Failure to read,
understand and follow the instructions given in this documentation may result in damage to the
unit, injury to operating personnel, and / or poor equipment performance.
Any internal adjustment, modification or maintenance to this equipment must be undertaken by
qualified service personnel.
The use of any hazardous material in the cabinet must be monitored by an industrial hygienist,
safety officer or some other suitably qualified individual.
Explosive or inflammable substances should never be used in the cabinet unless a qualified
safety professional has evaluated the risk involved.
If chemical, radiological or other non-microbiological hazards are being used in the cabinet,
additional protective measures should be taken. Besides that, the operation should be monitored
by a suitably trained individual.
Before you proceed, you should thoroughly understand the installation procedures and take note
of the environmental/electrical requirements of the cabinet.
In this manual, important safety related points will be marked with this symbol.
If the equipment is used in a manner not specified by this manual, the protection provided by this
equipment may be impaired.
LIMITATION OF LIABILITY
The disposal and / or emission of substances used in connection with this cabinet may be governed by
various local regulations. Familiarization and compliance with any such regulation are the sole
responsibility of the users of the cabinet. Air Sciences’ liability is limited with respect to user compliance
with such regulations.
EUROPEAN UNION DIRECTIVE ON WEEE AND RoHS
The European Union has issued two directives:
• Directive 2002/96/EC on Waste Electrical and Electronic Equipment (WEEE)
The objective of the WEEE directive is to promote “….the reuse, recycling and other forms
of recovery of such wastes (WEEE) so as to reduce the disposal of waste besides
improving the environmental performance of all operators involved in the life cycle
of electrical and electronic equipment, e.g. producers, distributors and
consumers….” and hence this directive refers to the disposal of this cabinet within
the EU. A “wheelie bin” sticker (shown alongside) has to be pasted on all products
covered by this directive, indicating that at the time of disposing of the product, it
should not be grouped together with general unsorted municipal waste. Instead,
distributors of electrical and electronic equipment should be responsible for the collection and
scrapping of the products they have sold Please note that this cabinet has been classified as
“fixed industrial equipment” and hence the WEEE directive is not applicable to its disposal.
• Directive 2002/95/EC on Restriction on the use of Hazardous Substances (RoHS)
DOMINIQUE DUTSCHER SAS

120 6th Street, Fort Myers, Florida, 33907 USA, www.Airscience.com, Tel: 239-489-0024, Fax: 239-489-0922
- 3 -
With respect to the directive on RoHS, please note that this cabinet falls under category 9
(monitoring and control instruments) and is therefore exempted from requirement to comply with
the provisions of this directive.
SYMBOLS
Warning of hazardous area or situation
Warning of dangerous electric voltage
Earth (ground) protective conductor
Local government may require proper lamp disposal
DOMINIQUE DUTSCHER SAS

120 6th Street, Fort Myers, Florida, 33907 USA, www.Airscience.com, Tel: 239-489-0024, Fax: 239-489-0922
- 4 -
FREIGHT CLAIM INFORMATION
Air Science inspects each product for defects before shipment. Air Science products are then carefully
packed in compliance with carrier regulations and thoroughly inspected before leaving our plant.
Responsibility for their safe delivery is assumed by the carrier upon acceptance of the shipment.
Occasionally damage occurs in transit. Claims for loss or damage sustained in transit must be made upon
the carrier.
Please remember that you are responsible for all freight claims and the cost of all replacement pieces for
each shipment you accept. Inspect each shipment very carefully before acceptance.
Carefully inspect each pallet or crate upon arrival. If a shipment is found to be damaged upon delivery, be
sure to have the driver/carrier note all damage details on the delivery receipt.
This is essential or your claim may be denied. Also if pallets are stacked, please note "Stacked
Pallets" on the delivery receipt (pallets are not stacked when shipped, unless otherwise stated for
certain products). Air Science is not responsible for pallets stacked at carrier terminal. Any unloading
difficulties or damages due to stacked materials are carrier's responsibility.
If freight damage is discovered, please refer to the following guidelines in order to
process and effective freight claim:
ACCEPTED FREIGHT WITH NOTED/VISIBLE LOSS OR DAMAGE
Any external evidence of loss or damage must be noted on the freight bill or delivery receipt and
signed by the courier's agent or delivery driver
NOTE: Failure to properly describe evidence of loss or damage may result in the carrier
refusing to honor a claim
Contact delivering terminal to arrange for a claim form and inspection report to be faxed or mailed to
you
Notify Air Science regarding which items need replacement
Keep all damaged items and packing material until claim is resolved between you and the carrier
ACCEPTED FREIGHT WITH CONCEALED LOSS OR DAMAGE
When a damage or loss is discovered during unpacking:
Contact the carrier immediately upon discovery of damage and request for inspection by the carrier's
agent.
Carrier will determine inspection needs based on value and time elapsed
Notify Air Science regarding which items require replacement
Air Science will fax to you an order acknowledgment that includes value of items for claim (less freight
amount)
Air Science will invoice you for replacement materials
Air Science standard payment terms will apply
UNACCEPTED FREIGHT
If substantial damage is noted upon inspection you have the right to refuse part or all of a
shipment. Do not unpack pallets or crates with damaged materials. Individual items cannot be
refused. You must refuse the entire pallet or accept the freight with noted damage (see above)
Air Science will handle all freight claim procedures and process a replacement order for your
company for the damaged pieces at no charge. (if the original order was shipped under CIF
terms i.e. Air Science had covered the insurance)
NOTE: Any correspondence with Air Science regarding loss or damage must be accompanied by
a copy of the shipping carrier's report. Air Science will not accept returns that have not been
authorized.
In the event of accepted freight with damage or loss, notification of loss or damage must
be sent to the carrier within 10 days of receiving the freight. Notification outside the 10-day
time frame may result in shipping damage claim being denied.
DOMINIQUE DUTSCHER SAS

120 6th Street, Fort Myers, Florida, 33907 USA, www.Airscience.com, Tel: 239-489-0024, Fax: 239-489-0922
- 5 -
WARRANTY TERMS AND CONDITIONS
Air Science value your business, so your satisfaction is important to us, so please complete and return
our customer satisfaction survey at the end of this manual.
Should you be unfortunate to receive product that appears to be damaged or defective or does
not
appear to be working satisfactorily, then please contact our experienced technicians for assistance at the
address shown at the foot of this page.
The Air Science range of cabinets has been carefully designed to produce a system that will provide
product safety in an easy to use system. However, basic safety precautions should always be followed
when:
Using an electrical product; and
Handling hazardous substances.
Air Science products come with a 2-year limited warranty beginning on the date of shipment
from the Air
Science. Air Science's limited warranty covers defects in materials and workmanship. Air Science's
liability under this limited warranty shall be, at our option, to repair or replace any defective parts of the
equipment, provided if proven to
the satisfaction of Air Science that these parts were defective at the time
of being sold.
This limited warranty does not cover:
Installation (inside delivery handling) damage.
Products
with missing or defaced serial numbers
Consumables such as filters
(HEPA, ULPA, carbon, pre-filters)
and fluorescent / UV bulbs
Problems that result from:
External causes such as accident, abuse, misuse, problems with electrical power, improper
operating environmental conditions
Servicing that is not carried out by Air Science personnel or their appointed agents, or in the case
of electrical work by a qualified electrician
Usage that is not in accordance with these product instructions
Failure to follow these product instructions
Failure to perform preventive maintenance
Problems caused by using accessories, parts, or components not supplied or approved by Air
Science
Damage by fire, floods, or acts of God
Customer modifications to the product
ALL EXPRESS AND IMPLIED WARRANTIES FOR THE PRODUCT, INCLUDING BUT NOT LIMITED
TO ANY IMPLIED WARRANTIES AND CONDITIONS OF MERCHANTABILITY AND FITNESS FOR A
PARTICULAR PURPOSE ARE LIMITED IN TIME TO THE TERM OF THIS LIMITED WARRANTY. NO
WARRANTIES, WHETHER EXPRESS OR IMPLIED, WILL APPLY AFTER THE LIMITED WARRANTY
PERIOD HAS EXPIRED. AIR SCIENCE DOES NOT ACCEPT LIABILITY BEYOND THE REMEDIES
PROVIDED FOR IN THIS LIMITED WARRANTY OR FOR SPECIAL, INDIRECT, CONSEQUENTIAL
OR INCIDENTAL DAMAGES, INCLUDING, WITHOUT LIMITATION, ANY LIABILITY FOR THIRD-
PARTY CLAIMS AGAINST YOU FOR DAMAGES, FOR PRODUCTS NOT BEING AVAILABLE FOR
USE, OR FOR LOST WORK. AIR SCIENCE LIABILITY WILL BE NO MORE THAN THE AMOUNT
YOU PAID FOR THE PRODUCT THAT IS THE SUBJECT OF A CLAIM. THIS IS THE MAXIMUM
AMOUNT FOR WHICH AIR SCIENCE IS RESPONSIBLE. FLORIDA LAW GOVERNS THIS
WARRANTY
DOMINIQUE DUTSCHER SAS

120 6th Street, Fort Myers, Florida, 33907 USA, www.Airscience.com, Tel: 239-489-0024, Fax: 239-489-0922
- 6 -
CHAPTER I
PRODUCT INFORMATION
The Air Science®range of UV-Boxes is a series of high-efficiency chambers designed to safely decontaminate
contents while providing for a safe work environment for the operator. High intensity UV lamps are positioned
within the cabinet producing short wave ultraviolet light at 254nm to destroy exposed surface DNA and
bacteria, leaving evidence free of contamination prior to other forensic tests, analysis or procedures.
DOMINIQUE DUTSCHER SAS

120 6th Street, Fort Myers, Florida, 33907 USA, www.Airscience.com, Tel: 239-489-0024, Fax: 239-489-0922
- 7 -
CHAPTER II
UNPACKING YOUR CABINET
This chapter aims to provide relevant information on how to handle the cabinet properly
upon receipt. Failure to follow the following instructions may damage the cabinet. We strongly
advise you to read this chapter carefully before proceeding further.
2.1 STEP-BY-STEP PROCEDURE
1. Inspecting the crate, pallet, boxes
Upon receipt of your new cabinet, inspect all cartons. If there is any visible damage to the
exterior please refer to freight claim information.
2. Moving the Pallet
The pallet is designed to protect our cabinet from any foreseeable circumstances. However,
excessive impact onto the boxes or pallet may also damage the cabinet. Prevent any direct
impact or hitting to the pallet when moving.
b. When lifting the pallet, please always ensure that the floor jack or mechanical lift truck has
always entered fully under the pallet in order to achieve stability. Failure to do so will increase the
risk of the pallet falling off the floor jack or mechanical lift truck during handling. Please use a
suitable extension bar when the situation arises.
3. Opening the Boxes
If you did not receive one or more of the parts listed on the packing checklist, or if any of the
items are damaged, please contact your distributor or Air Science immediately for further
instructions.
4. Removing the packaging material
The cabinet is protected by Styrofoam, cardboard, and or and shrink-wrap.
If you find any damage during this stage of unpacking please refer to freight claim information.
t is the best practice to leave the cabinet secured with straps to the pallet until the cabinet is
located in its approximate final position to facilitate ease and safety in handling.
Choosing the best location for your cabinet in order to achieve optimum operating
performance of your cabinet is determined by a number of factors. Please refer to the next
chapter for some guidelines.
5. Moving the cabinet
When lifting the pallet with the cabinet, please always ensure that the floor jack or mechanical lift
truck has always entered fully under the pallet. This is to increase the stability of the cabinet and
reduce the risk of the cabinet falling down. Please use extension bar when necessary. During the
moving of the cabinet, please ensure there is enough distance between the supports of pallet and
the ground. Dragging the pallet against the ground (at one side or otherwise) will damage the
pallet and possibly your new cabinet.
6. Removing the strapping
Remove the strapping by cutting it at a safe position to prevent any scratch on the surface of your
new cabinet.
Do not discard the packaging material for your cabinet until you have checked all of the
components, installed and tested the unit.
7. Lifting the cabinet
The Cabinet can be lifted in two sections: The HEAD unit and ENCLOSURE.
Install the cabinet on the existing work surface or Air Science support stand (if ordered)
NOTE:
When installing the cabinet onto an existing work surface, ensure that the structure can safely
support the combined weight of the cabinet and any related equipment. Some modifications to
the work surface may be necessary.
DOMINIQUE DUTSCHER SAS

120 6th Street, Fort Myers, Florida, 33907 USA, www.Airscience.com, Tel: 239-489-0024, Fax: 239-489-0922
- 8 -
The work surface should be smooth and nonporous and resistant to the disinfectants and
chemicals used in conjunction with the cabinet.
2.2 PACKAGING CONTENTS
The following items are included
with the UVB-15
Hanging rods and clips
Door Key
and USB thumb drive with test report and m
anual
In case this manual and/or test report is lost or misplaced, Air Science retains a copy in our files. A
replacement copy can be obtained by contacting Air Science and stating the cabinet
model, serial number
and a brief description of the information desired.
DOMINIQUE DUTSCHER SAS

120 6th Street, Fort Myers, Florida, 33907 USA, www.Airscience.com, Tel: 239-489-0024, Fax: 239-489-0922
- 9 -
CHAPTER III
INSTALLING YOUR CABINET
3.1 CHOOSING A SUITABLE LOCATION
Location impacts the nature and extent of external airflow disturbances, which may affect performance of
the cabinet when it is exposed to these disturbances.
When installing the cabinet, it should be located as far away as possible from sources of airflow
disturbance and in an orientation which optimally shields the cabinet’s airflow from all external airflow
disturbances. Please note that the cabinet should not be placed close to another cabinet.
Please follow these guidelines when choosing a suitable location for your cabinet:
The location must be far away from :
a. personnel traffic flows
b. air vents (in and out)
c. door and window
d. any other sources of disruptive air currents or air drafts
If drafts or other disruptive air currents exceed the face velocity of the filter, the potential exists for
contaminated air to enter the work zone of the cabinet.
A minimum distance of 50 cm to the top of the ceiling is recommended for blower changing purpose.
A clearance of 183 cm (6ft) in front of cabinet is strongly advised in order to maintain proper airflow.
Please permit adequate space for cleaning behind the cabinet.
3.2 ENVIRONMENTAL/ELECTRICAL CONDITIONS
The equipment is designed to be safe for at least the following conditions:
Indoor use
Altitude < 6,500 ft (2,000 m)
5ºC to 40ºC (41ºF to 104ºF) Ambient
Relative Humidity <80% up to 31ºC (88ºF) decreasing to <50% at 40ºC (104ºF)
UL Installation Category II
UL Pollution Degree 2
Continuous operation
Mains supply tolerance of –10%/+10%
120 VAC, 60 Hz, 10A or 230VAC, 50Hz, 5A
Fuse: 250V, 10A, Time Lag for 120VAC or Fuse: 250V, 5A, Time Lag for 230VAC
Always ensure the unit is connected to a reliable and properly grounded receptacle
The appliance inlet on this device is the disconnect device and the appliance should not be
positioned so that it is difficult to operate it.
3.3 INSTALLING YOUR CABINET
1. Please refer to the unpacking your cabinet on the previous chapter section on lifting the cabinet
2. Inspect your cabinet carefully, should you find any defect please refer to the freight claim
information and our warranty terms and conditions
4. Peal off any protective masking that was left on the cabinet during manufacturing.
3. Wipe down the interior and exterior of the cabinet with water or a mild household detergent.
4. Connect cabinet to the main power supply and turn on the blower. Each cabinet requires its own
dedicated 13A (230V) or 15A (115V) power outlet which should not be shared with other appliances.
DOMINIQUE DUTSCHER SAS

120 6th Street, Fort Myers, Florida, 33907 USA, www.Airscience.com, Tel: 239-489-0024, Fax: 239-489-0922
- 10 -
3.4 Set-up
Your Air Science product is shipped in one piece. Please follow the following instructions and photos
(shown is a standard UVB-15) that explain how to set up the main unit.
1. Unpack the unit.
a.
Take unit out of box and set on table
b.
Turn ‘T’ Latch front door know to open/close (this
lock is provided with a key)
c.
Install
hanging rods
in the workzone
.
d.
Plug unit into suitable power supply
DOMINIQUE DUTSCHER SAS

120 6th Street, Fort Myers, Florida, 33907 USA, www.Airscience.com, Tel: 239-489-0024, Fax: 239-489-0922
- 11 -
CHAPTER IV
OPERATING YOUR CABINET
4.1 CONTROL SYSTEM
UV Timer
Unit is equipped with a simple dial timer switch. Dial desired time feature.
4.2 CABINET OPERATING PROCEDURE
A.
Open Door
and load items. Do not overlap or layer items. Surfaces should be directly exposed to
the bulbs.
B.
Close Door
and turn the dial timer to desired setting.
C. Once cycle is completed, UV light will turn off. Wait a minute or two before removing items as the
bulbs generate heat and surfaces may be hot.
DOMINIQUE DUTSCHER SAS

120 6th Street, Fort Myers, Florida, 33907 USA, www.Airscience.com, Tel: 239-489-0024, Fax: 239-489-0922
- 12 -
CHAPTER V
MONITORING
5.1 GENERAL
The purpose of the monitoring program is to ensure consistent reliability from the system. This is
achieved:
a) Change UV lamp every 12 months.
DOMINIQUE DUTSCHER SAS

120 6th Street, Fort Myers, Florida, 33907 USA, www.Airscience.com, Tel: 239-489-0024, Fax: 239-489-0922
- 13 -
CHAPTER VI
MAINTENANCE
6.1 GENERAL
In some countries it is mandatory to maintain written records of checks, tests and repairs carried
out on safety equipment. These records must be kept for 5 years. A full list of Occupational
Exposure Limits should be obtained from your safety officer.
Regular preventative maintenance on the cabinet will reduce the possibility of hazard to the operator and
ensure reliable performance from the cabinet.
WARNING! Before attempting inspection and repairs to the cabinet please ensure the
power to the system has been removed and that the power lead has been removed. It
should also be noted that fume cabinets are sometimes used to contain and protect
users of the cabinet from hazardous or harmful substances. Before commencing this
schedule it is important to ensure the cabinet is safe to work
on.
6.2
GENERAL CLEANING
Wipe down the unit with only soapy water
. Disinfectants like 70% alcohol and hydrogen peroxide are
suitable for stainless steel surfaces.
DO NOT WIPE OR TOUCH THE BULB.
6.3
LIGHTS
Check that the light is working.
6.4
CHANGE OUT OF
UV
WARNING: Ensure persons removing
UV Bulbs
are made aware of any potential hazards
and that they are provided with any necessary protective clothing and equipment.
CONSULT YOUR SAFETY OFFICER OR INDUSTRIAL HYGIENIST BEFORE REMOVING OR
DISPOSING ANY
UV LAMPS
Disconnect unit from Power
Remove UV lamp cover
by undoing the four screws located on the left and right exterior
sides near the corners.
Release Bulb
from r
etaining
cl
i
p
Disconnect bulb
from socket
and replace
. Repeat with the other bulbs, then reattached
the UV lamp cover.
DOMINIQUE DUTSCHER SAS

120 6th Street, Fort Myers, Florida, 33907 USA, www.Airscience.com, Tel: 239-489-0024, Fax: 239-489-0922
- 14 -
6.5 FAULT FINDING
Warning: Before attempting any inspection or replacement of electrical components,
always isolate the fume cabinet from the mains supply and remove the power supply
cable.
FAULT CHECK
Lamp not working Check power to unit
Check door closed
Replace Bulb
COPYRIGHT INFORMATION
Copyright 2012 Air Science.
All rights reserved.
The information contained in this manual and the accompanying product are copyrighted and all
rights are reserved by Air Science. Air Science reserves the right to make periodic
minor design changes without obligation to notify any person or entity of such change.
Air Science is a registered trademark of Air Science USA LLC.
DOMINIQUE DUTSCHER SAS
Other manuals for UV-BOX UVB-15
1
Table of contents
Other Air Science Laboratory Equipment manuals
Popular Laboratory Equipment manuals by other brands

ThermoFisher Scientific
ThermoFisher Scientific iS20 with OMNIC user guide

Whatman Biometra
Whatman Biometra TProfessional 96 user manual

Electron Microscopy Sciences
Electron Microscopy Sciences Pathscan Enabler IV Slide Scanner instruction manual

Hartridge
Hartridge HK853 user manual

caron
caron 6540 Operation manual

gc
gc Aadva Lab Scanner 2 manual