Airlinkplus ATVUSB01 User manual

Model # ATVUSB01
User’s Manual

1
Table of Contents
CHAPTER 1 INSTALLING HARDWARE......................................................................................................2
1.1 Package Contents .................................................................................................................................2
1.2 Minimum System Requirements..........................................................................................................2
1.3 Upgrading USB 2.0 Host Controller Driver.........................................................................................2
1.4 Hardware Installation...........................................................................................................................5
CHAPTER 2 INSTALLING VIDEO CAPTURE ADAPTER DRIVER..........................................................6
CHAPTER 3 INTSTALLING PVR-PLUS........................................................................................................8
CHAPTER 4 USING PVR-PLUS.....................................................................................................................10
CHAPTER 5 USING TVR ...............................................................................................................................11
5.1 Main Panel Functions..........................................................................................................................11
5.2 Schedule Function ...............................................................................................................................14
5.3 Setup Utility ........................................................................................................................................16
5.4 Snapshot..............................................................................................................................................18
5.5 Sleeping Timer ....................................................................................................................................18
CHAPTER 6 USING MPEG ENCODER........................................................................................................19
6.1 Interface Explanation..........................................................................................................................19
6.2 Streaming Video Translation ...............................................................................................................19
6.3 Translation Option Dialog...................................................................................................................21
CHAPTER 7 USINGVIDEO EDITOR ...........................................................................................................24
7.1 Menu Area...........................................................................................................................................25
7.2 Display Area ........................................................................................................................................26
7.3 Original andStaging Clips..................................................................................................................26
7.4 Frame Edit Mode.................................................................................................................................28
CHAPTER 8 USING DVD MAKER ...............................................................................................................29
8.1 Adding Files ........................................................................................................................................29
8.2 Burning................................................................................................................................................30
8.3 Video Specifications............................................................................................................................31
CHAPTER 9 FAQ.............................................................................................................................................33
Appendix A .......................................................................................................................................................35
Product Specifications ...............................................................................................................................35
Appendix B .......................................................................................................................................................36
Technical Support......................................................................................................................................36

2
CHAPTER 1 INSTALLING HARDWARE
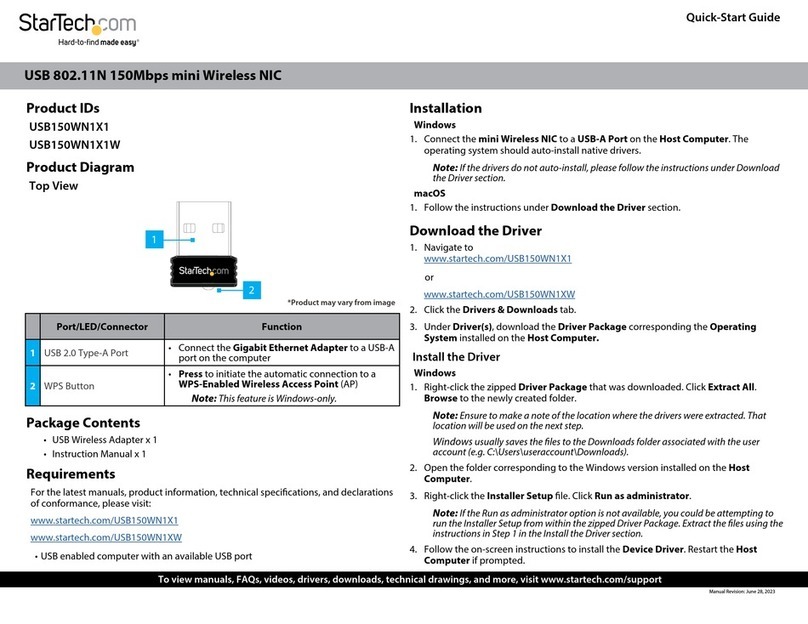
1.1 Package Contents
Unpack yourVision+ video capture adapterand make sure that allthe items are intact. The
following items should be included in your package:
lVision+ video capture adapter
lQuick Installation Guide
lInstallation CD-ROM
1.2 Minimum System Requirements
lIntel Pentium 4 1.6GHz or above CPU
l256 MB RAM
l200 MB available hard disk space
lOne available USB port (USB 2.0 recommended)
lMicrosoft Windows 2000/XP
lVGA with DirectDraw driver supporting Overlay Surface (DirectX 8.1 supported)
lAC 97 compatible sound card
lSpeakers for audio output
lCD-ROM drive
1.3 Upgrading USB 2.0 Host Controller Driver
Before you plug the Vision+ video capture adapterinto yourcomputer’s USB2.0 port, please
check your USB 2.0 device driver first. If your USB 2.0 host controller driver is not the latest
version or provided by Microsoft, we strongly recommend you use our USB 2.0 update
utility. It will help you to upgrade your USB 2.0 driver to the latest version releasedby
Microsoft in order to avoid some compatibility issues. Please follow the steps below to
upgrade your USB 2.0 host controller driver.
Note: DONOTconnect the video capture adapterto your computerwhen youare usingthe
USB update utility.
1. Turn on your computer.After Windows has finished loading, insert the provided
Installation CD into your CD-ROM drive. The autorun page will automatically detect your
USB 2.0 host controller device. If your host controller is not the latest version or providedby
Microsoft, the USB update utility will display the following warning message:(If your
driver is already the latest version,you would not see the warningmessage.SkiptoSection
1.4 Hardware Installation to install the Vision+ video capture adapter).

3
2. Click OK to begin the update process.
3. Select Yes, I want to reboot my computer nowand click OK.
4. After the computer reboots, the Found NewHardware Wizard will guide you to install
the updatedUSB driver. Click Nextto continue.

4
5. Select Search for a suitable driver for my device and click Next. (For Windows XP,
select Install software automatically and click Next).
6. Uncheck all the boxes under Optional search locations and click Next.
7. Windows will find the driver file automatically. Click Next.

5
8. Click Finish to complete the driver installation.
9. Leave your computer powered on and proceed to the next section,HardwareInstallation.
1.4 Hardware Installation
After you have updated the USB 2.0 host controller driver to the latest version, you can
install the Vision+ video captureadapter. Please refer to the diagram below as you follow the
installation procedures.
Note: Be sure to follow the steps carefully and plug in theUSB 2.0 connector last.
1. Connect the Composite In (or S-Video In) and AudioIn connectors to the output cables
of your video/audio source.
2. Connect the Audio Outcable of the video capture adapter to the Line In port of your
sound card.

6
3. Connect your speakers to the Line Out port of your sound card.
4. Connect the USB 2.0 connectorto the USB 2.0 port of your computer.
CHAPTER 2INSTALLING VIDEO CAPTURE ADAPTER
DRIVER
Before installing the driver, it is highly recommended that all background applications such
as antivirus software and system monitoring programs be disabled first.
1. When you plug in thevideo capture adapter’s USB2.0 connector to theUSB 2.0 port of
your computer, the Found New Hardware Wizard will appear. Make sure the
Installation CD is still in your CD-ROM drive and click Next.
2. Select Search for a suitable driver for my device and click Next. (For Windows XP,
select Install software automatically and click Next).

7
3. Select Specify a location, deselect every other option, and clickNext.
4. Click Browse and browse to theDriver folder in your CD-ROM drive. Example:
D:\Driver (where Dis the letter of your CD-ROM drive).
5. Click Next to install the driver.

8
6. Click Yes if the Microsoft Digital Signature message appears.(For Windows XP, click
Continue Anyway).
7. Click Finish to complete the driver installation.
CHAPTER 3INTSTALLING PVR-PLUS
PVR-PLUS is a set of utilities that allow you to record videos, edit video clips, burn DVDs,
and more. Before installation, it is highly recommended that all background applications
such as antivirus software and system monitoring programs be disabled first.
1. Insert the provided Installation CD-ROM and wait for the setup menu to appear.
2. Select PVR PLUS at the setup menu. If the setup menu does not appear automatically, go
to Start, Run, and type D:\ksetup.exe (where Dis the letter of your CD-ROM drive)
and click OK.
3. Click Next to begin installation.

9
4. Click Next to accept the default Destination Location or click Browse to choose a new
location.
5. Click Next to accept the default Program Folder.
6. Click Finish to complete the installation.

10
CHAPTER 4USING PVR-PLUS
Double-click the PVR Plus icon on your desktop to run PVR-PLUS. Afteryou started
PVR-PLUS, you can select the application you want to use. Click on each icon to start the
application.
•TVR: TVR turns your PC into a
full-featured video recorder. (For detailed
instructions, please refer to chapter 5).
•MPEG Encoder: MPEG Encoder
converts DV/AVI files into MPEG/DVD format.
(For detailed instructions, please refer to chapter
6).
•Video Editor: Video Editor allows you to
edit MPEG/DVD videos.(For detailed
instructions, please refer to chapter 7).
•DVD Maker: DVD Maker lets you create
VCD, SVCD,and DVD that can be playedona
PC or DVD player. (For detailed instructions,
please refer to chapter 8).
Note: You can also view and edit pictures using PVR-Plus.For detailed information about
how to view/edit the pictures, click the ?button on the PVR-Plus console.

11
CHAPTER 5USING TVR
TVR allows you to watch and record videoson your computer as well as to playback the
recordings.
5.1Main Panel Functions
Thedisplay window showsthe current or recorded videos. You can drag it anywhere on the
screen or adjust its size by double-clicking it to switch to full-screen and double-clicking the
screen again to return to its original size.The TVR has five major parts.
5.1.1 Information Window
The Information Window displaysthe current status of the TVR, including video status,
(Live, REC, Playback, Time-Shifting), recording time, recording file size,and the current
time.
5.1.2 Basic Tools
The Basic Tools have five buttons. You can click on each button for more specific functions.
For detailed instructions on each button, please refer to the following sub-sections.
Note: The two other buttons are reserved for models with TV Tuner function.
Input Source Switch: Changes the video input source
: Scheduling: schedules recording date/time
: Setup: opens the Setup Utility
: Snapshot: takes a snapshot of the current image in the display window
: Sleeping timer: configures the sleeping timer

12
5.1.3Input Source Switch
There are two video input sources to choose from:Composite and S-Video. You can change
the video input source by clicking on the Input Source Switch button, or choose Switch
Video Source from the popup menu of the display window.When the video source is
changed successfully, the Input Source Switch will display the corresponding source.
5.1.4Volume Adjust
Adjusting Volume:
: Increase volume
: Decrease volume
: Mute or restore sound
5.1.5Record, Playback, Time-Shifting
1. Record
At Live mode, you can start recordingthe current video by clicking on the capture button
. Once you are capturing, click the stop button to stop recording. You can
review your recorded files in the Play list after recording.
2. Playback
You can playback the recorded files by clicking on the play button . A playback
dialog box will appear, showing all the captured files and recently played files. Select the
files you want to playback and click Add to add them to the Play list. You can add more
than one file at a time, and you can also import files from other locations.Once you have
added all the files to the Play list, click OK to begin playback.

13
While playing, you can use following functions:
•Play button : If the video is paused, resume playback
•Pause button : If the video is playing, pause it
•Stop button : Stop current playback and go to Live mode
•Backward button :Go backward
•Forward button : Go forward
3. Time-Shifting
The Time Shifting function allows you to record and playback videos at the same time. At
Live mode, you can perform time-shifting by clicking on the time-shifting button .
Once you are in time-shifting mode,you need to wait at least 10 secondsbefore you can
playback the recorded video by clicking on the play button . If you want to stop
time-shifting, click the stop button . During time-shifting, you can switch between
the current video and the recorded video by selecting RealScreenfrom the popup menu of
the display window.

14
5.2Schedule Function
Click on the Schedule button to configure the Scheduled Recording Agent. Click OK
when you are done configuring.
Capture
Capture Source:Select the video input source
(Composite or S-Video).
Capture format (profile):Selectthe video
format you want to use.Note: If you want to burn
your captured videos to DVD, be sure to set the
capture format to DVD (NTSC) and not MPEG
2.
Capture size:Set the video capture size.
Bit rate (Kbps):Set the capture bit rate.
Capture quality:Set the capture quality.
Frame rate:Select the frame rate.
Capture audio option:Select from “Capture
audio”, “Capture audio only, No video”, or
“No audio”.
File name option:You can use the date/time as your capture file name or assign a name
yourself.
Time option
Current time:Showsthe current time.
Starting time: Enter the date and time when you want to start recording.
Duration:Enter the length thatyou want to record.
Recording rule: Select the recording rule you want to use. The default is "Once only.”
When you enter a record schedule, it will beadded to
the Open tab of the ScheduledRecording Agent.
Insert:Insert a new record schedule.
Edit:Edit the record schedule.
Delete:Delete a record schedule.
Delete All:Delete all record schedules.
Execute TVR: Starts the TVR program.

15
Today To-do List: displays all of today’s record
schedules. Click Refresh to update the list.
Log: If your record schedule has failed, the error
message will be recorded in the Log. You can
check for any message in the Log. ClickClearto
clear the log.
Setup:
Output folder: Assign a destination folder to
store your scheduled recorded files.
Auto-execute at start up: Allows the Scheduled
Recording Agent to start at Windows start up.
Default is enabled.

16
5.3Setup Utility
Click on the Setup button to enter the Setup Utility.
5.3.1Capture
Video capture device: Select your video
capture device.
Video input format: Select your video
input format (UYVY, YUY2, RGB24).
Capture format (profile):Select the
video format you want to record as.Note:
If you want to burn your captured videos
to DVD, be sure to set the capture format
to DVD (NTSC) and not MPEG 2.
Capture Size: Set the video capture size.
Bit Rate (Kbps):Set the capture bit rate.
Capture quality:Set the video capture
quality.
Frame Rate: Set the capture frame rate.
Capture location: Set the folder to store
your captured videos.
Capture filename:Set the capture file
name format. Choose either to name the
files with date/time or asa custom name
defined by you.
Enable time limit:Check this box to set a time limit for the video capture.
Capture audio option: Select from “Capture audio”, “Captureaudio only,No Video”,or
“No audio”.
Audio capture device: Select the audio capture device you want to use.
Audio Source: Select the audio input source. (Recommended using Line In)
Audio format: Select the audio format. For DVD, be sure to select 48000 Hertz.
Recording level: Adjust the audio recording level.
Click OK after you have configured all the settings.

17
5.3.2Video Color: Move the slide bar to adjust the
Brightness, Contrast, Hue, and
Saturationof the video. Click Default to
reset the settings to factory default.
Video System:Select the video system
for your Composite and S-Video inputs.
Always on Top:The preview window
will always be displayed on top of other
windows.
Enable high quality preview:Enables
high quality preview mode.
Don't use overlay as display surface: If
your VGA card doesn't support Overlay
mode, click on this option.
Display Aspect Ration:Set the display
aspect ratio to 4:3, 16:9,or free mode.
5.3.3Other
Multi language option:Select the language for
the user interface.
Enable PIP playback: Enables
Picture-In-Picture function when you playback
recorded videos.
MPEG4 Codec:Select the appropriate MPEG4
codec to use while capturing videos in the
MPEG4 format. (Choose from DivX, Microsoft
MPEG4 Codec V1, V2, and V3).

18
5.4Snapshot
You can take a snapshot (still image capture) of thecurrent image in the display window by
clicking on the Snapshot button . When the image is taken, the snapshot window will
appear. Click on the thumbnail to select the image. You can view, save, and delete the
images. The save image option supports Bitmap and JPEG formats. You can select which
format to save the image as when you clickSave or Save All.
Note: The snapshot button on the Vision+ video capture adapter only works with programs
that support the TWAIN function. For more information on how to use the adapter’s snapshot
button, please refer to the FAQ in Chapter 9 of this manual.
5.5Sleeping Timer
Activate the sleeping timer by clicking on the Sleeping
Timer button .
Use the slide bar to adjust the time before auto
shutdown, click OK to start, Cancelto exit.

19
CHAPTER 6USING MPEG ENCODER
The Mpeg Encoder lets you convert DV/AVI files into MPEG/DVD format.
6.1 Interface Explanation
Below is the interface window for the Mpeg Encoder:
The interface window is composed of four parts:
Header Buttons (Upper
Right) Add files, delete files, Edit options, Start and Stop
encoding, Help files.
Batch Process Display
Window (Upper Left) Displays the file name, encoding status, screen size, au
dio
format, and play time of the files to be encoded.
Progress Display Window
(Lower Left) Displays formatting information about the file being
encoded.
Preview Display Window
(Lower Right) Displays the video of the file being encoded.
6.2 Streaming Video Translation
MPEG Encoder converts multimedia files into MPEG/DVD format. For multimedia files to
be encoded using the MPEGEncoder, they must be able to be played with Windows Media
Player. File formats that can be converted are: AVI, DV-AVI, MPEG 1, MPEG 2, ASF, WMV,
DivX, and DAT.
Other manuals for ATVUSB01
1
Table of contents
Other Airlinkplus Adapter manuals

Airlinkplus
Airlinkplus WLC3010 User manual

Airlinkplus
Airlinkplus AWLL017 User manual

Airlinkplus
Airlinkplus AWLC011 User manual

Airlinkplus
Airlinkplus WLH3010 User manual

Airlinkplus
Airlinkplus AWLL3025 User manual

Airlinkplus
Airlinkplus AWLL017 User manual

Airlinkplus
Airlinkplus ATVUSB01 User manual

Airlinkplus
Airlinkplus ASOHOCB User manual

Airlinkplus
Airlinkplus WLC3010 User manual

Airlinkplus
Airlinkplus WLL013 User manual