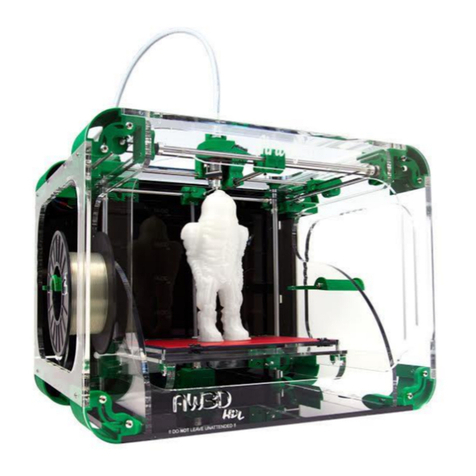
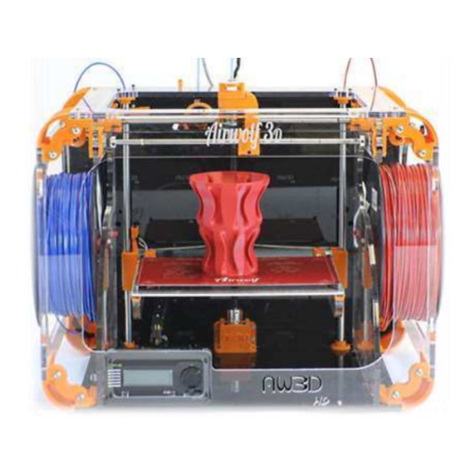
Airwolf 3D HDR User manual

Phone: 949.478.2933
130 McCormick Ave. Suite 105, Costa Mesa, CA 92626
facebook/Airwolf3d @airwolf3d
visit us at www.airwolf3d.com

Very Important
Airwolf 3D has spent countless hours perfecting these print settings
so that our customers have the best experience possible with their
new printer. Please make sure to use these default settings when
using the HDR.
They will give you excellent print results without the hassle of
tweaking settings. Airwolf will make sure to create and add settings
for new materials which are compatible with Airwolf 3D printers.
HDR QUICK START GUIDE PAGE 2
For technical support visit:
https://airwolf3d.freshdesk.com

Unboxing
Open the accessory kit. Plug the power cord into the back of
the printer and into a power source. A surge protector is highly
recommended.
Turn the power switch on at this time to give your
Wolfbox 3-5 minutes to boot up.
Setup
Remove the printer from the box.
Remove the labeled zip ties from the arms of the bed and the
red rod stabilizers that hold the X-axis in place. The foam
under your heat bed will be removed later in the “Wolfbox
Interface” section.
Press the two tubes into the plastic white adapters on the top
of the hot end. Make sure to secure the hot end as you push
the tube down to prevent the rods from bending. Also make
note that the left tube goes into the left adapter and the right
tube goes into the right adapter. Push in the tubes until you
feel some resistance. This will ensure that the tubes are
seated completely into the tube.
Insert the E-clips onto the plastic white adapters to secure
the tubes to the hot end. There is a plastic white adapter with
the E-clip installed on the extruder assembly for reference.
Firmly press the tube into the white adapter on the top of the
extruder assembly. Verify it is securely fastened to the white
adapter by lightly pulling up on the tube. When closed, the
latch should clear the plastic white adapter and only contact
the tube.
•
•
•
•
•
HDR QUICK START GUIDE PAGE 3

Loading Filament
TIP: Cut the end of the filament to form a point for
easy filament feeding.
Squeeze the latch on the extruder assembly, remove the pin
and set it aside, you will need it to run the printer.
Load the lament onto the spool minder. Make sure the
lament is unwinding from the bottom of the spool so the
natural curvature of the lament leads it up towards the
extruder assembly.
Insert the lament into the hole at the bottom of the
extruder assembly and halfway through the tube.
•
•
•
HDR QUICK START GUIDE PAGE 4

Heat Bed Preparation
For initial setup, you will be preparing the bed for use of ABS filament. For other types of
filaments after initial setup, please refer to our Bed Adhesion solution found on the tech portal at
www.airwolf3d.freshdesk.com
Open the manila envelope with the glass build plate inside.
Follow instructions for applying Wolfbite to your glass. The instructions are provided with your
bottle or nd them on page 20
Place the glass with the Wolfbite application face up onto your heat bed.
The 4 binder clips will be used to hold the glass to the heat bed. The front left clip needs to be oset
from the corner by 3 to 4 inches. This is to prevent the hot end from colliding with the clip when it
goes to its home position. Place the other 3 binder clips on each corner of the bed.
•
•
•
•
HDR QUICK START GUIDE PAGE 5

Astroprint.com Setup
Astroprint.com will be your dashboard for storing .STL files and creating G-code. G-code is the
instructions for the printer, e.g. speed, temperatures, and toolpaths.
Your printer should be on and have had at least 3-5 minutes to boot up.
On a desktop or laptop computer, go to “Astroprint.com”and create a free account. Decide if you
would like this account to be shared with multiple users or kept private. We recommend using a
general company email and password so all users can access the printer.
•
Turn on your Asus tablet. Once it has booted up, swipe across the screen to unlock it.
Swipe from the top of the tablet screen and select the gears settings icon, then select Wi-Fi. You
will need to connect to the printer’s hot spot for initial setup. The hot spot will be labelled HDR
followed by your printer’s serial number. This hot spot is temporary and will be shut o at the end
of setup.
•
•
HDR QUICK START GUIDE PAGE 6

The Wolfbox is the Wi-Fi board that will give you control of the printer, and how you will start print files. It
will be attached to the astroprint.com account you created to allow access and use of your stored .STL files
and G-code.
Wolfbox Setup (It is built into your HDR)
Open a Google Chrome Browser window on the tablet and
type “10.10.0.1”. This will take you to the Airwolf 3D Printer
setup page.
Click “Begin Setup”.
Verify that the Airwolf Printer Name is identical to your
serial number, then click “Internet Setup”. You can nd this
number located on the back panel of your printer etched
into the acrylic.
Select the Wi-Fi network you wish to connect your printer
to and click “Connect”. If your network has a password, you
will need to type this in and click “Connect” again.
Success! Click on “Astroprint Account” to connect the
printer to the Astroprint.com account you previously
created.
Type in your email address and password for your
Astroprint account, then click “Printer Connection”.
Check that the printer’s USB cable is connected to both the
RAMBo board (USB) and the Wolfbox (Wi-Fi). Click
“Continue”.
Verify the Baud Rate is set to 250000 and click “Connect”.
You’re Done! Feel free to Share or Tweet or click “Start
Printing!”
•
•
•
•
•
•
•
•
HDR QUICK START GUIDE PAGE 7

2. Obtaining your printer’s IP Address
3. Turn o the Hotspot
Verification
From the menu, go to Settings.
Go to Internet Connection
Below Wireless Connection, you will see the network you are connected to and the IP
address of your printer. Write this IP address down. You will need it if you experience
network or Wi-Fi connectivity issues.
•
•
•
Manually turn o the hotspot after set up is complete.•
Final Wolfbox Setup
Removal of foam under the bed can be found on page 14
There are a few nal setting adjustments you will need to make using your Wolfbox
interface. Please see page 16.
•
•
HDR QUICK START GUIDE PAGE 8
1. Ensure you are set up correctly by checking that 3 icons on the top right of your screen are green.

Astroprint Interface
HDR QUICK START GUIDE PAGE 9
Astroprint.com will be your dashboard for storing STL files and creating G-code. G-code is the
instructions for the printer, e.g speed, temperatures, and toolpaths.
Open AstroPrint and select "Upload Design", then navigate to the STL you'd like to upload. A new
page with a picture of the STL file should appear.
•
Select a "Printer Model"
"add printer" if the printer model is not already available in the list.
Select a "Filament"
"add filament" if the material is not already available in the list.
Select a "Print Quality"
"Normal" will yield a high quality part in most cases. Selecting "Best" when the part does not
require it will significantly increase print times unnecessarily.
•
•
•
•
•
•
Design Uploader

File Manager
Monitor
After initial setup, this tab will display
your HDR printer and will give you access
to the Wolfbox Interface (page 12).
Thingiverse
Browse and download STL les others
have created.
HDR QUICK START GUIDE PAGE 10
"Advanced Settings" can be used to alter the default settings.
Click "Generate Print File". This will slice your STL into G-code and return you to your file manager.
•
•
Under "Active Slices", the part should be slicing, demonstrated by the loading bar. This process may
take a minute or two, depending on the STL file.
Under "Your Designs", the latest STL file should be listed at the top. Under each name of the STL
files, it will display "# print file(s)". Clicking this will display all of the print files already generated
along with the settings used for that specific print. Clicking on the settings will pop up a secondary
window with all the specific settings used. Clicking "Make another >>" allows you to create another
print file for that particular STL.
•
•

“Camera/Controls”
•
From here, you can view basic information such as the current temperature of the printer and
what part is printing (during a print job). You also have the ability to capture photos if you attach a
webcam to your Wolfbox. If you are interested in more information on connecting a webcam,
please visit our tech portal.
Click “Launch UI”. This will open a new window in your browser with your printer’s Wolfbox
Interface (page 12). You must be connected to the same network that your printer was
connected to during initial setup.
•
•
Print Captures
This tab will display pictures taken if you have attached a webcam to your printer. Please visit our
tech portal for more information.
Printer Proles
During the slicing process, any printer you selected from “add printer” will be listed in this tab.
You can erase any printers you no longer
wish to have listed in your dropdown.
Do not edit any of the printer settings. Airwolf 3D has spent countless hours perfecting these
print settings so that our customers have the best experience possible with their new printer.
Please make sure to use these default settings when using the HDR.
•
•
HDR QUICK START GUIDE PAGE 11

HDR QUICK START GUIDE PAGE 12
Wolfbox Interface
The Wolfbox is the printer’s interface. This will be where you upload print files from your computer,
download print files from your Astroprint account, and start prints.
Material Profiles
During the slicing process, any printer you selected from “add filament” will be listed in this tab.
You can erase any filaments you no longer wish to have listed in your dropdown.
The option is available to edit default temperatures for the filament, however, we do not suggest
changing our recommended settings.
•
•
Settings
Change password, name or e-mail.
Yeggi Search
Browse and download STL files others
have created.

HDR QUICK START GUIDE PAGE 13
File Manager
Upload File (stl, gcode)
• Allows you to upload an STL le from your computer to your AstroPrint account and slice it
into G-code. The STL le will be stored on your AstroPrint account for future use.
• Allows you to upload a G-code le directly to your Wolfbox. This will not be stored on your
AstroPrint account, only on the Wolfbox.
Sync
• Synchronizes the Wolfbox with your AstroPrint account so you can view and download print
les that have recently been sliced on your AstroPrint account.
Local
• Shows you only les that have been sliced or run through this printer’s interface. You will not
be able to see any les that were sliced using your AstroPrint account.
Cloud
• Shows all print les on both the Wolfbox and your AstroPrint account. Print les that have not
been downloaded to the Wolfbox yet will be faded out. You can download them to your
Wolfbox, or start the print by clicking on them and selecting either the cloud icon (to
download the print le to the Wolfbox without starting the print) or the printer icon (to
download the print le to the Wolfbox and immediately start the print).
File Uploader
This option is the same as seen on page 9. Uploading stl files here will still be sliced using
Astroprint.com

HDR QUICK START GUIDE PAGE 14
Control
XY Plane (Horizontal)
• X and Y movement of the hot end.
• The house icon will move the hot end to its home position (front left).
Z Plane (Vertical)
• Z movement of the heat bed.
• The house icon will move the heat bed to its home position (the Z limit switch contacts the
Z adjust screw).
• The add and subtract options are for distances away from the hot end. So adding distance
means the heat bed will go down and subtracting distance will cause the heat bed to go up.
Movement Increment Control
• Displayed in millimeters, the amount of movement you would like in the X,Y, or Z axis.

Extrude Filament
Select Nozzle
Nozzle one is on the left side of your hot end and nozzle two is on the right.
Filament Amount
Increment control specic to lament extrusion/retraction.
Extrude
Clicking this will push the lament through the hot end by the amount selected in
“Filament Amount”.
Nozzles must be heated up to temp before attempting to extrude lament.
Retract
Clicking this will pull lament back out of the hot end by the amount selected in
“Filament Amount”.
Nozzles must be heated up to temp before attempting to retract lament.
Current Temp
When sitting idle, both displays will read room temperature in celsius.
The Temperature Controls are the scrollbars at the bottom. This allows the user to
control the hot end temperature, as well as the heat bed temperature.
Set the Nozzle Temperature to 240C by dragging the scrollbar up. This will set the
target temperature to 240C. The Current Temp will start to increase.
The side fan on the hot end can also be turned o and on with the ON/OFF button.
The fan on the back of the hot end is controlled by the printer, not the user.
•
•
•
•
•
•
•
•
•
HDR QUICK START GUIDE PAGE 15
Up to this point, the foam is still under the bed.
**Removing the Foam From Under the Heat Bed**
Change the increment amount to 100mm.
Conrm the zip ties are cut o.
Under “Vertical”, click “-” to lift the bed up.
Once the bed is clear, remove the foam from under the bed.
•
•
•
•
*
*

Printer
Connection
Here you can change the Baud Rate to 250000 if this step was missed previously.
If you are ever having connection diculties, “Test Connection” is also available here.
Prole
Maximum temperatures for your printer. Do not changes these to temperatures your printer is
incapable of.
**Final Wolfbox Setup**
For the HD-R, the number of extruders will need to be changed to 2 and the max temperature
changed to 320.
•
•
•
HDR QUICK START GUIDE PAGE 16
Settings
Supplies
This tab will take you to Airwolf 3D’s Store for stocking up on Wolfbite, glass, filament, etc.

Software
Update
Check for recent updates.
Advanced
Restore Factory Settings.
Disconnects the Wolfbox from the Astroprint account and Wi-Fi network, and turns on
the hotspot.
Logs
Send logs to Astroprint. This option is used for troubleshooting errors with astroprint. Checking
the “Turn on serial logs”should only be used if there are communication errors occurring.
•
•
•
Internet
Wireless Connection
View what network you are connected to.
IP Address location.
Local Hotspot
After setup, the hot spot is shut o for security purposes. If you would like the hot spot to
remain on, uncheck the box for “Turn hotspot o when a known network is found in the future”.
You can still connect directly to the Wolfbox by navigating through astroprint.com to monitor
tab, typing the IP address in your browser, or going to your printers network folder and clicking
on your printer under“Other Devices”.
•
•
•
•
HDR QUICK START GUIDE PAGE 17
Support
This tab will take you to Airwolf 3D’s Tech Assistance Portal (https://airwolf3d.freshdesk.com)
Solutions are available for everything from Unboxing the
Printer, to Maintenance and Troubleshooting.
Submit a Ticket for assistance from our technicians!
•
•

HDR QUICK START GUIDE PAGE 18
Calibration
Calibration is extremely important and will drastically improve your print quality and accuracy.
The printer will need to be calibrated initially out of the box, but should only require minimal adjustments
from there on out.
Calibrating the Nozzles
Set the glass on the heat bed and secure it
with the 4 binder clips.
Go to “Controls” in your Wolfbox menu and
click the icon under “Vertical” to home
your heat bed.
Wait one minute for the Z stepper motor to
turn o allowing easy manual movement.
By hand, rotate (clockwise) the Z coupling
until the glass is just about to touch the
lower of the two nozzles.
If both of your nozzles are level, you do not
need to do anything further. Continue to
page ___ for “Calibrating the Heat Bed”.
Otherwise, continue to the next step.
There is a large M4 bolt that sticks out from
the top back left of the hot end. Rotate the
bolt clockwise to raise the rst (left) nozzle.
Rotate the bolt counterclockwise to lower
the rst (left) nozzle.
Raise and lower the bed, as needed, while
adjusting the screw until you can see that
both nozzles would contact the bed at the
same time.
•
•
•
•
•
•
•

•
•
•
•
•
•
•
•
•
•
HDR QUICK START GUIDE PAGE 19
Additional Information
LEVELING THE HEAT BED VIDEO - Leveling the Heat Bed (HD series printers).
https://airwolf3d.freshdesk.com/support/solutions/articles/5000016861-video-leveling-the-heat-bed-hd-series-printers-
Calibrating the Heat Bed
Watch the video“HD Bed Leveling and Calibration”. As an HDR owner, you can skip to 4 minutes in.
Find this video in our Tech Portal or YouTube channel.
From the tablet navigate to your Wolfbox Home page, Upload Print File (.gcode),
open le manager and navigate to the le “First Print - HDR Calibration.gcode”.
sdcard > AW3D_HDR > Sample Prints > Dual Head > Print These (.gcode) > First Print - HDR Calibration
Preheat the Printer
In the Wolfbox menu go to “Control” and heat the nozzles to 240C if not already done.
Once the nozzles are up to temp, push the lament the remaining distance into the hot end
until you see the lament extruding out of the nozzle.
Hold the extruder latch close and push the pin back in.
You will need the 2.5mm allen wrench from the accessory kit and a piece of paper folded in half.
On the Wolfbox Home page, click the Print icon next to the G-code le to start the print.
It is highly recommended to print the Airwolf 3D sample prints for the rst two weeks to assist with the
learning process. Please visit our tech portal at www.airwolf3d.freshdesk.com if you have any
questions or concerns.

HDR QUICK START GUIDE PAGE 20
nano
PREMIUM GLASS BED ADHESION SOLUTION FOR PLA
Directions for use:
SHAKE WELL!
1. Remove lid and dip foam applicator
into solution.
2. Apply by painting on cold glass with long
strokes, covering the entire build area.
3. Place glass onto heatbed and preheat.
IMPORTANT!!!
One dip of
the foam applicator is enough to coat an
entire 12” x 12” piece of glass. Be
conservative with the solution, as too much
can lead to difficulty in removing parts and
can even damage the glass. After your print
is complete and removed from the glass,
take a wet cloth and gently wipe down the
glass print surface. This will prep the bed for
the next print. You can print multiple times
with this method without re-applying the
solution.
Airwolf 3D assumes no liability for
misuse of Wolfbite.
Use Wolfbite NANO for PLA prints.
Other manuals for HDR
1
Table of contents
Other Airwolf 3D 3D Printer manuals