Aiwa NSX-D70 User manual

alu.la
CDStereoSystem
NSX-D70
ill DIGITAL AUDIO
OWNER'SRECORD
Recordthemodelnumberandserialnumberofyourset(foundat[he
rearofyourset)bdow Refertothemwhencontactingyor Nwadealer
ModelNo
SerialNO
Forassistanceand information
call toll free 1-800-BUY-AIWA
(United Statesand Puerto Rico) 8C+N F6-903-01
011125AKH-U-M

n
|i|Ji|OJ I| f;,| L|m[_]_|| N || |_PJ |i|'JrJlifJ kP_
ReadtheOperatingInstrudonscarefullyandcompletelybefore
operatingtheunit Besire to keeptheOperatinginstructions
forfutureieferenceAllwarningsandcau[ionsin [heOperating
instructionsandontheunt shouldbestrictlyfollowed=asweft
asthesafetysuggestionsbelow
Warning
TOpreventelectricshockol injury, thesesafetyinstructions
shouldbefollowedin the installaton, useandservcingthe
unit
Installation
Attachments- Donotuseattachmentsnotrecommendedby
theunitmanufacturerastheymayresultintheriskoffire,eectdc
shockor iniurytopersons
Water and Moisture Donotuseths unitnea water-tar
example,heala bathtub,washbowl,kitchensink, or laundry
tub,inawetbasement,ornearaswimmngpoe, andtile like
Heat - Oeoat usethis _nit nearsourcesoi beat,nc/uding
nestingvents,stoves,orotherapp ancesthatgenerateheatIt
alsoshouldnot beplacedin temperaturesassthan5"C(41F)
orgreaterthan35"C(95F)
Mountingsadace- Place_heunt onafiat,evensurface
Accessories-Donotplacethsunitonanunstabecart,stand,
tdpod,bracket,ortableTheunitmaytal, causingseriousnjury
to a child or anadult,andseriousdamageto theappliance
Use only with a cart, stand, tripod, bracket, or table
recommendedby themarefacurer,or soldwiththe unit Any
mountingof theapplianceshouldfellowthe manufacturer's
instructions, and should use a mounting accessory
recommendedbythemanufadume
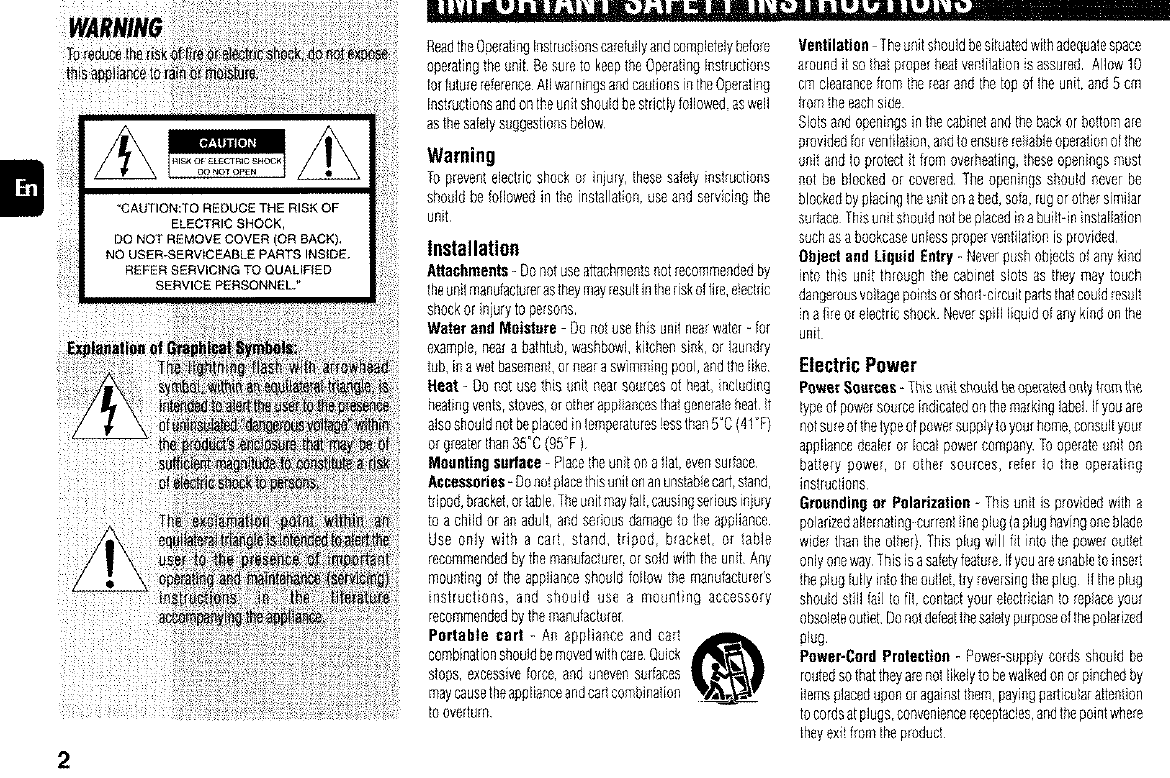
Portable cart - An appliance and cart
combinationshouidbemovedwithcamQuick
StOps,excessiveforce,andunevensurfaces
maycausetheapplianceandcartcombination
tooverturn
Ventilation Theunitsbouldbesgaatedwithadequatespace
aroundit sohat properheatvanlilatons assured Allow10
cmclearancefromtherearandlhe topoftheunit,and5cm
Itemtheeachside
SIoisandopeningsin thecabinetandthebackor bottomare
providedforventilagon,andtoensurere iableoperationolthe
unit andto protectit from overheating,theseopeningsmust
not beblockedor coveredThe openingsshou!dnever be
blockedbyplacingtheunitonabed,sofa,rugorothersimilar
surfacelhs unit sllouldnotbepiacedinabuilt-ininstallation
suchasabookcaseunlessproperventilationis provided
Object and Liquid Entry- Neverpushobiectsofanykind
into this unit through _hecabnet slots as they maytouch
dangerousvoltagepointsorshortcimuitpartsthatcoud result
n atireor electricshock Neverspill liquidof anykindonthe
unit
ElectricPower
Pa_e_:Saa_ces-This_it shouldbeopelate,donlyI_omg_o
typeOfpowersourceindicatedonthema_kinglabel ifyouare
notsureofthetypeofpowersupplytoyourhome,consultyour
appliancedealeror localpowercompanyTooperateunil on
battery power, or other sources, refer to the operating
instructions
Groundingor Polarization- Thisunit is providedwith a
poarizedaiternating-curren_ine plug(aplughavingoneblade
widel thantheethel} Thisplug will ft intothepowelouter
oniyoneway Thisisasafetyfeatureif youareunableto insert
theplugfully intotheoutlet,l_yreversingtheplug Iftheplug
shouldstill [a to ill, contactyour electrician_orapaceyour
obsoleteoatiet Donotdefeatthesafetypurposeofthepolarized
Plug
Power-Cord Prolection - Power-suppy cordsshould be
rootedsothattheyarenotlikelyto bewalkedonor pinchedby
itemsplaceduponor againstthem,payingparticularattention
tocordsatplugs,conveniencereceptac!es,andthepointwhere
theyexP.fromtheprodud

Overloading- DOnotoverloadwalloutletSrextensioncords,
integralconveniencereceptaclesasibiscanresJltin ariskof
fre or electricshock
OutdoorAntenna
Powerlines -Anoutsideantennasystemshouldnotbelocated
inthevicinityofoverheadpowerIglesorotherelectricght or
powerdmuts, or whereil can fall into suchpowerines or
circuits Wheninstallinganoutsideantennasystem,extreme
careshouldbetakento keepfromtouchingsuchpower[nes
orcircuitsascontactwi_hthemmightberata
OutdoorAntennaGrounding ifanoutsideantennaor cable
systemis connectedto theunit,besuretheantennaor cable
systems groundedso asto providesomeprotectionagainst
vogagesulgesandbuit-up staticchargesSection810ofthe
National Electr cal Code, ANS[/NFPANo 70, provides
informatonwith regardto propergroundingof themastand
supportingstructure,groundingofthelead-inwiretoanantenna
discharge unit, size ot groundingconductors, IDeationof
antenna-dischargeunit, connectionto groundingelectrodes,
andrequirereemsfor thegroundngelectrodeSeethefigure
_ NTENNA
LEADIN
-" WIRE
GROUNDCRAMP ANTENNA
DISCHARGE
UNIT
(NECSECTION
I I J;CI
Ep_GROUNDING CONDUCTORS
(NECSECTON
0 SERVCE 810-21
ELECTROD£SYSTEM GROUNDCLAMPS
(NECART250PARTN) NRCNADONALELECTRICALCODE
Lightning
Foraddedprolecgonforthis unit receiverduringa Iightngg
storm,orwhenitis leftunattendedandunusedforlongperode
oftime,unplugitfromthewal outletanddisconnect[heantenna
or cablesys[emThiswill preventdamagetotheunit due [u
lightningandpower nesurges
Maintenance
Cleaning- UnpugthisunitfromthewalloutletbeforecleaniP,g
Do notuse fiquid cleanersor aerosolcleanersUsea damp
ololhforcleaning
Damage RequiringService
Unplugthis unit fromthe wal ou!letand referservicingto
qualiliedservicepersonneunderthefo owingeonditona
Whenthepowercordorplug isdamaged
Ifliquidhasbeenspilled,orobjectshavefaen inlotheuni
- Iftheunit hasbeenexposedIo rainorwater
- Iftheunitdoesnotoperalenormallybyfollowinglheoperating
nstroctone Adjustonlythoseconlrolathatarecoveredby
theoberalinginstructionsas improperadjlstmentof other
controlsmayresulln damageandwil oftenrequireextensive
workbya qualifiedtechnicianto restoretheunit to normal
operaPon
Iftheunithasbeendroppedorthecabinethasbeendamaged
- Whenthe unit exhibitsa distinct changein performance-
ths indicatesaneedforservice
Donot attemptto servicethis unit yoursef as openingor
removingcoversmayexposeyoulo dangerousvoltageorother
hazardsReferall servcingtoqualifiedservicepersonnel
Replonenieet Pails - Whenreplacementpartsarerequired,
besuretheserviceteclmicianhas usedrepacementparts
specifiedbythemanufacturerorhavingthesamecharaciedslics
as theorigina part Unaulhodzedsubstitutionsmayresullin
fire,e ectdcshockorotherhazards
Solely Check- Uponthecompletonofanyserveeor repairs
toIbisunt, asktheservicetechnicianIoperformsafetycllecks
todeterminethat[heunit isn properoperatingcondt on
TABLEOFCONTENT5
IMPORTANTSAF_ INSTRUCTIONS ......... 2
PREPARATIONS.................................. 4
PARTSAND CONTROLS .............. ........... 5
ADJUSTMENTSBEFOREOPERATIONS........ 8
CO OPERATIONS ............................. 10
8ADI0 OPERATIONS........................... 12
TAPEOPERATIONS............................. 14
SOUNDADJUSTMENTS ........................ 17
TIMER OPERATIONS........................... 18
REFERENCE..................................... 20
System and accessories
CX-ND7OCOstereoeassetlereceiver
SX-ND70Frontspeakers
Remoteconlrol
FMantenna
AM antenna
3

PREPARATIONS
Connection
b_ AC_wercordtotheAC_weroutleta_ _o_
_onnectiorJsoremQde.
1Connect the front speakers.
Connectthedghl frontspeaker(marked"R"on therear
side) tothe SPEAKERSR terminalsand plaoeit on the
rgh sideoftheunit Connedtheleft(marked"L" onthe
rearside)to the SPEAKERSL terminalsand placeit on
theleft sideThespeakercordswith thewhitestlipes go
to _he0 _ermrials
2Connect the supplied antennas.
Strp off the nsuaton of theFM antennawith twisting
thecord
ConnecttheFMantennatotheEM75_ terminalwiihoui
the • mark and theAM antsn _ato '.heAM lOOP
ie_minas
AMantenna
3Connect the AC power cord to an AC outlet.
WhentheACpowercord is connectedreanACouterfor
thefirsttime, DEMOappearsonthedisplay
TcdeactivatetheDEMO,pressDEMO/ECO
•Donotshort-circuitthe@ and@ speakercord leads
• Do not leaveobeds generating magnetismor obeels
affectedby magnetismnearthespeakers
Remotecontrol
Detachthebatterycompartmentd atlhe leal ofthe remote
contlol and inselt two R6 (sze AA) batterieswi_hcorrect
Polarty
R6(AA)
• Repacethe batterieswith new oneswhenthe operationa
distancebetweenLheremolecontrolandmainunitbecomes
shorter
• Removethebatteriesif theunii is notgoingto beusedlot
anextendedperiodo[ time
• Theremolecontrolmaynotoperatef ii isusedunderintense
sun ght,elc, o if its Ine of sigd isobstructed
4

PARTS AND CONTROLS
Mainunit:rear _'yna°m_int-_rat-_ed-_e_o°_A_mp_ifie-_r
OAM LOOP, FM 75 _2terminals isabrend-newampli%rsys_emwhereclea_midtohigl_raoge
Pug nthesuppliedAM and EManiennashere frequencysound asweftasrichlow frequencysound,canbe
repeducedandlisfenerscanenjoytheclose-to-o%inalsound
] IE_ VIDEO/AUX jacks wgh lessdistorton ateitherhighor lowvolume levels
AccepBanalogsouedsignalsfromexlemalequipmeot "_ ...........................
--O Connectusingan optionalconnectngcablewith RCA
phoneplugs (red plug lo Rjack,white plug_oL iack)
Referalsototheoperatnginstruciionsofyourequipment
Toswitchluncgontoexternalinput,turntheDial%nelion
(see"ADJUSfMEN1SBEFOREOPERATIONS")to select
heVID£O/AUXtunc%n
--0
--G
TI,O;
TOchangethe displayednamelot this function, select
theVIDEO/AUXfunction, then Iold down ENTERand
pressPOWERontheunit Repea!lheprocedurelo seled
'RUX", "VIDEO" or 'TV"
O SPEAKERS_ terminals
Coneectthespeakercordofthesupped frontspeakers
here
O AC power cord

Mainunit:front
O--
m
0
0
0 o
0
o
0
0
0Dial Function
Selectsa function(TAPE,TUNER,VIDEO/AUXor CD)
DECK 1/2
SelectsDECK1or2 inTapefunction
BAND
Selectsa bandin T_nerfunction
0POWER _STANDBY/ON
Switchestheungonandoff(standby)
DEMO/ECO
Whentheunit is turnedoff:switchesDEMOonandoff
Whenlheunitisturnedon:enlersECOordimmersetting
mode
TIMER
Enterstimersettingmode
0
SYNC DUB
Startsdubbingawholetape
•REC/REC MUTE
Stadsrecording
II PAUSE/SET
CDandTape:pausesplayback
Radio:storesthereceivedstationto preset
•STOP/CLEAR
CDandTape:stopsplayback
Radio:clearsastation!)reset
I_ PLAY/PRESET
CDandTape:startsplayback
Radio:tunesintoapresetstation
<I<I/t<I_DOWN, IH_/IHHUP TUNING
CD: skips to a previous or a succeedingtrack when
pressed,searchesatrackin fastforwardor fastreverse
playbackwhenhed down
Tape:lastforwardsor rewindsthetape.
Radio:manuallytunesdown or upwithn theband
MULTI JOG
CD:skipstoapreviousora succeedngtrack
Radio:selectsapresd number
GrapHcEqualizer:se]edsaequafizationcurveoradiusts
[helevel
ClockandTmer: setsthetime
ECOandDimmer:selectsthemode
MODE
EntersthesettingmodeofGraphicEqualizerorSpectrum
analyzerdisplay
SOUND
SeledsaI_quencyrangeofG_phicEquafizertoadjust
theleve]
ENTER
Determinesthemodeandthetime (ECO,dimmel,clock
andtimer)
O DISC DIRECT PLAY 1-3
SelectsaCDtray
DISC CHANGE
Rota_estheCDtlays
'LCD OPEN/CLOSE
Opensor closestbe disc eombar[rnent
0 VOLUME
Adiuststhevolume
0 PHONES jack
Pig in herean optional headphonessetwith a mini
stereoplug (035 ram) Speakeroutputis canceled
6

Remotecontrol
0
0
0
m
0
0
0
Buttonswiththesameorsimilarnameswiththemaiaunit
hesicaflyhavethesamefuediaa.
O POWER
GEO
EnlersGraphicEqualizersettngmode
SOUND
ENTER
E) 0-9, +10
COselectsaCOtrackofthespecifiednumber
Radio:tunesintothestationwiththespecgedpreset
number
0
Theaurrtheredbuttoestakeonthesefunctionswhenpressed
togetherwithSHIFThelddown:
PROGRAM
EstersprogrammedCDplaybackmode
RANDOM/REPEAT
Enters_andomol tepeeCDplaybackmode
TUNER MODE
Switchesbetweenstereoar monauralFMreception
DISPLAY
SelectsaSpect_unqanalyzerdisplay
TIMER
SLEEP
Entersssap-timersettngmode.
CLOCK
Entersclockad}ustmentmode
CD EDIT/CHECK
Displaystheremainingprayoacktimeofa CDwhen
presseddudngplayback
EntersAIEditRecordingorProgrammedEditRecording
modewhenpresseddodngstop
CD DIRECT
SeleclaCDtraywiththenumberedbutton(1-3)
SHIFT
Haiddownwhenpressinganumberedbuttontochange
its functiontothatprintedabovethenumbec
e.g.)
'PressSHIFT+SLEEPontheremotecontroi"indicates
"HolddownSHIFTandpress'6' (SLEEP)",so that you
canuse'SleeptimePiundion
0 REC MODE
Staffsrecordingwith OREC/RECMUTE
QREC/REC MUTE
Startsrecordingwith RECMODE
PRESET (J_., V)
Pedo_msthesamelunctass asMULTIJOGonlhe unit
VOLUME (-t'-, --)
DECK 1/2
BAND
IISET
Thefunctionis thesameas_hatot _ ontheunil
_I1_1/1<1<, I_/1_1
IICLEAR
FUNCTION
Swdpheshe active f oction amoog TAPE,TUNER,
VIDEO/AUXpod CD
7

ADJUSTMENTS BEFORE OPERATIONS
MODE ....... ,_ j_-,_.................... _
D,o,F°oo,,on--
POWER_STA N D BY/O N = :: ..... _ _' J
DEMO/ECO -- _
-- MULTI JOG f"-_
-- VOLUME POWER
DISPLAY_ JLa
CLOCK_ _
-ENTER I
-- ,,i_l. I_11_ SHIFT -[,__
- ENTER
-VOLUME
• IISET
Power
Turningtheuniton
PressPOWER_STANDI3Y/ON(POWERon theremote
control)
Turning the unit off
PressPOWER(_STANDBY/ONagan
Theunitgoesintostandby
Volume
Turn VOLUME (Press VOLUME +, -- on the remote
control).
Adjst fromO(minimum)to 40a_,dMAX(maximum)
Tip:
Veume evelsettingis retaineddring poweroffsta_dby I
theunit is turnedoffwith the volumeset1o27 or more,it is
automaticallyturneddownto26thenexttimethe[Jntisturned
o[i
DialFunction
T_rn_e Dial FLJnCtiSlle selectaIeostier!(TAPE,TUNER,
VIOEO/AUXor CO)
Theredlightbesideiheselecledfuncionturns en
DEMO
the_h_ not beenset,oDEMOappeorson_e disptoy
TodeactivateandactivatetheDEMO
PressDEMO/ECOwhgnthe!!nilistum_g_!!
Spectrumanalyzerdisplay
You_n change_e _ectrum _atyzer _/a_
Press MODE twice and then within 4 seconds turn
MULTI JOG to select one of the three spectrum
analyzer dispIays.
Onthe remoteconiroi pressSHIFt+DISPLAYrepeatedly
- NORMAL:Dspays thefluctuationfrom ewfrequenciesto
high ones
BASS:Displaysthefluct atiooof lowfrequenciesonly
LEVEL:Displaysthe ilucluaPonofthe averageof a the
frequencies
8

ECOmode
Reducespower_nsumpfionw# theb_wingoperations,etc. Dimmer Settingtheclock
Adjuststhebrightnessofthedispla_ 1 PressSHIFT+CLOCKonthe remotecontrol.
ECOON mode
Theunt blacksoutwhenR'eunit isturboedoff Onlythered
indicatorIghts up (Onlywhentheclockisset)
if dimmermodeissettoon, theunit ifluminationbrightens
(for 10seconds)onlywhenyouoperatetbeuni
1PressDEMO/ECOonce whenthe unit is turned
on, andthen within4 secondspressENTER
2TurnMULTIJOGto select"EEO ON"and then
pressENTER.
gthereis noMULTIJOGo_butel operatonwithin4
seconds,thesettingiscanceled
TocanceltheECOmade
Repeattheaboveandstied"ECOOFF"
1PressDEMO/ECOtwice when the unit is turned 2
on,and thenwithin4secondspressENTER.
2 TurnMULTIJOGtoselectoneofthethreedimmer
modesor 'DiM-OFF', andthenpressENTER.
"DIM-OFF'islhebrgMestand"DIMMER 3" isthe
dimmest
IfthereisnoMULTi,JOGor buttonoperationwithin4 3
seconds,thesettingiscancded
Tocancelthedimmer
Repeattheaboveandseled"DIM-OFF'
Press_1_1or I_ to setthetime.
Eachpresschangesthetimein1-minutesteps.Holding
itdownchangesthetimeinlO-rninutesteps
if _ or Ib-I_ s nd pressedwithin4 seconds,the
settngiscanceled
• MULTiJOGisalsoavailableinplaceof_ orI_
PressENTERor IISET.
Thetimedisplaystopsflashingandthedockstartsfrom
OOseconds
Todisplay thelime
PressSHIFT+CLOCKontheremoteconlroi
Thetimewill bedisplayedfor4 seconds,butit cannotbe
displayeddudngrecording
Toswitchtothe24-hourstandard
Displaytbetimeandpress• within4seconds
Witheachpress,thedockalternatesbetweenthe12-hour
slandardand_he24-hourstandard
in the12Liedstandard,"RM 12:00" indicatesmidnight
aed"PM 12:00"noon
Iftheclockdisplayflasheswhenthe unitis tnrned
off
Therel_asbeeeapowernterruptionRe-sdtbedock
9

CD OPERATIONS
MULTi dOG
Dial Function
II
II
.__/ ...................
ThisunitplaysbackfinalizedCD-R/RWdiscsaswellasaudio
@s
Playback
I Turn the DiaI Function to select the CD function
andloaddisc(s).
Press_ CDOPEN/CLOSEtoopenthedisccompadmen!
and placeoneor wa disc(s)with thelabelledsideup
TOplacethreediscs,pressDISCCHANGEsothatthetrays
rotate, then place ihe third one Lastly. close the
compadmentwith _CD OPEN/CLOSE.
','Whenloadng an 8cm (3 inch) disc. pace it on tie
innercirce ofthetray
T_, pressIP-.
T_sired disc, press DISC DIRECT
PLAY1-3.
T'aynumberbeingpayedbackflashes
PROGRAM -
_0-9,+10
_1"_ CD EDIT/
_--_ _1 I CHECK
Toskipto thebeginningof the current/preceding/
succeedingtrack
Press_1_1orI_D,-repeatedlyorturnMULTiJOG
Tosearch(playbackinlastforwardorfastreverse)
Holddown4141or_ Releaseat!hedesRedpont
To selecta disc and a track with the remote control
1 PressCDDIRECfl aDd_henPressthenumberedbutton(t-
3)within3 secondsto selectadisc
2 Pressthenumberedbuttonstoselectalrack
Toseed track25. press-1O,4-10and5
- TOse!ecttrack10.press+10and0
To displaythe remaining playback lime of the CO
PressSHIFT+CDEDIT/CHECKontheremotecontrol Press
againto leturn to _heelapsedtime disp ay
",'Remainingplaybacktime cannot be displayed during
randomp aybackor programmedplayback
To replace disc(s) during playback without
interruption
Whie onedisc isbeingplayedback,pressDISCCHANGEso
hat thecompartmentopens,replacedsc(s)withotherone(s).
andpressDISCCHANGEto closethecompadmenl
Random/Repeatplayback
Randomplaybackplaysallthetracksononedesired_ orall
_a discsmrandomorder.Repeatplaybackplaysallthetracks
repeatedlyanonedesireddiscor all thediscs•
1Press SHIFT+RANDOM/REPEAT repeatedly on
the remote control to select one of the following
modes:
Randomplayback:"RANDOM" lights up
Repeatplayback:'c_,.' lightsup
- Randomand_epeatplayback:"RANDOM" and"_-"
lightsup
2Tog!ay one desired drsc, press DISC DIRECT
PLAY1-3.
T_, pressIb-
To cancel random/repeat playback
PressSHIFT RANDOM/REPEATrepeatedy on the iemote
controlso that both "RANDOM' and "_,_' disappearon
thedisplay
To repeat aselected set of tracks
Selectthe lracks with programmed payback,then press
SHiEI+RANDOM/REPEATon lhe lemotecontrol to sebct
repeatpayback
"-qtis impossibleto playase]ededset oftracksin random
order
To stop playback
Press•
To paase playback
PressII Pressagainto[esme p!ayback
10

Programmedplayback
Playsbackupto 30selected_s _ programm_ order.
1PressSHIFT+PROGRAMonthe remotecontrd
during stop.
"PRGM'flashesonthedisplay
2PressCDDIRECTontheremotecontrd andthen
press the numbered button (1-3) within 3
secondsto selecta disc.
Gotothenextstepwhenthetraystopsrotating
3Press the numbered buttons on the remote
control to program a track.
Theselectedtlacknumberlights uponthedisplay
- Toselectthe25thtrack,press10. _10and5
-in selectthelOthtrack,press_I0 and0
4Repeatstep2and3to programothertracks.
5PressI_.
• Duringprogrammedplayback,youcanrlotselectadsc ora
t_ackwiththe numbered buttons "ERN'T USE' s
displayedwhenyoutry toselecta track.
• if the total playbacktime of theprogram exceeds99:59
rnirutes.or if atrackwith atrackrumberexceeding30is
programmed,theplayingtime is displayedas"- -:- -"
,,You caeeot program more than 30 tracks "FULL" is
dispayed
To checkthe program
Press_ or I_ repealedlyduringstop thetracknumber
and programnumberaredisplayedin succession
Tocleartheprogram
Press• dudngstop"PRGM"disappearsonthedisplay
Toaddtrackstotheprogram
Repeatstep2and3beforestartingplaybackThetracksare
addedtotheendoftheprogram
Tochangetheprogrammedtracks
Cleartheprogramandreseledthetracksinyourdesiredorder
• Donotplacemore[nanonedisc ononetray
• Donottilt the unit with discsloaded
• TileunilmaynotplayaCD R/RWdisc recordedon personal
computersor certainkindsof CD-R/RWrecorders
• Donotattachadhesivelabel,etc to eithersde ofaCD R/
RWdisc. asdoingso maycausemagunctioe
• DenotloadanunrecordedCD-R/RWdisc Thediscmaybe
damaged
• Donotuseirregular-shapedCDs
11

RADIO OPERATIONS
BAND
POWER
Dial Function --
I|SET
mCLEAR
-- MULTI JOG
MODE
•BAND
- Ilm,_,
•IISET
- FUNCTION
mCLEAR
Manualtuning
1Turn the Dial Function to select the TUNER
function.
2PressBANDto selectaband(FMor AM).
3Press_1 or _ totune in to a station.
"TUNE"isdispayedwbenastationistunedin
"11_¢)_1)'gh!s upforFMstereoecepton
To search for a stationautomatically (Auto Search)
Hold down_ or
Theunit seachesforastationupor downthebandandstops
atreception
Tostopthesearchmanuafly,press_1,_1or I_
• AUlOSearchmaynotstopatslatonewghweaksignals
Preset tuning
Presetyourfavoritestationsandtunethemin direcHybyusing
presetnumbers.
Presetting stations
1Turn the Dial Function to select the TUNER
function and press BAND to select a band.
2Press _141 or _ to tune in to the desired
station.
3Press IISETtostorethestation.
ThepresetnumberbeginningIrom "1",appearson the
display
4Repeat step 1 to 3 to preset other stations.
"You cannotsto_emorethana total of 32 presetstations
"FULL" s displayed
Tunin#in topreset stations
On the unit
1Turn the Dial Function to select the TUNER
function and press BAND to select a band.
2Press IP- repeatedly or turn MULTI JOG.
With eachpress the stationwth thesucceedingpreset
numberis tunedin
Onthe remoteQgetroj
1PressFUNCTIONrepeatedlyto selecttheTUNER
functionandpressBANDto selecta band.
2Press the numbered buttons for the preset
number of your desired station.
-Toselectpresetnumber20,press+10,10 and0
Toselectpresetnueqber15,press+10arid5
• PressingPRESET/_. , V or _ repeatedlycan
aBo selectthepreset number
To clear a preset station
1Tunein tothestaten by presettoing
2Press==CLEAR,thenpress| |SET wthin 4 seconds
Presetnumbersof presetstationsn the bandwith higber
numbersdecreaseby one
12

Adjustments
Antennas
Keepaniennasawayfrom,netal[icebpde, dectricalequipment
andcords
F_: Extendfuly andpustiun for thebestreception
[fiecdvingconditionisPoor,connectoptionaloutdoorantenna
to FM75_ terminal Besureto corned theshieldbraid oi
theantennatone _ terminal
A_nlenna: Rda}etofind bestreception
Toswitchto monaural FM reception
PressSHIFT+TUNERMODEontheremotecontro Witheach
press 'MONO' and"STEREO" aredisplayedalternatey
onthedspay
Tip:
WhenFM stereoreceptionis poor,swi cPing to monaural
reducesnoise
To switchthe AM tuning interval
HoiddownBANDandpressPOWERontheunt Witb each
p_ess,theAM tunng in e_vaialternatesbetween9 kHz/step
and10kHz/step
Tip:
Thedefault s 10kHz/step Changeit only whenusingthe
unit n a9kHz/steparea SwitchingAM tunng intervaldears
all '.hep_esetstations
13

TAPE OPERATIONS
DECK 1/2
Dial Function
SYNC DUB --
DECK 1--
• REC/--
REC MUTE
I!
To reset the tape counter
Press• inslop mode,andthetapec(nmleronthedisplayis
- resetin '0000 Openinganddosing thecassetteholder
will a'soresetthetapecounter
REC ------'%
-MULT JOGMODEA-
--O,SCD REOT
PLAY 1-3 • REC/
RED "F
0-9,+10 _=
--DECK2
I_ SHIFT ----'_
CD EDIT/
C.ECK
Playback
Useonlytype, (normal)tapes.
1TurntheDia!FunctiontoselecttheTAPEfunction.
2Press A PUSH EJECT/CLOSEon either side
(DECKI and DECK2) to openthe outercassette
holder andinsert the tapein the deck.
Insertwiththeexposedsdedownandplaybacksidefacing
putfromtheunitToclose,pushA PUSHEJECT/ClOSE
onthesidewherethetanes nse[ed
t
_PUSH EJECT/CLOSE
APUSH EJECT
inner cassette holder
_)
Outer cassette holder
3PressD,,-.
Toopentheinnercassetteholder
Theinnercassetteholderopensordosesautomalicallywhen
openingor closingtheou!ercasse!teholder¸g _heouter
cassettehoderisalreadyopen,p_essA PUSHEJECTofthe
innercassetteholdertoopenit
To open or close beth decks (DECK 1and DECK2)
simultaneously
Pressor push APUSH EJECT/ClOSEonbothsidesofthe
outercassetteholdersimutareousl_
Tostopplayback
Press•
Topauseplayback(DECK2 only)
PressI| Pressagaintoresume
Tofastforwardorrewind
Press_ orI_
Toselect a deck(DECK1or DECK2)
PressDECK1/2 instop modewhentapesareloadedn both
decks Thedecknumbe_("TI" or "T2") isdisplayed
To play continuously(DECK 1to DECK2 )
Loadtapesin bothdecksandslartplaybackonDECK1 Then,
assoonasplaybackoil DECK1finishes,playbackoil DECK
2will startwithout interruption.
•Thebothdeckspay onesideofthetapes
TOplay basktype II (High position) tapes
TurnMULTIJOGuntil "SOFT" is displayedwhile playnga
typegtape
Theunitautomaticaly setsthegraphicequalizertoappropriate
levelstoprovidetheoptimumpaybacksoundfor typeIItape
The'SOFT"functonworksevenaftertheunit isturnedoffor
thefunctionis chanaedunlesst iscanceled
To cancel it cancel the orao!ic eeualizer /see "SOUND
• Use of 120-minuteor Ionge_tapesis net recommended
since they are extremely tlin and easily deformed of
damaged
,,Takeup anyslack in the tapewith a pencilor similar tool
beforeuse Slackape mayiam in themechanism
Basicrecording
UserallytypeI (normal)tapes.DECK2 istherecordingdeck.
Onlyonesideof the tapecanberecordedat atime.
IInsert the recording tape in DECK 2.
Press_ PUSHEJECf/CLOSEto opentheoutercassette
holder,and insertwith theexposedside downandthe
sideto berecordedonfacng out fromfheunit
Wind upthetapetothedesiredpointif needed
14

2 Prepare the source.
T_, selectfheCDfunctionand loaddisc(s)
TOrecordaradiobroadcasttunein tothe desiredstation
Torecorda togA,nsert the sourceIape d!DECK1and
selectthe1APEfundion (DECKt)
T_zecordf_omconnectedexternaleOUiDmentselectthe
ViDEO/AUXfunctionandpreparetheequipment
3PressOREC/RECMUTEto start recording,
Whenrecordinga CD or tape, playbackstarts
autemaPcafly
Whenrecordinginputfrom connectedequipment,
maouaflystartplaybackofthesource
Ontheremotecontrol,pressRECMODEandthenpress
OREC/RECMUTEwthio3seconds
• YoucanalsochangethesourcebypressingREDMODE
repeatedlybeforeplessingQREC/RECMUTE
• Volumeoftoneadjustmentdoesnotaffectrecording
• "ERN'T REE"s displayedifyouattempttorecordatape
wghthetabbrokenoff
To stop recording
Press•
Topauserecording(onlyfor TUNERorVIDEO/AUX
source)
PressII Pressagainteresume
Torecordaselectedsetoftracksfrom aCD
Programthedesiredtraeks(see"Programmedplayback')and
tdenpressOREC/RECMUTE
To record a 4-second blank space (only for TUNER
or VIDEO/AUXsource)
1 PressQREC/RECMUTEdudogrece_dingor n recording
pausemode
"REE" flasheson_hedisplayfor 4seconds(ablankspace
ismadeinthemeantime)andthentheuniteole_srecordng
pausemode
T_gL!_-_, pressQREC/
RECMUTEagainwhile"REC' flashes
To.recordmerethana4-secondblanksoacepress•REC/
RECMUTEagainaftertheungentersrecordingpausemode
Eachtimethe buttonispressed,a4-secnndblafkspaceis
added
2 PressII to resumerecording
TOeraseatape
I insertd'etapeinDECK2 Setthetapetothedesredpoiotif
needed
2PlessDECK1/2toselect"T2"
3PressOREC/RECMUTE
Wholetapedubbing
1TurntheDialFunctiontoselecttheTAPEfunction.
2Insert the original tape in DECK t and the
recordingtape in DECK2.
3PressSYNCDUB.
thetapesarerewoundtothebeginningnftheImntside
andrecordingstarts
• DubbingcannotstartJromapointhagwayinthetape
• Onlyonesdeofthetapecanberecordedatatime
Tostopdubbing
Press•
EditedCDrecording
AI Edit Recordinl7
WhenrecordingawholeCD,AIEditRecordingtakesthelength
ofyourtapeintoaccountandrearrangestherecordingorderof
thetracksifnecessary,sothatnotrackiscutshortattheend
oftheside.Prepareo tapetongenoughtorecordtheCD.
1Insertthe recordingtape in DECK2,
2Turnthe DialFunctionto selectthe CDfunction
andloaddisc(s).
3PressSHIFT+CDEDIT/CHECKonceonthe remote
control
'EDIT" is dsplayedand'AI c-g0" appearsonthe
dsplay
4PressDISCDIRECTPLAY1-3to selectadisc.
Press the numbered buttons on the remote
control toenterthe lengthofthe recordingtape,
10to99minntescanbespecfied
Fora60-minutetapepress6and0
in a fewseconds,theunitddermnesthetraekstobe
recordedforeachsde
ThemcoldingtimeleftlotsideAappearsonthedisplay
• _1_1,I_ o_MULTIJOGcanalsnbeusedtospecify
tapeength
Press OREC/REC MUTE to start recording on
side A.
Onthe remotecontrol pressRECMODEandthenpress
OREC/RECMUTEwghin3 seconds
Thetape s rewoundto the beginning of side A and
recordingstarts
Go_othenextstepwhenrecordhlgonsideAf nishes
7PressSHIFT+CDEDIT/CHECKonceontheremote
control.
TherecordingimeleI:fatsideBappearsonIhedisplay
Turnoverthe tapeand pressQREC/RECMUTE
to start recordingon sideB.
Ontheremotecontro,pressRECMODEandthenpress
OREC/RECMUlEwithin3seconds
• AIEditRecodingcannotbeusedwghdiscswithmorethan
30Lracks"TR OVER" is displayed
• Recordingcannotstartfromapoint halfwayin thetape
15

Pro#rammed Edit Recording
Asyou programthe CDtracksto record,ProgrammedEdlt
Recordingdisplaystileremainingrecordinglimefor eachside
of thetape, so you caneasilyselecta set of desiredtracks
withinthelengthof yourtape.
1Insertthe recordingtapsin DECK2.
2Turnthe DialFunctionto selectthe CDfunction
andloaddisc(s).
3Press SHIFT+CDEDIT/CHECKtwice on the
remotecontroL
'PRGM"and"EDIT"aredisplayedand'P C-O0'
appealsonthedisplay
4Press the numbered buttons on the remote
control to enter the length of the recording tape.
10to 99minuiescanbespecified
• _, _ or MULTIJOGcanalsobeusedto specify
tapeleng!h
5PressDiSCDIRECTPLAY1-3 to selecta disc.
Then,pressthe numberedbuttonsontheremote
control to seIectthefirst trackto berecordedon
sideA.
Toselectthe25thtrack,press÷10,_10and5
-ToselectthelOthrack,p_essHOandO
8Repeatstep5 to selectthe rest of thetracksfor
sideA.
1tiereroaggngrecarding[meofsideAisdisp!ayedYou
cannotselectatrackwithalongerplayinggme
7Press SHIFT+CDEDIT/CHECKon the remote
control to switch to sideBand selectthetracks
fortheside.
8Press SHIFT+CDEDIT/CHECKon the remote
control to switch backto sideA.
9Press OREC/REC MUTE to start recording on
side A.
Ontheremotecontrol,pressRECMODEandthen press
• REC/RECMUlE within 3seconds
Tbetape is rewoundto the beginningof side A and
recordingslarts
Go_othenextstepwhenlecordingonsideAfinishes
19Press SHIFT+CDEDIT/CHECKon the remote
controlto switchto sideB.
11 Turn over the tape and press OREC/REC MUTE
to start recording on side B.
Onthe remotecontrol,pressRECMODEand thenpress
OREC/RECMUTEwithin 3seconds
• You cannot program more than 30 tracks "FULL' is
displayed
• Youcannotprogramatlackwith atracknumberlargerthan
30
• Recordingcannotstafffroma pointha fwayin thetape
To stop recording
Press• Recordngand CDplaybackstopsimulaneous}y
To checkthe program
1Beforerecording press SHIE_CD EDll/CHECKon the
remoteconbol toseed sideA or B
2Press _ m I_1_ repeafedlyThetrack nnmberand
programnumberaredispayedin s cresson
Tochangetheprogramofeachside
PressSHIFI+CDEDIT/CHECKontheremotecontroltoselect
sideAorB,andpress• tocleartheprogramfortheselected
sideThen,selecttracksagain
Tocleartheeditprogram
Press• twicesothat'EDIT"disappearsfromthedisplay
Breakofflhep astirtabofthecassettetapewithascrewdriver
or otherpointedtoo Torecordonthetapeagain,coverthe
detectionslotwith adhesivetape
SideA _e A
16

SOUND ADJUSTMENTS
MODE
Graphicequalizer
Seledsosoundequotizoiioncurvetomatchfilemusic_,pe.
PressMODEonceandthenturn MULTiJOGwithin
4 seconds to select one of the four equalization
curves,
Ontheremoteconhol,pressGEQandthenpressPRESET
/% or V _epeatedlywithin4 seconds
ROCK:Powedldsoundemphasizglglrebleandbass
- POP:Morepresenceinthevocalsandmidrange
-JAZZ:Accentedlowerfrequenciesforiazz-typemusic
USER:Acustomizedcurve(see"Settingacurvemanually")
-- MULTI JOG
-- :._OUND
-ENTER
!NTER
To display the current GEQ mode
PressMODE/GEQonthe remotecontrol) once
ThemodewiPbedisplayedfor4 seconds
Tocancelequalization
PressMODEonceandthenturnMULTiJOGwithin4seconds
toselect"GEQOFF"
Ontheremotecontrol,pressGEQandthenwithin4seconds
pressPRESE]/_.or V repeatedlyuntil'GEQQFF"is
dsplayed
Theequalizationcurvecanbecustomizedto suityour
preference.
IPressSOUNDrepeatedtytoselectoneofthethree
frequencyrangesto adjust.
BASS:Lowrangeflequencies
- MiD:Mddlerangef_esuencies
- TRE:Highrangefrequencies
2TurnMULTiJOG(pressPRESET/%. or V on
the remotecontrol) to adjust the levelwithin 4
seconds.
3
4
Repeat Step 1 and 2to adjust all thethree ranges
if necessary.
_g_our customizedcurve,orocegdto
thenext:_f,g.
HoIddown MODE(GEQon the remotecontrol)
until "PRESET"flashesin the displayandthen
pressENTERwithin4 seconds.
Thecustomizedcurveisstoredin"USER"
• ifyouse]ectoneotthepresetcurvessuchasROCKbefore
performingSTEPE youcancustomizeacurveonit
• Onceoneofthefrequencyrangesis adjusted,theGEQ
ndJcatorremainsdisplayedurdi["GEQOFF"isselected
17

B
TIMER OPERATIONS
POWER
STANDBY/ON
TIMER
IIBET
Sleeptimer
Turnsoff theunit nutomat_atlyafteraspecifiedtime.
1PressSHIFT+SLEEPon theremotecontroL
"SLP"appearsonthedisplay
2Press _ or I_-t,,- repeatedIy to set the sleep
timer duration.
Witheachpress,thetimerdurabenchangesin5-minute
stepsbetween5 to240minutes It thereisno buttoninput
for4seconds,thecurrentsetgngisenteredautomabcally
Theunit turnsoffafterthese]eetedtime
,,MULTiJOGisalsoavailabien placeof _ or
Tip:
Te oisplayisdimmedwhilethesleeptimer isactive
Tochecktheremainingtime untilthe anitturnsoff
PressSHIFT+SLEEPontileremotecontrolTheremaining
times displayedfor4seconds
Tocancelthesleeptimer
P_essSHIFT_SLEEPtwceontheremotecontretsothat%LP
OFF" isdisplayed
--ENTER
- TIMER
• SLEEP
• IISET
- II_lb
Timerplayback
Turnsontheunit ataspecifiedtimeforthespecifiedduration.
Makesumthe dock_setcorrecH_
Press TIMER (SHIFT+TIMER on the remote
control).
_5" indicatorlights upand _(_ PLRY" appearsonthe
display Then,the timer-ontime andthesource name
appea_alternatelyonthedisplay
Press <_1 or i,,i,,- to set the timer-on time, then
press ENTERor ||SET.
if _ or I_i,,- is not pressedwithin 6 seconds,you
wifl exil thetmer settingmodeendthe preyoussetting,
howeve_s entered
3Press_1<1or i-i,- to selectthe source,then
pressENTERor IISET.
Press<< or _ to set the timer-activated
duration,thenpressENTERor IISET.
Witheachpress,thegmeractivatedduretoochangesin
5 minulestepsbetween5to240minutes
5Press_ or _ to adjust the volume level,
thenpressENTERor IISET.
Adjustfrom0to26
6Preparethe source.
T_I loaddisc(s)
T_, selectthebandandtuneintothedesired
station.
T_, insertthetapeandselectthedeck
Top]_yexiernalenuiomentconnectedtotheV]DEO/AUX
jTLO_,setanexternaltimerfortheequipmentsothatits
playbackbeginsetthesametime
7Press POWER _STANDBY/ON to turn the unit
off,
Atbmer-ontime,theunt turnsonandplaystheseeeted
source Afterthespecifiedtimer-activatedduretion,the
unit turnsoffagain
Tip:
Thedisplayis dimmedwhiletbetimerplaybackisactive
• Tostoptmer settingin steps2 to5,press•
Timerstandbymedeis alsocanoeed
",,Timerplaybackwill notbeginunlesstheunit is turnedoff
first
• Connectedequipmentcannotbeturnedonor offbythebuilt-
in timer(If !his ung Useanexternaltimer
• MULTIJOGis alsoavailablein placeof<< or i,,,!,,-
• In step3, FUNCIIONel DialFunctionis alsoavailableto
selectthesource
Instep5,VOLUME'-I-,-- or VOLUMEis alsoavailableto
selectthesource
18

Todisplay the timer setting
PressTIMER
Thetimer-ontime,thesourceandthetimer-activatedduration
aredsplayedfor 6seconds
Tip:
Timersettingcanbedislgayedevenwhiletheung is turned
off,andatthattimeif youpressENTERol II| within6seconds
afterTIMERispressedryou canenterthetimersettingmode
andchangethesetting
Tochangethetimersetting
Resetthetimeragain
To cancel the timer
PressTIMERrepeatedlyuntd"(_ OFF" is displayed "_)"
disappearsfromthedisp!ay
Tip:
Yor timersettingis retanedevenif thetimeris canceled
Nexttimethetimerisactivated,you(;anchangeyourprevious
setting,orsimply usethesamesettingagain
Timer recording
TimerrecordingisavailableonlyforTUNERandVIDEO/AUX
(withanexternaltimer)sources.
1Press TIMER (SHIFT+TIMER on the remote
control)repeatedlyuntil "_)REC"appearsonthe
display.
2Carryout step 2 to step 5 describedin "Timer
playback".
Prepare the source.
To recordthe radio selecttheband and tunein to the
desiredstation
To recordexternaleouirJmentconnectedto theVIDEO/
_, setanexternalHmerfortheequipmentsothat
itsplaybackbeginsatthesametime
4Inserttherecordingtapein DECK2andthenturn
the unit off.
TIp_
Thedsplay isdimmedwhilethelimef recordingisactive
19

REFERENCE
Careandmaintenance
Oneusiun_coreandm_teo_ce oftheunitandtheso_ure
oreneededto_fimize theperformanceof yourunit.
To clean the cabinet
Use asoft and dryoath if theuflg Suflacesaraextremey
oirty, useasoft clotb tightly moistenedwilh mid detergent
solution Donotusestrongsolventssuchasalcohol,benzine
or thinner
To clean the tape heads
Dirtytape headscausesounddeterioration Afterevery10
hours of use dean the tape l_eadswith a head cleaning
cassetteRefertofheinstructionsofthecleaningcassette
To demagnetize the tape heads
Useademagnetizingcassetteafterevery20 to 30 hoursOl
use Referto theinstructcos atthe demagnetizingcassette
CareofCDs
WhenaCDbecomesdirty,wipeitfom thecentreoutwitha
cleaningclothAfterplayingaCD,storeit initscaseDonot
keepitinhotorhumidplaces
Care of tapes
Storetapesin their casesafteruse DOnotleavetapesnear
magnets,motors,televisionsets,or anysourceofmagneism
DOoutexposetapestodirectsunlight=or leavethemin acar
parkedn dirad sunigbt
Troubleshooting
tf yourunit failstoperformproperty,checkthefollowingguide
andtherelevantsectionsof theOperatingIostraetlons.
There is no sorted,
•AretbespeakersandACpowercordconnededproperly?
The unit shotoff suddenly.
• Possiblyashortcircuit inthespeake[termieaisDisconnect
theACpowercordfromtheACpowerotlet andre-connect
*.hespeakercordscorrectly
The unit blacks outwhen the unit is turned off.
•is ECOmodesettoon?
Erroneousdisplay.
•Resettheunit
Poor radio reception.
• Checkantennaconnection Adiust Pieantennato fed the
bestreception
• Moveunit andanteonaawayfromotherelectricappiances
andcolds
Thetapedoesnotran,
• isthedeckin pause?
Poortapesound,
• CheckfordirtyPleadsCleanthemifneeded
• UsetypeI(norma)tapes
Condensation
Moisturemayform ontheCDpickuplenswhen:
•Theunit is movedlrom acoldspottoa warmspot
• Thehealingsystemhasjustbeenturnedon
• Theunit is usedin averyhumidroom
,,Theunit is cooledby anairconditioner
Whenthisunit has condensationinside=it maynot funcgon
normally Shouldthis occur leavetheunit for a fewhours,
thentry tooperateagan
Cannot record.
• is theerasurepreventiontabof thetapebrokenoff? gso,
cove_the detectionaid wth adflesivetape
The CD player works poorly.
• Is thedisc cormcllyloaded?
• is thedisc dirty?
',,is the lens affected by condensation? if so, wait
appraximatdyonehourandfly again
Resetting the unit
if anunusualcoedgionoccursin thedisplay windowor the
cassettedeck,resetthe ungas follows:
1 PressPOWERtoturnoffthepower
if thepowercannotbeturnedoff,disconnecttheACpower
cord,thenphJgit in again
2 Holddown • andpressPOWER
Everythingstoredn memoryafterpurchaseiscleared
20
Other manuals for NSX-D70
3
Table of contents
Other Aiwa Stereo System manuals