manuals.online logo
Brands
  1. Home
  2. •
  3. Brands
  4. •
  5. AJAX
  6. •
  7. Security Sensor
  8. •
  9. AJAX LeaksProtect User manual

AJAX LeaksProtect User manual

1. FEATURES
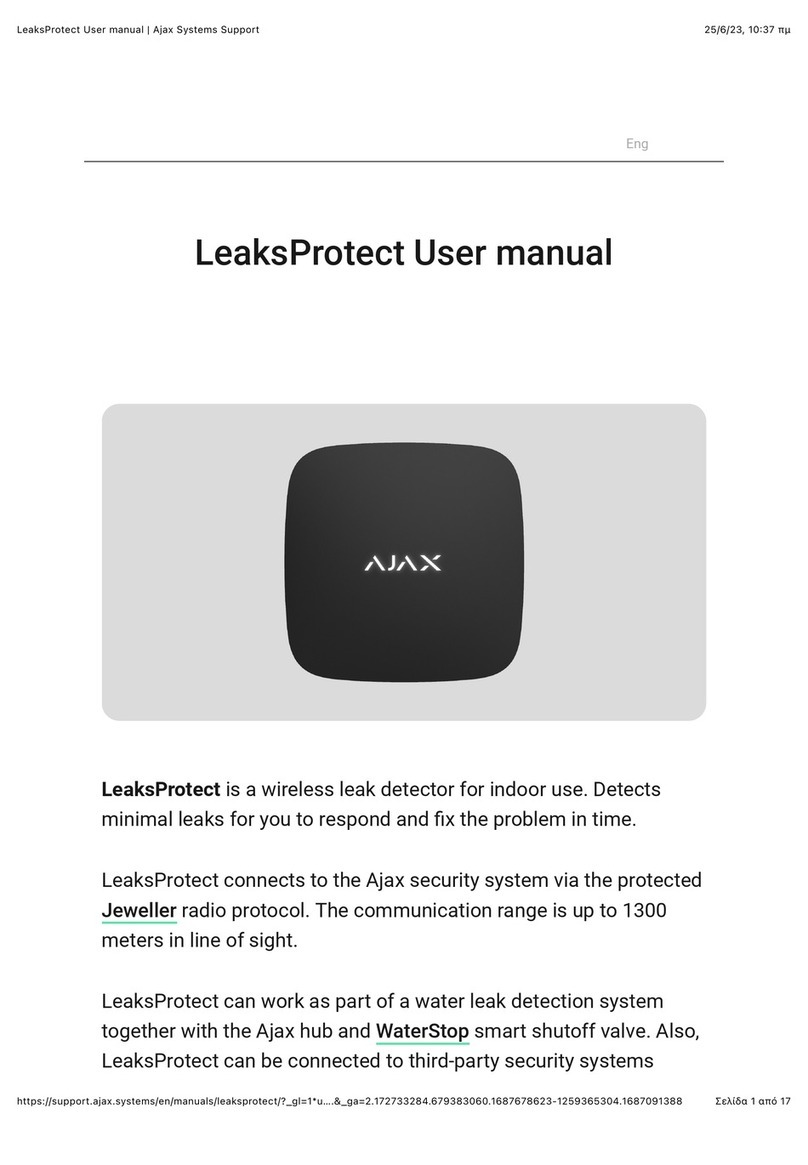
Wireless LeaksProtect flood detector is designed to detect water leakage.
SPECIFICATION MEANING
Detector type Wireless
Use Indoor
Radio signal power 20 mW
Communication protocol Jeweller (868 or 915 MHz depend-
ing on the country of distribution)
Maximum distance between detector and
central unit
Up to 1,000 m (3,300 ft) (in open
area)
Polling interval 3 min
Transmission of alarm after detection Immediately
Battery type 2 ААА
Power supply voltage 3V
Battery life Up to 5 years
Operating temperature range From 0°С (+32°F) to +50°С (+122°F)
Tamper protection Аvailable
Operating humidity Up to 100%
Ingress protection IP65
Dimensions 60х60x14 mm
3. PACKAGE CONTENTS
4.1 Before installing the detector it is required to register it in Ajax security system. To
register detector, Ajax security system receiving device must be set in “Add Device”
mode (refer to receiving unit user’s manual), than switch on the detector with the power
button «3» (PIC. 1) (the detector is switched on/off by holding down the power button for
three seconds). When switching on, detector will blink with a green light. Request for
registration is transmitted only when detector is switching on! If detector registration in
the security system for whatever reason did not take place, LeaksProtect blinks 6 times
once every second with green light, then switches off automatically (quickly blinking 3
times with red light). After that detector can be switched on again. If LeaksProtect has
been removed from registered devices list in security system, it also blinks 6 times with a
green light and switches off automatically (quickly blinking 3 times with red light). Flood
detector always works in the active mode, when using it with third party central unit
(panel), it is recommended to place detector in a constantly active 24-hour security zone!
2. SPECIFICATIONS
LeaksProtect
PICTURE 1. LeaksProtect flood
detector
1 – light
2 – water sensor contacts
3 – power button
4 – fixing screws
IMPORTANT!
Make sure that in the installation location detector has a stable radio contact with
the receiver! A maximum distance of 1000 m (3300 ft) between the detector and the
receiver is mentioned as a comparison with other devices. This distance was found
as a result of open area tests. Connection quality and distance between the detector
and the receiver can vary depending on installation location, walls, compartments,
bridgings, as well as the thickness and constructional material. Signal coming
through the obstacles, loses power. For example, distance range between the
detector and receiver, divided with two reinforced concrete bearing walls, constitutes
approximately 30 m (98 ft). Please note that moving the detector even 10 cm (4 in), it is
possible to improve the signal reception considerably.
Before installation make sure to check the signal level in the place where you intend to
install the detector! It is possible to launch a signal strength test on the receiver’s side.
Test launching is described in the receiver’s manual.
RECEIVER DETECTOR’S LIGHT DESCRIPTION
3 indication bars lights almost constantly, with
short breaks every 1.5 seconds excellent signal level
2 indication bars blinks 5 times per second medium signal level
1 indication bar blinks twice per second bad signal level
0 bars short flashes each 1.5 seconds no signal
For reliable radio connection the signal should be no worse than of medium level!
1
4
2
2
2
4
3
Flood detector, manual, 2 batteries ААА (pre-installed)
4.2 After successful detector registration select optimal location for its installation.
AJAX Systems Inc.,
www.ajax.systems
[email protected]
IMPORTANT!
Do not install detector:
• near metal objects, causing radio signal attenuation, or shielding from it;
• outdoor and in premises with a temperature above limits specified.
IMPORTANT!
LeaksProtect detects water by measuring resistance between its contacts.
Sometimes it may visually appear that detector contacts are dry, but detector alarms.
It can happen if soapy water was splashed onto detector contacts, and thin film is
formed between contacts (it may not be visually noticed). This film can cause a false
flood detection. If this happens, simply wipe dry a detector bottom surface between
contacts and contacts themselves. False alarm will stop.
IMPORTANT!
Detector’s batteries operation duration depends on their quality. On the average, the
batteries will work for approximately 5 years.
1 – antenna
2 – tamper button
3 – AAA batteries
PICTURE 2. View of flood detector with
removed cover
battery
+ –
battery+ –
6. MAINTENANCE
6.1 Once in 6 months it is necessary to clean the detector body from dust, cobwebs and
other dirtying.
6.2 Don’t wipe detector with substances containing alcohol, acetone, benzene and other
active solvents.
6.3 Replace the batteries with new ones in time. When discharging, the battery detector
sends a corresponding signal to the central alarm unit (panel). When battery is low,
detector switch on and slowly switch off green light every hour and at any triggering. To
replace the batteries unscrew four screws «4» (PIC. 1) at the corners of the body and
remove top cover of the detector. Replace the batteries «3» (PIC. 2) with new ones of AAA
type, complying with correct polarity.
5. INSTALLATION
5.1 Detector should be placed in areas of possible water leakage from the water supply,
heating or sewerage: on the floor under bathroom, under sink, a washing machine, etc. If
water ingresses on contacts «2» (PICTURE 1) placed on the detector’s back side, detector
immediately transfers an alarm to receiving unit. To activate alarm it is enough water
(liquid) detection on at least at one pair of contacts. It is recommended to check detector
functioning in the place of installation!
5.2. To check the flood detector, place it in installation location and touch two sensor
contacts «2» (PIC. 1) with wet object - cloth, wet finger, or just pour a little water on the
floor and place flood detector on top of it. When water is detected, the LeaksProtect
switches on a red light for 1 second.
After detector checking, wipe the contacts with a dry cloth and then put detector on it’s
installation place. When flood no longer detected the detector also switches on a red light
for 1 second.
7. WARRANTY
7.1 Warranty period of the detector is 24 months. The warranty does not apply to the
batteries.
1
2
3

Other manuals for LeaksProtect

6

Other AJAX Security Sensor manuals

AJAX GlassProtect Fibra User manual

AJAX

AJAX GlassProtect Fibra User manual

AJAX GlassProtect User manual

AJAX

AJAX GlassProtect User manual

AJAX DoorProtect Plus User manual

AJAX

AJAX DoorProtect Plus User manual

AJAX HomeSiren User manual

AJAX

AJAX HomeSiren User manual

AJAX GlassProtect User manual

AJAX

AJAX GlassProtect User manual

AJAX CombiProtect User manual

AJAX

AJAX CombiProtect User manual

AJAX CombiProtect User manual

AJAX

AJAX CombiProtect User manual

AJAX CombiProtect User manual

AJAX

AJAX CombiProtect User manual

AJAX FireProtect User manual

AJAX

AJAX FireProtect User manual

AJAX DoorProtect Plus Jeweller User manual

AJAX

AJAX DoorProtect Plus Jeweller User manual

AJAX FireProtect 2 Jeweller User manual

AJAX

AJAX FireProtect 2 Jeweller User manual

AJAX FireProtect 2 Heat/CO Jeweller User manual

AJAX

AJAX FireProtect 2 Heat/CO Jeweller User manual

AJAX DoorProtect User manual

AJAX

AJAX DoorProtect User manual

AJAX MotionProtect User manual

AJAX

AJAX MotionProtect User manual

AJAX LeaksProtect User manual

AJAX

AJAX LeaksProtect User manual

AJAX LeaksProtect User manual

AJAX

AJAX LeaksProtect User manual

AJAX DualCurtain Outdoor User manual

AJAX

AJAX DualCurtain Outdoor User manual

AJAX FireProtect User manual

AJAX

AJAX FireProtect User manual

AJAX MotionProtect Plus Fibra User manual

AJAX

AJAX MotionProtect Plus Fibra User manual

AJAX DoorProtect Plus User manual

AJAX

AJAX DoorProtect Plus User manual

AJAX vhfBridge User manual

AJAX

AJAX vhfBridge User manual

AJAX MotionProtect Curtain User manual

AJAX

AJAX MotionProtect Curtain User manual

AJAX FireProtect 2 Jeweller User manual

AJAX

AJAX FireProtect 2 Jeweller User manual

AJAX FireProtect 2 Jeweller User manual

AJAX

AJAX FireProtect 2 Jeweller User manual

Popular Security Sensor manuals by other brands

Micropack FDS300 installation guide

Micropack

Micropack FDS300 installation guide

Elko iNels RFMD-100 quick start guide

Elko

Elko iNels RFMD-100 quick start guide

HIOTH TECHNOLOGY CT-SMEO2001-ID user manual

HIOTH TECHNOLOGY

HIOTH TECHNOLOGY CT-SMEO2001-ID user manual

Assa Abloy Yale SR-A100-0EIR Installation

Assa Abloy

Assa Abloy Yale SR-A100-0EIR Installation

Bosch DS939 installation instructions

Bosch

Bosch DS939 installation instructions

RAB Lighting STL12LV installation manual

RAB Lighting

RAB Lighting STL12LV installation manual

Prime Controls LH200H operating instructions

Prime Controls

Prime Controls LH200H operating instructions

Mannesmann 99980 instruction manual

Mannesmann

Mannesmann 99980 instruction manual

PCB Piezotronics 118B11 Installation and operating manual

PCB Piezotronics

PCB Piezotronics 118B11 Installation and operating manual

ActiV C4408R manual

ActiV

ActiV C4408R manual

PSM LD161 installation guide

PSM

PSM LD161 installation guide

LEGRAND Plexo 695 01 manual

LEGRAND

LEGRAND Plexo 695 01 manual

Elkron IR600VC Installation, programming and functions manual

Elkron

Elkron IR600VC Installation, programming and functions manual

Honeywell Miller EN 360 Picture guide

Honeywell

Honeywell Miller EN 360 Picture guide

Carrier HyperSense 7C-HS-C1W-X installation guide

Carrier

Carrier HyperSense 7C-HS-C1W-X installation guide

Eaton COOPER POWER SERIES Installation and maintenance instructions

Eaton

Eaton COOPER POWER SERIES Installation and maintenance instructions

BEA IXIO-ST manual

BEA

BEA IXIO-ST manual

TH COMMUNICATIONS MotionProtect Outdoor user manual

TH COMMUNICATIONS

TH COMMUNICATIONS MotionProtect Outdoor user manual

manuals.online logo
manuals.online logoBrands
  • About & Mission
  • Contact us
  • Privacy Policy
  • Terms and Conditions

Copyright 2025 Manuals.Online. All Rights Reserved.