G
@-Precautions
&
FOR
CUSTOMERS
IN
THEUK
IMPORTANT
FORYOUR
SAFETY
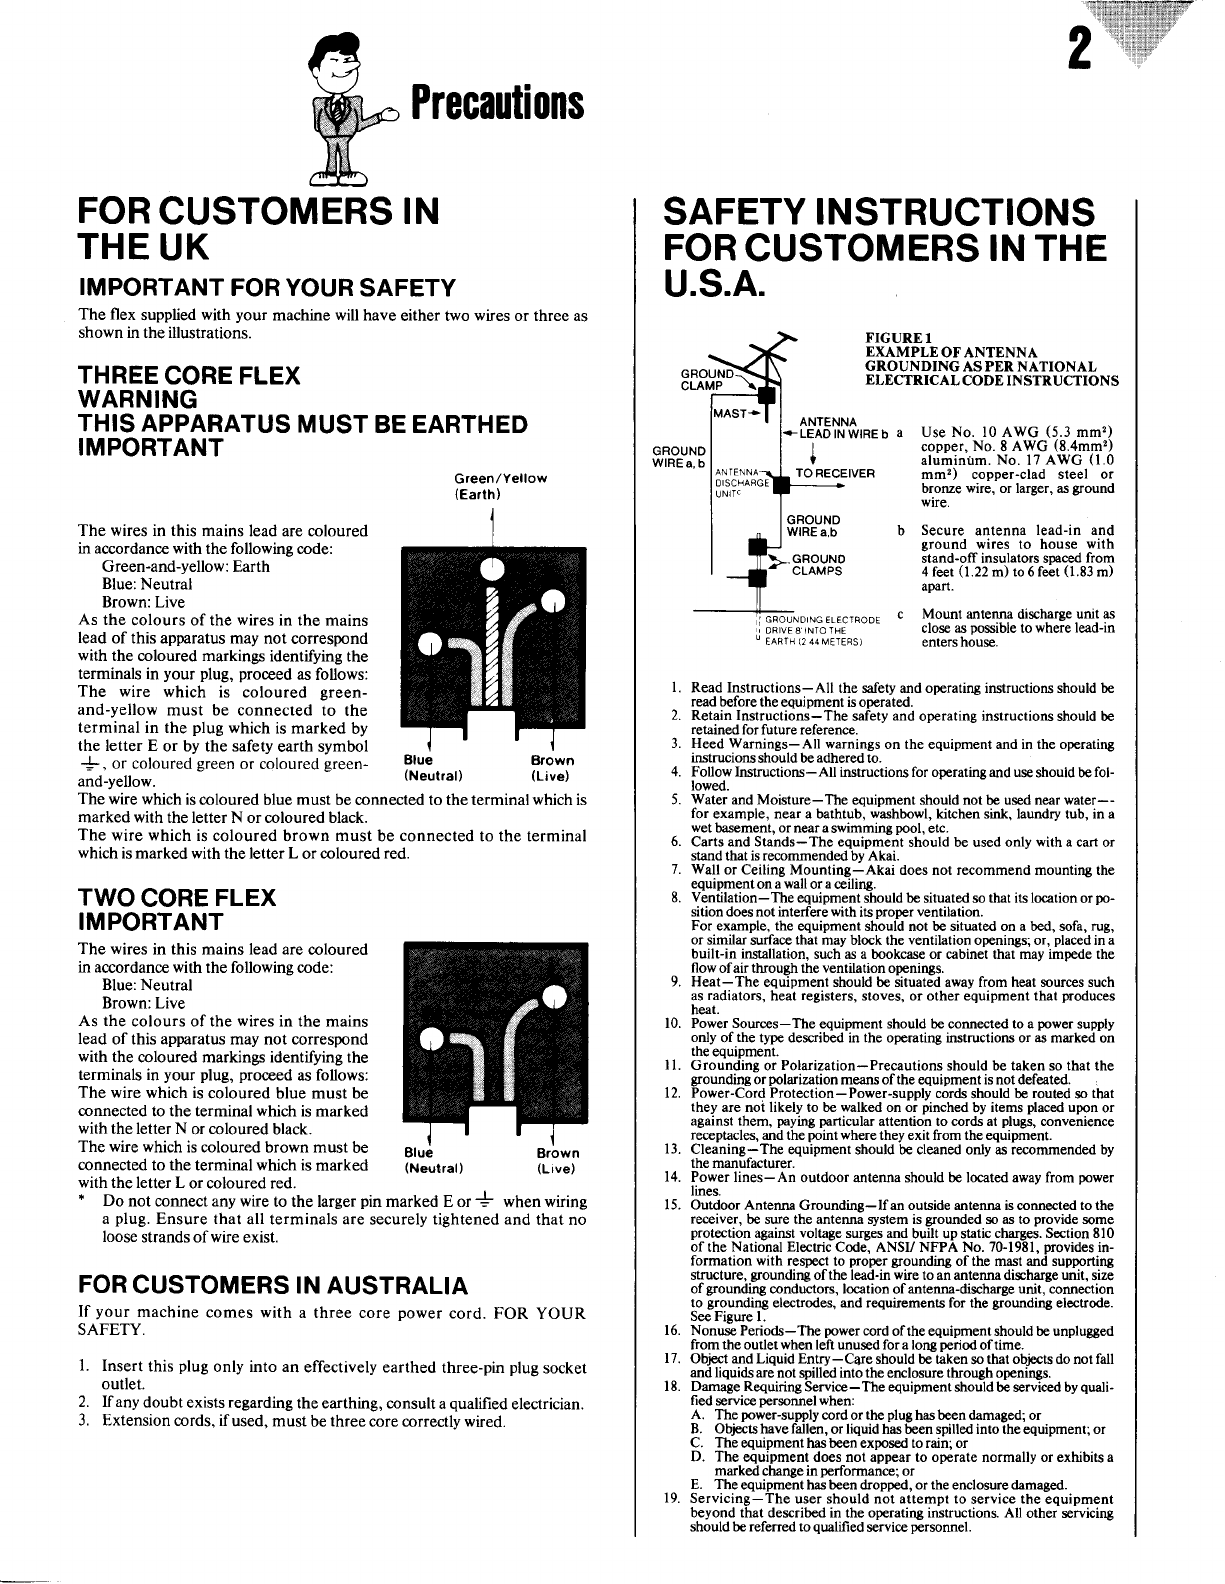
Theflex supplied
with your machinewill have
eithertwowires
or threeas
shownintheillustrations.
THREE
COREFLEX
WARNING
THISAPPARATUS
MUST
BEEARTHED
IMPORTANT
Green/Yellow
(Earth)
Thewiresin thismains
leadarecoloured
inaccordancewiththefollowingcode:
Green-and-yellow:Earth
Blue:
Neutral
Brown:Live
As thecoloursof thewires
in themains
lead
of thisapparatusmaynot correspond
with thecolouredmarkings
identifyingthe
terminalsin your plug,proceed
asfollows:
The wire which is coloured green-
and-yellowmust be connected
to the
terminalin theplug
which
ismarked
by
the letter E or by the safety
earthsymbol
{, or coloured
green
or coloured
green-
and-yellow.
TWO
CORE
FLEX
IMPORTANT
Thewires
in thismainsleadare
coloured
inaccordancewiththefollowinsmde:
Blue:Neutral
Brown:Live
As thecoloursof thewires
in themains
leadofthis apparatusmaynot correspond
with thecolouredmarkingsidentifyingthe
terminalsin yourplug,proceed
asfollows:
Thewire
whichis
colouredbluemustbe
connected
to theterminal
whichismarked
withtheletterN orcoloured
black.
Thewirewhich
iscoloured
brownmustbe
connected
to theterminalwhichismarked
Brown
(Live)
Thewirewhich
is
colouredblue
mustbeconnectedto theterminal
which
is
markedwiththeletterN orcolouredblack.
Thewire whichiscoloured
brown mustbeconnected
to theterminal
which
ismarkedwiththeletterL orcolouredred.
Blue
(Neutral) Erown
(Live)
withtheletterL orcolouredred.
* Do notconnectanywireto thelarger
pinmarkedE or* whenwiring
aplug.
Ensurethatall terminalsare
securely
tightenedandthatno
loose
strandsofwireexist.
FOR
CUSTOMERSINAUSTRALIA
If your machine
comeswith a threecore
power
cord.
FOR YOUR
SAFETY.
1. Insert
this
plug
onlyintoaneffectivelyearthed
three-pin
plug
socket
outlet.
2. If any
doubt
exists
regarding
theearthing,consult
a
qualified
electrician.
3. Extension
mrds,if used,mustbe
three
corecorrectlywired.
tl :::::l::,::::::::::::::::'
a- .1:::::::::::r:::
t lllii:i::i:::
f-
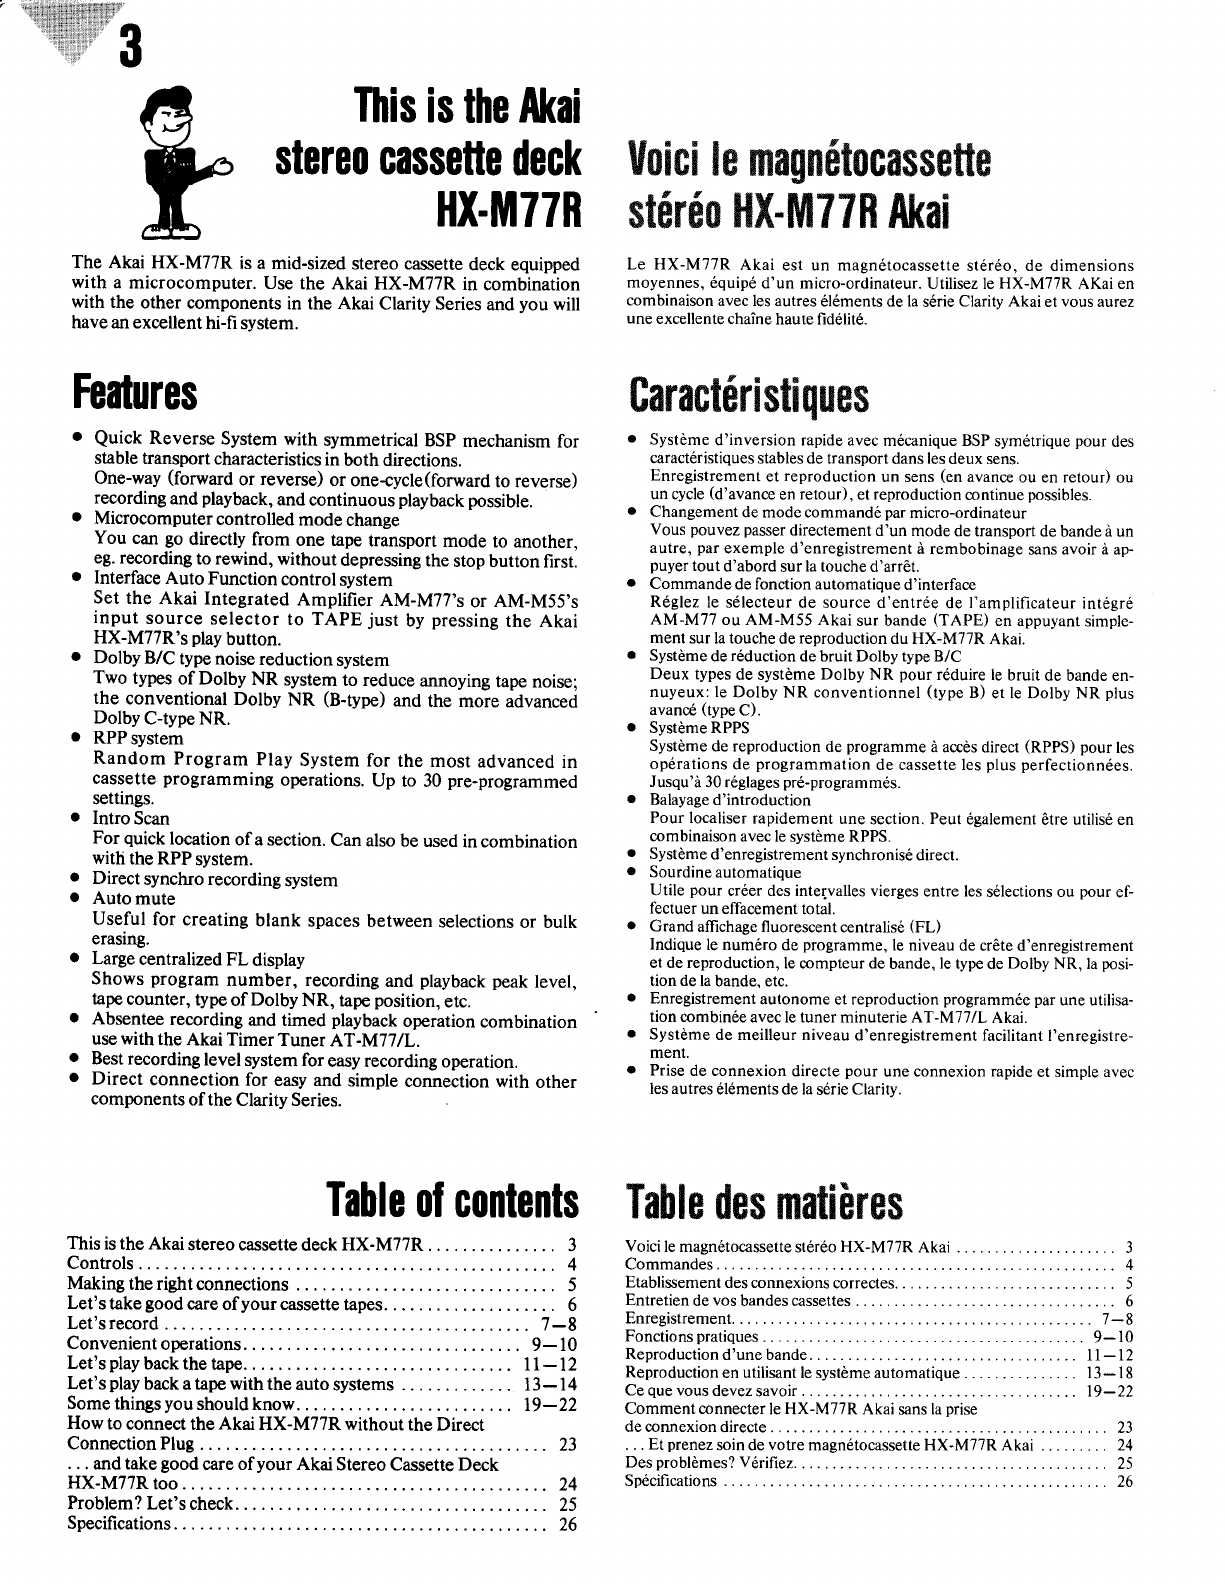
ANTENNA
LEAD
INWIRE
b
I
t
TO
RECEIVER
a UseNo. l0 AwG (5.3
mm'?)
copper,
No. 8AWG (8.4mm'z)
alumintm.
No. 17
AWG (1.0
mm2) copper-cladsteel or
bronzewire, or larger,as
gtound
wre.
b Secure antenna lead-in and
ground wires to house with
stand-offinsulatorssDaced
from
4feet
(1.22
m)to6feit (1.83
m)
apart.
c Mount antennadischargeunit as
closeas
possible
towherelead-in
entershouse.
GROUND
WIRE
a,b
GROUND
CLAMPS
l.
2.
3.
A
5.
6.
7.
8.
10.
n.
12.
13.
14.
15.
16.
17.
18.
FOR
CUSTOMERS
INTHE
U.S.A.
SAFETY
INSTRUCTIONS
FIGURI,I
EXAMPLE OFANTf,NNA
GROUNDING ASPERNATIONAL
ELECTRICAL CODEINSTRUCTIONS
GROUND
WIRE
a,b
i GROUNDTNG
ELECTRODE
, DRIVE
8 1NTOTHE
u EARIH
(2
44METERs)
ReadInstructions-All thesafetyandop€ratinginstructionsshouldbe
readbefore
theequipmentisoperated.
RetainInstructions-The safety
andoperating
instructions
shouldbe
retained
forfuturereference.
HeedWarnings-All warnings
on the equipmentandin theop€rating
instrucions
shouldbeadhered
to.
Follow Instructions-All instructionsfor operatinganduse
shouldbe
fol-
lowed.
Water
and
Moisture-The equipmentshouldnotbe
usednearwater--
for example,nearabal.htub,
washbowl,
kitchensink,laundry
tub,in a
wet
basement,orneara
swimming
pool,
etc.
CartsandStands-The equipment
shouldbe usedonly with acartor
standthatisrecommended
byAkai.
Wall or CeilingMounting-Akai doesnot recommendmountingthe
equipment
onawalloraceiling.
Ventilation-The equipmentshouldbesituatedsothatitslocation
orpo-
sitiondoesnotinterferewithits
proper
ventilation.
Forexample,theequipmentshouldnot besituatedonabed,sofa,
rug,
or similarsurface
that mayblock the ventilation openings;or, placed
in a
built-in installation,
suchasabookcaseor cabinetthatmayimpedethe
flow
ofair throughthe
ventilation
openings.
Heat-The equipmentshouldbesituatedawayfromheatsourcessuch
as
radiators,
heatregisters,
stoves,or other equipmentthat produces
heat.
PowerSources-Theequipmentshouldbeconnectedtoapower
supply
only of the typedescribedin the operatinginstructionsor asmarkedon
the
equipment.
Grounding or Polarization-Precautionsshouldbetakensothat the
grounding
orpolarization
meansofthe equipmentisnotdefeated.
Power-CordProtection-Power-supplycords
shouldberouted
sothat
theyarenoi likely to bewalked
onor pinched
byitems
placed
upon
or
againstthem,payingpanicular
attentiontocordsatplugs,
convenience
receptacles,
andthepointwhere
theyexit from theequipment.
Cleaning-The equipmentshouldbecleanedonlyasrecomrnendedby
themanufacturer.
Powerlines-An outdoorantennashouldbelocatedawayfrom power
lines.
Outdoor
Antenna
Grounding-lfan outsideantennaisconnectedtothe
reteiver, besurethe antennasystemis gounded soasto providesome
protection
against
voltage
surgesand
builtupstatic
charyes.Section810
of theNationalElectric
Code,ANSI/ NFPA No. 70-1981,
provides
in-
formation with respeat
to propergroundingof the mastandsupporting
structure,groundingofthe lead-inwireto anantennadischargeunit, size
of groundingconductors,locationof antenna-dischargeunit, connection
to grounding electrodes,and requirementsfor the groundingelectrode.
SeeFigure
l.
Nonuse
Periods-Thepower
cord
oftheequipmentshouldbeunplugged
from theoutletwhenleft unusedfor alongperiodoftime.
Obixt andLiquid Entry-C4re shouldbetakensothatobisctsdonot fall
andliquidsarenot spilledinto theenclosurethroughopenings.
DamageRequiringService-The equipment
shouldbeservicedbyquali-
fiedservice
personnel
when:
A. Thepower-supply
cordor theplughasbeendamaged;or
B. Objectshavefallen,
orliquidhasbeenspilledintotheequipment;or
C. Theequipmenthasbeenexposedtorain;or
D. Theequipmentdoesnot appearto op€ratenormallyor exhibitsa
marked
changein performance;
or
E. Theequipmenthasbeendropped,or theenclosuredamaged.
Servicing-The usershouldnot attemptto service
theequipment
beyondthatdescribedin theoperatingiffitructions.All otherservicing
shouldbereferredtoqualifiedservice
personnel.
19.