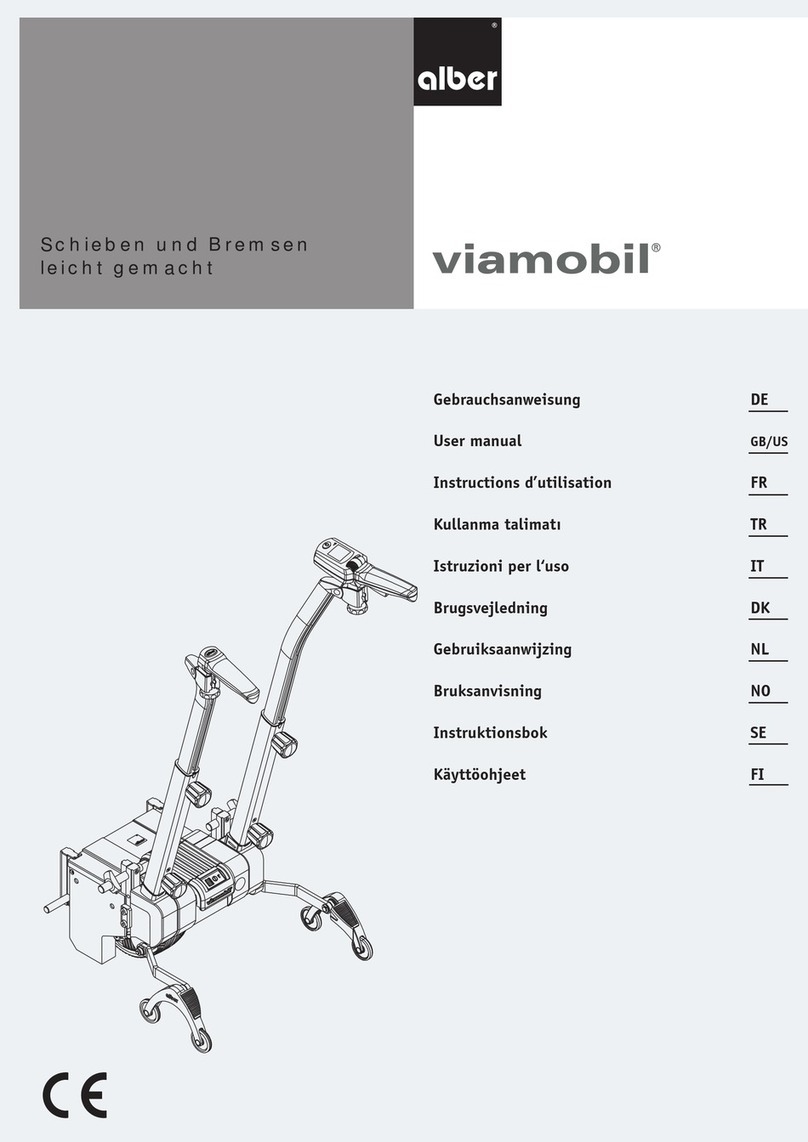
Alber e-pilot User manual

Gebrauchsanweisung DE
User manual EN
Instructions d’utilisation FR
Manual de instrucciones ES
Istruzioni per l‘uso IT
Gebruiksaanwijzing NL
Bruksanvisning NO
Instruktionsbok SE
Brugsvejledning DK
Käyttöohjeet FI
Speed up your life Zuggerät für Rollstühle

Service Center (Deutschland)
Montag bis Donnerstag von
8.00 - 18.00 Uhr
Freitag von
8.00 - 16.00 Uhr
erreichbar unter
Telefon (0800) 9096-250
(gebührenfrei)


Abmessungen Akku-Pack

8
1
Contents
1. Introduction 2
1.1 Note on usage 2
1.2 Important safety notes – please observe
at all times 2
1.3 Proper use of the e-pilot 2
1.4 Handling instructions 2
1.5 Signs and symbols 3
1.6 Permissible conditions of use/locations of operation 4
1.7 Standard scope of delivery 5
1.8 Optional accessories 5
1.9 The main elements at a glance 5
2. Commissioning 6
2.1. Connecting the e-pilot to a wheelchair 7
2.2. Disconnecting the e-pilot from a wheelchair 8
2.3 Control elements on the handlebar 9
2.4 Button for on/off and reverse 9
2.5 Throttle handle 10
2.6 Button for warning signal and light 10
2.7 Brake lever 10
2.8 Safety note on locking and releasing the
brakes on inclines and gradients 11
3. Battery pack 11
3.1 Displays on the battery pack 12
3.2 Removing the battery pack 12
3.3 Inserting the battery pack 13
3.4 Switching on the battery pack 13
3.5 Charging the battery pack 14
3.5.1 Connecting the charging plug to the battery pack 14
3.5.2 Displaying the charge status 14
3.5.3 Fault indication during charging 14
3.5.4 General information on charging the battery pack 15
3.5.5 Safety instructions for the charger and
the charging process 15
3.5.6 Safety instructions for the battery pack 16
3.5.7 Storing the battery pack 16
3.5.8 Safety instructions and precautions on how
to transport and ship the battery pack 16
4. Display 17
4.1 Fitting and removing the display 17
4.2 USB port on the display 17
4.3 Menus in the display 18
4.3.1 Menu structure (overview) 18
4.3.2 Driving screen 19
4.3.3 Setting the drive speeds 19
4.3.4 Displays in the menu 20
42.0001.4.99.01
Version: 2018-05-09
5. Driving mode 21
5.1 Switching on the e-pilot 21
5.2 Forward travel 21
5.3 Reverse travel 21
6. Safety instructions and hazard information when using
the e-pilot 22
6.1 General instructions 22
6.2 Driver training 22
6.3 Safety instructions 23
6.4 Obstacles 25
6.5 Hazardous areas and hazardous situations 25
7. Error messages and notes on the display 27
7.1 Error messages 27
7.2 Notes 28
8. USB charger socket 29
9. Light 29
10. Transport 30
10.1 e-pilot 30
10.2 Wheelchair 30
11. Storage, maintenance, care and disposal 31
11.1 Storage 31
11.2 Care 31
11.3 Reuse 31
11.4 Maintenance 31
11.5 Disposal 32
12. Warranty and liability 32
12.1 Warranty for defects 32
12.2 Guarantee of durability 32
12.3 Liability 32
13. Technical data 33
14. Labels 34
15. Product safety information 37
The latest applicable version of this operating manual is available for download on our
website www.alber.de. If you require a version that is written in a larger font, contact
the Alber Service Center.

2
1. Introduction
1.1 Intended purpose
The e-pilot is a medical device for active wheelchair users who are reliant on a manual wheelchair as a result of their disability. The e-pilot
is an electrically driven towing device that is attached to a manual wheelchair, converting it into an electrically driven wheelchair, signific-
antly increasing the wheelchair user’s mobility and flexibility.
1.2 Important safety notes – please observe at all times
The e-pilot is a towing device for wheelchairs. For safety reasons, it must only be operated by persons who
•have been instructed in its handling,
•can move and coordinate both hands or arms without major restrictions,
•have the physical and mental ability to safely operate the wheelchair with the e-pilot attached to it in all possible situations (e.g. road
traffic) and, in the event of the e-pilot failing to work, are able to brake the wheelchair and stop safely.
A one-to-one instruction session on handling and operating the device is included in the scope of delivery. Please contact your specialist
dealer or Alber GmbH agent to arrange for a training session. The instruction is free of charge.
If you feel a little unsure about how to handle your e-pilot, please contact your specialist dealer for advice.
In the event of technical faults, please contact your specialist dealer or the Alber Service Center, telephone 0800 9096 250 (toll-free; only
applies within the Federal Republic of Germany).
•When operating the e-pilot, observe the specifications of the wheelchair manufacturer (e.g. maximum slope, air pressure of tyres, the
maximum speed etc.), and strictly adhere to the operating instructions of the wheelchair. Never exceed any of the specified limit values.
•We recommend refraining from using the e-pilot in locations that are exposed to strong electric fields.
•In rare cases, the operation of the e-pilot may interfere with other electrical devices such as anti-shoplifting barriers in department stores.
•You must not use the e-pilot on escalators or moving walkways.
•If carrying out sporting activities in the wheelchair, such as lifting weights or similar, remove the e-pilot from the wheelchair.
•Similarly, combining the e-pilot with accessories that have not been approved by Alber is also prohibited.
It is prohibited to start up the e-pilot before being instructed in how to use it.
Contact your authorised specialist dealer or Alber agent for this instruction.
Starting up the e-pilot before receiving instruction is contrary to the intended use and will, among other things,
invalidate the warranty. Any use contrary to the intended use involves a risk of injury.
The requirements for the e-pilot user are stricter than the requirements for manual operation of the wheelchair; special
attention must be paid and all the operating information included in this operating manual must be complied with.
1.3 Proper use of the e-pilot
The e-pilot is a medical device for active wheelchair users who are reliant on a manual wheelchair as a result of their disability. The e-pilot
is an electrically driven towing device that is attached to a manual wheelchair, converting it into an electrically driven wheelchair, signific-
antly increasing the wheelchair user’s mobility and flexibility.
The e-pilot must always be used, transported, maintained and serviced as described in this operating manual. The e-pilot must only be fitted
to and operated with wheelchairs that are listed in Alber's mounting database.
The selection is made by the specialist dealer or by Alber itself.
1.4 Handling instructions
Do not attach any parts other than the accessories that have been approved for use by Alber. Do not make any technical modifications to
the e-pilot or its accessory parts.
The e-pilot must only be operated under the following conditions:
•Full compliance with the information, instructions and recommendations contained in this operating manual
•Observe the information on travelling with the e-pilot, as well as the safety and hazard information in chapter 6.
•The e-pilot is only operated by a person who has been instructed in its use
•No technical modifications have been made to the e-pilot by the user or by any third party.
An instructed person is a person who has been instructed in the operation of the e-pilot and in his/her tasks and who has been made
aware of the possible hazards associated with improper use of the device. In the case of the e-pilot, this is the user of the wheelchair
to which the e-pilot is fitted. The instruction session is provided by the authorised specialist dealer or by an agent of Alber GmbH. It is
strictly prohibited for any uninstructed or unqualified persons to use the e-pilot.

8
3
The e-pilot must not be used for any purpose that contravenes the intended use of the device. This particularly applies to all types of load
transportation such as transporting household objects or additional people in the wheelchair.
It is also forbidden to use the e-pilot as a drive for any type of mobile object, device, machine or means of transport (e.g. converted bicycles
or scooters).
Proper use includes complying with the information specified in this operating manual on carrying out maintenance work and observing
and adhering to the safety precautions and hazard information for driving.
Alber GmbH deems the following cases to be contrary to the intended use of the e-pilot:
•Use of the device that contravenes the instructions and recommendations in this operating manual
•Exceeding the technical limits laid down in this operating manual
•Technical modifications to the device
•Attachment and/or use of parts and accessories that have not been supplied or approved by Alber GmbH.
Alber GmbH excludes any liability for damage caused by use contrary to the intended purpose of the e-pilot and its
accessory parts, by handling of the e-pilot and its accessory parts by a person who has not been instructed, by use
of the e-pilot and its accessory parts contrary to the instructions and specifically the safety and hazard informa-
tion in this operating manual, or by exceeding the technical limits laid down in this operating manual on the part
of the user or third parties.
Before using the e-pilot, carefully read all safety and hazard information contained in the individual chapters of
this operating manual.
1.5 Signs and symbols
Important tips and information are identified in this operating manual as follows:
Indicates tips and special information.
Warning against possible hazards to your safety and health, and indication of possible injury risks. Warning against pos-
sible technical problems or damage.
Observe these indications and warnings at all times to avoid injury to people and damage to the product.
Information in this operating manual, such as “in front”, “behind”, “left”, right” etc. refers to the position from the point of view of the
wheelchair user.
The symbols used on the labels (see chapter 13) and in some parts of this operating manual are explained in the following.
The e-pilot and corresponding off-board charger comply with the applicable sections of standard EN 12184
for electric wheelchairs and meet the currently applicable EC directive for medical devices, 93/42/EEC.
The e-pilot is a Class I medical device.
For information on how to dispose of the e-pilot and its components, see chapter 7.4.
Protect the device from moisture.
Indicates the temperature range in which the e-pilot or battery pack can be used.
i

4
Important, observe accompanying documents.
Maximum weight of person that the e-pilot can accept as its load capacity: 100 kg
Specification of the manufacturing date on the system label
Name and address of the device manufacturer (see reverse of this operating manual)
Hazardous goods labelling (class 9) on the battery pack box
See chapter 3.5.8.
Protective insulation / appliance class 2
Do not use outdoors
1.6 Permissible conditions of use/locations of operation
•Observe the permissible conditions of use of the wheelchair to which the e-pilot is attached (see wheelchair operating manual).
•In addition to observing the information provided on the e-pilot, it is also imperative to observe the information provided by the
wheelchair manufacturer (e.g. maximum gradeability, maximum permissible height of obstacles, maximum user weight, maximum speed
etc.). The lowest values always apply.
•Any limits regarding the operation of the wheelchair (e.g. maximum gradeability, maximum permissible height of obstacles, maximum
user weight etc.) must also be observed when using the e-pilot.
•The e-pilot must only be used at temperatures between -25 °C and +50 °C. Therefore, do not expose the e-pilot to any heat sources
(such as intense sunlight) as this may cause surfaces to reach high temperatures.
•Avoid using the wheelchair on soft ground (e.g. loose chipping, sand, mud, snow, ice or deep puddles).
•Particularly observe the safety instructions and hazard information from chapter 3.
When not in use, do not expose your e-pilot to strong sunlight for long periods of time. This could cause the motor to
heat up and in an extreme case, not be able to operate at full power. Plastic parts also age quicker under intense sun-
light.

8
5
1.7 Standard scope of delivery
•e-pilot towing device
•Display
•Battery pack with key
•Charger
•This operating manual
•Operating instructions for charger
A special bracket must be present on the wheelchair in order to attach the e-pilot. If it is not present, please contact your specialist dealer
or an Alber agent.
1.8 Optional accessories
•Front base support
•Rear base support
•Shopping bag
•Bottle holder
•Vario support
•Compact bag
•Rear light for push handles
•Supernova E3 pure light
•Manual rear wheels, complete (pair), reinforced
•Rear mirror
•Handrest for throttle handle (operating aid)
We recommend using only original accessories supplied by Alber.
The e-pilot is designed in such a way that it performs best when using Alber original accessories. Alber GmbH shall not be liable for dam-
age to the product or accidents (e.g. fires) caused by a malfunction of non-original accessories or spare parts. The warranty does not cover
repairs for damage caused by malfunction of non-original accessories. Alber GmbH will, however, carry out such repairs for you at a charge.
1.9 The main elements at a glance
(please see overview drawing in the cover)
e-pilot
Throttle handle 1
Button (several functions) 2
Display 3
Holder for display 4
Button for light and horn 5
Locking mechanism for brake lever 6
Brake lever (right) 7a
Brake lever (left) 7b
Mount for bracket 8
Release flap 9
Charger socket (with cover) 10
Display (capacity display) 11
Info button 12
Battery pack 13
Mount for battery pack 14
Key to lock battery 15
Battery lock 16
Light 17
Stand 18
Brakes (activated by brake lever 7a/7b) 19
Valve 20
Wheel 21
Brake disc 22
USB charger socket 35
Charger
Charger 23
Display 24
Charging plug 25
Mains plug 26
Wheelchair
Bracket 27
Quickpin 28
Releasing the quickpin 29

6
2. Commissioning
The e-pilot and any accessories you ordered will be fitted to your wheelchair by Alber or
your specialist dealer and delivered so that they are ready for operation. There is there-
fore a bracket [27] on the underside of your wheelchair, with which the e-pilot can be
connected to your wheelchair (see chapter 2.1).
On delivery of your e-pilot, your specialist dealer or an Alber agent will show you how to
operate the system and how any accessories you ordered function. You will also be given
this operating manual which, in addition to the technical information, also contains
important driving instructions.
The display [3] of the e-pilot is set to English in the factory and it can be altered to the
language of your choice by yourself or your specialist dealer (see chapter 4.3.4).
Due to the applicable transport regulations, the battery pack is only charged to a max-
imum of 30 percent on delivery. You should therefore charge it fully before using it for
the first time (see chapter 3.5).
Before putting the e-pilot into operation, read this operating manual,
and all the safety instructions and warning information in particular,
as well as the documents included with the charger and the battery
pack. If you have any questions, please contact your specialist dealer.
The bracket [27] must be attached to the wheelchair by Alber or its
authorised specialist dealers.
Regularly check the bracket [27] to ensure that it is firmly screwed
onto the wheelchair. If a screw connection has become loose, con-
tact your authorised specialist dealer to have it retightened.
At regular intervals, check that the brakes on the e-pilot and on
your wheelchair are fully functional. If the brakes are not in perfect
working order, the e-pilot must not be put into operation.
Important information for persons with a pacemaker
There is a magnet [62] on the fork of the wheel.
Persons with a pacemaker should not bring it closer than 20 centimetres
to this device, in order to avoid possible malfunctions and resultant harm
to health.
27
3

8
7
2.1. Connecting the e-pilot to a wheelchair
To connect the e-pilot to the wheelchair, proceed as follows:
•Apply the parking brakes of the wheelchair.
•Make sure that the e-pilot is not switched on. The following steps may only be carried
out with the e-pilot switched off.
•If necessary: Open the release flap [9] on the e-pilot by pulling it upward (see dia-
gram C).
•Hold the handles of the e-pilot and pull it straight towards you (diagram A) until the
cross rod [8a] in the mount [8] is directly in contact with the bracket [27] on the
wheelchair (see diagram C).
•Now continue to pull the e-pilot towards you. If this action is carried out correctly,
you will hear an audible “click” as soon as the two brackets [8 and 27] are in contact.
During this procedure, you will notice that the wheel [21] of the e-pilot first lifts up
slightly and then lowers back to the ground when the two brackets engage.
•Lean back and push the e-pilot away from you on the handles (see diagram B).
The castors on your wheelchair and the stand of the e-pilot are lifted slightly and the two
brackets [8 and 27] connect firmly to each other. The release flap [9] also swivels down
automatically and snaps into place, thereby locking the mechanism (see diagram D).
•If the release flap [9] does not automatically swivel down: Manually push the
release flap [9] down and make sure that it snaps into place (see diagram D).
•Check that the wheelchair and e-pilot are firmly connected to each other. It should no
longer be possible to push the e-pilot away from the wheelchair.
•Once the e-pilot is correctly connected to the wheelchair, you can release the wheel-
chair’s parking brakes and begin moving.
To connect the e-pilot, it must be switched off. Never connect the
e-pilot when it is switched on.
Always perform the connection in full and with your complete atten-
tion, without any interruptions (e.g. phone calls, conversations with
other people etc.).
If the release flap [9] does not automatically swivel down during
the connection (diagram D), you should contact your specialist
dealer and have the position of the bracket [27] checked.
Travelling with the e-pilot is only permitted with the release flap [9]
closed (swivelled down and snapped into place – see diagram D).

8
2.2. Disconnecting the e-pilot from a wheelchair
To disconnect the e-pilot from the wheelchair, proceed as follows:
•Apply the parking brakes of the wheelchair.
•Make sure that the e-pilot is not switched on. The following steps may only be carried
out with the e-pilot switched off.
•Swivel the release flap [9] of the e-pilot upward (see diagram G).
•Push the e-pilot forwards away from you until you hear an audible click.
•Now pull the e-pilot towards you until the castors of your wheelchair are in contact
with the ground.
•Push the e-pilot down and slightly forwards. The two brackets [8 and 27] disconnect;
at the same time, the castors of the wheelchair are lowered to the ground.
•The wheelchair and e-pilot can now be set down; you should engage the brakes of the
e-pilot (see chapter 2.7) to prevent it from rolling away.
To disconnect the e-pilot, it must be switched off. Never disconnect
the e-pilot when it is switched on.
Always perform the disconnection in full and with your complete
attention, without any interruptions (e.g. phone calls, conversations
with other people etc.).
Once the release flap [9] has been swivelled up, the mechanical
connections between the e-pilot and the wheelchair (mount [8] and
bracket [27]) are released. In this state, a small push is enough to
completely disconnect the two components.
It is therefore expressly forbidden to travel using the e-pilot once
the release flap [9] has been swivelled up.
E
F
G

8
9
2.3 Control elements on the handlebar
From the wheelchair user’s perspective, you will find on the right side of the handlebar:
•The throttle handle [1]
•The button [2] for on/off, forwards travel, reverse, preselecting the maximum speed
and menu control
•The brake lever [7a] for one of the brakes [19]
You will find on the left side of the handlebar:
•The button [5] for light and horn
•The brake lever [7b] for the second brake [19]
•The locking mechanism [6] for the brake lever [7b]
Apart from the two brake levers [7a, 7b], the battery pack must be switched on in order
to use the control elements (see chapter 3.4).
The functions of the individual control elements are described in the following chapters.
2.4 Button for on/off and reverse
The control elements of button [2] have several functions.
With the battery pack switched on and the e-pilot switched off
•Button [2] has no function when the e-pilot is switched off.
•Pressing button [31] switches the e-pilot on. On the display [3], certain parameters
are queried one after the other (see also chapter 4.3).
During the switching-on procedure and the querying, do not press
either button [30] or button [32], and do not activate the throttle
handle [1]. This could result in a safety shutdown.
With the e-pilot switched on and in idle
•The driving screen appears continuously on the display [3], informing you of various
parameters (see chapter 4.3.2).
•You can select the maximum speed to be travelled using button [30] only (see
chapter 4.3.3). Never use button [32] to select the speed as this button activ-
ates reverse travel!
•When you turn the throttle handle [1], the e-pilot always moves forwards. To travel in
reverse, you have to let go of the throttle handle [1] and press button [32] instead.
The device continues reversing until you release button [32].
•Pressing button [31] for about three seconds switches the driving screen to the
menu. You navigate through the menu with buttons [30] and [32]. For more inform-
ation about the menu parameters, see chapter 4.3.4.
•If the e-pilot is not used for one hour, the system automatically switches off. If you
want to put the e-pilot back into operation, press button [31] again.
During travel
•You can also preselect the maximum speed to be travelled by pressing button [30]
while travelling (see chapter 4.3.3).
•To reverse, you first have to bring the e-pilot to a standstill.
Only use button [30] to preselect the maximum speed. Never use
button [32] to select the speed as this button activates reverse travel!
In this case, there is a risk of the e-pilot switching the direction of
travel in an uncontrolled manner, causing injuries.
7b

10
2.5 Throttle handle
Driving mode is operated using the control elements on the right side of the handlebar.
•Press button [31] on button [2] for approximately two seconds. Do not activate the
throttle handle [1] when doing this.
•The e-pilot is now switched on and the preselected driving mode (see chapter 4.3.4
Driving mode) is shown on the display [3].
•Turn the throttle handle [1] clockwise and travel begins.
Before travelling with the e-pilot for the first time, read the travel
information, as well as the safety and hazard information (all in
chapter 6).
2.6 Button for warning signal and light
Button [5] has two functions, which can be activated when the e-pilot is at a stand-
still (and the battery pack [13] is switched on), or during travel.
•Pressing button [33] emits a warning signal. If release the button, the warning sig-
nal stops.
•Pressing button [34] switches the light [17] on or off.
Note the additional information in chapter 9, as there is an additional button on
the light to switch it on and off.
2.7 Brake lever
The wheel [1] of the e-pilot is not automatically locked when the e-pilot is at a standstill
and it can move freely. To prevent the e-pilot and the attached wheelchair from inadvert-
ently rolling away, you should activate the brakes on the wheel using the brake levers [7a
on the right side of the handlebar and 7b on the left] when at a standstill.
Locking the brake lever
If you are going to be at a standstill for a longer period of time, you can use the locking
mechanism [6] on the brake lever [7b] on the left side of the handlebar to permanently
engage the brake lever.
•With your thumb, push the locking mechanism [6] forwards.
•Push the opening [41] over the end [40] of the brake lever.
•If the end [40] of the brake lever is completely inside the opening [41], you can
gently (not suddenly!) release the locking mechanism [6]. This pulls the brake lever
towards the handle, automatically activating the brake [19] on the wheel.
•Also apply the brakes on your wheelchair.
Your wheelchair and the e-pilot are now secured against inadvertently rolling away.
Releasing the brake lever
•With your thumb, push the locking mechanism [6] forwards.
•Pull the opening [41] off the end of the brake lever [7a] so that the lever is unob-
structed and the brake is released.
•Only release the brakes on your wheelchair after you have done this.
!

8
11
2.8 Safety note on locking and releasing the brakes on inclines and gradients
Whenever possible, avoid stopping on inclines and gradients.
If you have no choice but to stop on a slope, take particular care to prevent inadvertent rolling of the e-pilot and wheelchair. In these
situations, note the following safety instructions.
Brief stop
•Use both brake levers [7a/7b] to brake the e-pilot to a standstill and then do not release the brake levers after coming to a standstill.
This way, the brakes [19] remain activated.
•To start up again after stopping, you should slowly release the brake lever [7b] on the left of the handlebar while simultaneously turn-
ing the throttle handle [1] to start travel.
Longer stop
•Use both brake levers [7a/7b] to brake the e-pilot to a standstill.
•Keep one of the two brake levers [7a or 7b] applied and apply the brakes on your wheelchair.
•Once you have applied the brakes on your wheelchair:
Lock the brake lever [7b] on the left of the handlebar, as described in chapter 2.7.
Starting up after a longer stop
•Release the brakes on your wheelchair.
•First pull on brake lever [7a] and then release the locking mechanism on brake lever [7b].
•Manually apply brake lever [7b].
•Now slowly release brake lever [7b] while simultaneously turning the throttle handle [1] to start travel.
In general, whenever you stop for a longer period of time, you should lock brake lever [7b] and apply the brakes on
your wheelchair.
This is particularly true when on inclines and gradients.
This reduces the risk of inadvertently rolling away.
If stopping for a longer period of time on a slope:
If possible, position the e-pilot and wheelchair at right angles to the incline or gradient and apply all the brakes.
If the e-pilot is no longer attached to the wheelchair, lock the brake with brake lever [7b].
3. Battery pack
Before starting up the e-pilot and before charging the battery pack, read and observe the general information and instructions and the
safety instructions and precautions in chapters 3.5.4 to 3.5.6. Failure to comply with the safety precautions and instructions may damage
the product or result in electric shock, fire and/or serious injuries. The lithium-ion battery pack contains chemical substances that may
cause hazardous reactions if the safety instructions specified here are disregarded. Alber GmbH cannot be held liable for damage caused by
non-compliance with the general information and safety instructions.
Due to the applicable transport regulations, the battery pack is only charged to a maximum of 30 percent on delivery.
You should therefore charge it fully before using it for the first time (see chapter 3.5).
i

12
3.1 Displays on the battery pack
The display with button [12] and the LED display [45] are located on the front of the
battery pack.
Button [12]
Button [12] includes the functions
•“Wake up” battery pack (see chapter 3.4)
•Display the battery pack’s residual capacity (as described below)
Capacity of battery pack
The LED display [45] can show the current residual capacity of the battery.
Activate the display by pressing button [12].
The following indications mean:
•5 LEDs light up – the battery pack is charged to 100%.
•4 LEDs light up – 80 to 99% residual capacity available
•3 LEDs light up – 60 to 79% residual capacity available
•2 LEDs light up – 40 to 59% residual capacity available
•1 LED lights up – 20 to 39% residual capacity available
•1 LED flashes – maximum 19% residual capacity available
We strongly recommend that you do not cover expansive distances without previously
charging the battery pack.
The capacity of the battery pack is also shown on the display [3] on the handlebar of the
e-pilot.
3.2 Removing the battery pack
In general, the battery pack [13] remains on the e-pilot at all times. However, if you
need to remove it (for example for transportation), proceed as follows.
•Insert the key [15] into the battery lock [16].
•Release the battery lock [16] by turning the key [15] backwards (towards the driver).
•First swivel the bottom end of the battery pack [13] out of the mount [14] and then
pull it down and completely out.
•Set down the battery pack [13] in a suitable location (see also the relevant informa-
tion in chapter 3.5.7).
•Turn the key [15] slightly forwards again (away from the driver) and pull it out.

8
13
3.3 Inserting the battery pack
If you have removed the battery pack [13], you have to insert it back into the battery
holder [14] before starting up the e-pilot.
•Turn the key [15] forwards.
•Slide the battery pack [13] at an angle upwards into the battery holder [14], as shown
in the diagram here. Then swivel the bottom end into the battery holder [14]. The bat-
tery pack must snap audibly into place.
•If the battery holder has not snapped into place correctly:
Check that the key [15] has been turned forwards and push on the battery pack again
forcefully until it snaps into the battery holder [14].
•It must no longer be possible to remove the battery pack from the battery holder [14].
•We recommend removing the key [15] from the battery lock [16] to prevent undesired
removal of the battery pack (e.g. theft).
These few steps mean that your e-pilot is once again ready for use.
3.4 Switching on the battery pack
If the e-pilot is not in operation for more than 24 hours, the battery pack automatically
switches to sleep mode to save energy. To activate it again, briefly press the info button
[12] on the battery pack’s display.
•When the battery pack is activated, the LEDs [45] indicate the current charge status.
•If none of the LEDs [45] lights up, the battery pack has to be charged (see chapter 3.5)
15

14
3.5 Charging the battery pack
The battery can be charged with the battery pack attached to the e-pilot or when it has
been removed from the e-pilot.
Before charging the battery pack [13], read the information on the charging process
in chapters 3.5.4 to 3.5.6 and then carry out the charging process as described in the
instructions and information in the separate, enclosed operating manual for the charger.
3.5.1 Connecting the charging plug to the battery pack
•Pull the rubber cover off the charger socket [10].
•Insert the charging plug [25] into the charger socket [10]. The white marking on the
charging plug (position [A] in the diagram here) should be facing forward.
•Carry out the charging process.
•After charging, disconnect the charging plug [25] from the charger socket [10] and
disconnect the mains plug [26] from the mains socket.
•Replace the rubber cover on the charger socket [10].
3.5.2 Displaying the charge status
The five LEDs on the LED display [45] indicate the charge status of the battery pack once
the charging process begins. Each LED corresponds to about 20% capacity.
If the battery charge is under 19%, the first LED flashes. When the battery is fully
charged, all five LEDs light up.
3.5.3 Fault indication during charging
If a fault occurs during the charging process, the red LED flashes on the charger [23] and
the green LED is out. Check the following:
•The mains plug [26] for the charger must be connected properly to a live mains socket
•The charging plug [25] for the charger must be connected properly to the battery pack
If charging is still not possible and the red LED on the charger is still flashing, there is a
serious fault. End the charging process and contact your specialist dealer without delay.
During the charging process, the e-pilot can be switched on, but
travel is not possible.
If the battery pack is on the e-pilot during charging, switch off the
system before starting the charging process. The e-pilot must also
be secured against inadvertently rolling away by applying the lock-
ing mechanism [6] to the brake lever [7b] and the wheelchair must
be secured by applying the parking brakes.
If the e-pilot is not used for a longer period of time (more than one
day) the battery pack should not remain on the charger the whole time.
In general, check the charge status of the battery pack before using
the device. The battery pack should be fully charged at the start of
your trip.
Always recharge the battery pack fully. Only interrupt the charging
process in an emergency.
LEDs Battery capacity
0 - 19 %
20 - 39 %
40 - 59 %
60 - 79 %
80 - 99 %
100 %
i
!
!
i

8
15
3.5.4 General information on charging the battery pack
•Do not charge the battery pack in the presence or vicinity of flammable liquids or gases.
•In the (unlikely) event of the battery pack overheating or catching on fire, you must ensure that the battery does not come into con-
tact with water or other liquids. The only suitable extinguishing agent that is recommended by the battery manufacturers is sand.
•Do not carry out the charging process in rooms where moisture may affect the battery pack.
•Carry out the charging process with the wheelchair in a location that has at least twice the space required by the wheelchair itself and
that provides sufficient ventilation, in order to avoid the danger of flammable gas accumulating.
•Explosive gases may form during charging. Keep the wheelchair and charger away from sources of ignition, such as flames and sparks.
•Never charge the battery pack at temperatures under 0 °C or over 45 °C.
3.5.5 Safety instructions for the charger and charging process
•Switch off the system before starting the charging process. If the battery pack is charged directly on the e-pilot, the e-pilot (and the
wheelchair, if attached) should be secured using the brakes to prevent it inadvertently rolling away.
•Only use the enclosed charger to charge the battery pack. The charging process ends automatically when the battery pack is fully
charged. Overcharging is therefore not possible.
•Do not use any other charger than the one supplied by Alber.
•Do not charge any other batteries with the charger; only charge the e-pilot battery pack.
•If the e-pilot is not used for a longer period of time (more than one day) the charger should not remain on the e-pilot the whole time.
Disconnect the charger from the battery pack first before disconnecting it from the mains socket.
•Do not expose the charger to moisture of any kind during charging (water, rain water, snow, etc.).
•Be aware of condensation. If the charger is brought from a cold area into a warm room, condensation may occur on and in the device.
In this case, refrain from using the charger until all condensation has dissipated. Please note that this may take several hours.
•Do not carry out the charging process in rooms where moisture may affect the charger.
•Never carry the charger by its power cable or the charger cables.
•Never tug at the power cable to disconnect the charger from the mains socket.
•Lay the mains cable and charging cable so that no-one can tread on them or trip over them. Do not expose the two cables to any other
harmful influences or stresses.
•Do not operate the charger if the power cable, the charging cable or the plugs attached to the cables are damaged. Damaged parts must
be replaced immediately by a specialist dealer that has been authorised by Alber.
•Do not use or disassemble the charger if it has received a hard blow or was dropped or damaged in some other way. Take the damaged
charger to a specialist dealer that has been authorised by Alber to perform repairs.
•The charger must not be used by young children.
•The charger is designed to operate only with mains alternating voltage of 207 V to 264 V.
•Never attempt to disassemble or modify the charger.
•Do not cover the charger during the charging process or place any objects on top of the device.
•Never subject cable and plug to any pressure. Overstretching or bending the cable, pinching cables between a wall and a window frame
or placing heavy objects on a cable or a plug may result in electric shock or fire.
•Never connect the two terminals of the charging cable to any metal objects.
•Ensure that the mains plug is firmly inserted in the socket.
•Do not touch the mains plug or the charging cable plug with wet hands.
•Do not use the plug of the charger and/or the mains plug if they are wet or dirty. Before inserting them, clean the plugs using a dry
cloth.
•Once the charging process is complete, first disconnect the charging plug from the socket on the battery pack and then disconnect the
plug of the charger from the mains socket.
•Ensure that no moisture can get into the charger socket [10] on the battery after the charger is disconnected.
Before and after charging, ensure that the charger plug [25] and the charger socket [10] on the battery pack are
clean and that there are no metallic particles. If there are any metallic particles, remove these with a clean, dry
cloth to prevent the risk of a short circuit or loss of contact.

16
3.5.6 Safety instructions for the battery pack
•Before the e-pilot is used for the first time, the battery pack should be fully charged.
•The e-pilot must only be used at temperatures between -25 °C and +50 °C.
•Never charge the battery pack at temperatures below 0 °C or above 45 °C. If you attempt a charging process outside of this temperat-
ure range, the charging process will be automatically aborted.
•The battery pack must not be exposed to heat (e.g. radiators) or fire. External heat exposure can lead to the battery pack exploding.
•In the (unlikely) event of the battery pack overheating or catching on fire, you must ensure that the battery pack does not come into
contact with water or other liquids. The only suitable extinguishing agent that is recommended by the cell manufacturers is sand.
•Your e-pilot uses power in all operating modes. Therefore, if possible, fully charge the battery pack after every use.
•The battery pack housing must not be opened or taken apart. Improper opening or wilful destruction carries a danger of serious injury.
In addition, opening the battery voids any warranty claim.
•Never connect the battery pack socket [25] to metallic objects, and ensure that the contacts do not come into contact with metallic
objects (for example with metal filings).
•If the socket [25] is dirty, clean it with a clean and dry cloth.
•Never immerse the battery pack in water.
•If damaged or defective, the battery pack must be checked. Please contact your specialist dealer to learn about the proper procedure
that must be used for returns and repairs (see also chapter 3.5.8).
•If the battery pack is defective or damaged, you must not use the e-pilot under any circumstances. Contact your specialist dealer about
a repair.
•Always ensure that the battery pack is kept clean and dry.
3.5.7 Storing the battery pack
•The service life of a battery pack is partly dependent on its storage location. Therefore do not leave the battery pack or the e-pilot in
hot locations for prolonged periods. In particular, use the boot of a car parked in the sun only for transport rather than as a storage
location.
•Store the battery pack and the e-pilot in a cool and dry location where they are safe from damage and unauthorised access.
•To achieve the optimum service life, store the battery pack at a temperature from 18 °C to 23 °C, an air pressure of 500 to 1060 hPa,
and a humidity of 0 to 80 per cent. The battery capacity should be at least 50 percent here. Under these conditions, the battery pack
can be stored for up to a year.
•Do not expose the battery pack to moisture of any kind during storage (water, rainwater, snow, etc.).
•Before storing it, charge the battery pack to 50 percent and check its charge status every month. If necessary, charge the battery pack
if the charge status drops to below 50 percent.
3.5.8 Safety instructions and precautions on how to transport and ship the battery pack
•Lithium-ion cells are used in the e-pilot’s battery pack. Transport and shipping of the battery pack are, therefore, subject to all applic-
able statutory requirements, which must be strictly observed.
•The e-pilot battery pack must never be transported by plane, either as hand luggage or as hold baggage (as of January 2018).
•As transport regulations may change annually, we strongly recommend that you consult your travel operator or transport company (e.g.
railway, bus company, shipping company) before you set out on your trip in order to learn about the current applicable regulations.
•If your battery pack is defective, take it personally to your specialist dealer as shipping lithium-ion batteries by post or other carriers is
subject to strict rules and regulations. Once again, we recommend that you contact your specialist dealer in advance.
Make sure you keep the packaging container of the battery pack in case you need to transport it.
Discuss the necessary measures with your specialist dealer before sending the battery pack.
i
Table of contents
Other Alber Mobility Aid manuals