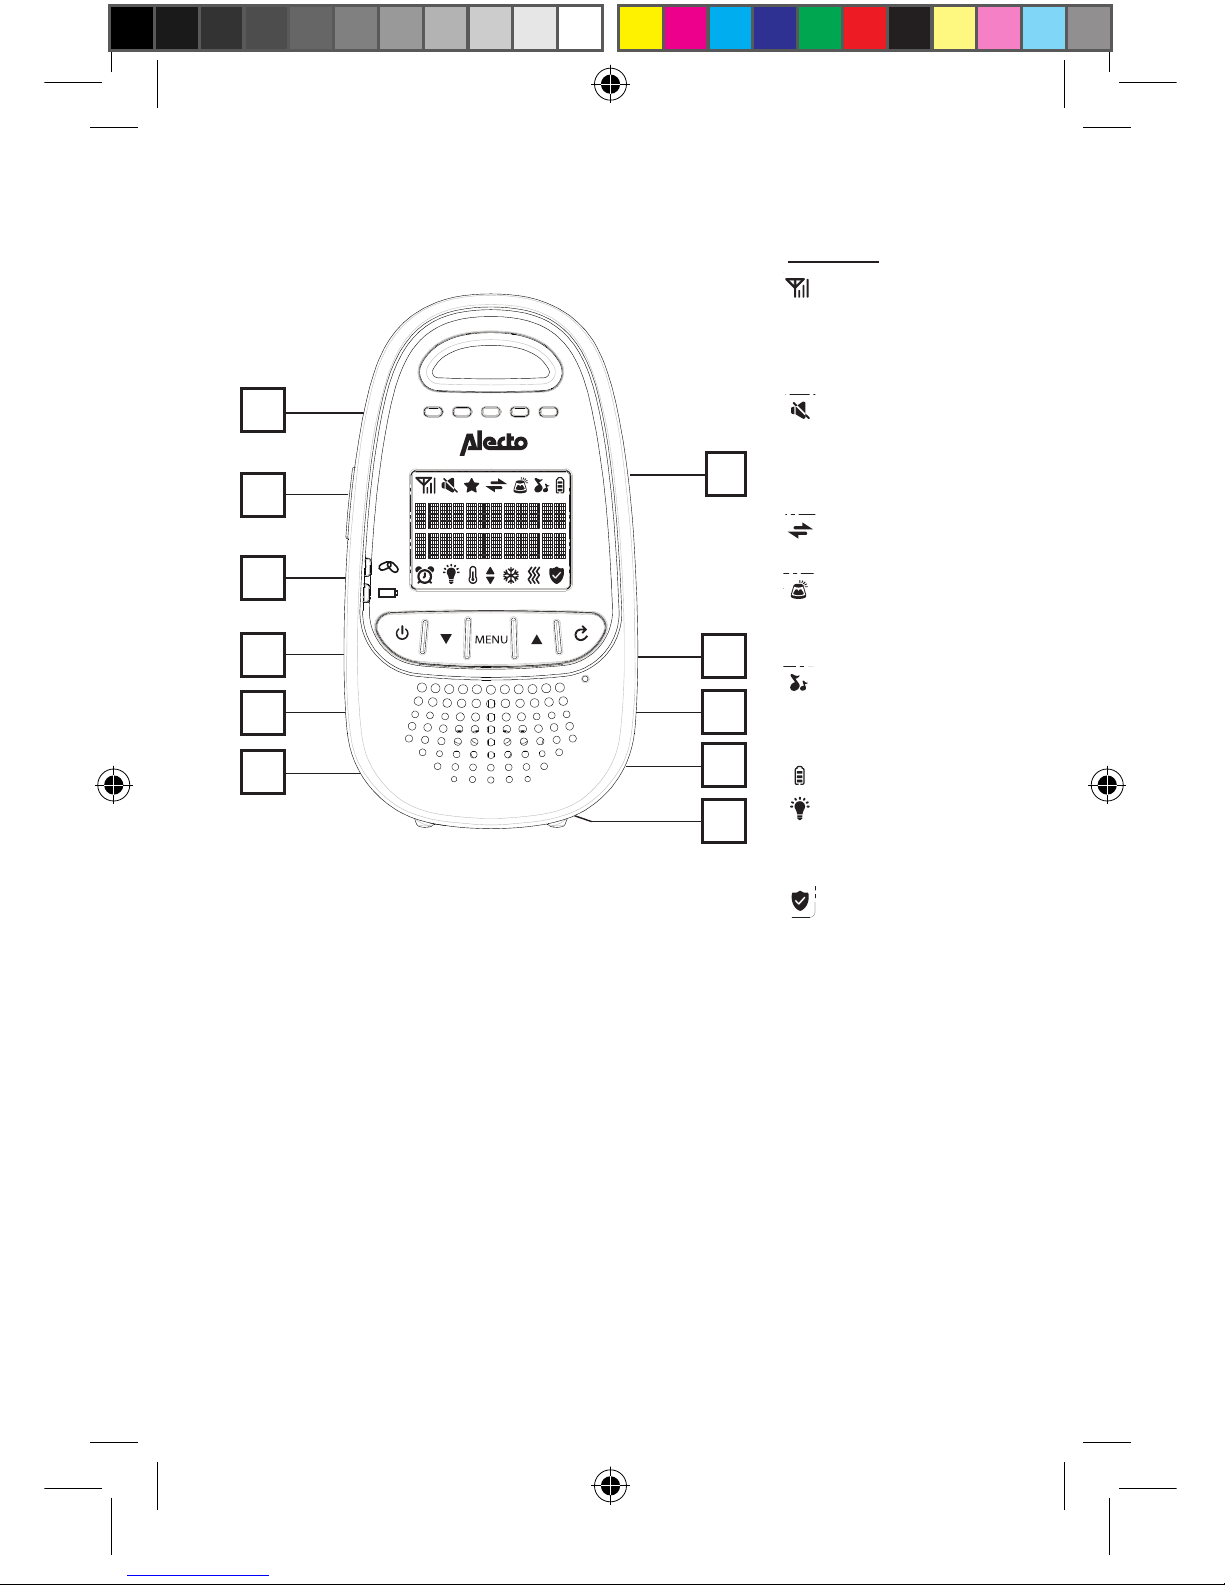
3.3 LISTENING:
Reception volume:
You can set the volume (5 levels + sound off)
with the keys and on the parent unit.
• The set level is indicated by illuminating indica-
tor lights, as well as on the display.
• Upon reaching the maximum or minimum vol-
ume, an extra beep tone will sound when you
press the + or - button.
• The symbol appears on the display when the
volume is set to 0 (no sound)
Optical sound notification:
The indicators on the parent unit illuminate when
the baby unit transmits sound. The louder the
sound that is picked up by the baby unit, the
more indicators on the parent unit illuminate.
3.4 DISPLAY LANGUAGE:
The various notications on the display can be displayed in various
languages. The Dutch language is set as default. You can change the
language as follows:
Press on the key MENU.
Search the option [ TAAL ] with the keys and .
Press on the key MENU.
Search the desired language with the keys
and .
Press on the key MENU to safe the selection.
Press short on the key to nish set up.
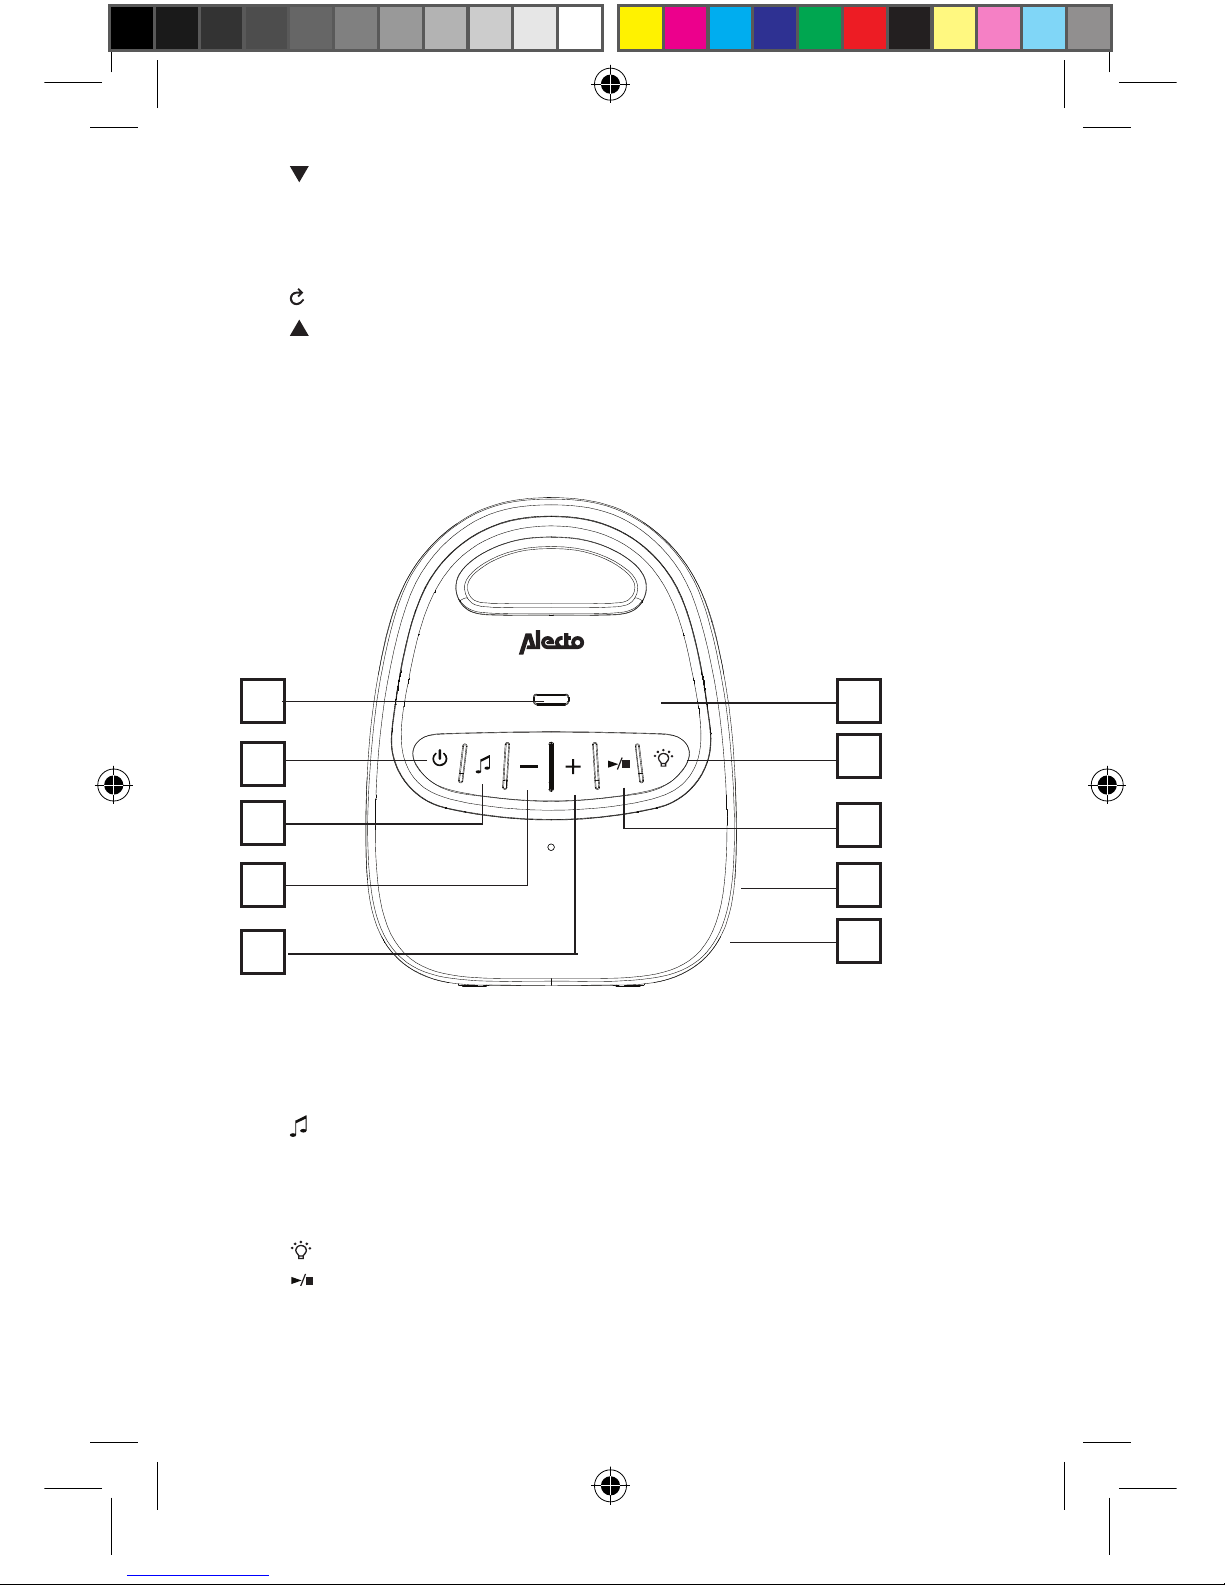
3.5 LULLABIES:
5 different lullabies have been programmed in the baby unit. The selected
lullaby will be plaid during 15 minutes.
On the baby unit, press shortly on the key
5
6
Date : 21JAN2015
BM202_BU Prepared by : Jai Jung
Page 2 of 2
Version :
1.0
Texture / FinishPart Description Color
1
2
Front housing
Back housing
Antenna
Front housing(Seperated piece)
Front housing (LED)
Matte rubberish
3
4
Matte rubberish
Rmax-150
Rmax-150
Rmax-150
5
Rubber keys
6
AT&T White 01
AT&T White 01 (Silkscreen cool gray 11 c)
AT&T White 01 (Silkscreen cool gray 11 c)
Pantone Cool gray 11C (Silkscreen white)
Rmax-150
Pantone Cool gray 11C
Translucent (Milky)
POWER
to
start or stop the playback of the lullaby.
During playback, press on the key to select
another song.
Adjust the playback volume on the baby unit with
the keys - and +.
Indication on the display:
During playback of a lullaby, the symbol
NEW
2015. 07. 03
YGT1-00 2015. 01. 14
2015. 07. 03
PDF "#$% "pdfFactory Pro" &%'()*
ap-
pears on the display, and the title of the lullaby is
displayed.
3.6 SOUND ALERT:
When you have turned off the sound on the parent unit, then you can
enable an alert tone as soon as the baby unit registers loud sounds.
Press on the key MENU.
Search the option [SOUND ALERT] with the keys
and .
Press twice on the key MENU to enable this
function when it was disabled, of disable it when
it was enabled.
Press short on the key to stop set up.
Indicator sound alarm:
A switched on sound alarm is made visible on the
display by illuminating the symbol .
Menu
Menu
2x
- +
5
6
Date : 21JAN2015
BM202_BU Prepared by : Jai Jung
Page 2 of 2
Version :
1.0
Texture / FinishPart Description Color
1
2
Front housing
Back housing
Antenna
Front housing(Seperated piece)
Front housing (LED)
Matte rubberish
3
4
Matte rubberish
Rmax-150
Rmax-150
Rmax-150
5
Rubber keys
6
AT&T White 01
AT&T White 01 (Silkscreen cool gray 11 c)
AT&T White 01 (Silkscreen cool gray 11 c)
Pantone Cool gray 11C (Silkscreen white)
Rmax-150
Pantone Cool gray 11C
Translucent (Milky)
POWER
NEW
2015. 07. 03
YGT1-00 2015. 01. 14
2015. 07. 03
PDF "#$% "pdfFactory Pro" &%'()*
NEW
2015. 07. 03
YGT1-00 2015. 01. 14
2015. 07. 03
PDF "#$% "pdfFactory Pro" &%'()*
DBX99-manual-GB-v1.0.indd 9