6 7
Problema: non si riesce a
riavvitare completamente la
testina.
Soluzione: controllate che
il gruppo lame sia inserito
correttamente (i due segni rossi
devono combaciare).
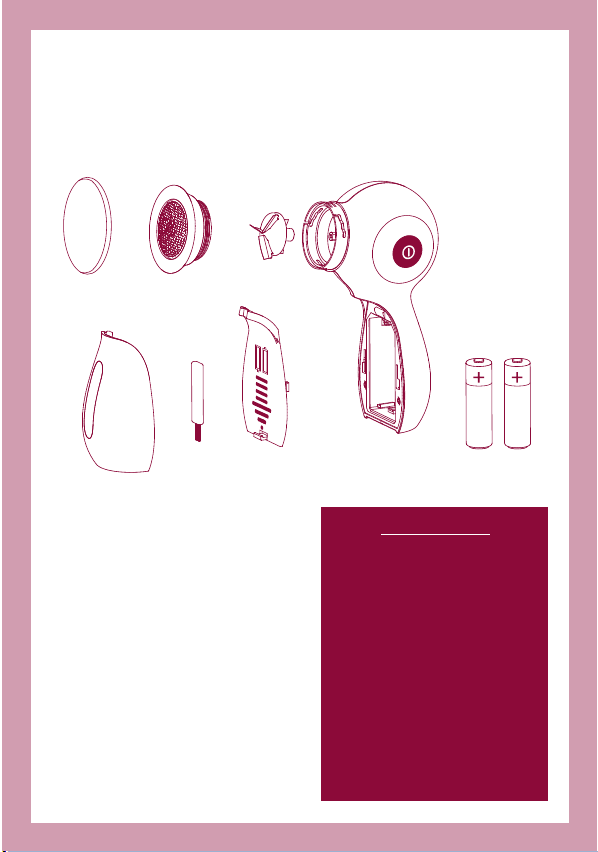
Ricambi
In caso di usura, smarrimento
o danneggiamento, potete
acquistare presso il vostro
rivenditore Alessi di fiducia i
seguenti ricambi:
Ecoperchio proteggi-testina;
Gcoperchio dello scomparto
delle batterie;
Hcontenitore;
Ispazzola di pulizia.
Come pulire la superficie
esterna dell’apparecchio
•Passateunpannoumidoe
asciugate accuratamente con
un panno morbido.
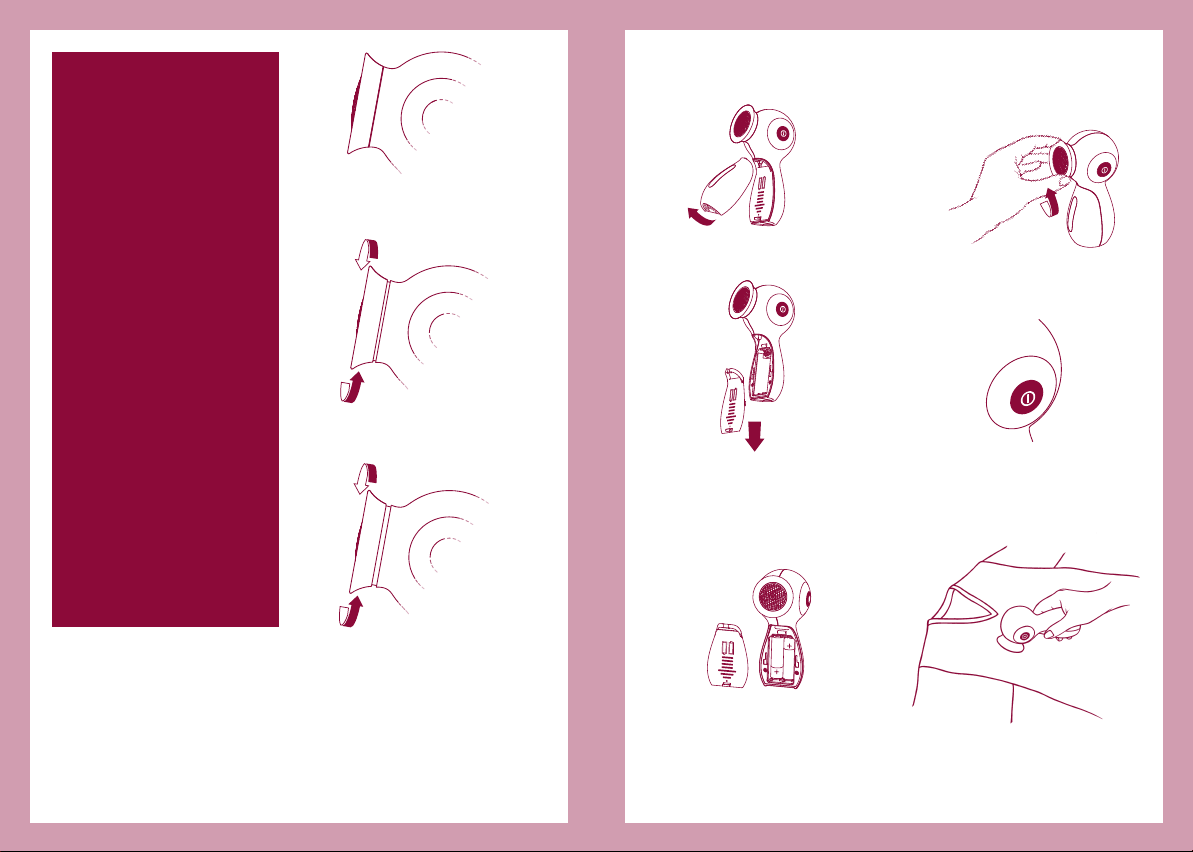
Problemi e soluzioni
Problema: il Levapelucchi non
funziona.
Soluzione: controllate che:
•lebatterienonsianoscariche
e/o siano inserite correttamente;
•ilcanaledelcontenitoree/ola
testina siano puliti;
•latestinasiainserita
correttamente.
Problema: l’apparecchio non
toglie i pelucchi.
Soluzione:
•regolatel’anellodellatestina
in una posizione più bassa;
•fatecontrollaredalvostro
rivenditore Alessi di fiducia
che le lame siano affilate;
•controllatecheilcanaledel
serbatoio e/o la testina siano
puliti.
Problema: il Levapelucchi è
troppo rumoroso.
Soluzione: spegnete
l’apparecchio, togliete le batterie
e controllate che:
•lelamee/olatestinasiano
inserite correttamente;
•controllatecheilcanaledel
contenitore e/o la testina siano
puliti.
ATTENZIONE!
In caso di malfunzionamento
o danneggiamento
dell’apparecchio, spegnetelo,
non usatelo e rivolgetevi al
vostro rivenditore Alessi di
fiducia o al centro assistenza
Alessi.
•Reinseriteilcontenitore.
Come pulire le lame
•
Ruotate completamente
l’anello
regolatore verso
sinistra per togliere la testina
(fig. 12).
•Facendomoltaattenzione,
estraete le lame (fig. 13) e
pulitele con la spazzola.
•Riposizionatelelame,in
modo che i due segni rossi
combacino (fig. 14), e
reinserite la testina ruotandola
verso destra.
•Ilcontenitoreèdotatodiuna
finestra che vi permette di
controllarne il contenuto.
Svuotatelo quando è pieno
per metà.
•Quandononusateil
Levapelucchi, mettete il
coperchio sulla testina per
proteggerla.
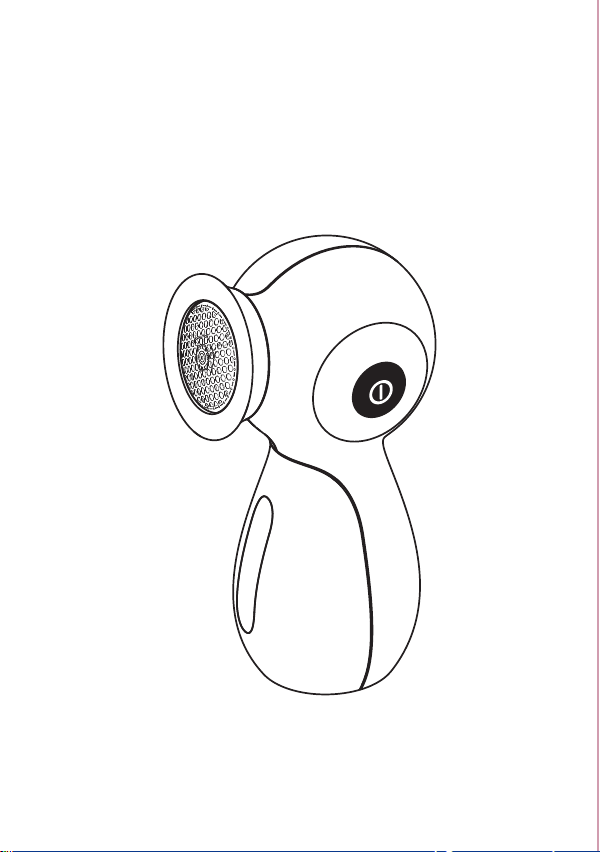
Come prendersi cura
del Levapelucchi
Come svuotare il contenitore
•SpegneteilLevapelucchie
togliete il contenitore.
•Eliminateipelucchiela
lanugine dal contenitore e dal
canale di passaggio (fig. 11).
fig. 11
IMPORTANTE!
Il Levapelucchi è dotato di
un dispositivo di sicurezza
auto-stop che impedisce il
funzionamento delle lame
quando viene tolta la testina.
Vi consigliamo però di
togliereSEMPRElebatterie
prima di ogni operazione di
manutenzione.
fig. 13
fig. 12
fig. 14
Impaginato OK.indd 6-7 11-03-2008 15:20:02