Alfa Romeo GIULIA User manual

Scan
QUICK GUIDE
ENGLISH

The data contained in this publication should be understood as intended to guide you in the correct use of the car.
Alfa Romeo S.p.A. aims at a constant improvement of the vehicles produced. For this reason it reserves the right to make
changes to the model described for technical and/or commercial reasons.
For further information, contact an Alfa Romeo Dealership.
Dear Customer,
We would like to congratulate and thank you for choosing an Alfa Romeo.
This Quick Guide will provide you with the main indications and some recommendations for the use of your car.
This Quick Guide is not a substitute for reading the full Owner Handbook, which is available online, in greater depth.
The figures in this guide are only examples. This might imply that some details of the image do not correspond to the actual arrangement
of your car.
After reading it, you are advised to keep this Quick Guide inside the car, for an easy reference and for making sure it remains aboard the
car should it be sold.
In the attached Warranty Booklet you will also find the description of the Services that Alfa Romeo offers to its customers, the Warranty
Certificate and the detail of the terms and conditions for maintaining its validity.
We are confident that these will bring you closer to your new car and make you appreciate the assistance provided by Alfa Romeo team.
Enjoy reading. Happy driving!

2
ONLINE OWNER HANDBOOK
FCA is committed to protecting the environment and invites you to refer to the Complete Owner Handbook in digital form, via the QR
code on this page or on the internet pages listed below.
Go to the www.mopar.eu/owner website and access your personal area.
The "Warranty and Maintenance" page contains all the information about your car and a link to access eLUM, where you will find all the
details of the online Owner Handbook.
Alternatively, to access this information, go to the Internet website at http://aftersales.fiat.com/elum/.
The eLUM website is free and conveniently allows you to browse the handbooks of all other models of the Group, among many other
things.
Have a nice read and happy motoring!

3
CONTENTS
DASHBOARD ......................................... 5
AUTOMATIC DUALZONE CLIMATE
CONTROL SYSTEM............................... 5
DISPLAY................................................. 6
INSTRUMENT PANEL............................ 6
“HERITAGE” DISPLAY ................................6
“EVOLVED” DISPLAY..................................7
“RELAX” DISPLAY ........................................7
“Race” DISPLAY Quadrifoglio
versions.............................................................7
WARNING LIGHTS AND
MESSAGES............................................ 8
INSTRUMENT PANEL DISPLAY
FAILURE.............................................................8
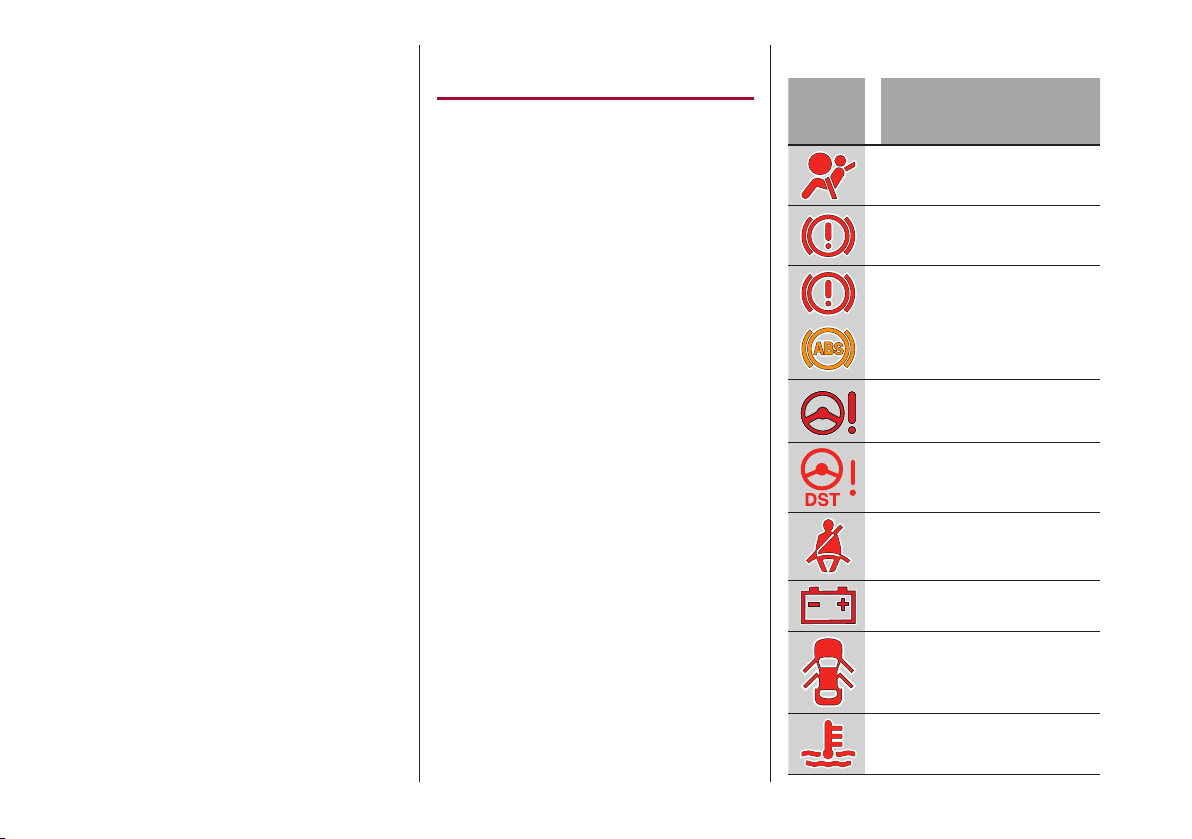
RED WARNING LIGHTS
SYMBOLS.........................................................8
AMBER WARNING LIGHTS
SYMBOLS.........................................................9
GREEN WARNING LIGHTS
SYMBOLS..................................................... 11
BLUE WARNING LIGHTS
SYMBOLS..................................................... 11
WHITE WARNING LIGHTS
SYMBOLS..................................................... 11
LANE KEEPING ASSIST
SYMBOLS..................................................... 11
THE KEYS ............................................12
ELECTRONIC KEY .................................... 12
IGNITION DEVICE................................12
EXTERNAL LIGHTS ............................13
DIPPED BEAM HEADLIGHTS............. 13
DAYTIME RUNNING LIGHTS
DRL Daytime Running Lights
AND SIDE LIGHTS..................................... 13
REAR FOG LIGHT ...................................... 13
PARKING LIGHTS...................................... 13
MAIN BEAM HEADLIGHTS.................. 13
DIRECTION INDICATORS..................... 13
AUTO FUNCTION Dusk sensor ....... 14
TPMS Tyre Pressure Monitoring
System ...............................................14
AUTOMATIC TRANSMISSION ...........15
GEAR LEVER................................................ 15
LEVERS ON THE STEERING
WHEEL............................................................ 15
"ALFA DNA™" SYSTEM ......................16
MANUAL SOS CALL............................17
CHILD RESTRAINT SYSTEMS ...........18
PASSENGER'S FRONT AIRBAG AND
CHILD RESTRAINT SYSTEMS........... 18
DEACTIVATINGACTIVATING
THE PASSENGER SIDE AIRBAGS:
FRONT AIR BAG AND SIDE BAG
(where provided)........................................ 18
REPLACING A BULB............................19
DRIVING TIPS......................................20
TYRE REPAIR KIT................................20
PRELIMINARY OPERATIONS ............ 20
OPT1 KIT DESCRIPTION....................... 20
OPT2 KIT DESCRIPTION....................... 22
FUSES ..................................................26
SCHEDULED SERVICING....................27
SERVICE SCHEDULE
2.9 V6 engine............................................ 27
SERVICE SCHEDULE
2.0 T4 MAir engine ................................ 29
SERVICE SCHEDULE
2.2 JTD engine.......................................... 31
REFILLING ...........................................33
WHEELS...............................................35
COLD TYRE INFLATION
PRESSURES psi/bar............................. 35
CONNECT.............................................36
CONTROLS ON TUNNEL....................... 36
WIDGETS....................................................... 36

4
RADIO TUNER MODE .......................... 37
MEDIA MODE.............................................. 37
PHONE MODE ............................................ 38
NAVIGATION MODE................................ 38
SETTINGS ..................................................... 38
PERFORMANCE ........................................ 39
CAR INFORMATION ................................ 39
ALFACONNECT SERVICES ................ 39
OFFICIAL TYPE APPROVALS ............39
RADIO EQUIPMENT................................. 39
RADIO FREQUENCY DEVICES.......... 39
SUPPLEMENTS
EURO 6B................................................
AUSTRALIA.........................................

5
DASHBOARD
1 9550460
(1) External light switch
(2) Left stalk (external lights/ LDW (Lane
Departure Warning) system/ LKA (Lane
Keeping Assist) system
(3) Instrument panel features
(4) Right stalk (Windscreen wiper)
(5) Right-side steering wheel controls
(interaction with Connect system)
(6) Ignition device (START/STOP
ENGINE)
(7) Left-side steering wheel controls
(Speed Limiter/ Cruise Control/ Active
Cruise Control/ HAS (Highway Assist)
system/ TJA (Traffic Jam Assist) system)
2 9550461
(8) Connect system
(9) Automatic dual-zone climate control
system
(10)12V Power socket/ USB port
3 9550462
(11)Gear lever
(12)Rotary Pad/ Connect system
interaction controls
(13)Alfa DNA™ Pro system selector
(14)Electric Parking Brake (EPB)
AUTOMATIC DUALZONE
CLIMATE CONTROL SYSTEM
4 04156S0770EM
(1) Left-side temperature
(2) AUTO Automatic operation (left side)
(3) Left-side air distribution
(4)
MAX
MAX-DEF function (rapid
defrosting/demisting)
(5) Fan speed
(6) Heated rear window
(7) Right-side air distribution
(8) AUTO Automatic operation (right
side)
(9) Right-side temperature
(10)SYNC alignment of set temperatures
(left-side/right-side)
(11) Right heated seat (where provided)
(12)A/C Climate control compressor on

6
(13) Heated steering wheel (where
provided)
(14) Left heated seat (where provided)
(15) Internal air recirculation/
automatic function selection
DISPLAY
5 9550237
The following information can be shown on
the instrument panel display, fig.8:
(1) Customisable notification area, main
beam/dipped beam, side lights, rear fog
lights icons, second instantaneous speed
display ("Evolved” display only).
(2) Instantaneous speed (numerical),
driving assistance system notification
icons
(3) Customisable notification area,
engine torque/External temperature
display
(4) Gear shift indicator (GSI)/Automatic
transmission information
(5) Menu title, screen navigation
indications (e.g.: reset counters,
customisation of information display, etc.)
(6) Main screen with driving assistance
system notifications/Car speed display
(7) Operating mode display: Dynamic,
Natural, Advanced Efficiency, Race (where
provided)
INSTRUMENT PANEL
“HERITAGE” DISPLAY
6 9550238
7 9550239

7
“EVOLVED” DISPLAY
8 9550412
9 9550413
“RELAX” DISPLAY
10 9550414
11 9550415
“Race” DISPLAY Quadrifoglio versions
12 9550416
13 9550417
Information shown:
(1) Speedometer (excluding "Relax”
display)
(2) Driving assistance system
indications/ Customisable notification
area ("Relax" display only)/ Instantaneous
speed display ("Relax" display only)

8
(3) Digital fuel level gauge, SBA (Seat
Belt Alert) system indications, TPMS (Tyre
Pressure Monitoring System) notification
icon
(4) Tachometer
(5) Customisable and notification area
with pop-ups
(6) Notification icon display area
(7) Digital engine oil temperature
indicator
(8) Longitudinal/lateral acceleration
trend display, considering gravity
acceleration as a reference unit. Lateral
acceleration peaks are also displayed
("Race" display only)
WARNING LIGHTS
AND MESSAGES
WARNING The instrument panel warning
lights/symbols are accompanied
by a dedicated message and/or
acoustic warning where applicable.
These indications are indicative and
precautionary and as such must not
be considered as exhaustive and/or
alternative to the information contained
in the online Owner Handbook, which you
are advised to read carefully in all cases.
Always refer to the information in this
section in the event of a failure indication.
WARNING Causes of ignition and actions
to be taken are illustrated in detail in the
online Owner Handbook. However, the
following actions are briefly outlined in
this Quick Guide:
(*) Contact an Alfa Romeo Dealership
(**) Repair immediately using the dedicated
‘‘Tirekit’’ kit and contact an Alfa Romeo
Dealership
INSTRUMENT PANEL DISPLAY FAILURE
All warning lights remain off in the event of
an instrument panel display failure. In this
case, contact an Alfa Romeo Dealership.
RED WARNING LIGHTSSYMBOLS
Warning
Light/
Symbol
Meaning
AIRBAG FAILURE (*)
INSUFFICIENT BRAKE FLUID
(*)/ ELECTRIC PARKING BRAKE
ON
EBD FAILURE (*)
POWER STEERING FAILURE
ALFA™ SYSTEM STEERING
TORQUE (AST) FAILURE
SEAT BELTS REMINDER
ALTERNATOR FAILURE (*)
DOORS OPEN
COOLANT TEMPERATURE TOO
HIGH (*)

9
Warning
Light/
Symbol
Meaning
BONNET NOT PROPERLY SHUT
LUGGAGE COMPARTMENT
NOT PROPERLY SHUT
LOW ENGINE OIL PRESSURE (*)
LOW ENGINE OIL LEVEL/ OIL
OVER MAXIMUM LEVEL (*)
ENGINE OIL TEMPERATURE
TOO HIGH (*)
AUTOMATIC TRANSMISSION
FAILURE (*)
DAA SYSTEM ACTIVATION
SPEED LIMIT EXCEEDED
BRAKE DISC TEMPERATURE
AMBER WARNING LIGHTSSYMBOLS
Warning
Light/
Symbol
Meaning
ABS FAILURE (*)
Warning
Light/
Symbol
Meaning
ELECTRIC PARKING BRAKE
FAILURE (*)
ESC SYSTEM INTERVENTION/
ESC SYSTEM FAILURE (*)/
HILL STARTASSIST SYSTEM
FAILURE (*)
PARTIAL/TOTAL
DEACTIVATION OF ACTIVE
SAFETY SYSTEMS
EOBD/ INJECTION SYSTEM
FAILURE (*)/ DAMAGED
CATALYTIC CONVERTER
AdBlue® (UREA) INJECTION
SYSTEM FAILURE (Diesel
versions) (*)
TPMS SYSTEM FAILURE (**)/
TYRE PRESSURE LOW
REAR FOG LIGHT
GLOW PLUG PREHEATING/
GLOW PLUG PREHEATING
FAILURE (*)
FUEL CUT-OFF SYSTEM
OPERATION
Warning
Light/
Symbol
Meaning
LANE DEPARTURE
WARNING(*)/ LANE KEEPING
ASSIST FAILURE (*)
FUEL RESERVE/ LIMITED
RANGE
LOW WINDSCREEN WASHER
LEVEL
WINDSCREEN WIPER FAILURE
(*)
ACTIVE CRUISE CONTROL
SYSTEM FAILURE (*)
PARK SENSORS SYSTEM
FAILURE (*)
FORWARD COLLISION
WARNING (FCW) SYSTEM
FAILURE (*)
START&STOP EVO SYSTEM
FAILURE (*)
SPEED LIMITER FAILURE (*)
DPF CLEANING IN PROGRESS/
GPF CLEANING IN PROGRESS/
GPF FAILURE (*)
FORWARD COLLISION
WARNING (FCW) SYSTEM OFF

10
Warning
Light/
Symbol
Meaning
BLIND SPOT MONITORING
SYSTEM FAILURE
ENGINE IMMOBILIZER
SYSTEM FAILURE (*)/ BREAK-
IN ATTEMPT/ ALARM FAILURE
(*)
AdBlue® (UREA) LEVEL LOW
WATER IN DIESEL FILTER (*)
RAIN SENSOR FAILURE (*)
BRAKE PAD WEAR (*)
CARBO-CERAMIC BRAKE
(CCB) DISC WEAR (*)
KEYLESS STARTSYSTEM
FAILURE (*)
POSSIBLE ICE ON ROAD
ENGINE OIL DEGRADED (*)
FUEL CUT-OFF SYSTEM
FAILURE (*)
Warning
Light/
Symbol
Meaning
EXTERNAL LIGHT FAILURE (*)
AUTOMATIC MAIN BEAM
HEADLIGHTS FAILURE (AHB)
(*)
DUSK SENSOR FAILURE (*)
FUEL LEVEL SENSOR FAILURE
(*)
ENGINE OIL LEVEL SENSOR
FAILURE (*)
GENERIC FAILURE (*)
ABS ACTIVATION
DYNAMIC TRACTION
CONTROL SYSTEM FAILURE (*)
ALL-WHEEL DRIVE FAILURE (*)
TEMPORARY ALL-WHEEL
DRIVE FAILURE (*)
DAA SYSTEM FAILURE (*)
HAS SYSTEM (*)/ TJA SYSTEM
FAILURE (*)
Warning
Light/
Symbol
Meaning
SHOCK ABSORBERS (ADC)
FAILURE (*)
SOFT SUSPENSION
CALIBRATION
SUSPENSION CALIBRATION
CHANGE
TRANSMISSION FLUID
OVERHEATING (*)
ENGINE OIL PRESSURE
SENSOR FAILURE (*)
TRAILER LIGHT CONTROL
MODULE FAILURE (*)
FUEL TANK CAP NOT CLOSED
AFS SYSTEM FAILURE (*)
DIPPED BEAM AUTOMATIC
ADJUSTMENT FAILURE

11
GREEN WARNING LIGHTSSYMBOLS
Warning
Light/
Symbol
Meaning
SIDE LIGHTS AND DIPPED
BEAM HEADLIGHTS
FOG LIGHTS
DIRECTION INDICATORS
START&STOP EVO SYSTEM
OPERATION
AUTOMATIC DIPPED BEAM
HEADLIGHTS
DIPPED BEAM HEADLIGHTS
CRUISE CONTROL ACTIVATION
ACTIVE CRUISE CONTROL
(ACC) ACTIVATION
SPEED LIMITER ACTIVATION
BLUE WARNING LIGHTSSYMBOLS
Warning
Light/
Symbol
Meaning
MAIN BEAM HEADLIGHTS
ACTIVE
AUTOMATIC MAIN BEAM
HEADLIGHTS ACTIVE
WHITE WARNING LIGHTSSYMBOLS
Warning
Light/
Symbol
Meaning
AUTOMATIC DIPPED BEAM
HEADLIGHTS LIT
AUTOMATIC DIM HIGH BEAMS
LIT
GEAR SHIFT INDICATOR
(SINGLE GEAR SHIFT
SUGGESTION)
GEAR SHIFT INDICATOR
(DOUBLE GEAR SHIFT
SUGGESTION)
LANE KEEPING ASSIST SYMBOLS
Symbol
on the
display
Meaning
SENSOR NOT AVAILABLE
SYSTEM ON
SYSTEM ON (only one side line
detected)
CAR CLOSE TO SIDE LINE
CROSSING SIDE LINE

12
THE KEYS
1)
ELECTRONIC KEY
ATTENTION
1) Do not swallow the battery. Danger of
chemical burns. The keys contain a small
battery. If the battery is swallowed, it
can cause severe internal burns in just 2
hours and cause death. Keep new and used
batteries out of the reach of children. If
the battery compartment does not close
securely, discontinue use of the product and
keep it out of reach of children. If you believe
that batteries may have been swallowed
or inserted inside the body, seek medical
attention immediately. The emergency
key (where provided) must be immediately
inserted into the electronic key to prevent
easy access to the battery.
IGNITION DEVICE
2) 3) 4)
14 04026S0001EM
STOP: engine off, steering column
locked.
ON (single button press): all electrical
devices are available.
AVV: engine starting.
ATTENTION
2) Always take the key with you when
you leave your car to prevent someone
from accidentally operating the controls.
Remember to engage the electric parking
brake. Never leave children unattended in
the car.
3) Before leaving the car, ALWAYS engage
the electric parking brake. Activate mode P
(Park) and press the ignition device to set it
to STOP. When leaving the car, always lock
all the doors by pressing the button on the
handle.
4) For versions equipped with the Keyless
Start system, do not leave the electronic key
inside or near the car or in a place accessible
to children. Do not leave the car with the
ignition device in ON position. A child could
activate the electric window winders, other
controls or even start the car.

13
EXTERNAL LIGHTS
15 9550200
DIPPED BEAM HEADLIGHTS
Turn the light switch (1) fig.15 to to
switch on the side lights, the lights on the
instrument panel and the dipped beam
headlights.
The warning light switches on in the
instrument panel.
DAYTIME RUNNING LIGHTS
DRL Daytime Running
Lights AND SIDE LIGHTS
(where provided)
5) 6)
With the ignition device turned to ON and
the light switch (1) fig.15 turned to the O
position, the daytime running lights, the
rear light clusters and the number plate
lights are automatically activated.
REAR FOG LIGHT
Press the button (2) fig.15 to switch the
light on.
PARKING LIGHTS
They are switched on if, within a few
seconds from stopping the engine, the
light switch (1) fig.15 is taken first to the
Oposition and then to position .
The warning light switches on in the
instrument panel.
MAIN BEAM HEADLIGHTS
To activate the fixed main beam headlights
push the left lever towards the instrument
panel fig.16. The light switch must be
turned to AUTO or .
With main beam headlights on, the warning
light/icon on the instrument panel will
come on.
The main beam headlights are switched by
pushing the left stalk forward again.
16 9550234
DIRECTION INDICATORS
Move the left stalk fig.16 to the end of its
travel (unstable position):
upwards: activates the right direction
indicator;
downwards: activates the left
direction indicator.
Warning light or will blink on the
instrument panel
"Lane Change" function
When you want to signal the change of the
driving lane, move the lever until the first
impulse (about half stroke).
The direction indicator on the side
selected will be activated for 3 flashes and
then go out automatically.

14
AUTO FUNCTION Dusk sensor
This function switches the headlights
on/off automatically according to the
environmental light.
With the ignition device ON, turn the light
switch (1) to fig.15 the AUTO position.
ATTENTION
5) The daytime running lights are an
alternative to the dipped headlights for
driving during the daytime in countries
where it is compulsory to have lights on
during the day; where it is not compulsory,
the use of daytime running lights is
permitted.
6) Daytime running lights cannot replace
dipped beam headlights when driving at
night or through tunnels. The use of daytime
running lights is governed by the highway
code of the country in which you are driving.
Comply with legal requirements.
TPMS Tyre Pressure
Monitoring System
(where provided)
7) 8) 9) 10) 11)
1)
The TPMS signals the driver a possible
insufficient pressure if this falls below the
warning limit for any reason, including the
effects of low temperature and normal
loss of pressure from the tyre.
The TPMS will stop indicating insufficient
tyre pressure when it is equal to or
greater than the prescribed cold inflation
pressure.
If insufficient tyre pressure is indicated
( symbol shown on the instrument
panel), increase the inflation pressure up
to the prescribed cold inflation value.
Once the system receives the updated
inflation pressures, it will automatically
update and the symbol will turn off.
The car might need to be driven at a
speed higher than about 25km/h up to
20 minutes for theTPMS to receive this
information.
To view TPMS information on the Connect
system display, and activate the "Car
information" function, fig.17 using the
corresponding widget in the Main Menu.
17 12126S2305EM
If the inflation pressure corresponds to
the correct value, "OK" will appear on the
display, otherwise "KO" will appear.
Press the graphic button (1) fig.18 on the
display of the Connect system to see the
screen showing the inflation pressures of
each tyre.

15
18 12126S2310EM
ATTENTION
7) The presence of the TPMS does not
permit the driver to neglect regular checks
of the tyre pressure, including for the spare
tyre, and correct maintenance: the system is
not used to signalling a possible tyre fault.
8) Tyre pressure must be checked with tyres
rested and cold. Should it become necessary
for whatever reason to check pressure with
warm tyres, do not reduce pressure even
though it is higher than the prescribed value.
Repeat the check when the tyres are cold.
9) Should one or more wheels be fitted
without sensors, the system will no longer
be available and a warning message will
be shown on the display, until wheels with
sensors are fitted again.
10) The TPMS cannot indicate sudden tyre
pressure drops (e.g. if a tyre bursts). In this
case, stop the car, braking with caution and
avoiding abrupt steering.
11) Changes in external temperature may
cause tyre pressures to vary. The system
may temporarily indicate insufficient
pressure. In this case, check the tyre
pressure when cold and, if necessary,
restore the inflation values.
WARNING
1) The Tyre Repair Kit, provided with the car,
is compatible with the TPMS sensors. Using
sealants different from that in the original
kit may compromise its operation. If sealants
not equivalent with the original one are used,
it is recommended to have theTPMS sensor
operation checked by a qualified repair
centre.
AUTOMATIC TRANSMISSION
12)13) 14) 15)
GEAR LEVER
19 07076V0686EM
P= Park
R= Reverse
N= Neutral
D= Drive (automatic forward speed)
AutoStick:
• + shifting up in sequential driving
mode
• – shift down in sequential driving
mode
LEVERS ON THE STEERING WHEEL
(where provided)
Left shift paddle (-): pull the left shift
paddle towards the steering wheel and
release it to shift down.

16
Right shift paddle (+): pull the right shift
paddle towards the steering wheel and
release it to shift up.
To engage N (Neutral), pull both levers
simultaneously.
To activate D (Drive) mode, from N
(Neutral), P (Parking) and R (Reverse)
position: push the brake pedal and the
right paddle (+).
Deactivation: To deactivate the sequential
driving bring the gear lever back in
position D (Drive) ("automatic“ mode).
20 9550205
ATTENTION
12) Never use position P (Park) instead of
the electric parking brake. Always engage
the electric parking brake when parking the
car to avoid the accidental movement of
the car.
13) If the P (Park) position is not engaged,
the car could move and injure people. Before
leaving the car, make sure that the gear
lever is in position P and that the electric
parking brake is engaged.
14) Do not shift the gear lever to N (Neutral)
and do not stop the engine when driving
on a downhill road.This type of driving
is dangerous and reduces the possibility
of intervening in the case of variation of
the road traffic or surface. You risk losing
control of your car and causing accidents.
15) NEVER leave children unattended
inside the car, let alone leave the car with
the doors unlocked in a place that children
can access easily. Children may seriously, or
even fatally, injure themselves. Also ensure
that children do not inadvertently operate
the electric parking brake, the brake pedal
or the gear lever.
"ALFA DNA™" SYSTEM
21 04026S0997EM
By using the selector fig.21 on the central
tunnel, different response modes to be
selected according to driving style and
road conditions.
d= Dynamic (sports driving mode)
n= Natural (mode for driving in normal
conditions)
a= Advanced Efficiency (driving mode
for maximum fuel savings)
RACE (where provided) = track race
driving mode
(where provided) = changes the
suspension setting

17
MANUAL SOS CALL
(for versions/markets where provided)
This is designed to provide support in the
event of an accident and/or emergency
(SOS) the function is activated:
automatically in the event of a major
collision recorded by the device aboard
the car;
manually, by pressing the SOS button
located on the ceiling light fig.22 or by
means of the appropriate menu fig.23
on the Connect system (for versions/
markets, where provided).
22 04136S0073EM
23 12126S2330EM
WARNING If the SOS emergency service
is activated, the call will be routed
automatically to a private call centre.We
hereby specify that, whenever the SOS call
is referred to the text, the SOS call is to
be considered managed by private service
providers.This SOS call service is not the
e-call system.
If the system is unable to establish the
voice call, or the line disconnects due to
insufficient coverage, the SOS service will
try to call the operational centre again for
5 minutes.
Privacy: GPS location is always active for
SOS. Deactivating it via the menu items
in the "Settings" menu of the Connect
system will make some with other services
unavailable (see the "Settings" chapter of
the Connect system for more details).
WARNING The icon is shown at the bottom
left of the Connect system display when
the geolocation function is active (ON).
When geolocation is on, the vehicle
position is tracked to enable the functions
that require it. When geolocation is off,
the vehicle position is only tracked by the
navigation, safety, insurance and driver
assistance systems (where provided). See
the Connect system "Settings" chapter to
deactivate the function.
WARNING Malfunctions of the SOS call
system are indicated when the engine is
started, when the malfunction is detected
and by a corresponding message on the
Connect system display. Contact an Alfa
Romeo Dealership as soon as possible.
WARNING Ignoring malfunction warnings
displayed by the Connect system for a
long time could lead to being unable to
make an SOS call when needed.

18
CHILD RESTRAINT SYSTEMS
For optimal protection in the event of
an impact, all occupants must be seated
and wearing adequate restraint systems,
including newborn and other children!
This prescription is compulsory in all
EC countries according to EC Directive
2003/20/EC.
PASSENGER'S FRONT AIRBAG AND
CHILD RESTRAINT SYSTEMS
16) 17) 18) 19) 20) 21) 22) 23) 24) 25) 26)
Rearward-facing child restraint systems
must NEVER be fitted on the front seat
with an active passenger side airbag
since in the event of a collision the airbag
activation may cause fatal injuries to the
transported child.
ALWAYS comply with the instructions on
the label stuck on the passenger side sun
visor (A) or (B) fig.24.
24 9550193
25 06106S0376EM
DEACTIVATINGACTIVATING THE
PASSENGER SIDE AIRBAGS: FRONT AIR
BAG AND SIDE BAG (where provided)
The ON and OFF status LEDs are on the
front ceiling light, fig.25.
The LEDs indicates the passenger airbag
protection status:
Passenger protection activated: the
ON LED switches on fixed
Passenger protection deactivated:
the OFF LED turns on fixed
ATTENTION
16) Incorrect fitting of the child restraint
system may result in an inefficient
protection system. In the event of an
accident the child restraint system may
become loose and the child may be injured,
even fatally.When fitting a restraint system
for newborns or children, strictly comply
with the instructions provided by the
Manufacturer.
17) When the child restraint system is not
used, secure it with the seat belt or with
the ISOFIX anchorages, or remove it from
the car. Do not leave it unsecured inside the
passenger compartment. In this way, in the
event of sudden braking or an accident, it
will not cause injuries to the occupants.
18) After installing a child restraint system,
do not move the seat: always remove the
child restraint system before making any
adjustment.

19
19) Always make sure that the belt strap
does not pass under the child’s arms or
behind its back. In the event of an accident
the seat belt will not be able to secure the
child, with the risk of injury, including fatal
injury. Therefore the child must always wear
the seat belt correctly.
20) Do not use the same lower anchoring to
install more than one child restraint system.
21) If a Universal ISOFIX child restraint
system is not fixed to all three anchorages,
it will not be able to protect the child
correctly. In the event of an accident, the
child could be seriously or fatally injured.
22) Fit the child restraint system when the
car is stationary. The child restraint system
is correctly secured to the brackets when
you hear the click. Follow the instructions for
assembly, disassembly and positioning that
the Manufacturer must supply with the child
restraint system.
23) SEVERE DANGERWhen a front
passenger airbag is fitted, do not install
rearward facing child restraint systems on
the front passenger seat. Deployment of the
airbag in a crash could cause fatal injuries
to the child regardless of the severity of
the collision. It is advisable to always carry
children in a child restraint system on the
rear seat, which is the most protected
position in the event of a collision.
24) On the sun visor there is a label with
suitable symbols reminding the user that
it is compulsory to deactivate the airbag if
a rearward facing child restraint system is
fitted. Always follow the instructions on the
passenger-side sun visor.
25) Should it be necessary to carry a child
on the passenger side front seat in a rear
facing child restraint system, the passenger
side front and side airbags must be
deactivated through the main menu of the
Connect system, verifying deactivation by
checking that the OFF LED on the front
ceiling light is lit. Move the passenger's seat
as far back as possible to avoid contact
between the child seat and the dashboard.
26) Do not move the front or rear seat if a
child is seated on it or on the dedicated child
restraint system.
REPLACING A BULB
2)
WARNING
2) The number plate lights are of the LED-
type. For bulb replacement, contact an Alfa
Romeo Dealership.
Other manuals for GIULIA
7
This manual suits for next models
1
Table of contents
Other Alfa Romeo Automobile Accessories manuals
Popular Automobile Accessories manuals by other brands

ECB
ECB BIG TUBE BH39SY Fitting instructions

Audiovox Electronics
Audiovox Electronics PRO-9276i owner's manual

Enelion
Enelion Stilo Full guide

FALCON RIDGE
FALCON RIDGE PO-10MIDRANGER-RW01 Instructions for Installation and Care

Kuda
Kuda 143230 Installation instruction

Broadfeet
Broadfeet DWHY-306-33 installation instructions