ALK CoPilot Truck Pocket PC User manual


Important Note, Please Read:
CoPilot Help Files on your Pocket PC
Do not use this product in any way that interferes with safe and attentive
operation of a vehicle. The driver must remain alert at all times to actual road
conditions and obey all posted signs and traffic regulations. Always keep
your hands on the steering wheel and eyes on the road when driving!
While driving,either ask a passenger to operate CoPilot or pull over to the
side of the road when interacting with CoPilot on your Pocket PC.
Now CoPilotTruck includes Help files on your Pocket PC to assist you. After
launching CoPilot,tap Tools at the bottom of the screen and tap Help.
1. Check the package contents
Your CoPilotTruck package includes the following:
Install/Data Disks
Quick Start Guide
GPS Receiver (not in software-only packages)
In-Vehicle PowerAdapter (not in software-only packages)
Vent Mount (not in software-only packages)
2. Uninstall any previous version
If you have a previous version of CoPilot installed on your Pocket PC and/or
desktop computer, you must uninstall it before updating. Make sure your
GPS receiver is NOT attached,then follow these steps:
(1) On your Pocket PC:
1. Tap the Start menu and select Settings/System/Remove Programs
2. Select Pocket CoPilot and tap Remove.
3. Select Pocket Speech and tap Remove.
4a.If you stored map data on a storage card:
i. Delete the Pocket CoPilot folder on the storage card. Tap Start, then
Programs/File Explorer/My Device/SD Card,then tap and hold on Pocket
CoPilot and select Delete from the menu.
4b.If you stored map data on your device memory:
i. Delete the Pocket CoPilot folder on My Device. Tap Start,then
Programs/File Explorer/My Device,then tap and hold on Pocket CoPilot
and select Delete from the menu.
(2) On your Desktop/Laptop computer:
1. Select Start/Settings/Control Panel.
2. Double-click Add/Remove Programs.
3. Select Pocket CoPilot and click on the Remove button.
4. If asked to confirm the removal of Pocket CoPilot and all of its
components,selectYES.
5. If asked to remove shared files during the uninstall process,select
NoTo All.
6. Select Start/Search/Files or Folders and find the Pocket CoPilot folder.
7. Right-click the Pocket CoPilot folder and select Delete.
NOTE: Make sure no previous version of CoPilot is installed (see above).
Your desktop/laptop and Pocket PC should both be turned on. The cradle/cable
for your mobile device must be connected to your desktop through either a USB
or Serial port. Your Pocket PC should be connected to your desktop via
ActiveSync. If it is not, see the instructions that came with your Pocket PC.
If you plan to use a Storage Card Reader,it must be installed and connected to
your desktop. You can also use a PCMCIA adapter for the Storage Card if you
have a laptop.
3. Install CoPilotTruck
- ii -

Installation Steps:
Step 1: Insert the CoPilotTruck Install Disk into your CD-ROM drive.
Enter your Product Key Code when prompted (you can find it on
the cover of your printed Quick Start). Click Next.
Step 2: Make sure Pocket PC Installation and Desktop Installation are
checked on the installation menu. Click Next.
Step 3: The installation will start with the text-to-speech software.
Choose a Male or FemaleVoice (both are standardTTS file),or
Pre-recorded Sound Files (WAV files, male voice) when prompted.
The pre-recorded option saves space on your Pocket PC,but
provides less detailed driving instructions. Click Next.
Step 4: Click Next if prompted to make anActiveSync connection.
(You should already be connected. If not, cancel the installation,
make the connection and start over.)
Step 5: Choose an installation location on the Pocket PC. The default is the
device’s main memory (click Yes). Recommended: To install to a
storage card,click No, then choose Storage card from the drop-
down pick list.
Step 6: When CoPilot has been installed to your Pocket PC (this will take a
few minutes),you will be prompted to begin the desktop/laptop
installation. Click Next and follow the on-screen instructions.
Step 7: When the installation is complete, a CoPilotTruck icon will appear on
your desktop. See Step 4 (Activate the software).
NOTE to Navman GPS Jacket Users: If you are using this software with
the Navman GPS Jacket (the jacket will have the word NAVMAN molded into
the back of it and has a conical antenna),you must also install drivers for that
jacket separately:
1. Insert the CoPilotTruck Install Disk into your CD-ROM drive.
2. Exit out of the Installation screen when it appears.
3. Open up My Computer,right-click on your CD-ROM drive and
select Explore from the pop-up menu.
4. Open the WinCE folder, then open the Legacy Drivers folder and
copy the file 3.1.1.COM.ALKNavman.arm.CAB to the My
Documents folder on your Pocket PC.
5. On your Pocket PC open File Explorer and go to My Device >
- iii - - iv -
My Documents and single-tap the CAB file you just copied from your
computer. This will install the appropriate drivers.
6. You may have to unseat/reseat your iPAQin the jacket in order for the
drivers to take effect.
4. Activate the software
At the end of the installation process you will be asked to activate your desktop
software. You must activate CoPilot on both your desktop and your Pocket PC.
If you do not activate you will be asked to do so when you open the application.
Follow the steps below to activate your desktop and Pocket PC software.
Desktop — Automatic Activation
If your desktop is connected to the Internet you can automatically activate
CoPilot at the end of the installation process as follows:
1. At the end of the software installation an activation screen will appear.
Follow the on-screen instructions and clikc Next.
2.In the next screen enter your e-mail address and click Next. You will see
the message“License activated successfully” when the process is
finished. Click Next to begin using CoPilot.
Pocket PC — Automatic Activation
If your desktop is connected to the Internet you can automatically activate
CoPilot on your Pocket PC as follows:
1. Connect your Pocket PC to your desktop viaActiveSync.
2. Make sure your desktop has an active connection to the Internet
3. On your Pocket PC go to Start > Programs > CoPilot Live.
4. An activation screen will appear. Follow the on-screen instructions and
click Next.
5. In the next screen,enter your e-mail address and click Next. You will see
the message“License activated successfully” when the process is
finished. Click Next to begin using CoPilot.
Desktop — ManualActivation
1. At the end of the software installation an activation screen will appear.
Check Activate Manually and click Next.

- v - - vi -
5. Download map data
NOTE: CoPilotTruck won’t open on your Pocket PC unless map
data has been downloaded first.
(1) Choose a Storage Location:
1.Open the CoPilotTruck application on your desktop/laptop,then
click the Data DownloadWizard icon in the sidebar on the left.
Make sure your Pocket PC is synchronized.
2. Choose where you would like data stored on the Pocket PC.
CoPilot will scan your computer to detect which options are avail-
able. If you choose an option other than the device memory, click
the pick list that appears and select a storage card name or the drive
letter of your storage card reader. Click Next.
NOTE: If data is stored on the device's memory and also on a Storage Card
in the device,CoPilot will use the Storage Card by default. To have it use map
data on device memory, you must remove the Storage Card.
(2) Select a Data Area:
Select City Radius to create a data region of a specified radius around
a city of your choice:
1. In the City,State or ZIP Code box,type a City,State (e.g. new york,
ny) and press <Enter>.
2. Specify the Distance Around City to Download (e.g.60) and press
<Enter>. Click Next.
3. Your selected data region will be displayed. A window will appear
showing how much space you have available on your selected
destination (see Choose a Storage Location above) and how much
memory this data region will take up. If necessary, adjust the radius
to make sure your data region will fit on your selected destination.
Click Next.
4. Give your data region a name and click Next.
5. You will then be given the option to either select additional map data
or download selected areas to your Pocket PC. Click Download.
(3) Download the Data:
1. Clicking the Download icon will take you to a screen where
AvailableArea(s) for download are displayed on the left.
2. The next screen is the Activation Code screen where you'll see your
Product Key and License ID. You'll need this information to manually
activate CoPilot as follows:
a. If your desktop is connected to the Internet you can click the link to
ALK's activation web page.
i. On theALK activation page enter your Product Key, License ID and e-
mail address,then click Submit. YourActivation Code will appear on-
screen and an e-mail that contains yourActivation Code will be sent
to you.
ii. Enter yourActivation Code in the blank field in theActivation Code
screen and click Activate.
b. If your desktop isn't connected to the Internet you can visitALK's
activation web page (http://activate.alk.com) on another personal
computer. Follow steps i) and ii) above.
c. If you do not have internet access you can call,fax or e-mailALK.
Technical support is available to registered users during standard
business hours. See Contact Information and Additional Help,p.x.
Pocket PC — ManualActivation
1. Connect your Pocket PC to your desktop viaActiveSync.
2. Make sure your desktop has an active connection to the Internet
3. On your Pocket PC go to Start > Programs > CoPilot Live.
4. An activation screen will appear. Check Activate Manually and click
Next.
5. The next screen is theActivation Code screen where you'll see your
Product Key and License ID. You'll need this information to manually
activate CoPilot as follows:
a. On your desktop visitALK's activation web page
(http://activate.alk.com)
i. On theALK activation page enter your Product Key, License ID
and e-mail address,then click Submit. YourActivation Code will
appear on-screen and an e-mail that contains yourActivation Code
will be sent to you.
ii. Enter yourActivation Code in the blank field in theActivation
Code screen and click Activate.
b. If you do not have internet access you can call,fax or e-mail ALK.
Technical support is available to registered users during standard
business hours. See Contact Information and Additional Help,p.x.

- vii - - viii -
9. Enter an address
NOTE: There is no need to enter a starting point. CoPilotTruck uses GPS
positioning to determine your location automatically.
1. The first time you use CoPilotTruck,you will be asked to enter your
nearest city to help speed up the initial GPS acquisition. Enter your city,state
(e.g. new york,ny) and tap OK. You will only need to enter your nearest city
the first time you use CoPilotTruck.
2. Tap the Address button
when asked to enter a
destination.
3. Select a state from
the drop-down menu.
4. Using the keyboard,type
in the name of a city.
Possible matches will be
provided. Tap the <Enter>
key to select the city.
If this is not your first use of
CoPilotTruck, a pick list of
cities previously entered may
appear.
5. In theAddr box, type
a street address (optional). Then tap <Enter>.
If there is an exact match in CoPilot’s database,your address will appear on
the Address list highlighted in blue. Tap <Enter> again to confirm your
destination. If no exact match was found,a list of possible matches appears.
Highlight one and tap <Enter>.
Step 2
Step 4 Step 5
Step 3
6. In-vehicle hardware setup
WARNING: Never leave GPS receiver in closed vehicle that exceeds 140o F.
First turn on your Pocket PC,then make sure that the GPS receiver is attached
and powered and your engine is running before using CoPilotTruck.
If you have a CoPilot vent mount and in-vehicle power adapter:
1. Attach the cable to the Pocket PC and insert it into your vehicle’s
cigarette lighter socket. Make sure it is firmly seated (red light on).
2. Attach the vent mount clips to the vent in your vehicle,in a position that
will allow you to be comfortable as you view and operate CoPilot.
3. Slide the Pocket PC into the vent mount,and make sure it is turned on.
Third Party GPS Receiver setup:
On your Pocket PC,select Options from CoPilot’s Tools menu. Then
select the GPS tab (bottom) and tap on Auto Scan. CoPilot will scan
all COM Port and Baud Rate settings until it finds your GPS receiver.
7. Adjust the speech volume
8. Launch CoPilot Truck on your Pocket PC
To hear CoPilotTruck’s voice prompts,the volume on your Pocket PC must
be turned all the way up. In the Pocket PC Start menu,go to Settings and tap
on Sounds and Notifications. Under SystemVolume, move the slide bar all the
way to the right. You can also use your Pocket PC’s keypad when CoPilot
Truck is open:tap up until you reach the maximum volume.
To launch CoPilot Truck, your Pocket PC should be turned on and the GPS
receiver should be attached. Tap Start on your Pocket PC and choose CoPilot
Truck from the drop-down menu.
2. To designate an area to include in the download,highlight it and then click
on the right arrow button to move it to the Data Included inThis
Download list on the right. To take an area off the list,highlight it and click
the left arrow button.
3. After confirming that the area(s) you would like to download are in the
Data Included inThis Download list,click Download to complete the map
data download process.

- ix - - x -
10. Start driving
Contact information and additional help
Start driving! To toggle between the Driver Safety and the Passenger screens,
tap the Driver/Passenger button. The Driver Safety screen only shows maps
as you approach your next turn or when you’re traveling slower than 10 m.p.h.
For more detailed instructions and descriptions of CoPilotTruck screens,menus,
and features,see the .pdf format User’s Guide and the .txt Readme that came with
the product or the Help Files in either your desktop (Help menu > Help Contents
and Search) or Pocket PC (Tools menu > Help) installation.
Registered users can call 800-377-MILE,Monday-Friday, 9:00 am - 5:00 pm EST for
site at www.alk.com for technical support,posted answers to common questions,
and product upgrades.
6. In the EditTrip screen,tap the
View Route button to begin
receiving guidance instructions to
the destination you entered. Or
enter additional stops first.
Driver/Passenger Button
Driver Safety Screen Passenger Screen

Contents
Quick Start .......................................................................... i-x
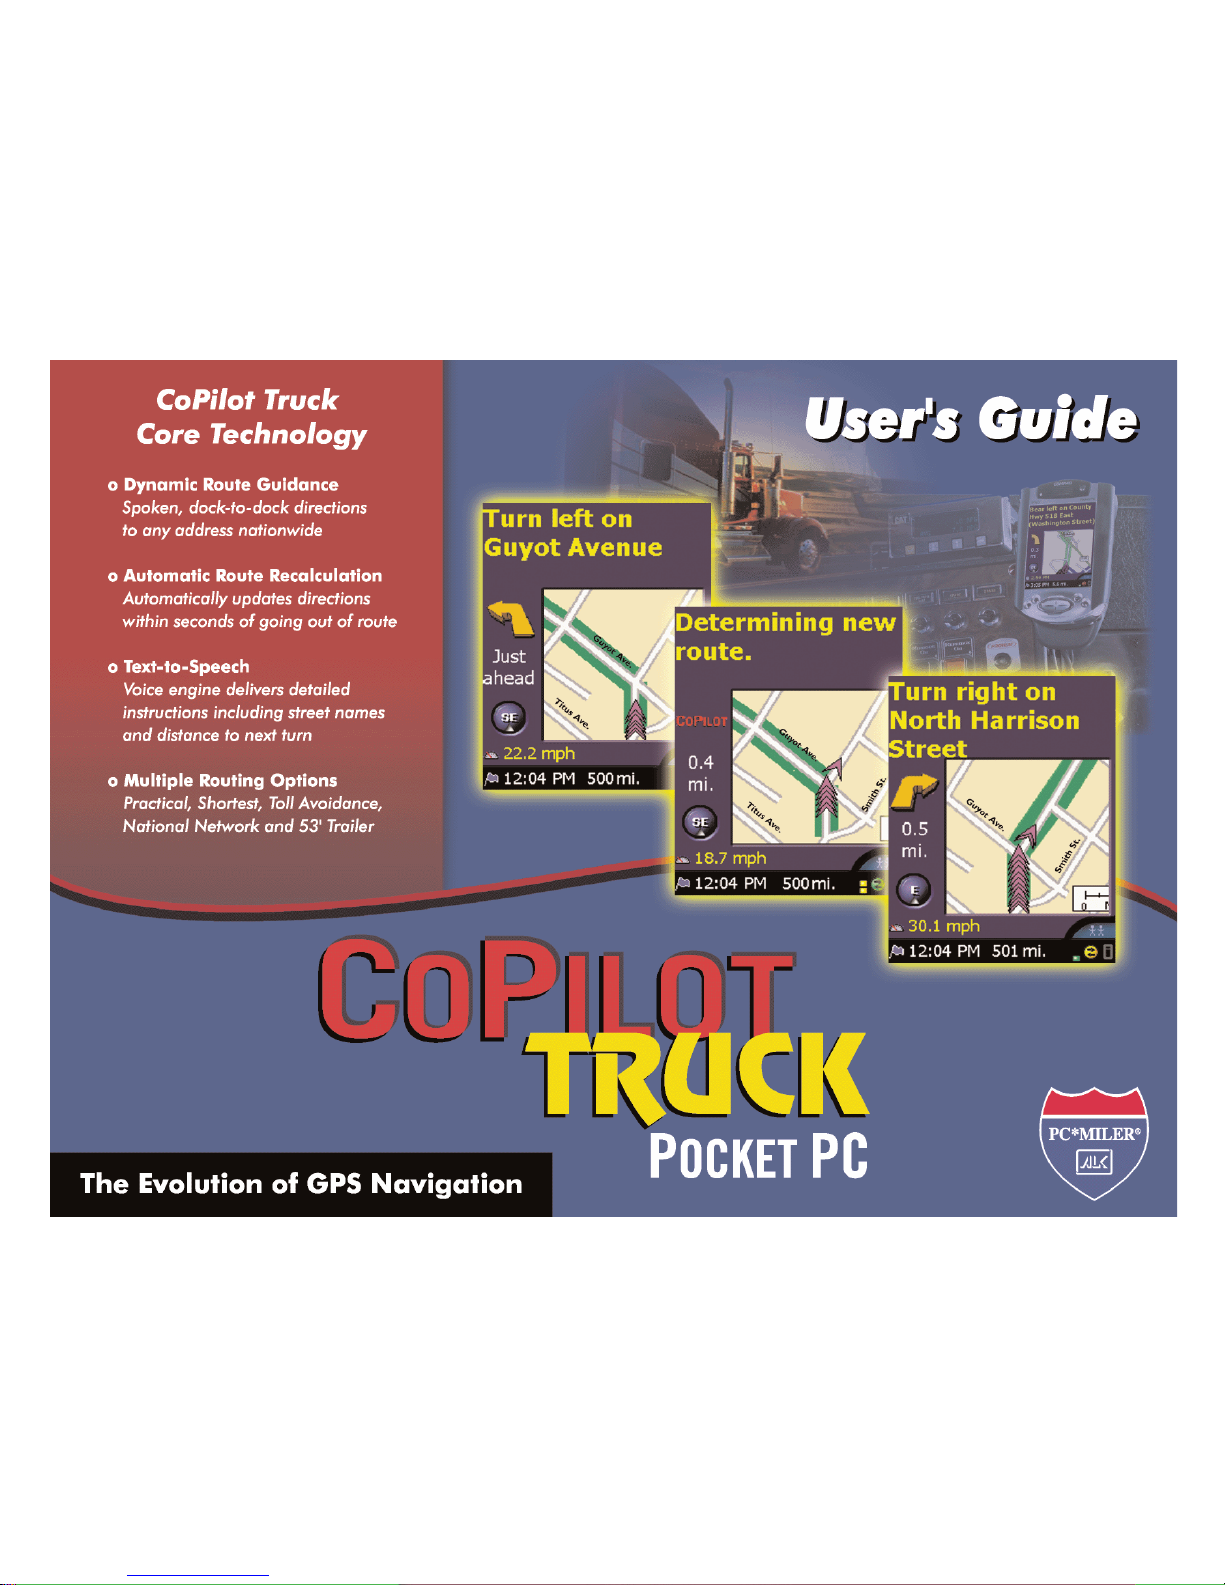
CoPilotTruck Overview ................................................ 1
SafetyWarning ................................................................... 2
CoPilotTruck Features ................................................... 2
Getting Started ................................................................. 3
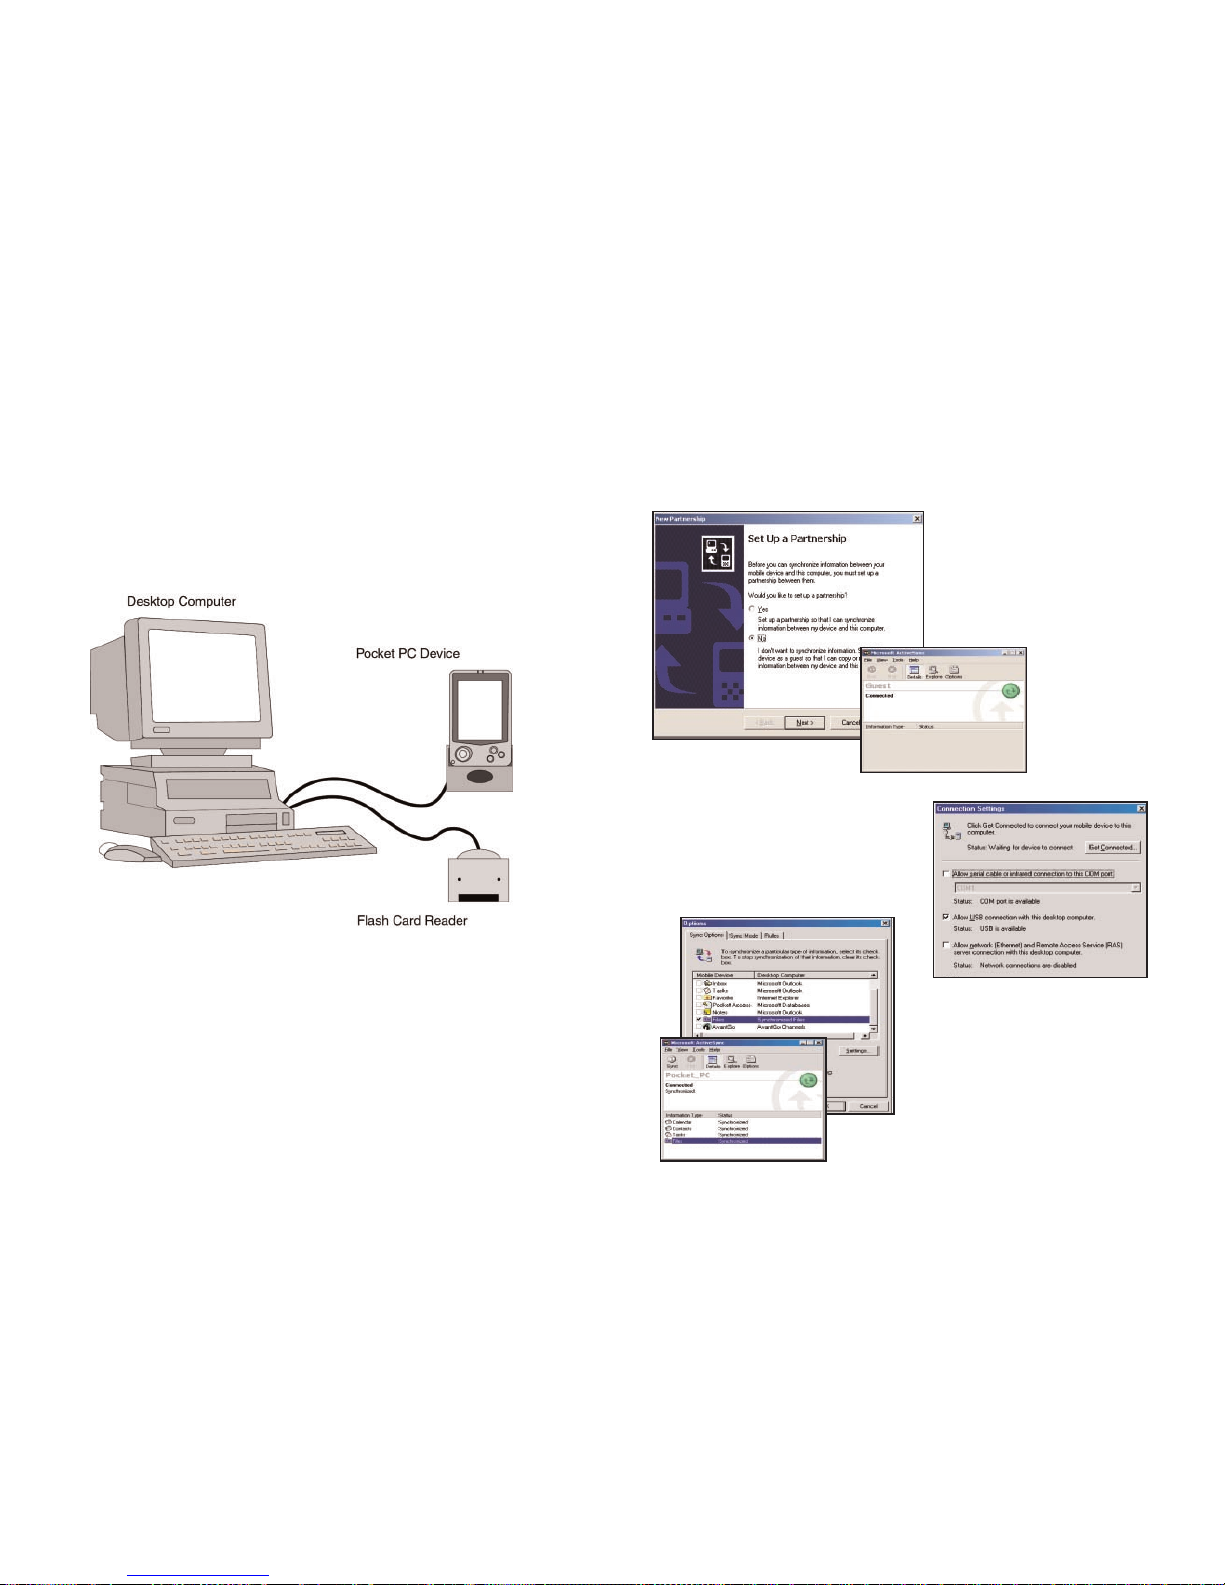
Getting Started - Hardware.......................................... 3
Getting Started - Get Connected ............................... 4
Uninstalling a PreviousVersion ..................................... 5
Installing CoPilotTruck ................................................... 6
Changing theVoice Option At AnyTime..................... 8
Software Activation ........................................................ 9
SpeechVolume .................................................................. 10
Data DownloadToYour Pocket PC ....................... 11
Step 1:SpecifyWhere Data Is Stored ........................ 11
CoPilot QuickStart .......................................... 12
Step 2:Choose a Data Selection Method ................. 13
Step 3:Select the Data ................................................... 15
City Radius .......................................................... 15
MapArea .............................................................. 17
Trip ........................................................................ 19
Step 4:Download the Data .......................................... 20
POI Download Options ................................................ 21
TripTransfer ..................................................................... 21
Importing Custom Places ............................................. 22
UsingYour Pocket PC for Guidance ..................... 25
Address Entry ................................................................... 26
Start Driving! .................................................................... 28
Entering a HomeAddress .............................................. 28
Entering aWork Address ............................................... 29
Finding Points of Interest ............................................... 29
Favorites ............................................................................. 30
Closing CoPilot ................................................................ 30
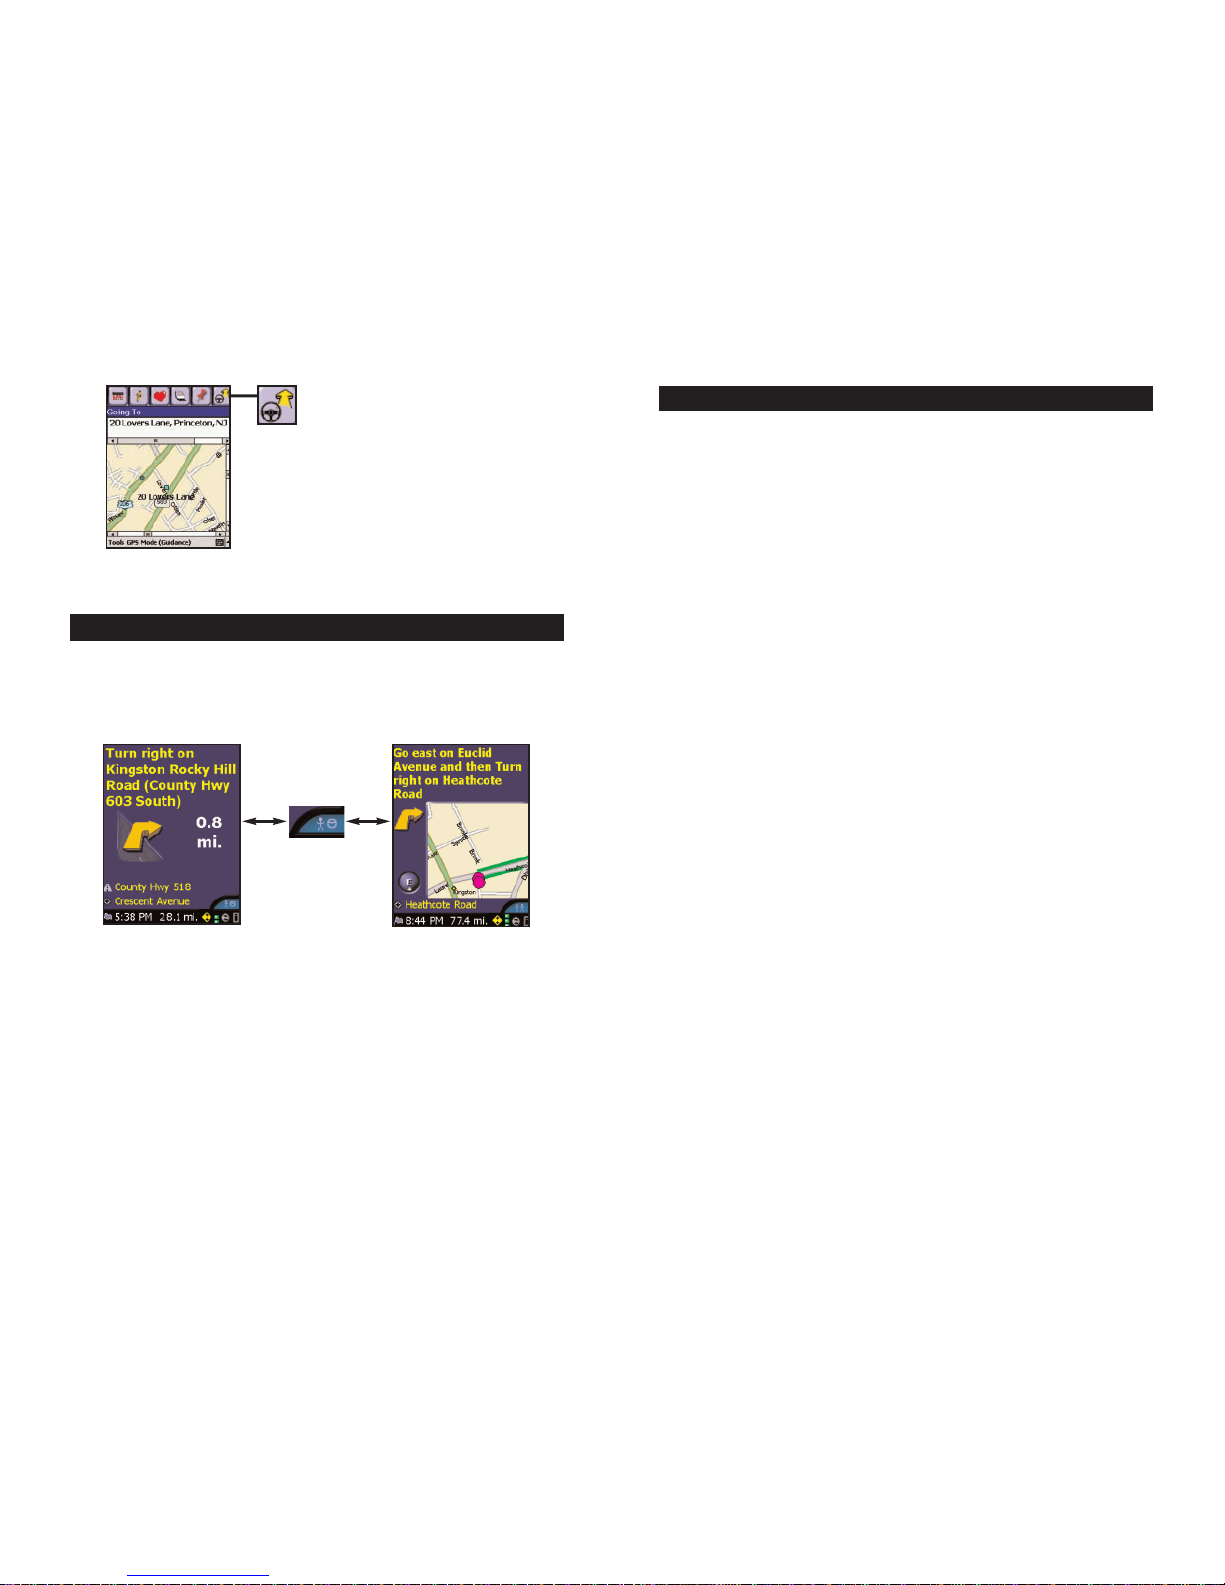
Map/Itinerary/GuidanceToggle ..................................... 31
Customizing the Guidance Screens ............................ 32
Trip Editing andWaypoints ............................................ 33
Getting ETA’s and Distances ......................................... 33
Contact Integration ......................................................... 34
Picking Stops from the Map ........................................... 35
Optimizing Stops .............................................................. 35
Detour Feature ................................................................. 36
Selective Routing ............................................................. 37
Tool Menu Options ........................................................ 38
POI Alert Options ........................................................... 39
Modes ................................................................................. 40
The GPS Menu .................................................................. 41
Open and Play GPSTracks ............................................. 42
Save Current Location .................................................... 43
Reference:CoPilotTruck onYour Pocket PC ........... 44
Trip Planning onYour Pocket PC ............................. 49
Saving and LoadingTrip Itineraries ............................... 50
Trip Planning onYour Desktop ................................ 51
Menus andToolbar Buttons ........................................... 51
Reference:CoPilotTruck onYour Desktop ............... 59
MapWindow ....................................................... 59
Trip PlannerWindow ........................................ 59
Driving Directions and Map (Split Screen) .. 61
Routing Options ................................................. 62
Trip Summary ...................................................... 63
Fuel Cost Calculator ......................................... 63
CoPilotTruck Live Communications ........................ 64
CoPilot LiveWeb Page..................................................... 64
Live Mode Overview ........................................................ 64
Live Mode -AutomaticVehicle Location (AVL) ......... 66
Live Mode - Send/Receive Messages ............................ 66
Live Mode - Remote Dispatch .......................................68
Driving with Live - Pocket PC Setup ........................... 69
Driving with Live - Receive/Respond to Messages ... 72
Driving with Live - Receive Remote Dispatch ........... 73
Helpful Hints ........................................................................ 74
About GPSTechnology .................................................... 74
Trouble-shooting ................................................................. 76
Using Help Files .................................................................. 77
Technical Support .............................................................. 77

CoPilot Truck Overview
Your CoPilot Truck
|
Pocket PC Includes:
Install/Data Disks
GPS Receiver (not in software-only packages)
In-Vehicle PowerAdapter (not in software-only packages)
Vent Mount (not in software-only packages)
Desktop PC Requirements
MicrosoftWindows 95, 98,2000, ME, XP, Windows NT®
(4.0 or higher) orWindows Mobile 2003
Pentium II processor or better
12X CD-ROM or better
64 MB of RAM and a hard drive with at least 65 MB
of available disk space
MicrosoftActiveSync version 3.1 or later
Pocket PC Requirements
With Map Data on Storage Card
Pocket PC runningWindows CE 3.x or Pocket PC 2002
MIPS,SH3 or StrongARM processor
4-7 MB of storage RAM
6-12 MB of program RAM (available for running programs)
Storage Card recommended
(minimum 32MB, 64MB recommended)
GPS Requirements
Standard NMEA GPS receiver* including:
CF GPS receivers
iPAQ GPS Jacket
Cabled GPS receivers
Wireless Bluetooth GPS receivers
* For information on purchasing a GPS receiver from
ALK Technologies, go to www.alk.com.
A Safety Warning
Always keep your hands on the steering wheel and eyes on the road when
driving!
Do not use this product in any way that interferes with safe and attentive operation
of a vehicle. When used in a vehicle, do not place the GPS receiver, antenna, power
supply, or your computer where it may strike the driver or passengers if the vehicle
turns sharply or stops abruptly. This product is designed, manufactured,and
intended as an aid to planning and navigating routes. The accuracy of the map data,
driving directions,and GPS tracking system is insufficient for this product to be used
for automated navigation or in any situation in which the failure of the product
could lead directly to death,personal injury,or physical or environmental damage.
The driver must remain alert at all times to actual road conditions and obey all
posted signs and traffic regulations.
TravRoute assumes no responsibility for any damage or injury resulting
from the use of this product.
CoPilot Truck|Pocket PC Features
CoPilotTruck’s “live” navigation system includes the following major features:
Dynamic Route Guidance provides spoken,turn-by-turn directions to
any address nationwide.
Text-to-Speech engine delivers detailed instructions including street
names and distance to next turn.
Automatic Route Recalculation gets you back on track within seconds
of missing a turn or going off route for any reason.
ETA and Distance to Destination are always displayed and constantly
updated.
Waypoints let you tailor your route preferences and get ETA’s and
distances to multiple stops on a route.
Detour and Selective Routing get you around delays and congestion
and let you avoid busy roads.
Routing Options that let you select a Practical or Shortest route in
combination withToll Avoidance,National Network,or 53’Trailer routing.
You may also include/exclude international border crossings,choose light
vehicle routing,and set a break time.
Live Messaging and Real-timeTracking - Maintain two-way
communication with a driver who’s using CoPilotTruck and actually see
where he or she is currently located using your home or office PC!
TripTransfer feature allows you to download trip itineraries created on
your desktop/laptop to your Pocket PC for later use.
- 1 - - 2 -

Getting Started - Hardware
Both your desktop/laptop and your Pocket PC must be turned on. The
cradle/cable for your mobile device must be connected to your desktop/laptop
computer through either the USB or Serial port.
If you plan to transfer the map data to your mobile device's main memory, or to
a Storage Card in the device,there are no more connections needed.
If you plan to transfer data to a Storage Card through a Storage Card Reader,
you must also have the reader installed and connected to your desktop/laptop.
You can also use a PCMCIA adapter for your Storage Card if you have a laptop.
- 3 -
Getting Started - Get Connected
In order to successfully transfer data from your desktop to your Pocket PC,
you must have Microsoft ActiveSync 3.1 (or later) installed. This software is
necessary to connect the two machines and is provided by your Pocket PC
manufacturer. If you did not receive this software with your mobile device,
contact the distributor immediately.
1. When connecting your Pocket
PC, if you have not set up a
partnership between your Pocket
PC and your desktop,you will be
prompted to do so. This is not
required. If you choose not to set
up a partnership,select Guest
partnership and
you will be logged
in as a Guest and
ready to transfer
data between
machines.
2. If you have set up a partnership
in the past,or choose to do so at
this point,be sure to allow your
Pocket PC to synchronize with
your desktop/laptop prior to
launching CoPilotTruck.
NOTE: If your desktop/laptop computer
does not seem to be recognizing the
connection with your Pocket PC,select
Connection Settings... from the drop-
down File menu,and make sure you're
connected using the appropriate Port.
Then click Get Connected... in the
File menu and follow the on-screen
instructions.
- 4 -

Uninstalling a Previous Version
If you have been using an earlier version of Pocket CoPilot it will be necessary
for you to uninstall the application and its data before installing CoPilotTruck.
NOTE: When uninstalling CoPilot, your GPS receiver cannot be
attached. Before uninstalling,you must disconnect the receiver and perform a
soft restart. Then follow the steps outlined below:
(1) On your Pocket PC:
1.From the Start menu, select Settings/System/Remove Programs.
2.Select Pocket CoPilot and tap Remove.
3.Select Pocket Speech and tap Remove.
4a.If you stored map data on a storage card:
i. Delete the Pocket CoPilot folder on the storage card. Tap Start,
then Programs/File Explorer/My Device/SD Card,then tap and
hold on Pocket CoPilot and select Delete from the menu.
4b.If you stored map data on your device memory:
i. Delete the Pocket CoPilot folder on My Device. Tap Start, then
Programs/File Explorer/My Device,then tap and hold on Pocket
CoPilot and select Delete from the menu.
(2) On your Desktop/Laptop computer:
1.From the Start menu, select Settings/Control Panel.
2.Double-click Add/Remove Programs.
3.Select Pocket CoPilot and click on the Remove button.
4.If asked to confirm the removal of Pocket CoPilot and all of its
components,selectYES.
5.If asked to remove shared files during the uninstall,select NoTo All.
6.Select Start/Search/Files or Folders and search for the Pocket CoPilot folder.
7.Right-click the Pocket CoPilot folder and select Delete.
Installing CoPilot Truck
NOTE: You must uninstall any previous version of Pocket CoPilot from
your desktop/laptop and Pocket PC before proceeding (see above).
To install CoPilot Truck, first turn on your computer and set up your Pocket PC.
Do NOT attach the GPS receiver yet,the application should not be
installed with the GPS receiver attached. Your Pocket PC should be
connected viaActiveSync, as described on p.4.
The steps in the installation process are covered on the following pages.
To Install CoPilotTruck:
3. Make sure there are check marks
next to Pocket PC Installation
and Desktop Installation.
(Your Pocket PC should be
connected with the desktop/
laptop before doing this part of
the installation). Click Next.
2. After clicking Yes to accept the
LicenseAgreement, enter your
Product Key Code when prompt-
ed,then click Next. The
installation menu will appear.
1. Insert the CoPilotTruck Install
Disk in your CD-ROM drive.
Have your Product Key Code
ready (you can find it on your
printed Quick Start).
4. The InstallationWizard will then
start installing to your Pocket PC,
beginning with the text-to-speech
software that delivers CoPilot
Truck’s spoken driving instruc-
tions. You’ll be prompted to
choose a Male or FemaleVoice
(both are standardTTS files), or
Pre-recorded Sound Files
(WAV files,male voice). Choosing
- 6 -- 5 -

- 7 -
6. The installation to your Pocket PC will
take a few minutes. Check your Pocket
PC screen to determine when the
installation is complete.
NOTE to Navman GPS Jacket Users: If you are using this software with the
Navman GPSJacket (the jacket has the word NAVMAN molded into the back of it
and has a conical antenna),you must also install drivers for that jacket separately:
1. Insert the CoPilotTruck Install Disk into your CD-ROMdrive.
2. Exit out of the Installation screen when it appears.
3. Open up My Computer, right-click on your CD-ROMdrive and select
Explore from the pop-up menu.
4. Open the WinCE folder, then open the Legacy Drivers folder and copy
the file 3.1.1.COM.ALKNavman.arm.CAB to the My Documents
folder on your Pocket PC.
5. On your Pocket PCopen File Explorer and go to My Device > My
Documents and single-tap the CAB file you just copied from your
computer. This will install the appropriate drivers.
6. You may have to unseat/reseat your iPAQin the jacket in order for the
drivers to take effect.
1. Insert the Install Disk into your CD-ROM drive, follow instructions.
2. Make sure ONLY Pocket PC Installation is checked,click Next,and
select the voice option you want. Click Next again.
3. Click Yes to reinstall Pocket Speech.
4. Click No to reinstall CoPilotTruck.
5. Click Yes to install in the default directory if that’s where you originally
installed. If you installed CoPilotTruck elsewhere,click No and choose the
appropriate location.
6. Tap OK on your Pocket PC to reinstall.
7. Tap Yes to All if prompted.
8. Click OK on your Desktop,then click Finish to complete the process.
9. When the installation is complete,a CoPilot
Truck icon will appear on your desktop or laptop.
You are now ready to start using CoPilot! For
software activation,see p.9.
8. As the desktop installation
proceeds,you will be given the
choice to install the CoPilotTruck
US Data to your hard drive. This
is the recommended option and
requires 700 MB of available space.
If you choose None,you will need
to insert the CoPilotTruck Data
Disk each time you download data
to your Pocket PC or use CoPilot
Truck for trip planning on your
desktop.
- 8 -
7. When CoPilot has been installed
to your Pocket PC,you will be
prompted to begin the desktop/
laptop installation. Click Next and
follow the on-screen instructions.
Changing the Voice Option at Any Time
To change the voice CoPilotTruck uses from male to female or vice versa at any
time after installation,you must first delete CoPilot from your Pocket PC (see
Uninstalling a PreviousVersion, p.5,for how to uninstall the application). Then re-
install CoPilotTruck to your Pocket PC,choosing only the Pocket PC Installation,
and when you are prompted to choose a voice option,make your selection.
5. Next, you will be prompted to choose
an installation location on the Pocket
PC. The default location is the Pocket
PC main memory (click Yes). To install
to a storage card,click No, then
choose Storage card from the drop-
down pick list (recommended).
the pre-recorded option saves space
on your Pocket PC,but will give you
less detailed driving instructions. Click
Next to continue.

Software Activation
At the end of the installation process you will be asked to activate your desktop
software. You must activate CoPilot on both your desktop and your Pocket PC.
If you do not activate you will be asked to do so when you open the application.
Follow the steps below to activate your desktop and Pocket PC software.
Desktop — Automatic Activation
If your desktop is connected to the Internet:
1. At the end of the software installation an activation screen will appear.
Follow the on-screen instructions and click Next.
2.In the next screen enter your e-mail address and click Next. You will see
the message“License activated successfully” when the process is
finished. Click Next to begin using CoPilot.
Pocket PC — Automatic Activation
If your desktop is connected to the Internet
1. Connect your Pocket PC to your desktop viaActiveSync.
2. On your Pocket PC go to Start > Programs > CoPilot Live.
3. An activation screen will appear. Follow the on-screen instructions and
click Next.
4. In the next screen,enter your e-mail address and click Next. You will
see the message“License activated successfully” when the process is
finished. Click Next to begin using CoPilot.
Desktop — ManualActivation
1. At the end of the software installation an activation screen will appear.
Check Activate Manually and click Next.
2. The next screen is the Activation Code screen where you'll see your
Product Key and License ID. You'll need this information to manually
activate CoPilot as follows:
a. If your desktop is connected to the Internet you can click the link to
ALK's activation web page.
i. On the ALK activation page enter your Product Key, License ID and
e-mail address,then click Submit. YourActivation Code will appear
on-screen and an e-mail that contains yourActivation Code will be
sent to you.
ii. Enter yourActivation Code in the blank field in theActivation Code
screen and click Activate.
b. If your desktop isn't connected to the Internet you can visitALK's
activation web page (http://activate.alk.com) on another personal
computer. Follow steps i) and ii) above.
c. If you do not have internet access you can call,fax or e-mailALK.
Technical support is available to registered users during standard
business hours. SeeTechnical Support,p.77.
Pocket PC — ManualActivation
1. Connect your Pocket PC to your desktop viaActiveSync.
2. Make sure your desktop has an active connection to the Internet
3. On your Pocket PC go to Start > Programs > CoPilot Live.
4. An activation screen will appear. Check Activate Manually and click
Next.
5. The next screen is theActivation Code screen where you'll see your
Product Key and License ID. You'll need this information to manually
activate CoPilot as follows:
a. On your desktop visitALK's activation web page
(http://activate.alk.com)
i. On theALK activation page enter your Product Key, License ID
and e-mail address,then click Submit. YourActivation Code will
appear on-screen and an e-mail that contains yourActivation Code
will be sent to you.
ii. Enter yourActivation Code in the blank field in theActivation
Code screen and click Activate.
b. If you do not have internet access you can call,fax or e-mail ALK.
Technical support is available to registered users during standard
business hours. See Technical Support,p.77.
Deactivation and License Update:
If you’re planning to uninstall CoPilotTruck from
one Pocket device and install the same version on
another device,you need to deactivate the software
on the first device before installing it again. To do
this,open CoPilotTruck on your Pocket PC,tap the
Tools menu,then tap Update License. Then tap
Deactivate in the License Manager. Your Pocket
PC must be synchronized for the deactivation
process to take effect. When you re-install CoPilot
Truck on another device, you will be asked to
activate it again.
Speech Volume
To hear CoPilot’s voice prompts,the volume on your Pocket PC must be turned all
the way up. In the Pocket PC Start menu, go to Settings and tap on Sounds and
Notifications. Under SystemVolume,move the slide bar all the way to the right. You
can also use your Pocket PC’s keypad when CoPilot is open:tap up until you reach
the maximum volume.
- 9 - - 10 -

Data Download to Your Pocket PC
To use CoPilot Truck on your Pocket PC,you first need to download map data
from your desktop or laptop computer to your Pocket device. You select the data
to download from one or more regions (“data areas”) that you specify in the
CoPilotTruck application on your desktop. It’s a simple 4-step process.
Step 1:
Specify Where Data Will Be Stored
To begin the data download process,open the CoPilotTruck application on your
desktop/laptop,then click the Data DownloadWizard icon or pick Data
DownloadWizard from the File menu.
CoPilotTruck gives you three options for downloading data:
1) directly to the Pocket device's memory,
2) to a Storage Card in the device,or
3) to a Storage Card through a Storage Card Reader.
You will be prompted to enter one of these choices before you can download.
CoPilot will detect which options are available to you.
NOTE: If there is data stored on the device's memory and also on a
Storage Card in the device,CoPilot will use the map data on the
Storage Card by default. To have it use the device's memory,you must
remove the Storage Card.
- 12 -
1.To download to Pocket PC
Device Memory:
(In this example, CoPilotTruck has
detected that there is no Storage
Card in the device.) Click Next to
go to the Data Selection window.
See CoPilot QuickStart,p.12, for a
description of software included in
downloads. See p.22 for Options.
2.To download to a Storage
Card in the device:
(In this example, CoPilotTruck has
detected that all options are
available.) Select a storage card
name from the drop-down pick
list,then click Next to go to the
Data Selection window. See CoPilot
QuickStart,p.12, for a description
of software included in downloads.
See p.22 for Options.- 11 -
3.To download to a Storage
Card through a Card Reader:
(In this example, again all options
are available.) Pick the drive letter
associated with your Storage Card
Reader,then click Next to go to
the Data Selection window. See
CoPilot QuickStart below for a
description of software included in
downloads. See p.22 for Options.
CoPilot QuickStart
Storage Card Application Download
If you are downloading map data to a Storage Card or Storage Card
Reader, you have the option to download a complete, ready-to-use
“QuickStart” version of CoPilot Truck along with the data. Having the
QuickStart version on your Storage Card ensures that CoPilotTruck will
be available even if you experience technical problems with your Pocket
PC and need to perform a hard reset. (During a hard reset, all installed
applications are deleted from the Pocket PC.) Inserting a storage card
with the QuickStart version will automatically install CoPilot,
and your map data will already be there!
The QuickStart option can be turned on or off in the final step of the
download process (see p. 21). By default this option is active and
the QuickStart download will be executed each time you
download map data.
The QuickStart needs 10 MB of space on your Storage Card. Once the
QuickStart has been copied, you can save time the next time you
download data by unchecking the Create QuickStart option in the final
Data DownloadWizard screen before proceeding to download. You will
also want to uncheck this option if you do not have enough room on your
Storage Card for it.
If the QuickStart is copied onto your Storage Card and you need to
remove it, simply delete the folder that contains it. The folder will be
named either “2577”, “4000”, or “10003” depending on which type of
Pocket PC you are using.
NOTE: You can also download to a Storage Card through a PCMCIA
adapter. Simply identify the drive letter associated with the adapter under the
Storage Card Reader option.

Data Download
Step 2:
Choose a Data Selection Method
After you specify a location where the data will be stored,you will be prompted
to select a region on the map to download. CoPilot allows you to download
data using one of the three methods described below.
See Data Download Step 3 beginning on p.15 for step-by-step instructions for
downloading data to your Pocket PC using each of these three methods.
City Radius - This method allows you to quickly select data in the shape of a
circle surrounding any city in the United States. In the Data DownloadWizard
you type a city name and state abbreviation or ZIP code and enter the number of
miles you would like the radius
to extend around the city, then
click Next.
TheWizard displays a map that
shows the city and the radius
you chose. At this point you
can zoom the map in and out
using zoom buttons and adjust
the size of the data area by
altering the radius of the circle.
Map Area - This method of selecting data allows you to choose an area of data
by drawing a box on the Data DownloadWizard's map screen.
In theWizard,you enter a city
name near which you would like
to select data,then click Next.
The map will zoom to that
location. Then you create a
box around the desired area by
clicking and dragging your
mouse across the map. The
street-level data within that box
will be selected.
At this point you can zoom
the map in and out using zoom
buttons and adjust the size of
the data area by redrawing
the box.
Trip - The Trip method of selecting data is by far the most customizable method.
This option allows you to run a trip and select street-level data specific to that trip,
thereby avoiding unneeded data
and saving valuable memory
space.
Once the trip is run,the Data
DownloadWizard automatically
selects circles of data around
your origin and destination,
and a corridor of data along
your route. You can then click
Options to adjust the radius of
the circles and the width of the
corridor.
TheTrip Itinerary for each trip
you download will be stored on
your Pocket PC (see Trip
Transfer,p.22). Multiple trips can
be downloaded to the Pocket
PC for later use.
- 13 - - 14 -
City Radius
Map Area
Trip

Data Download
Step 3:
Select Your Data
Use any of the three methods covered on the following pages (City Radius,
Map Area,or Trip) to select one or more regions and then download your data.
City Radius
- 16 -
Note: CoPilot’s available mem-
ory calculations subtract 15 MB
from the available memory on
your storage card (if you are
using one) to account for
support files.
1. Click the City Radius icon.
4. Name the selection.
Click Next.
5. You will return to the Data
Selection Menu where you can
select another data area if you
like,using any method. When
you finish selecting data areas,
click the Download icon and
you will be taken to the final
screen where you can build
your download.
2. Enter a City,State or ZIP
code, and a mile radius
around the area that you
would like to download. Click
Next to verify that the area is
correct.
3. Using the Data Download
Wizard toolbar you can zoom
in or out,change the radius, or
go back to the previous screen.
When you are satisfied with
your selection,click Next.
- 15 -

Map Area
- 17 - - 18 -
Note: CoPilot’s available
memory calculations subtract
15 MB from the available
memory on your storage card
(if you are using one) to
account for support files.
4. Name the selection.
Click Next.
2. Enter a City,State or ZIP
code (address optional) within
the area that you would like to
download. Click Next.
5. You will return to the Data
Selection Menu where you can
select another data area if you
like,using any method. When
you are finished selecting data
areas,click the Download icon
to go to the final screen where
you can build your download.
3. Click and hold the left
mouse button and drag the
cursor to draw a box around
a desired area. The size of the
area will be displayed in the
toolbar.Click Next.
1. Click the Map Area icon.

Trip
- 19 - - 20 -
3. If you choose the Points of
Interest tab,enter a City, State
or a ZIP Code and click the
Find button.
You can specify search
parameters by selecting a POI
Category and/or Type (this
will speed up the search).
3a. Highlight a selection,click
Select,then Add Stop.
When all your stops have
been entered,click Select
Data.
4. By default a 20 mile radius
around all stops and a width of
4 miles along the corridor
which connects them will be
highlighted. Note: CoPilot’s
available memory calculations
subtract 15 MB from the avail-
able memory on your storage
card (If you are using one) to
account for support files.
5. To customize these
distances for any trip,click
Options and type a distance
in the appropriate box.
6. You will return to the Data
Selection Menu where you can
select another data area if you
like,using any method. When
you are finished selecting data
areas,click Download. Trip
itineraries that were created
using the Trip download
method will be transferred
along with map data. See p.22.
1. Click the Trip icon.
2. You now have three options for
entering stops on your trip. If
you choose the Cities and
Addresses tab you will need to
enter a City, State or ZIP
code, press <Enter>,and click
theAdd Stop button.
You may enter one or multiple
destinations. Use the buttons
to the right of the Itinerary to
zoom to a stop on the map,
change the order of stops,or
delete a stop.

Data Download
Step 4:
Download the Data
When you’re ready to execute a download,theWizard will display a list of
Available Area(s) for download on the left side of the window. To designate
an area to include in the download,click on it and then click on the right arrow
button to move it to the Data Included inThis Download list.
Notice that the amount of available map memory and the memory required for
all the areas on the Included list is shown under the list. NOTE: CoPilot's
available memory calculations subtract 15 MB from the available memory on
your storage card (if you are using one) to account for support files.
If you need to move an area off the Included list,click on it and use the left
arrow button. To delete an area from memory, click on it and click Delete.
IMPORTANT: Each data download overwrites the data that is already
on your Pocket PC. If any data areas are already loaded on your Pocket PC,
they will be overwritten by the new download. Therefore,your download must
include all areas that you wish to have available on your Pocket PC.
Check Include US Highway Network to download CoPilot’s complete US
Highway Network along with your data. This additional download requires
approximately 36 MB of space on your Pocket PC. When this network is loaded,
major roads,cities,and some points of interest outside your selected data region
will be shown on the map and you’ll be able to receive guidance as you drive
anywhere in the United States.
Check Download Favorites to download your Favorites list from theTrip
Planner window on your desktop along with map data. These addresses will then
be available as Favorites for trip entry on the Pocket PC.
Uncheck Create QuickStart if you do not want the CoPilot QuickStart
software copied to your Storage Card (see p.12 for a description of this feature).
POI Download Options
When you download a data region,you’ll get all roads within that region (but not
roads outside the region). Also included with each download are regional points
of interest (POI) such as gas stations,hotels, restaurants, visitor attractions,etc.
CoPilotTruck now lets you control the number and types of points of interest
that get downloaded along with your data areas. You can save space on your
Pocket PC by eliminating categories of POI that you’re not interested in seeing.
To select which POI categories you want,choose POI Download Options from the
Edit menu in the desktop application or, when you first open the Data
DownloadWizard, click the Options button in theWizard. In the window that
opens,check the categories you wish to select. Click the plus sign next to each
category to see the included sub-categories.
Click Save Settings to save the set of categories you create. Click Restore
Default to return to CoPilot’s default categories.
Trip Transfer
CoPilotTruck now transfers whole trips to your Pocket PC when you use the
Trip option for data downloading. Any trip you create,including its Itinerary, is
automatically downloaded along with the surrounding data corridor and will
become the current trip on your Pocket PC. A .TRP file is created and placed in
the Save directory in the CoPilot installation folder on the Pocket PC. Subsequent
downloads will add more .TRP files to this folder. The number of trips that may
be stored is limited only by the available memory on your Pocket PC.
If multiple trips are downloaded,the last one to be added will open as the current
trip. Use OpenTrip in the pop-up Tools menu to open a stored .TRP file.
- 21 - - 22 -

Importing Custom Places
CoPilotTruck’s Custom Place ImportWizard enables you to import addresses from
your Outlook Contacts database,an Excel file,or text file. (If you are using
another type of database or contact manager,you can export your contacts/
locations to an Excel or text file before importing them into CoPilotTruck.)
These points are added to CoPilot’s POI database under the Custom category.
Once they are in the database,they are displayed on maps as pushpins and
included in search results when you search for points of interest on your Pocket
PC or in theTrip Planner window on your desktop/laptop.
NOTE: CoPilotTruck now allows importing of multiple POIs with the same
name (e.g. an entire database of“Starbucks”).
To access the Wizard, choose Import Custom Places from theTools menu in
Planning Mode on the desktop,then follow the step-by-step instructions given by
theWizard.
Use the Data Import Status window to edit any addresses that were not accepted
during the importing process,then click Add to import the final list of addresses.
For more detailed instructions,refer to the CoPilotTruck Help files on your
desktop (Help Contents and Search in the Help menu).
- 23 -
EEddiittiinnggCCuussttoommPPllaacceessiinntthheeDDaattaabbaassee
After custom places have been added to the database,they can be edited at any
time. Select Manage Custom Places from theTools menu, then highlight the
custom place you wish to edit,click Edit,and make your changes. Click Apply
when finished.
NOTE: By default,addresses entered as Custom Places are assigned to the
Custom POI category. You can change this assignment at any time by selecting
another Category from the drop-down pick list as you edit.
- 24 -

Address Entry
NOTE: There is no need to enter a starting point. CoPilotTruck uses GPS
positioning to determine your location automatically.
Using Your Pocket PC for Guidance
In CoPilotTruck's Guidance Mode you will receive turn-by-turn route guidance
information as you travel. For your safety the Driver Safety screen will hide maps
when they are not necessary to avoid distractions.Using the Passenger screen the
map will be visible in half of the screen at all times.
REMINDER: CoPilotTruck won’t open on your Pocket PC unless map data has
been previously downloaded from the CoPilot desktop application.
- 25 - - 26 -
1. To launch the CoPilotTruck program,
tap Start and choose “CoPilotTruck”
from the drop-down menu. Because
you have the GPS receiver attached and
powered,CoPilot assumes that you are
on the road ready to drive,and opens in
Guidance Mode to get you on your way
quickly and easily.
2. The first time you use CoPilotTruck,
you will be asked to enter your current
location to help speed up the initial GPS
acquisition. Enter your city,state
(e.g. new york,ny) and tap OK.
PLEASE NOTE: You will only
need to enter your initial city the
first time you use CoPilotTruck.
For subsequent uses,CoPilot will
remember your last location
automatically.
3. CoPilot will then provide you with a
number of different ways to enter an
address. You can:
a) Program your Home address
b) Program your Work address
c) Enter a newAddress
d) Select a destination from your
Favorite List,or
e) Search for a Point of Interest
Tap the appropriate button to choose the
option you would like to use.
Select a state from the
drop-down menu. Using
the keyboard,type in the
name of a city. Tap on the city
or tap the <Enter> key to
select it.
If this is not your first use of
CoPilotTruck, a pick list of
cities previously entered may
appear.
Tap the
Address
button.
In theAddr box, type in the
street address (optional). Then
tap the <Enter> key. If there
is an exact match in CoPilot’s
database, your address will
appear on the Address list
highlighted in blue. Tap
<Enter> again to enter it.If
no exact match was found,a list
of possible matches appears.
Highlight one and tap <Enter>.
Tap the Name box to enter a
name (optional),type in a name,
then tap OK.
In-vehicle Hardware Setup:
First turn on your Pocket PC,then make sure that the GPS receiver is attached
and powered and your engine is running before using CoPilotTruck.
If you have a vent mount and in-vehicle power adapter:
1. Attach the cable to the Pocket PC and insert it into your vehicle’s cigarette
lighter socket. Make sure it is firmly seated (the red light should be on).
2. Attach the vent mount clips to the vent in your vehicle,in a position that will
allow you to be comfortable as you view and operate CoPilot.
3. Slide the Pocket PC into the vent mount,and make sure it is turned on.
Launch CoPilotTruck:
Table of contents
Other ALK GPS manuals

ALK
ALK CoPilot CoPilot 3.0 User manual

ALK
ALK CoPilot Truck Laptop User manual

ALK
ALK CoPilot Live Smartphone 6 User manual

ALK
ALK CoPilot Live User manual

ALK
ALK CoPilot Live Laptop 7 User manual

ALK
ALK CoPilot Truck Laptop User manual

ALK
ALK CoPilot Truck 2003 User manual

ALK
ALK CoPilot Pocket PC 5 User manual

ALK
ALK CoPilot Live Laptop 8 User manual

ALK
ALK GIZMONDO NAVIGATOR 2006 COPILOT User manual