Alltion AC-2000 Series User manual

I
n
s
t
r
u
c
t
i
o
n
s
F
o
r
AC-2000
Series
OfColposcope
CE NO.: CTE12090042
Issue date: 2012-08-01
Revision date: 2014-12-05

One-Step
C
o
l
p
o
s
c
o
p
e
Fine Heightadjustment
Diopter Knobs
LED Bulb Cover
Red Dot concept design award
Head Inclination
Adjusting Knob
Fine Focus Handle
Gross HeightAdjustment
and Locking Knob
Clutter Reducing
Internal Power
Cables
P
atent
ed
Power supply inside base
•The Rolling Base, with 3 locking wheels, is
a highly portable industry standard with a
clean, sleek design.
On/Off Switch and
Power Indicator Light
F
e
a
t
u
r
i
n
g
LED
L
i
g
h
t
S
o
u
r
c
e
* Lasts longer
* Cool to the touch
* Gives you more of a sure color balance
Rolling base
P
atent
ed

T
h
r
ee
-
S
t
e
p
C
o
l
p
o
s
c
o
p
e
Diopter Knobs
LEDBulb
Cover
Red Dot conceptdesign award
Head Inclination
Adjusting Knob
Fine Height Adjustment
Fine Focus Handle
Gross Height Adjustment
and Locking Knob
Clutter Reducing
Internal Power
Cables
P
atent
ed
Power supply inside base
•The Rolling Base, with 3 locking wheels, is a
highly portable industry standard with a clean,
sleek design.
On/Off Switch and
Power Indicator Light
P
atent
ed
Three-step
Magnification
Knob
F
e
a
t
u
r
i
n
g
LED
L
i
g
h
t
S
o
u
r
c
e
* Lasts longer
* Cool to the touch
* Gives you more of a sure color balance

LED Bulb Cover
Green Filter Knob
Rheostat Knob
Fine Focus Handle
Diopter knobs
Eye shields help block
external light
Fine Height
Adjustment
Handle
These circles give you the
millimeter size at the tissue
site according to the
magnification you’re using.
Three-step
Magnification
Knob
Fuse Seat

I
nd
i
ca
t
i
o
n
s
for
Use
The ALLTION brand C
olposcope is a device designed to permit viewing of the tissues of the vagina
and cervix by a telescopic system located outside the vagina. A colposcope is used to diagnose and
examined abnormalities of the vagina and cervix.
1.
F
eat
u
re
s
*Total magnification 3.75X,7.5X,15X for 3-step models and 7.5X for single magnification models
*300mm focal length
*Field of View:79mm,39mm19mm dia. For 3-stepmagnificationmodels and 39mm for single
magnification models
*Depth of Field: 4.5mm,1.13mm,0.76mm for 3-step magnification models and 1.13mm for single
magnification models
*Light intensity: >25,000 LUX
*Individually adjustable eyepiece 16.7X
*Right eyepiece with built-in two circles for you to measure the size of the problem you see.
*Built-in rheostat for brightness adjustment
*User-selectable built-ingreen filter for enhanced contrast
*LED bulb is easily changeable.
*Working Height: 950mm to 1250mm
*Fine focus adjustment Handles
*Two(Gross/Fine)height adjustment Handles
* Unit is completely assembled and ready for use once power is on
* Main Power Supply: 100V to 240V
2.
C
o
n
t
e
n
t
s
ofBox
*1 Colposcope
*1 Power Cord
*2 Fuses
*1PlasticDust Cover
*1 Instructionsforuse
*1Screwdriver
* 1 Cloth
* 1Extra video cable for built-in CCD
colposcope
3.
R
e
m
o
v
i
n
g
the
C
o
l
p
o
s
c
o
p
e
F
r
o
mthe Box
The Colposcopecomes with a one yearwarrantywith freerepairs (Shipping not included). Please keep
this box and the protective foam for at least a year;should you need to return it to ALLTION for any
warranty repairs. Otherwise there will be a nominal fee forustosend you a new box.
*During the handling and Unpacking, the box must be placed in the up position according to the arrows
that are printed on the outer box.
*Remove top protective material.
*Grasp the Colposcope at thecenter post (A cutout in the foam for your hands is provided.) and lift the
Colposcopestraight out ofthe protective material. Note:When removing the instrument out of the
protective foam, remove withcare to prevent the instrument from being damaged.

4.
Se
tt
i
n
g
Up
the
C
o
l
p
o
s
c
o
p
e
A. Remove the power cord from the shipping box.
B. Insert the power cord into the plug located at the back end of
the base.
C. Insert the other end of the power cord into the wall socket.
Note:It must be a three-holewall socket, in order to ensure
propergrounding of the instrument.
D. Press the power on/off button, toturn on the power. The
power indicator light will come on at that time.
E. Important: Rotate the Rheostat Knob to turn on theViewing
Light. (5B.)
F. When the instrument is ready to be shut off, simplydepress
the power on/off button with your right foot. The power
indicator light will go off at that time.
5. A
d
j
u
s
t
m
e
n
t
ofthe
E
y
e
p
i
e
c
e
s
You must adjust the eyepieces to your interpupillary distance
(IPD). TheIPD is the distance in the spacing between a person’s
eyes.
To Adjust theIPD
A. Turn on power by pressing the foot-switch on the base.
B. Turn the black Rheostat Knob on the left to adjust the light intensity.
Light will project from upper part of the Colposcope.
C. Gently place your eyes against the black rubber eyepieces. Grasp the
metal housing with both hands. Gently rotate the barrels together or apart.
D. A singular circular image should be seen through both eyepieces. This
adjustment is similar to adjusting the eyepieces ofbinoculars.
Rheostat
Knob
5B
P
l
ug
i
npower
cord
4B
Roller base on/off switch
4D
IPD
5C
5C
5C

6. A
d
j
u
s
t
m
e
n
t
oftheDi
o
p
t
e
r
K
no
b
s
A.
SettheDiopter
K
nob
s
at
zero.
B. Turn the Colposcope on, place your eyes against the eyepieces, and focus the Colposcope on a fixed
object until that object appears clear and sharp.
C. It is recommended to focus on letters such as a book or a magazine. Do not focus on an object like a piece
of fruit.
D. Close your right eye. With your left hand, rotate the Diopter Knob until the object is clear and sharp for
your left eye. Note: The Diopter allows you to adjust for plus and
minus vision corrections.
E. Then close your left eye. With your right hand, rotate the diopter
knob until the object is clear and sharp for your right eye. Note: The
Diopter allows you to adjust for plus and minus vision corrections.
F. It is important to keep a recordof the adjustments on the
Diopters for both your left and right eyes. Since most offices
have multiple people using the Colposcope, the eyepieces will
be different when someone else wants to use it. By
remembering your diopter settings, clarity can be achieved by
simply movingthe diopters to your setting when you are ready to use the Colposcope. This avoids
you going through steps A–E each time.
G. You will see two measuring circles through the lens. Since your Colposcope has three different
magnifications, the measurement at the tissue site will vary according to the magnification you’re using. The
reference chart gives you the correct size per magnification change.
Note: There is
a chart on the right metal housing.
L
e
n
s
e
s
Be
f
o
r
e
Adjustment
L
e
n
s
e
s
D
u
r
in
g
Adjustment
L
e
n
ses
Adjusted
5D
5D
5D
6A
6C
6D and 6E
6F
M
e
a
s
u
r
e
m
e
n
t
At
T
i
ss
u
e
S
i
t
e
3.75X
M
e
a
s
u
r
e
m
e
n
t
At
T
i
ss
u
e
S
i
t
e
7.5X
M
e
a
s
u
r
e
m
e
n
t
At
T
i
ss
u
e
S
i
t
e
15X

7.
C
o
l
p
o
s
c
o
p
e
I
n
s
t
r
u
c
t
i
o
n
s
for
Use
The following briefly describes using the Colposcope with a patient. It is
recommended that you practice using the Colposcope to familiarize your-
self with all of the features it has to offer.
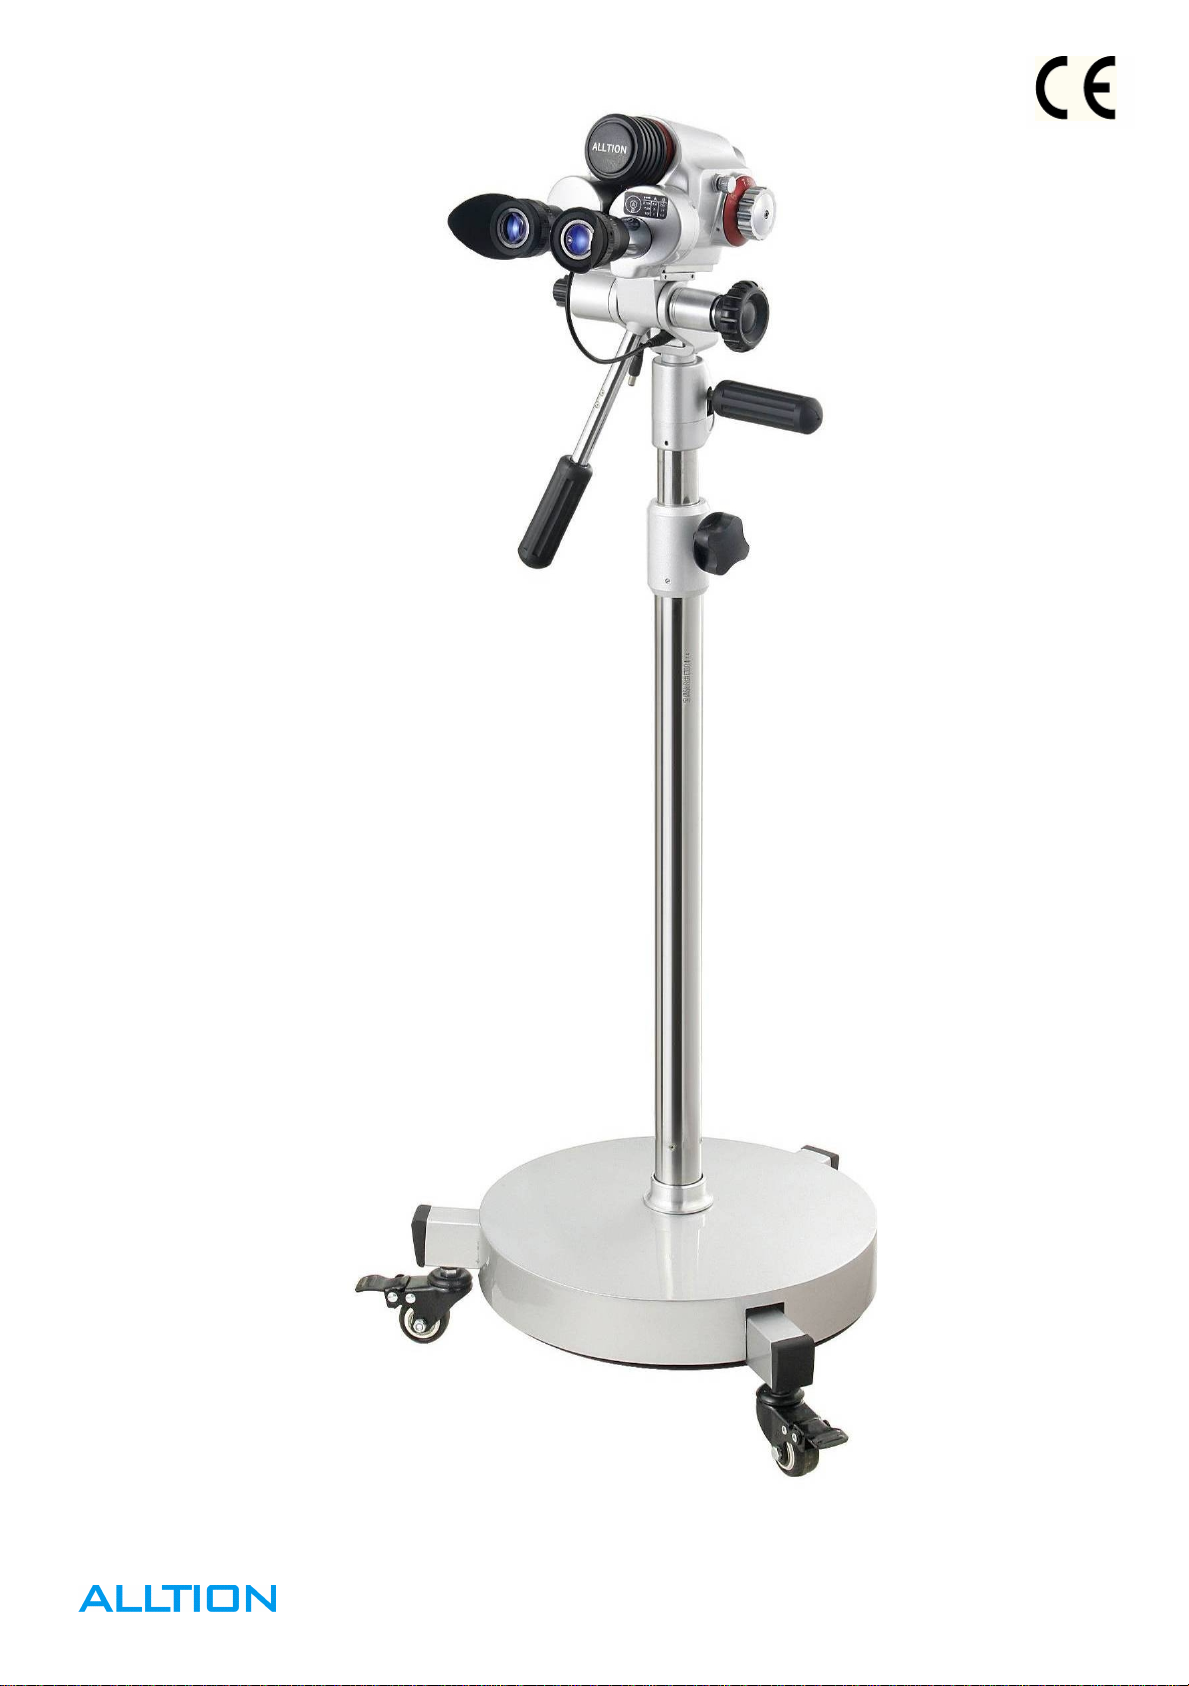
A. With patient in lithotomy position,
your Colposcope should be placed so
that the head of the scope is 300mm
from the area you wish to view, with the
post to as near vertical as possible.
Rotate the Gross Height Adjustment and
Locking Knob to loosen it and move the
inner post up or down. Tighten the knob
to lock the inner post in place.
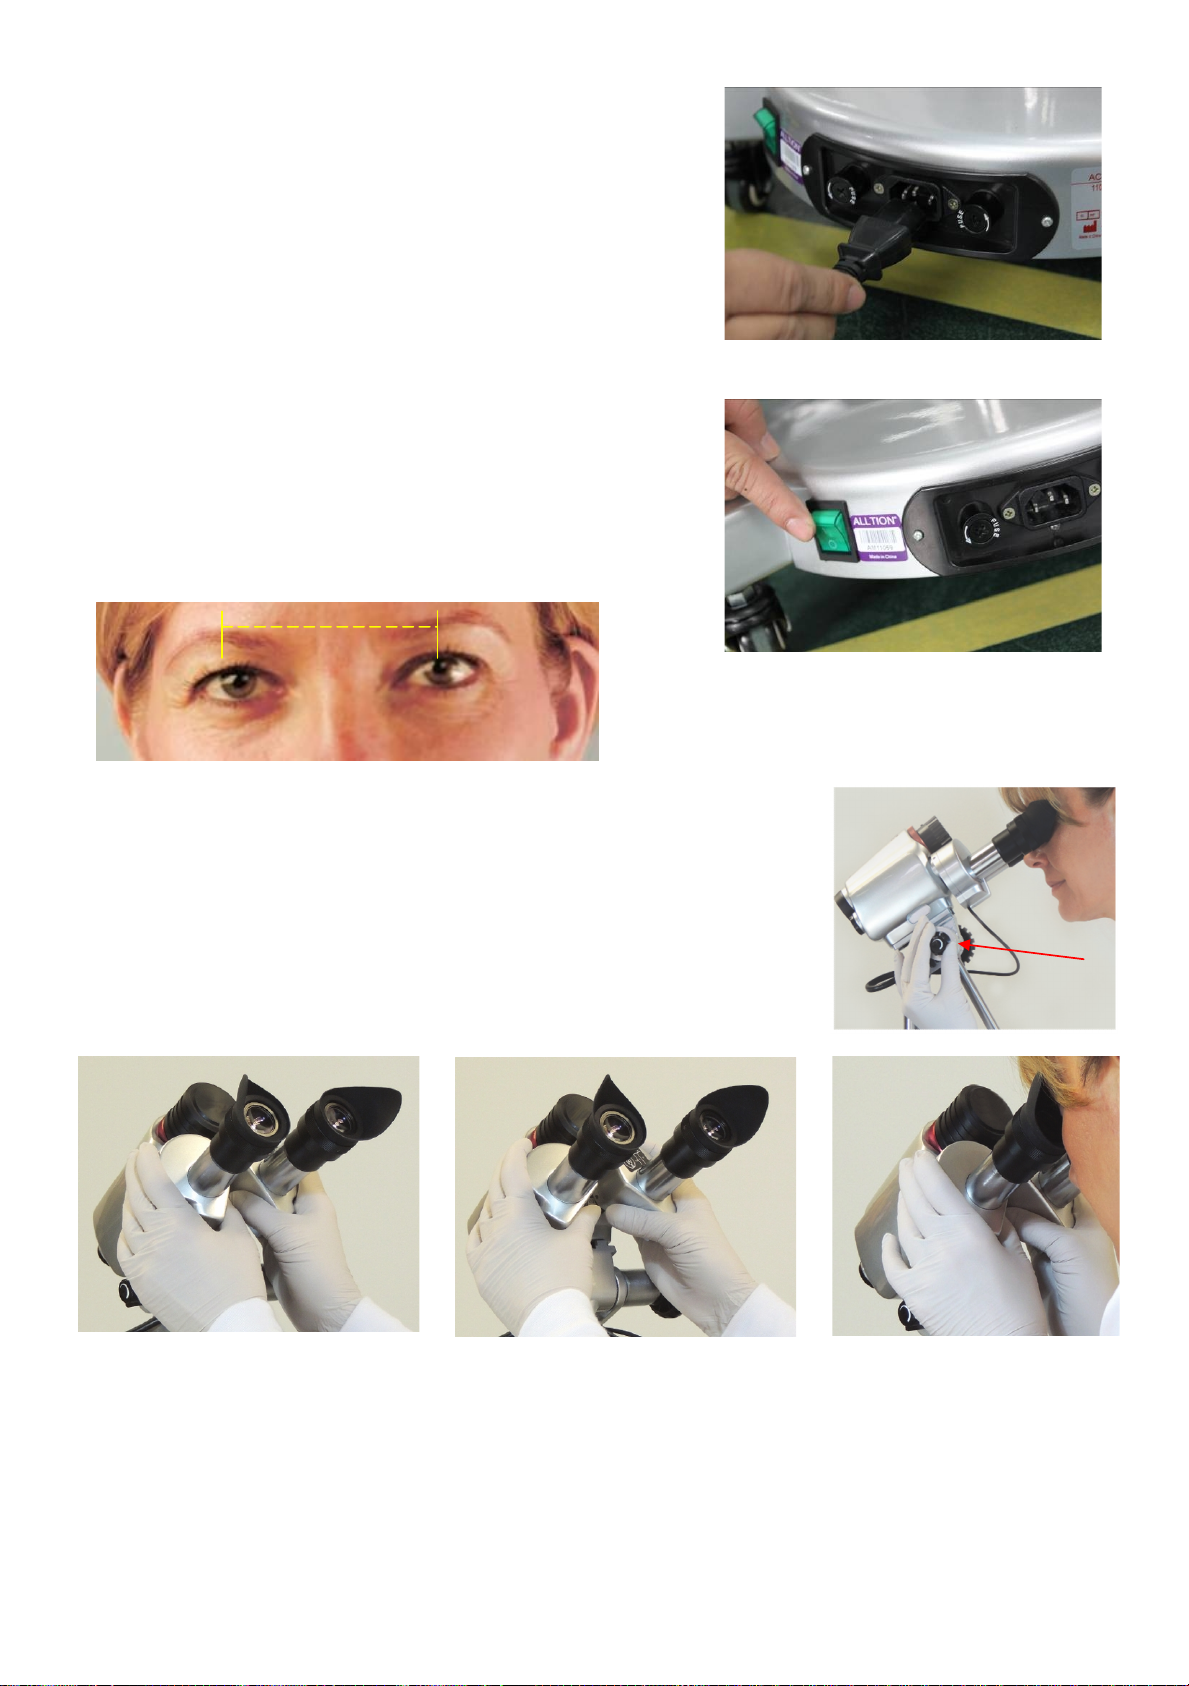
B. In a sitting position, place your feet
on the rubber pad part of the base. Place your eyes against the eyepiece.
Adjust for pupillary distance and make
sure that you set your correct diopter
reading. Place your right hand on the
Fine Height Adjustment Handle and
your left hand on the Fine Focus Handle. Note: Do not try to focus with
Fine Focus
C. With your right hand on the Fine Height
Adjustment Handle, slowly push or pull the
Colposcope, until the field comes into view.
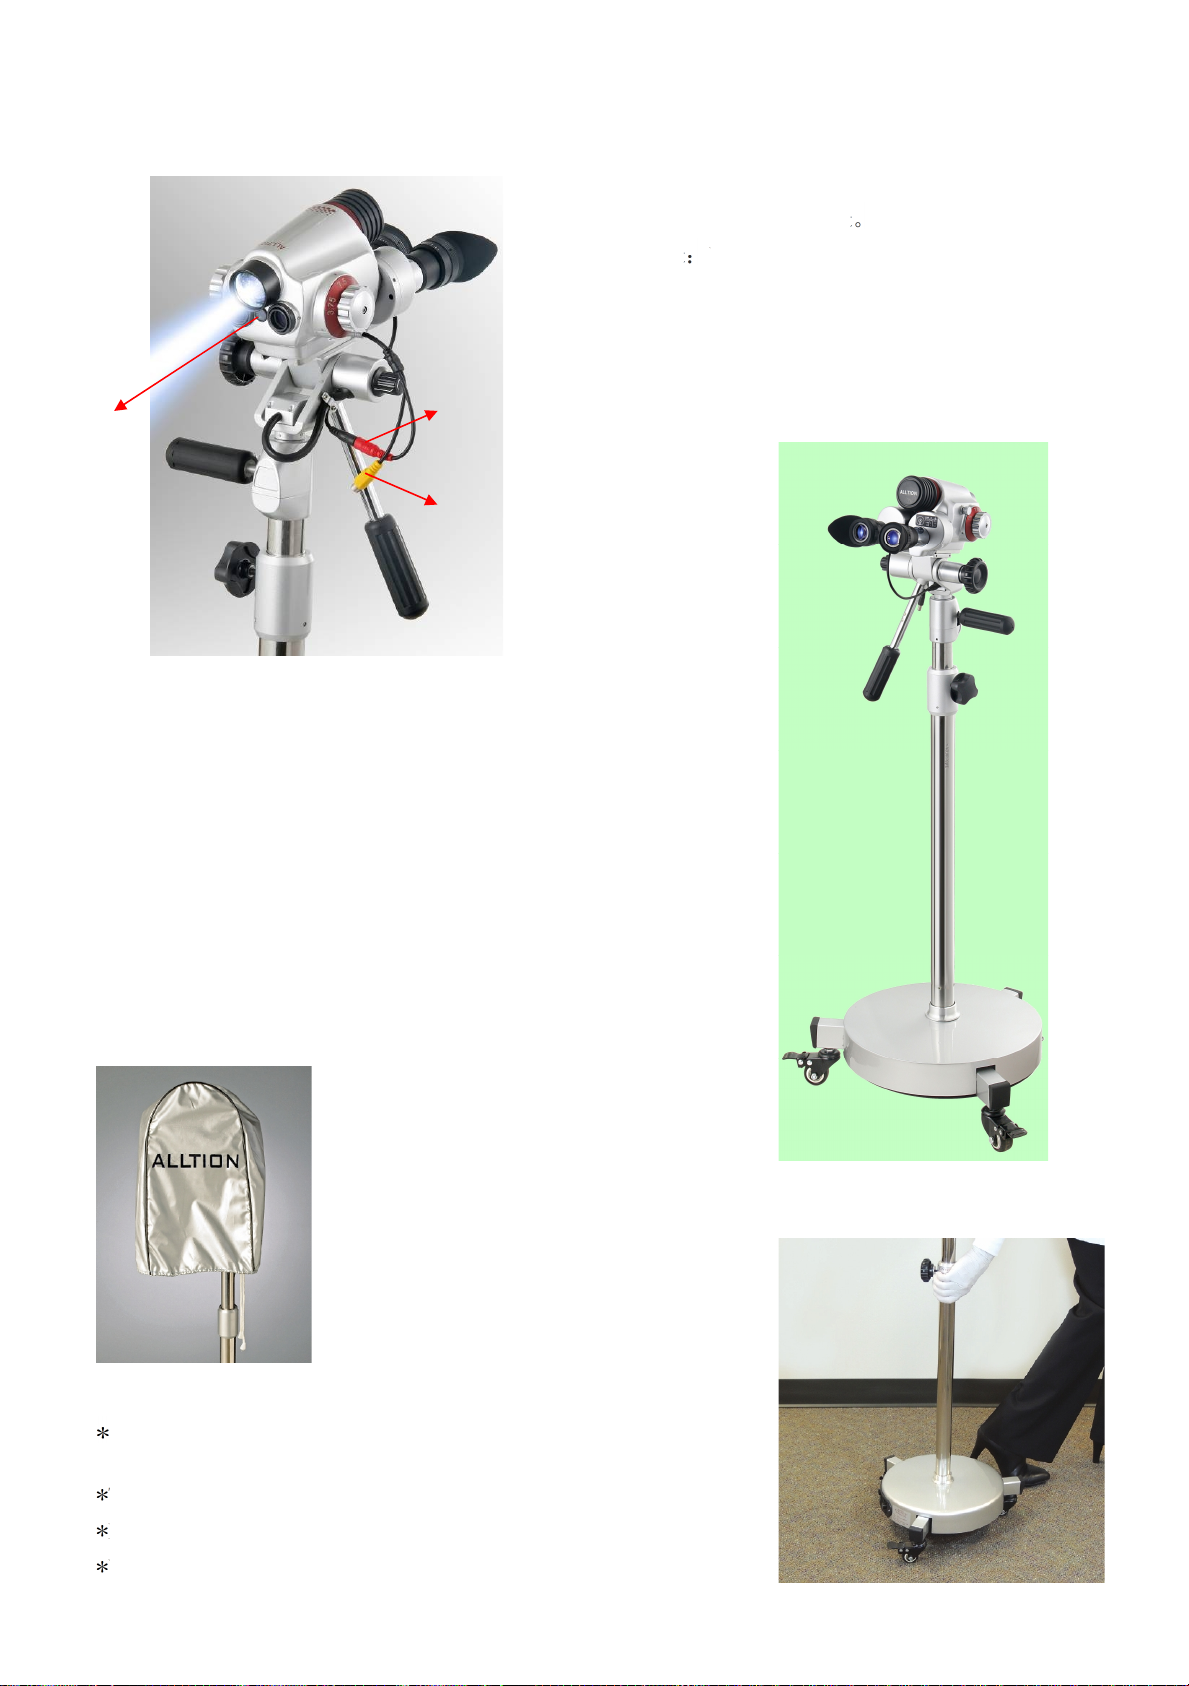
D. Adjust the Fine Focus Controls to provide clear, magnified views of the area to
be examined. Rotate your left hand on the Fine
Focus Handle which will finely move the optics
towards or away from the object that you wish to
view. Also, rotate your right hand which is on the
Fine Height Adjustment Handle up or down to
raise or lower the optics. Adjust light intensity
rheostat as needed by turning the black Rheostat
Knob. Turn the silver Green Filter Knob for
optimum assessment of affected area.
Note: Both the black Rheostat Knob and the silver
Green Filter Knob are conveniently located on the
Colposcope head, thus allowing the user complete
control without looking up from the eyepieces.
E. The Colposcope head may be tightened or loosened according to your preference by turning the Head
Inclination Adjusting Knob.
Note on all photos
All 1 step colposcopes use the same adjustment techniques as shown on
these pages, although models shown may differ.
7B.
7C
7D
7E

8.
Se
l
e
c
t
i
n
g
Y
o
ur
Pr
e
f
e
rr
e
d
L
e
v
e
l
ofMagnification
The ALLTION offers you the
advantage of increasing or decreasing
magnification during a colposcopic
examination.
A. When viewing the cervix, reach up
and rotate the Three-Step
Magnification Knob.
B. Rotate it to your desired magnifica-
tion (3.75, 7.5, or 15).
When moving from one magnification
to another, slight adjustments in the
fine focusing mechanism might be necessary.
C. Turn the Fine Focus Handle.
If patient is not centered, you can move the Colposcope head in
multiple directions to change your field of vision. See photos D–H.
Move
H
e
a
d
Up &
Down
T
w
i
st
the
ad
j
ustmen
t
hand
l
e
to
movethehead
up or down.
Angle
Head Up
Angle
Head
Down
Move
Head Left
Push the Fine Height Adjustment
Handle forward and to the left
Move Head Right
Pull the Fine Height Adjustment
Handle backward and to the right
Angle
Head Up
8G.
Pushthe FineF
o
c
u
s
Handle
down and forward.
Angle
Head
Down
8H.
P
u
ll
theFineF
o
c
u
s
Handle
up and backward.

9.IntegratedVideoCamera
An integrated video camera (1 CCD) is available in specific models. It is very convenient for the doctors to
communicate with the patient by this device.
1.CCD camera power: connect the red wire from the head
to the black wire from the bracket
2.Video Output Use the extra video cable to connect the
yellow video cable and the TV or monitor AV adapter.
The images from integrated video camera can be inputted
into a monitor or a TV set directly. Or it can be inputted
into a computer by image collection with USB adapter or
stored into a hard disk recorder
10.
Storage
and
Pr
e
ca
u
t
i
o
n
s
A. For storage, the instrument should be placed in a clean, dry
environment with stable temperatures to extend the life of the
components and ensure longevity of the instrument.
B. Please cover the Colposcope with the plastic dust cover that is
included with this instrument. This will keep the optics and components
relatively dust free.
C. When storing or carrying the instrument, adjust the instrument to the
lowest position. This will help ensure that if it is inadvertently hit, it will
resist tipping over.
11.
Movingthe
C
o
l
p
o
s
c
o
p
e
Rotate the Gross Height Adjustment and Locking Knob to move the
post to a comfortable position.
Tighten the Gross Height Adjustment and Locking Knob.
Place your foot between the wheels at the front end of the base.
With your hand on the Fine Height Adjustment Handle, pull forward
and roll across the floor.
Video
cable
CCD
Power
Video
Camera
10C
10B

12.
F
u
s
e
R
e
p
l
ac
e
m
e
n
t
Unscrew the fuse seat located at the back end of
the base using a screwdriver that is included With
the Colposcope.
Remove the broken fuse (dispose of correctly).
Replace with the fuse that is also included with the
colposcope. Two fuses have been included for
your convenience.
Screw the Fuse Seat into the proper position, using
a Phillips or slot screwdriver.
13.
T
r
o
ub
l
e
s
hoot
i
n
g
Viewing Light Will Not Come On
On-off Light Indicator Burning
Check power plug toensure that itissecure.
Rotate the black Rheostat Knob.
Call ALLTIONCustomerservice for assistance:+86-774-2836101
On-Off Light IndicatorNot Burning
Place hand in frontofcolposcope head,aslight indicator bulb may be burnedoutif there is no light on the
hand.
Push On/Offswitch.
Checkcord tosee if plug is in at both thecolposcope andwall.
Check fuse. Fuses arelocatedon the edgeof thestand base.
Checkwallplugwith another electrical instrument
CallALLTIONcustomerservice for assistance:+86-774-2836101.
Colposcope Head Keeps Turning
Tighten Gross Height Adjustment andlocking Knob.
14.Informationabout disinfection forAlltionLEDColposcope
You can wipe the colposcope with alcohol on a clean cloth, andyou canusethe disposable alcohol pads,
usually used to clean skin. Care must be taken not to put the alcohol on any lenses, whether that be the
lenses the doctor looks through or the lenses towardsthe patient.
15.Warra
n
ty
Any unauthorized maintenance or repairs on this colposcope will void all warranties. Please make sure to
save the original Colposcope shipping box and packing materials; in order to safely shipit back to
ALLTION.
Atwoyears–parts and labor warranty is already included with your purchase of the Colposcope.
For
more
information:
Phone:
+86-774-2836101
Web:
http://www.alltion.com/
http://www.alltion-microscope.com/
Email: sales@alltion.com or sales@alltion-microscope.com
Other manuals for AC-2000 Series
2
Table of contents
Other Alltion Medical Equipment manuals