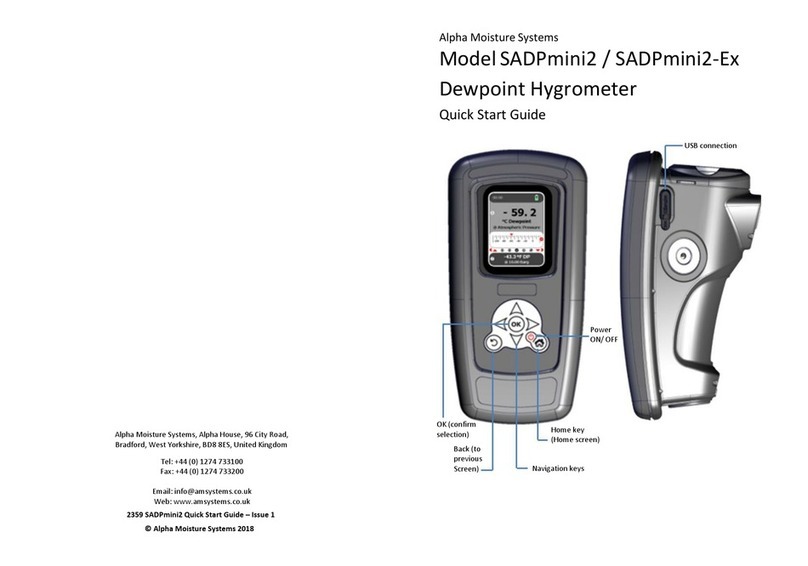
Alpha Moisture Systems SADPmini2 User manual

Alpha Moisture Systems
Model SADPmini2 Dewpoint
Hygrometer
2301 SADPmini2 User Manual

Contact Information
Head Office
Alpha Moisture Systems
Alpha House
96 City Road
Bradford
West Yorkshire
BD8 8ES
United Kingdom
Tel: +44 (0) 1274 733100
Fax: +44 (0) 1274 733200
Web: www.amsystems.co.uk
Office Opening Hours:
Monday - Thursday 8.30am - 5.30pm (UK TIME)
Friday 8.30am - 5.00pm
Saturday and Sunday - Closed
Authorised Distributor Contact Information
© Alpha Moisture Systems 2017-2019
2301 SADPmini2 –Issue 2

SADPmini2 User Manual
Contents
1 Introduction.......................................................................................................................3
1.1 Explanation of Prohibition, Warning and Note Symbols used .................................3
1.2 Warranty ..................................................................................................................3
1.3 Instrument Description ............................................................................................4
1.4 General Arrangement ..............................................................................................5
1.5 Functional Description of Desiccant Chamber .........................................................6
2 Important Information.......................................................................................................7
2.1 Symbols Table ..........................................................................................................7
2.2 Battery Information..................................................................................................8
2.3 Cleaning and Decontamination................................................................................8
2.4 Information Screens.................................................................................................8
3 Installation .......................................................................................................................10
3.1 Gases to avoid........................................................................................................10
3.2 Gas Sampling System .............................................................................................11
3.3 Installation Configurations .....................................................................................11
3.4 Installation and Sample..........................................................................................13
4 Instrument Use ................................................................................................................14
4.1 Powering Up the Instrument..................................................................................14
4.2 Start Up Screen ......................................................................................................14
4.3 Navigation Carousel ...............................................................................................15

SADPmini2 User Manual
5 Instrument Settings .........................................................................................................16
5.1 Setting the Language, Date and Delimiter Display: Navigation Keypad .................16
5.2 Setting the Time, Date and Power Saving Mode (ECO): Navigation Keypad..........17
5.3 Notes on the Correct Use and Choices of Moisture Measurement Units ..............18
5.4 Setting the Main and Secondary Screen Units: Navigation Keypad .......................20
5.5 Instrument Settings using PC Tool..........................................................................21
5.6 Setting the Language, Date and Delimiter Display: User Tool................................21
5.7 Setting the Time, Date, and Power Saving Mode (ECO): User Tool........................22
5.8 Setting the Main and Secondary Screen Units: User Tool......................................23
5.9 Setting the Gas Type: User Tool .............................................................................24
6 Calibration........................................................................................................................26
6.1 AutoCal...................................................................................................................26
6.2 CalSet .....................................................................................................................28
6.3 Single Point Calibration (SPC).................................................................................30
Appendix A Instrument Specification ........................................................................................32
A1: Instrument Specifications............................................................................33
Appendix B Trouble Shooting ....................................................................................................34
B1: Trouble Shooting.........................................................................................35
Appendix C User Tool Software Installation and Guidance .......................................................36
C2: User Tool Software Guide ...........................................................................41
Appendix D Firmware Maintenance..........................................................................................44
D1: Firmware Update ........................................................................................45
D2: Loading User Tool Configured Files.............................................................47
D3: Saving User Tool Configured Files ...............................................................49
D4: Downloading Settings to the SADPmini2 ....................................................51
D5: SADPmini2 Report.......................................................................................52
D6: Configuring Instrument to Default Settings ................................................53
D7: Downloading Calibration Files.....................................................................54
SADPmini2 User Manual
3
1Introduction
This User Manual is only for use with the instrument supplied. All information required
for the safe and proper operational use of the instrument is contained here. Make sure
you read and understand the information and instructions in the User Manual before
using the instrument. Failure to operate the instrument as directed in this User Manual
may:
•Impair the inbuilt safety protection offered by the instrument
•Expose personnel to risk of injury
•Cause damage to and/or impair the function of the instrument
•Invalidate the instrument warranty
1.1 Explanation of Prohibition, Warning and Note Symbols used
Local health and safety regulations should be observed as should the safety critical
prohibitions, warnings and notes highlighted in this user manual.
DO NOT
Prohibited actions or behaviours
WARNING
Danger to personnel and/ or damage to equipment
NOTE
Additional information
1.2 Warranty
The SADPmini2 is supplied with a two-year warranty from the date of purchase. This
warranty is subject to the proper operational use of the instrument and following the
information provided in this User Manual. The instrument should not be repaired
without prior inspection or authorisation by Alpha Moisture Systems or an authorised
distributor. Any unauthorised alteration or misuse may invalidate the instrument
warranty.
NOTE
Please retain the original equipment packaging so the SADPmini2 can be
returned to Alpha Moisture Systems or your authorised distributor if required

SADPmini2 User Manual
4
1.3 Instrument Description
The SADPmini2 is a fully self-contained, micro-controller based, battery operated
dewpoint hygrometer primarily used for mobile analysis and short term continuous
monitoring. Using an ultra-high capacitance aluminium oxide sensor and a high
accuracy, high speed, Analogue to Digital Converter (ADC), the SADPmini2 monitors
dry industrial process gas and dry compressed air samples. Results are displayed on a
colour Liquid Crystal Display.
The SADPmini2 is controlled via the Navigation Keypad. The display screen has two
sections:
•A primary, upper section ①providing
numerical, scrolling strip chart and
horizontal moving coil configuration
sample readouts.
•A lower secondary screen ②providing
numerical sample readings in a
secondary unit as required.
The display units of each section can be changed independently e.g. °C, °F, mg/m3,
ppm(v), ppm(w), and lb/MMscf.
A single USB port charges the battery when connected to either a PC or a dedicated
power supply. The USB port also allows firmware, calibration and set-up data transfer
from dedicated User Tool PC software. Alternatively a removable SD Card allows data
transfer between the SADPmini2 and PC using the User Tool software.
DO NOT
Do not substitute the SD Card supplied with this instrument

SADPmini2 User Manual
5
1.4 General Arrangement

SADPmini2 User Manual
6
1.5 Functional Description of Desiccant Chamber
Keeping the sensor dry between tests makes sure that the SADPmini2 is ready to carry
out rapid sample checks. The design of the Desiccant Head achieves this by
surrounding the Aluminium Oxide Sensor with desiccant, keeping the sensor dry when
not in use.
A sample of the process gas or air is piped to the inlet port. The sample flows through
the measuring chamber while the Desiccant Head remains in position over the
Aluminium Oxide Sensor.
Restricting the continuous flow of the sample by closing off the opposite
port causes a pressure increase inside the instrument which raises the Desiccant
Head and exposes the Aluminium Oxide Sensor to the sample. When the desiccant
chamber s fully extended the outlet flow restriction should be removed and the
sample gas allowed to flow through to the measuring sensor.
When measurement is complete, manually depress the desiccant chamber until it is
fully closed. Disconnect the sample pipe from the instrument.
Between tests the sensor should not be exposed to ambient air. The chamber
is designed so that the void space and chamber wall surfaces can be purged with
sample gas before the sensor is exposed to the sample gas which allows the
SADPmini2 to provide faster, more accurate and reliable results.

SADPmini2 User Manual
7
2Important Information
2.1 Symbols Table
Symbol
Description
Lithium-ion Battery
The SADPmini2 is powered by a single lithium-ion battery. The battery
may be exchanged by an authorised agent with the necessary training,
support systems and accreditation.
Only use the USB power supply supplied with the instrument to charge
the battery.
It is recommended that the SADPmini2 be put on charge overnight prior
to use
Pressure Exposure
The telescopic measuring head should not be exposed to
more than 0.3 barg, 4 psig
Exposing the measuring head to higher pressures may
damage the instrument and result in injury to the
operator or other personnel in the area.
USB Communication Performance
Using the USB communication channel and charging power port within
the instrument may result in not all connections to all USB ports on all
PCs or laptops being entirely successful. Many USB ports, even within the
same PC or laptop, differ from each other in electrical hardware or
firmware implementations, whilst still broadly complying with the overall
USB standards, giving rise to a variety of situations which may manifest in
a reduced connection experience. It is recommended that if a port is not
connecting as expected then the user should try an alternative port
within the PC or laptop or employ a USB Hub device which would
effectively isolate the problematic PC or laptop USB port from the
instrument.

SADPmini2 User Manual
8
2.2 Battery Information
The SADPmini2 uses a single lithium-ion battery (3.65 V nominal). The battery cannot
be removed or replaced by the user. The instrument must be returned to an
authorised agent for battery replacement. When the battery charge is low and/ or the
battery is charging, the instrument display will be dimmed. If the battery is very low
and the user tries to turn the instrument on, a battery low icon will be displayed and
the instrument will shut down.
DO NOT
Do not replace the battery. Only authorised agents should replace the battery.
Do not open, crush, expose to heat above 50 °C or incinerate the battery. There is a
risk of fire and burns.
Only use the USB charging equipment supplied with the SADPmini2
2.3 Cleaning and Decontamination
The instrument must only be cleaned with a soft cloth dampened with water.
DO NOT
Do not use solvents, silicones or abrasives to clean the SADPmini2
2.4 Information Screens
The SADPmini2 Information screens provide various instrument specification,
manufacturer and authorised agent details. Information screens are for reference
purposes only and do not provide any instrument functionality. To view the available
Information Screens:
1. Select the Information icon ① from the Navigation Carousel to display the
Information screen ②.
2. Using the navigation key ③scroll through the screens ④ & ⑤ as required.

SADPmini2 User Manual
9
NOTE
Authorised distributor details will differ locally

SADPmini2 User Manual
10
3Installation
This section details the sample specific SADPmini2 installation procedures and the
instructions for obtaining the correct result from sample gas.
3.1 Gases to avoid
Corrosive Gases: The Sensor should not be exposed to corrosive gases (or corrosive
contaminants in the gas sample) as these can chemically attack the sensor, impairing
calibration accuracy and/or damaging it beyond economic repair. Examples of such
gases are mercury (Hg), ammonia (NH3), chlorine (Cl2) etc. Strong oxidising agents such
as ozone (O3) should also be prevented from coming into contact with the sensor.

SADPmini2 User Manual
11
3.2 Gas Sampling System
DO NOT
Do not allow the sample pressure to exceed 0.3 bar / 4 psi above ambient
NOTE
To maintain sample integrity and minimise equilibration time the system should
be as simple as possible and of minimum swept volume.
NOTE
The sample tube should be stainless steel for very dry gas applications. If any section of
the pipework must be flexible, it is recommended that PTFE is used.
3.3 Installation Configurations
The installation configurations discussed cover the following sample scenarios:
•Clean gas < 10 bar
•Clean gas > 10 bar
•Particulate or liquid contamination
No.
Description
1
Process Line
2
Isolation Valve
3
Needle Valve
4
SADPmini2
5
Flow Indicator (Optional)
6
Pressure Regulator
7
Filter Unit
8
Needle Valve OR Pressure Regulator
(depending on pressure of system)
WARNING
Make sure that the rubber SD Card and USB power protector bungs are installed
during sampling to comply with IP65 (NEMA4X) protection

SADPmini2 User Manual
12
Clean Gas < 10 Bar
Reduce positive pressure gas
to atmospheric pressure.
Use a needle valve at low
pressures (<10 barg) to control
flow and pressure drop.
Clean Gas > 10 Bar
Reduce positive pressure gas to
atmospheric pressure.
Use a stainless steel, low swept
volume pressure regulator at higher
pressures (>10 barg).
Particulate/ Liquid Contamination
Filter all particulate matter.
Use a coalescing filter (with
drain) for liquid condensate
samples. Hygroscopic
particulates and liquid
condensate will slow the
achievement of equilibrium
and delay the final result.
Hygroscopic liquid (such as
glycol) may accentuate the
buffering effect (as above)
and render the sensor too
slow to use.
Install the filter as close to
the sample point as practical.

SADPmini2 User Manual
13
3.4 Installation and Sample
1. Install the sample piping system and equipment as per the required installation
configuration.
NOTE: The SADPmini2 is not connected to the inlet piping system at this stage.
2. Open the sample Isolation Valve and adjust the needle valve/ regulator to allow a
flow of 5-15 litres per minute to atmosphere through to sample pipe.
3. Allow the gas to flow through the sample pipe for 2 minutes to purge the system.
4. After ensuring that the sample gas is clean and dry connect the sample pipe to
the instrument.
NOTE: The orientation of the ports is not important.
5. When the sample flow is low or very dry gas is being measured connect a >20 cm
pipe to the outlet port to prevent back diffusion.
WARNING
Failure to purge the system may expose the SADPmini2 to residual moisture and/ or
liquid or particulate damage. Use white/ filter paper to check for dust or oil mist in
the sample
WARNING
Do not exceed a flow rate of 20 litres per minute
6. Allow the gas to flow through the SADPmini2 for two minutes.
7. Press the power button on the SADPmini2 and ensure that the sensor is ‘dry’.
8. Block the instrument outlet, e.g. cover with a finger and allow the Desiccant Head
to extend fully.
NOTE: Do not lift the Desiccant Head manually as this will draw ambient air into
the sample chamber and produce a false reading.
9. Unblock the outlet and allow the gas to flow through the sensor.
10. The displayed reading will rise until the sensor is in equilibrium with the sample
gas.
11. When the displayed reading has settled record the final reading.
12. When completed manually depress the Desiccant Head fully.
NOTE: It is important to make sure the Desiccant Head is depressed fully when
the instrument is not in use to prevent the sensor and desiccant material
becoming saturated.
13. Close the sample Isolation Valve.
14. Press and hold the power button for two seconds to switch off the SADPmini2.
15. Disconnect the sample pipework from the SADPmini2.

SADPmini2 User Manual
14
4Instrument Use
The SADPmini2 is designed for quick start-up and ease of use. This section details how to
power up the instrument and how to use the Navigation Keypad to access the different
instrument displays and functions.
4.1 Powering Up the Instrument
No.
Description
1
Power ON/ OFF
Press to switch ON
Press and hold to switch OFF
2
Home Key (returns to Home
screen)
Press Home Key to exit power
saving Mode (no activity for 10
min.) Current screen
re-activated
3
Back (to previous screen)
4
OK (confirm desired selection)
5
Navigation keys (move between
screens)
4.2 Start Up Screen
After displaying the Splash screen, the SADPmini2 will display the following screen on
start up.
No.
Description
1
Status bar (Time and battery
status)
2
Upper Section of Screen
(Main Unit/Analogue scale)
3
Navigation Carousel
4
Lower Section of Screen
(Secondary Units display,
additional information)

SADPmini2 User Manual
15
4.3 Navigation Carousel
The different instrument functions are accessed using the Navigation Carousel.
Navigation icons on the carousel relate to the three different screen options available.
The Navigation arrows displayed to the left and right of the Navigation Icons indicate the
other screens that can be accessed after selecting one of the three Navigation icons.
No.
Description
1
Navigation Keys (left and up)
2
Information (icon)
3
Home (icon)
4
Settings (icon)
5
Navigation Keys (right and down)
Selecting an icon on the Navigation Carousel will display the associated screen.

SADPmini2 User Manual
16
5Instrument Settings
The SADPmini2 is despatched with client specific factory settings pre-installed. However,
it may be necessary to adjust these settings periodically. Settings can be adjusted by
using either the:
•Navigation keypad to directly input the setting changes into the instrument
•PC User Tool software to update the instrument settings via a USB
5.1 Setting the Language, Date and Delimiter Display: Navigation Keypad
1. Select the Setting icon
from the Navigation
Carousel ① to display
the Settings screen.
2. Select the International
Settings icon on the
Settings screen ②.
3. Using the navigation
keys ③select the
required language ④.
4. Using the navigation
keys select the
required date
format ⑤.
5. Using the navigation
keys select the
required Numerical
Delimiter format ⑥.
6. Using the navigation
keys select/ highlight
the Blue tick ⑦.
7. Select OK ⑧to save
the settings.
NOTE
The language selected is displayed in the dialogue box and as a flag at the
bottom of the screen

SADPmini2 User Manual
17
5.2 Setting the Time, Date and Power Saving Mode (ECO): Navigation Keypad
NOTE
To save power and extend the battery life, the SADPmini2 has a power saving
mode (ECO). When the ECO setting is enabled, the display will dim after 10
minutes and turn off after a further 30 minutes. When not enabled the display
will not dim and the unit will remain active using normal power
1. Select the Setting icon from the Navigation Carousel ① to display the Settings
screen.
2. Select the Time/ Date
and ECO icon ② on
the Settings screen.
3. Select OK on the
navigation keypad ③.
4. Select OK ③ again
to access the time
display.
5. Using the navigation
keys ④set the
time ⑤.
6. Select OK (3) to save
the time setting.
7. Using the navigation
keys ④highlight
the date display ⑥.
8. Select OK ③ to access
the date display.
9. Using the navigation
keys ④set the date.
10. Select OK ③ to save
the date setting.
11. Using the navigation
keys ④highlight the
ECO display ⑦.
12. Select OK ③ to
enable/ disable the ECO setting.
13. Select the navigation down key ④ to display a blue tick icon ⑧.
14. Select OK ③ to save the time/ date and ECO settings.

SADPmini2 User Manual
18
5.3 Notes on the Correct Use and Choices of Moisture Measurement Units
The SADPmini2 has two display screens:
•A primary, upper screen ① providing
numerical, scrolling strip chart and
horizontal moving coil configuration
sample readouts.
•A secondary screen ②providing
numerical sample readings in an
alternative unit if required.
Dewpoint °C or °F
For moisture measurement indication in units of Dewpoint °C or °F the pressure at
which the measurement is required to be indicated is also required. Please note that the
instrument has been calibrated at atmospheric pressure and care must be exercised
when choosing other engineering Units involving Gauge pressures such as barg and psig.
You may select either ‘atmospheric pressure’or one of four pressure engineering units
along with the value of the system pressure. Absolute units of kPa and kg/cm² are also
available. When selected, the main or secondary display screens will display the
pressure at which the Dewpoint reading is being calculated.
The pressure units and value can be set differently for the Main and Secondary units.
Note For calculation and data entry reasons the pressure range is from vacuum to 500
bar (and equivalent units), however, the device still operates at atmospheric pressure.
Other Units
There are four other Moisture Measurement Units available, which are all either
pressure independent (because they are concentrations) or must be quoted at
atmospheric pressure and hence do not feature the need to specify the pressure at
which the indicated measurement is to be calculated.
Other manuals for SADPmini2
1
This manual suits for next models
1
Table of contents
Other Alpha Moisture Systems Measuring Instrument manuals

Alpha Moisture Systems
Alpha Moisture Systems DS1200-AMT Guide

Alpha Moisture Systems
Alpha Moisture Systems SADPminiEx User manual

Alpha Moisture Systems
Alpha Moisture Systems SADPmini2 User manual

Alpha Moisture Systems
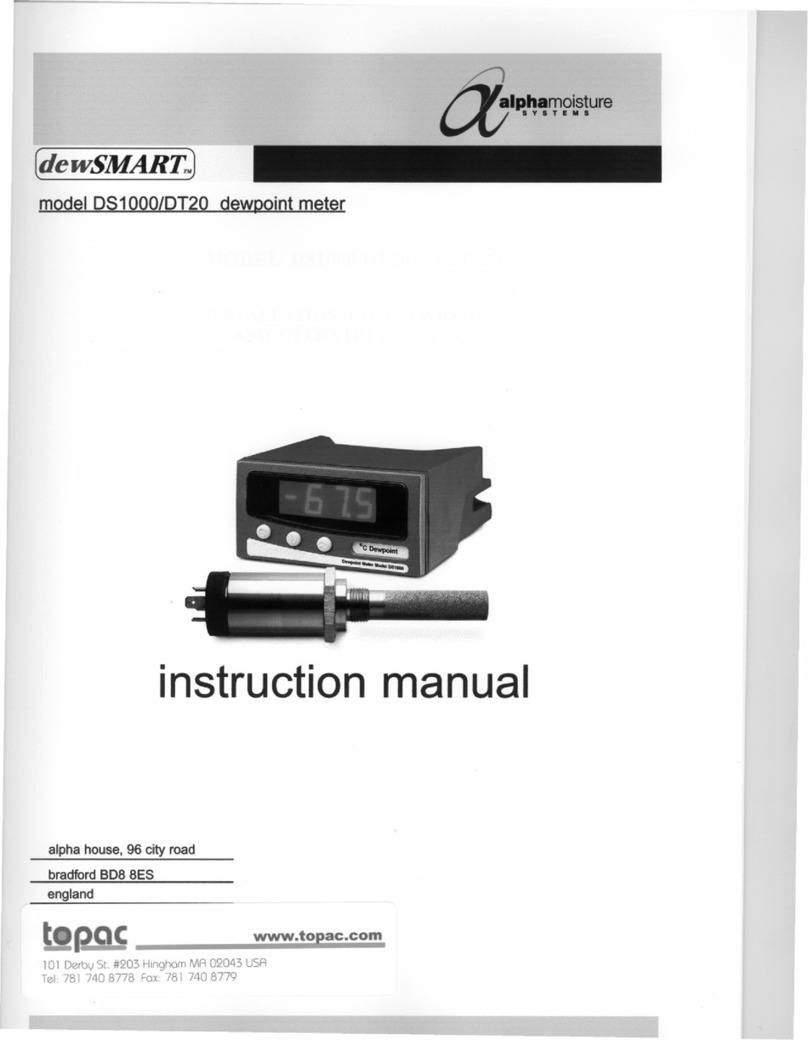
Alpha Moisture Systems dewSMART DS1000 User manual

Alpha Moisture Systems
Alpha Moisture Systems DS1200-PDT User manual

Alpha Moisture Systems
Alpha Moisture Systems dewTEC DS2000 User manual