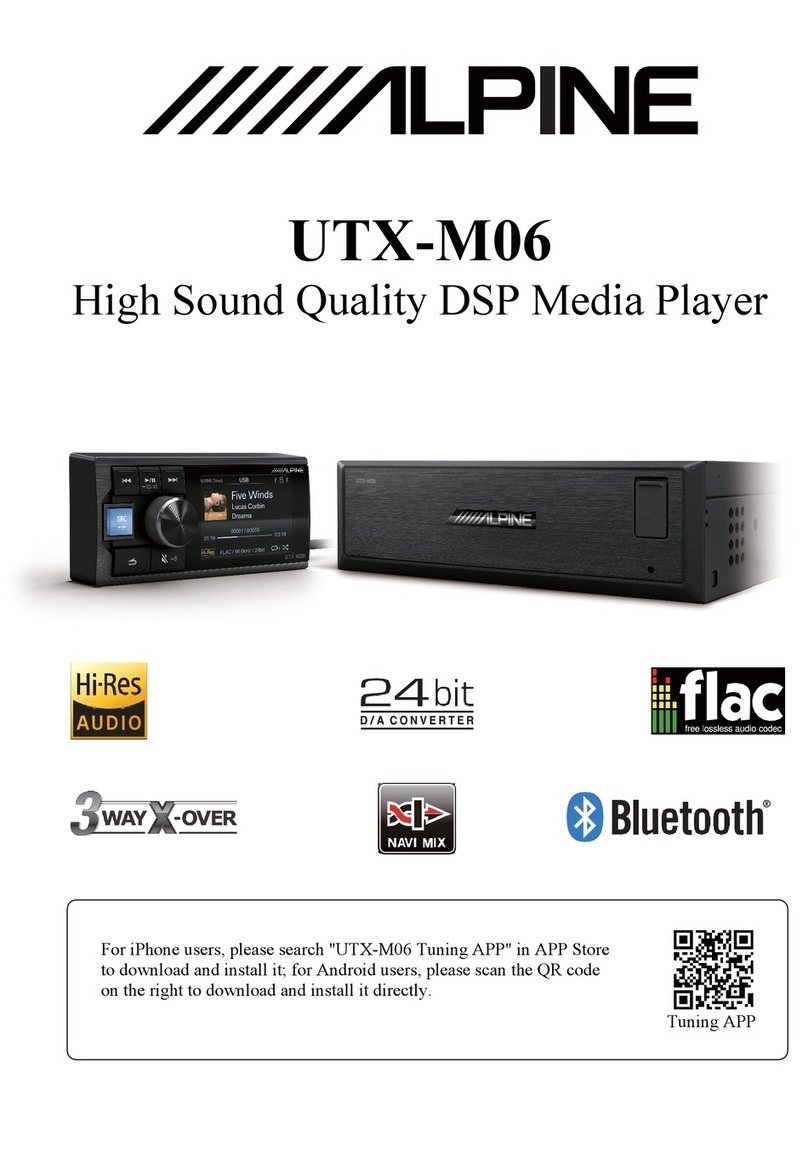
Alpine UTX-A09 User manual

High-end Sound Quality Upgraded Audio Media Player
UTX-A09
Please read before using this equipment.
ALPINE ELECTRONICS MARKETING, INC.
1-7, Yukigaya-Otsukamachi, Ota-ku,
Tokyo 145-0067, JAPAN
Phone: 03-5499-4531
ALPINE ELECTRONICS GmbH
Wilhelm-Wagenfeld-Str. 1-3, 80807 München, Germany
Phone 089-32 42 640
ALPINE ITALIA S.p.A.
Viale Cristoforo Colombo 8,
20090 Trezzano Sul Naviglio (MI), Italy
Phone +39 02 484781
ALPINE ELECTRONICS OF AMERICA, INC.
19145 Gramercy Place, Torrance,
California 90501, U.S.A.
Phone 1-800-ALPINE-1 (1-800-257-4631)
ALPINE ELECTRONICS OF U.K. LTD.
Alpine House
Fletchamstead Highway, Coventry CV4 9TW, U.K.
www.alpine.co.uk
ALPINE ELECTRONICS DE ESPAÑA, S.A.
Portal de Gamarra 36, Pabellón, 32
01013 Vitoria (Alava)-APDO 133, Spain
Phone 945-283588
ALPINE ELECTRONICS OF AUSTRALIA PTY.
LTD.
161-165 Princes Highway, Hallam
Victoria 3803, Australia
Phone 03-8787-1200
ALPINE ELECTRONICS FRANCE S.A.R.L.
184 allée des Erables
CS 52016 - Villepinte
95 945 Roissy Charles CDG Cedex
France
Phone: + 33(0)1 48 63 89 89
ALPINE ELECTRONICS (China) Co., Ltd.
R2-4F, CHINA MERCHANTS TOWER
NO. 116, JIANGUO STREET,
CHAOYANG DISTRICT
BEIJING 100022, CHINA

Operating Instructions
WARNING
This symbol means important instructions. Failure to heed them can result in serious injury or death.
DO NOT OPERATE ANY FUNCTION THAT TAKES YOUR ATTENTION AWAY FROM SAFELY DRIVING YOUR
VEHICLE.
Any function that requires your prolonged attention should only be performed after coming to a complete stop. Always stop the vehicle in a
safe location before performing these functions. Failure to do so may result in an accident.
KEEP THE VOLUME AT A LEVEL WHERE YOU CAN STILL HEAR OUTSIDE NOISES WHILE DRIVING.
Excessive volume levels that obscure sounds such as emergency vehicle sirens or road warning signals (train crossings, etc.) can be dangerous
and may result in an accident. LISTENING AT LOUD VOLUME LEVELS IN A CAR MAY ALSO CAUSE HEARING DAMAGE.
DO NOT DISASSEMBLE OR ALTER.
Doing so may result in an accident, fire or electric shock.
USE ONLY IN CARS WITH A 12 VOLT NEGATIVE GROUND.
(Check with your dealer if you are not sure.) Failure to do so may result in fire, etc.
KEEP SMALL OBJECTS SUCH AS BATTERIES OUT OF THE REACH OF CHILDREN.
Swallowing them may result in serious injury. If swallowed, consult a physician immediately.
USE THE CORRECT AMPERE RATING WHEN REPLACING FUSES.
Failure to do so may result in fire or electric shock.
DO NOT BLOCK VENTS OR RADIATOR PANELS.
Doing so may cause heat to build up inside and may result in fire.
USE THIS PRODUCT FOR MOBILE 12V APPLICATIONS.
Use for other than its designed application may result in fire, electric shock or other injury.
DO NOT PLACE HANDS, FINGERS OR FOREIGN OBJECTS IN INSERTION SLOTS OR GAPS.
Doing so may result in personal injury or damage to the product.
CAUTION
This symbol means important instructions. Failure to heed them can result in injury or material property damage.
HALT USE IMMEDIATELY IF A PROBLEM APPEARS.
Failure to do so may cause personal injury or damage to the product. Return it to your authorized Alpine dealer or the nearest Alpine Service
Centre for repairing.
PRECAUTIONS
WARNING

Product Cleaning
Use a soft dry cloth for periodic cleaning of the product. For more severe stains, please dampen the cloth with water only. Anything else has
the chance of dissolving the paint or damaging the plastic.
Temperature
Be sure the temperature inside the vehicle is between +60°C and -10°C before turning your unit on.
Maintenance
If you have problems, do not attempt to repair the unit yourself. Return it to your Alpine dealer or the nearest Alpine Service Center for servicing.
Installation Location
Make sure this unit will not be installed in a location subjected to:
•Direct sunlight and heat
• High humidity and water
• Excessive dust
• Excessive vibrations
Protecting the USB Connection Terminals
•This unit provides a front USB terminal and a rear one. The rear connector supports connection and use of iPhone/iPod/MTP/USB Memory.
The front terminal can connect USB Memory/MPT only. Correct performance of this unit cannot be guaranteed if both front and rear
terminals connect charging equipment (e.g. iPhone/iPod/MTP).
•Only a USB Memory, MTP or iPod/iPhone can be connected to the USB terminal on this unit. Correct performance using other USB
products cannot be guaranteed.
• If the USB connector is used, be sure to use a USB extension cable (supplied). A USB hub is not supported.
• Depending on the connected USB Memory/MTP, the unit may not function, or some functions may not be performed.
• The file systems supported by the unit are FAT16, FAT32, and ex FAT.
• Be sure the number of songs in the connected USB memory/MTP (the total number of songs in both USB memories connected to the front
and rear terminals) will not exceed 10,000. Otherwise, the unit may fail to play songs properly.
• The audio file format that can be played back on the unit is MP3/WMA/AAC/FLAC/WAV/APE.
• Artist/song name, etc. can be displayed. However, some particular characters may not be correctly displayed.
On Handling USB Memory
CAUTION
Alpine accepts no responsibility for lost data, etc., even if data, etc., is lost while using this product.
•To prevent malfunction or damage, note the following points.
Read the USB Memory Owner’s Manual thoroughly.
Do not touch the terminals by hand or metal.
Do not subject USB Memory to excessive shock.
Do not bend, drop, disassemble, modify or soak in the water.
• Avoid usage or storage in the following locations:
Anywhere in the car exposed to direct sunlight or high temperature.
Anywhere the possibility of high humidity or corrosive substances is present.
• Fix the USB Memory in a location where driver operation will not be hindered.
• USB Memory may not function correctly at high or low temperature.
• The USB Flash Memory supports only 512 or 2,048 bytes per sector.
• Use only certified USB Memory. Note that even certified USB Memory may not function correctly depending on its type or state.
• USB Memory function is not guaranteed. Use USB Memory according to the terms of agreement.
• Depending on the settings of the USB Memory type, memory state or encoding software, the unit may not play back or display properly.
• A file that is copy-protected (copyright protection) cannot be played back.
• USB Memory may take time to start playback. If there is a particular file other than audio in the USB Memory, it may take considerable
time before the file is played back or searched.
• The unit can play back the files with “mp3”, “wma”, “m4a”, “wav”, “flac”, or “ape” extension.
• Do not add the above extension to a file other than audio data. This non-audio data will not be recognized. The resulting playback may
contain noise that can damage speakers and/or amplifiers.
• It is recommended to back up important data on a personal computer.
• Do not remove the USB device while playback is in progress. Change SOURCE to something other than USB, and then remove the USB
device to prevent possible damage to its memory.
• iPhone, iPod touch and Lightning are trademarks of Apple Inc., registered in the U.S. and other countries.
• The use of Apple logos means that the product has been designed to connect specified Apple products and has been certified by the
developer to meet Apple performance standards. Apple is not responsible for the operation of this device or its compliance with safety
and regulatory standards. Please note that the connection with iPod or iPhone may affect wireless performance.
• Android is a trademark of Google Inc.
• The Android robot is reproduced or modified from work created and shared by Google and used according to terms described in the
Creative Commons 3.0 Attribution License.
• Windows Media is a trademark or registered trademark of Microsoft Corporation in the United States and/or other countries.
•The BLUETOOTH word mark and logos are registered trademarks owned by the Bluetooth SIG, Inc. and any use of such marks by
Alpine Electronics, Inc. is under license.
•The products with High-Resolution nark comply with the benchmark defined by Japan Audio Society. The use of High-Resolution mark
has been authorized by Japan Audio Society.
• MPEG Layer-3 audio coding technology licensed from Fraunhofer IIS and Thomson. Supply of this product only conveys a license for
private, noncommercial use and does not convey a license nor imply any right to use this product in any commercial (i.e. revenue
generation) real time broadcasting (terrestrial, satellite, cable and/or any other media), broadcasting/streaming via internet, intranets
and/or other networks or in other electronic content distribution systems, such as pay-audio or audio-on-demand applications. An
independent license for such use is required. For details, please visit http://www.mp3licensing.com.
Accessory List
Head unit .................................................................................................................................................................................................1
Power cable..............................................................................................................................................................................................1
USB cable................................................................................................................................................................................................1
AUX/Pre-output cable.............................................................................................................................................................................1
Microphone............................................................................................................................................................................................. 1
Mounting bracket.................................................................................................................................................................................... 2
Round head screw (M5 × 8) .................................................................................................................................................................. 8
Controller................................................................................................................................................................................................ 1
Controller cable ......................................................................................................................................................................................1
Controller tray......................................................................................................................................................................................... 1
Controller bracket................................................................................................................................................................................... 1
Light shield............................................................................................................................................................................................. 1
Adhesive tape...........................................................................................................................................................................................1 set
Owner's Manual.......................................................................................................................................................................................1 set
GETTING STARTED

Turning Power on and off
Press any button on the controller to turn on the unit.
Press and hold for at least 2 seconds to turn off the unit.
Note
•The first time power is turned on, the volume will start from level 12.
Setting AUX Mix Mode
High-quality audio processing chip has been present in this unit. You may choose ALPINE Direct Mode to appreciate the high-quality signal
source of this unit or choose AUX Mix Mode to listen to the voice of original vehicle equipment (e.g. navigator) while appreciating the signal
source of this unit.
Press and hold for at least 2 seconds to switch to AUX Mix Mode.
AUX Mix (initial setting) ALPINE Direct
Aux Mix:
When the unit plays music, mix the music played by vehicle sound system with the voice navigation prompts.
ALPINE Direct:
Only appreciate the high-quality music brought by UTX-A09.
Note
•When the source is AUX, it cannot switch to AUX Mix Mode.
•Before using this function, make sure the audio output of vehicle sound system is correctly connected to AUX IN of the unit. For
details, please read “Connection”.
Source Selection
Press to change the source.
FM → AM → USB*1 → iPod*2 → AUX → Bluetooth Audio*3 → FM
*1 When the unit connects two USB memories, the audio files will be played as a single USB source.
*2 Displayed only when the iPod/iPhone supported by this unit is connected. Please connect iPod/iPhone to the rear USB terminal.
*3 Displayed only when Bluetooth Audio is set to ON. Refer to "Setting the BLUETOOTH Connection".
Initial System Startup
Be sure to press the RESET switch when using the unit for the first time or after changing the car battery, etc.
1Turn off the unit power.
2Press RESET with a ballpoint pen or similar pointed object.

Adjusting Volume
Turn the Rotary encoder until the desired sound is obtained.
Control the unit by using the optional controller.
Aim the controller transmitter at the remote sensor.
Connect it to the controller connector
You may control the unit by using the steering wheel controls through the optional Alpine steering wheel controller connector. For
details, please contact your authorized Alpine dealer.
Radio
Listening to Radio
1Press to select FM or AM mode.
2Press to select TUNER mode.
AUTO SEEK (automatic mode) MANUAL SEEK (manual mode)
Note
•The initial mode is automatic mode.
Automatic mode:
Automatically search TUNER.
Manual mode:
Manually tune the frequency level by level (manual tuning).
3Press or to recall the desired radio station.
Holding or , you will switch to the preset radio station.

Presetting Stations Manually
1Press the Rotary encoder in FM or AM mode.
2Turn the Rotary encoder to select any preset number (1-12 or 1-6) in the memory list.
3Press and hold the Rotary encoder for at least 2 seconds.
The current radio station is stored into the preset button selected by you.
Note
•A total of 18 stations can be stored in the preset memory (12 stations for FM band; 6 stations for AM band).
•If you store a station in a preset memory which already has a station, the current station will be cleared and replaced with the new station.
Presetting Stations Automatically
1Press to select FM or AM.
2Press the Rotary encoder.
3Turn the Rotary encoder to select “Presetting Stations Automatically”, and press the Rotary encoder.
The tuner will automatically seek and store 12 (or 6 for AM band) strong stations in the selected band. They will be stored into preset
buttons in ascending order of frequency.
Tuning to Preset Stations
1Press the Rotary encoder in FM or AM mode.
2Turn the Rotary encoder to select a preset station in the memory list.
3Press the Rotary encoder to receive the station selected.
The display shows the preset number and frequency of the station selected.
USB Memory / MTP (Optional)
Note
•When the unit connects two USB memories at the same time, the system will automatically play the contents in both USB memories.
•Do not connect two charging devices concurrently to the USB terminal of this unit. If you do so, normal performance cannot be guaranteed.
•The unit is compatible with a mobile phone supporting MTP.

Connecting USB Memory / MTP (Optional)
If you connect a USB memory / MTP device to the unit, it can play MP3/WMA/AAC/WAV/FLAC/APE files.
Playback
1Press to select USB mode.
2Touch or to select the desired track (file).
Pressing and holding or will fast backward/fast forward track continuously.
3To pause playback, press .
Pressing again will resume playback.
Note
•Depending on the file stored in USB/MTP, it may take some time to start playback.
•During playback, the screen will display the format of file played.
•When it plays a high-resolution (Hi-Res) audio file, the screen will display HR icon.
•Any file protected by DRM (Digital Rights Management) copy protection, cannot be played back on this unit.
•The playback time may not be correctly displayed when a VBR (Variable Bit Rate) recorded file is played back.
•If the file contains tag information, the song name / artist name / album name will be displayed.
•The unsupported characters will be replaced with “ ” when displayed.
Repeat Play
1Press .
The song is played back repeatedly.
*1 Only a track/file is repeatedly played back.
*2 Only files in a folder are repeatedly played back (it works after searching by folder).
*3 Repeat Play is turned off.
2To cancel Repeat Play, turn off this function by following the above procedure.
Searching for a desired Song
A USB memory can contain many songs. Search by folder or category to find a desired song rapidly.
1Press the Rotary encoder to activate the search mode.
2Turn the Rotary encoder to select “Searching by folder” or Searching by category”, and press the Rotary encoder.
Searching by folder
Searching by folder will display all valid folders in USB/MTP. Then rapidly find a desired song.
3Turn the Rotary encoder to select a desired folder, and press the Rotary encoder.
Note
•An empty folder or a folder with no valid file will not be displayed.
Searching by category
In this mode, you can choose to search by song/artist/album.
3-1 Turn the Rotary encoder to choose searching by song, artist or album, and press the Rotary encoder.

3-2 Turn the Rotary encoder to select a desired song, artist or album, and press the Rotary encoder.
If searching by song is chosen at this step, it will directly play the selected song. You do not need to perform the next step.
If two USB memories are connected at the same time, the system will automatically merge the song categories in both USB memories.
4Turn the Rotary encoder to choose a song of the selected folder, artist or album, and press the Rotary encoder.
Start to play back the selected song.
Note
•Searching may be slow if many songs are stored in USB/MTP.
About MP3/WMA/AAC/WAV/FLAC/APE
CAUTION
Except for private use, duplicating audio data (including MP3/WMA/AAC/WAV/FLAC/APE data) or distributing, transferring, or
copying it, whether for free or for a fee, without permission of the copyright holder is strictly prohibited by the Copyright Act and by
international treaty.
What is MP3?
MP3, whose official name is “MPEG Audio Layer 3”, is a compression standard prescribed by the ISO (the International Standardization Organization) and
MPEG which is a joint activity institution of the IEC. MP3 files contain compressed audio data. MP3 encoding is capable of compressing audio data at extremely
high ratios, reducing the size of music files to as much as one-tenth their original size. This is achieved while still maintaining near CD quality. The MP3 format
realizes such high compression ratios by eliminating the sounds that are either inaudible to the human ear or masked by other sounds.
What is WMA?
WMA or “Windows Media™ Audio” is compressed audio data. WMA is similar to MP3 audio data.
What is AAC?
AAC is the abbreviation for “Advanced Audio Coding” and a basic format of audio compression used by MPEG2 or MPEG4.
What is WAV?
WAV is an audio file format developed by Microsoft Corporation, and conforms to RIFF (Resource Interchange File Format) file specification. It is used to
store audio information resources of the Windows platform and is widely supported by Windows platform and its applications. The WAV format supports
various compression algorithms such as MSADPCM and CCITT A LAW. It supports multiple audio bits, sampling rates and channels. The standard format
WAV file is the same as the CD format. It is also a 44.1 kHz sampling frequency with 16 quantized bits. Therefore, WAV format sound file quality is almost the
same as CD. As this is the most lossless music format, the file size is relatively large.
What is FLAC?
FLAC is a lossless audio compression encoding format. FLAC is a set of famous free lossless audio codec characterized by lossless compression. Different
from other lossy compression encoding formats such as MP3 and AAC, this format does not damage any original audio information.
What is APE?
APE is one of the popular lossless compression formats for digital music. Different from MP3, a lossy compression format that irreversibly deletes data
(insensitive to human hearing) to reduce the size of source file, APE is a lossless compression format that reduces file size by a more refined way of recording,
and restored data are the same as source file, thus guarantee the completeness of file.
Method for creating MP3/WMA/AAC/WAV/FLAC/APE (USB Drive) files
Audio data is compressed using software with MP3/WMA/AAC/WAV/FLAC/APE codec. For details on creating MP3/WMA/AAC/WAV/FLAC/APE files,
refer to the user’s manual for that software. MP3/WMA/AAC/WAV/FLAC/APE (USB Drive) files that are playable on this device have the file extensions as
below:
MP3: “mp3”
WMA: “wma”
AAC: “m4a”
WAV: “wav”
FLAC: “flac”
APE: “ape”
Files with no extension cannot be played back. WMA Lossless and WMA Professional files are not supported. Protected files are not supported. Neither are

raw AAC files (using the “.aac” extension).
There are many different versions of the AAC format. Confirm that the software being used conforms to the acceptable formats listed above. It’s possible that
the format is unplayable even though the extension is valid.
Playback of AAC files encoded by iTunes is supported. APE decoding only corresponds to APE v2 label.
Supported playback sampling rates and bit rates
MP3
Sampling rates: 48 kHz, 44.1 kHz, 32 kHz, 24 kHz, 22.05 kHz, 16 kHz, 12 kHz, 11.025 kHz, 8 kHz
Bit rates: 8 - 320 kbps
WMA
Sampling rates: 48 kHz, 44.1 kHz, 32 kHz, 22.05 kHz, 16 kHz, 11.025 kHz, 8 kHz
Bit rates: 12 - 192 kbps (stereo)
0-128 kbps (monaural)
AAC
Sampling rates: 48 kHz, 44.1 kHz, 32 kHz, 24 kHz, 22.05 kHz, 16 kHz, 12 kHz, 11.025 kHz, 8 kHz
Bit rates: 8 - 320 kbps
WAV
Sampling rates: 192 kHz, 176.4 kHz, 96 kHz, 88.2 kHz, 48 kHz, 44.1 kHz, 32 kHz, 24 kHz, 22.05 kHz, 16 kHz
Quantized bit: 8 bit, 16 bit, 24 bit
FLAC
Sampling rates: 192 kHz, 176.4 kHz, 96 kHz, 88.2 kHz, 48 kHz, 44.1 kHz, 32 kHz, 24 kHz, 22.05 kHz, 16 kHz, 12 kHz, 11.025 kHz, 8 kHz
Quantized bit: 16 bit, 24 bit
APE
Sampling rates: 192 kHz, 176.4 kHz, 96 kHz, 88.2 kHz, 48 kHz, 44.1 kHz, 32 kHz, 24 kHz, 22.05 kHz, 16 kHz, 12 kHz, 11.025 kHz, 8 kHz
Quantized bit: 8 bit, 16 bit, 24 bit
Depending on the sampling rates, the device may not play back correctly.
The playback time may not be correctly displayed when a VBR (Variable Bit Rate) recorded file is played back in the USB mode.
Playing back MP3/WMA/AAC/WAV/FLAC/APE
MP3/WMA/AAC/WAV/FLAC/APE files are prepared, then stored to a USB Memory/MTP (mobile phone).
Maximum number of files/folders that can be played back
USB Memory/MTP (mobile phone): 10,000 files / 700 folders (including the root folder)
Maximum nested folder depth is 8 (including the root folder)
Playback may not be performed if the USB Memory/MTP (mobile phone) exceeds the limitations described above.
Do not make the file playback time more than 1 hour.
RSA Data Security, Inc. MD5 Message-Digest Algorithm
Media supported
This device can play back USB Memory/MTP (mobile phone) media.
Corresponding File Systems
This device supports FAT 16/32 for USB Memory/MTP (mobile phone).
Order of files
Files are played back in the order that the files/folders are stored in the USB Memory/MTP (mobile phone). Therefore, the playback order may not be what is
expected. The playback order of the folders and files is as follows.

* The folder No./Folder Name will not be displayed if the folder is empty or has no valid file.
Terminology
Bit rate
This is the “sound” compression rate specified for encoding. The higher the bit rate, the higher the sound quality, but also the larger the files.
Sampling rate
This value shows how many times per second the data is sampled (recorded). For example, music CDs use a sampling rate of 44.1 kHz, so the sound is sampled
(recorded) 44,100 times per second. The higher the sampling rate, the higher the sound quality, but also the larger the volume of data.
Encoding
Converting music CDs, WAVE (AIFF) files, and other sound files into the specified audio compression format.
Tag
Song information such as track titles, artist names, album names, etc., written into MP3/WMA/AAC/WAV/FLAC/APE files.
Root folder
The root folder (or root directory) is found at the top of the file system. The root folder contains all folders and files.
Sound Setting

Audio Setup
You can flexibly customize the unit to suit your own preference and usage. From the Sound Setting menu, Audio Setup can be modified.
Use steps 1 to 5 to select any setting mode you wish to modify. For details on how to change each setting, see the applicable sections
below.
1Press and hold the Rotary encoder for at least 2 seconds to activate the SETUP mode.
2Turn the Rotary encoder to select SOUND, and then press the Rotary encoder.
Sound*1 Normal Bluetooth
*1 Adjustment cannot be performed during a call.
3Turn the Rotary encoder to select the desired sound setting menu, and then press the Rotary encoder.
EQ PRESETS*1/*2/*3 BASS*4/*5 TREBLE*2/*4 PARAMETRIC EQUALIZER*2/*3 SUBWOOFER LEFT/RIGHT BALANCE
FRONT/REAR BALANCE*5 AUX MIX ADJUSTMENT*6 MX HD*2/*7 ADJUSTING TIME CORRECTION CROSSOVER SETUP*8
DEFEAT SETTING BUILT-IN AMPLIFIER SWITCH COAXIAL/OPTICAL SWITCH STORING SOUND SETTING
*2 Adjustment cannot be performed when DEFEAT is set to ON.
*3 Any change made to either EQ PRESETS or PARAMETRIC EQUALIZER will be reflected in the others’ settings.
*4 The setting of this item will be reflected in EQ PRESETS or PARAMETRIC EQUALIZER.
*5 Adjustment cannot be performed when the Crossover Setup is set as active 3-way mode. For more information, refer to “About the
Crossover”.
*6 Adjustment cannot be performed when the unit is set as ALPINE Direct mode. For more information, refer to “Setting AUX Mix
Mode”.
*7 This item cannot be adjusted in the AM mode.
*8 The setting items vary, depending on Crossover Setup. For more information, refer to “About the Crossover”.
4Turn the Rotary encoder to change the setting or proceed to the next level, and then press the Rotary encoder.
5Press to disable the setting mode.
Note
•Pressing returns to the previous Sound menu mode.
Equalizer Presets
10 typical equalizer settings are preset at the factory for a variety of musical source material.
FLAT (Initial setting) POPS ROCK NEWS JAZZ HIP HOP EASY LIS COUNTRY
CLASSICAL CUSTOMIZE
Note
• The 9-Band, Parametric EQ is used to customize the EQ PRESETS settings. After adjusting BASS/TREBLE or PARAMETRIC
EQUALIZER, the “CUTOMIZE” item will display.
Adjusting the Bass/Treble Level
You can adjust the Bass/Treble level according to your preference.
Setting item: BASS/TREBLE
Setting contents: -7~+7 (Initial setting: 0)
Adjusting the Parametric Equalizer Curve
You can modify the Equalizer settings to create a response curve more appealing to your personal taste.
1 After selecting Parametric Equalizer from the Sound mode, turn the Rotary encoder to select the desired band, and then press the Rotary
encoder.
2Press the Rotary encoder after selecting the frequency. Turn the Rotary encoder to select the frequency value.
Press to exit frequency setting.
3Repeat Step 2 to adjust the bandwidth and level in the selected band.

Adjusting the Band
Setting contents:
Band 1/Band 2/Band 3/Band 4/Band 5/Band 6/Band 7/Band 8/Band 9
Adjusting the Frequency
Adjustable frequency bands: 20 Hz to 20 kHz
Band 1: 20 Hz ~ 100 Hz (63 Hz)
Band 2: 63 Hz ~ 315 Hz (125 Hz)
Band 3: 125 Hz ~ 500 Hz (250 Hz)
Band 4: 250 Hz ~ 1 kHz (500 Hz)
Band 5: 500 Hz ~ 2 kHz (1 kHz)
Band 6: 1 kHz ~ 4 kHz (2 kHz)
Band 7: 2 kHz ~ 7.2 kHz (4 kHz)
Band 8: 5.8 kHz ~ 12 kHz (8 kHz)
Band 9: 9 kHz ~ 20 kHz (16 kHz)
Adjusting the Bandwidth (Q)
Setting contents:
3.0 (Initial setting) / 4.0 / 5.0
Note
•Settings exceeding the frequency of adjacent bands are not available.
• While adjusting the Parametric Equalizer, you should consider the frequency response of the connected speakers.
• When adjusting the Parametric Equalizer, the adjusted EQ PRESETS will become invalid.
Adjusting the Level
Setting content:
-7 to +7 (Initial setting: 0)
Note
•Settings exceeding the frequency of adjacent bands are not available.
• While adjusting the Parametric Equalizer, you should consider the frequency response of the connected speakers.
• Adjusting the Parametric Equalizer displays the screen to customize the EQ PRESETS settings.
Setting Subwoofer
Turning Subwoofer ON/OFF
When the subwoofer is on, you can adjust the subwoofer phase output level.
Setting item: SUBWOOFER
Setting contents:
OFF / ON (Initial setting)
OFF:
No subwoofer signal is output from the Subwoofer RCA Connectors (refer to “Connections”).
ON:
The subwoofer signal is output from the Subwoofer RCA Connectors (refer to “Connections”).
Setting the Subwoofer Phase
The subwoofer output phase is toggled between 0° (NORMAL) and 180° (REVERSE). Turn the Rotary encoder to adjust the phase.
Setting item: SUBW PHASE
Setting contents:
0° (Initial setting) / 180°

Setting the Subwoofer Level
When the subwoofer is on, you can adjust the subwoofer output level.
Setting item: SUBW LEVEL
Setting contents: 0~+15 (Initial setting: 0)
Adjusting the Speaker Output Balance between Left and Right
Setting item: LEFT/RIGHT BALANCE
Setting contents: L15~0~R15 (Initial setting: 0)
Adjusting the Speaker Output Balance between Front and Rear
Setting item: FRONT/REAR BALANCE
Setting contents: F15~0~R15 (Initial setting: 0)
Adjusting the AUX MIX Level
After selecting the AUX MIX mode, you can set the AUX MIX output level.
Setting item: AUX MIX ADJUSTMENT
Setting contents: 0~12 (Initial setting: 6)
Setting MX HD Mode
MX HD makes the sound of a person or musical instrument clearer regardless of the source. The music can be clearly reproduced from USB,
iPod, etc even in the vehicle on a very noisy road.
Setting item: MX HD
Adjustable sources (media) and settings
FM/Compressed Media/AUX: OFF (Initial setting)/Level 1/Level 2/Level 3
Note
•MX HD settings are only applicable to the source being played.
• The sources corresponding to compressed media are iPod, USB, and Bluetooth Audio.
• The MX mode is not available for AM radio.
Adjusting the Time Correction
Before performing the following procedures, refer to “About Time Correction”.
1After selecting “Adjusting the Time Correction” from the Sound Setting mode, turn the Rotary encoder to select the speaker or time
correction unit option to be adjusted, and then press the Rotary encoder.
FRONT-L FRONT-R REAR-L REAR-R LEFT SUBWOOFER* RIGHT SUBWOOFER*
*Adjustment cannot be performed when the SUBWOOFER mode is off.
2Turn the Rotary encoder to adjust the distance or time correction unit of the selected speaker, and then press the Rotary encoder.
0.0 cm to 336.6 cm (3.4cm/step)
0.0 inch to 132.7 inch (1.3inch/step)
0.0 to 9.9msec (0.1msec/step)
Such settings make the sound of this speaker to reach the listening position at the same time as the sound of other speakers.
Note
•The total adjustment distance for all speakers should be less than 510 centimeters/201 inches/15 milliseconds.
•Time correction units that can be selected: cm (Initial setting) / inch / msec
Adjusting the Crossover Settings
Before performing the following procedures, refer to “About the Crossover”.
1After selecting Crossover Settings from the Audio Setup mode, turn the Rotary encoder to select the desired channel, and then press the
Rotary encoder.
Active 2-way mode
FRONT SPEAKER REAR SPEAKER SUBWOOFER*1

Active 3-way mode
LOW MID LOW MID HIGH HIGH
*1 Adjustment cannot be performed when the SUBWOOFER mode is off.
2Turn the Rotary encoder to select the desired setting item, and then press the Rotary encoder.
Setting the Cut-off Frequency
Active 2-way mode
Setting contents:
20 / 25 / 31.5 / 40 / 50 / 63 / 80 (Initial setting) / 100 / 125 /160 / 200 (Hz)
Active 3-way mode
Setting contents:
LOW/MID LOW*:
20 / 25 / 31.5 / 40 / 50 / 63 / 80 / 100 / 125 / 160 / 200 / 250 / 315 /400 / 500 (Initial setting) / 630 / 800 (Hz)
MID HIGH:
20 / 25 / 31.5 / 40 / 50 / 63 / 80 / 100 / 125 / 160 / 200 / 250 / 315 / 400 / 500 / 630 / 800 / 1 k / 1.2 k / 1.6 k / 2 k / 2.5 k / 3.2 k / 4 k / 5 k (Initial setting) /
6.3 k / 8 k / 10 k / 12.5 k / 16 k / 20 k (Hz)
HIGH:
1 k / 1.2 k / 1.6 k / 2 k /2.5 k / 3.2 k / 4 k / 5 k (Initial setting) / 6.3 k / 8 k / 10 k / 12.5 k / 16 k / 20 k (Hz)
*The cut-off frequency setting of MID LOW should not be more than that of MID HIGH.
Adjusting the Slope
Setting contents:
FLAT* / 6 / 12 (dB/oct.)
*In the 3-way mode, HIGH does not correspond to FLAT.
Note
The initial setting of active 2-way mode is FLAT, and the initial setting of active 3-way mode is 12.
Adjusting the Level
Setting contents:
-12dB~0dB (Initial setting: 0)
DEFEAT Setting
When DEFEAT is turned on, the sound effect related settings such as EQ PRESETS will become invalid. Turning DEFEAT off can return to
the previous sound effect setting.
Setting item: DEFEAT Setting
Setting contents: OFF (Initial setting) /ON
Turning the Built-in Amplifier ON/OFF
Connecting to an External Amplifier
When an external amplifier is connected, sound quality can be improved by stopping the power supply of the built-in amplifier.
Setting item: BUILT-IN AMPLIFIER SWITCH
Setting contents:
OFF / ON (Initial setting)
OFF:
Use this mode when the pre-output of this unit is used to drive an external amplifier. In this setting, the head unit’s internal amplifier
is turned OFF and cannot drive speakers.
ON:
The speakers are driven by the built-in amplifier.

OFF:
ON:
Note
•No sound is produced by the system when the Built-in Amplifier Switch is set to OFF.
Setting Coaxial/Optical Switch
This function is turned ON when the unit connects the devices such as PXE-0850 Amplifier or PXA-H800 Audio Processor.
Generally, the output from coaxial terminal and optical fiber has similar audio quality. Select the coaxial or optical connector, depending on
the model of connected amplifier or processor.
COAXIAL/OPTICAL SWITCH
Setting contents: OFF (Initial setting) / ON
Storing and Recalling Sound Setting Parameters
Storing Sound Setting Parameters
After this unit is purchased from and installed by an authorized Alpine dealer, the technical professionals will debug and store relevant sound
setting parameters in Dealer Setup.
In addition to Dealer Setup, if you have your own preferences, you can select Customized Setup after setting the sound parameters such as
EQ PRESETS, BASS, TREBLE, and CROSSOVER SETUP. Press and hold for at least 2 seconds to store the debugged sound
parameters in Customized Setup.
Recalling Stored Sound Setting Parameters
After selecting Dealer Setup or Customized Setup, press to recall the debugged sound setting parameters.
Note
•The stored contents will not be deleted even when you reset the unit or disconnect the battery.
About Time Correction
The distance between the listener and the speakers in a car vary widely due to the complex speaker placement. This difference in the distances
from the speakers to the listener creates a shift in the sounds image and frequency characteristics. This is caused by the time delay between the
sound reaching the listener’s right versus the left ear.
To correct this, this unit is able to delay the audio signal to the speakers closest to the listener. This effectively creates a perception of increased
distance for those speakers. The listener can be placed at an equal distance between the left and right speakers for optimum staging. The
adjustment will be made for each speaker in 3.4cm steps.
Listening Position examples as follows:

Example 1: Front Left Seat
Adjust the time correction level of the front left speaker to a high value and the rear right to zero or a low value.
The sound is not balanced because the distance between the listening position and the various speakers is different. The difference in distance
between the front left speaker and the rear right speaker is 1.75 m (68-7/8"). Here we calculate the time correction value for the front left
speaker in the above diagram.
Conditions:
Farthest Speaker – listening position: 2.25 m (88-9/16")
Front left speaker – listening position: 0.5 m (19-11/16")
Calculation: L = 2.25 m – 0.5 m = 1.75 m (68-7/8")
Time correction = 1.75 ÷ 343* × 1,000 = 5.1 (ms)
*Speed of sound: 343 m/s (765 mph) at 20°C
In other words, giving the front left speaker a time correction value of 5.1 ms makes it seem as if its distance from the listener is the same as
the distance to the farthest speaker. Time correction eliminates the differences in the time required for the sound to reach the listening position.
The time of the front left speaker is corrected by 5.1 ms so that its sound reaches the listening position at the same time as the sound of other
speakers.
Example 2: All Seats
Adjust the time correction level of each speaker to almost the same level.
1Sit in the listening position (driver’s seat, etc.) and measure the distance (in meters) between your head and the various speakers.
2Calculate the difference between the distance correction value to the farthest speaker and the other speakers.
L = (distance to farthest speaker) – (distance to other speakers)
These values are the time correction values for the different speakers. Set these values to make each sound reach the listening position at
the same time as the sound of other speakers.
Time Correction Value List
Delay Number
Time Difference (ms)
Distance (cm)
Distance (inch)
0
0.0
0.0
0.0
1
0.1
3.4
1.3
2
0.2
6.8
2.7
3
0.3
10.2
4.0
4
0.4
13.6
5.4
5
0.5
17.0
6.7
6
0.6
20.4
8.0

7
0.7
23.8
9.4
8
0.8
27.2
10.7
9
0.9
30.6
12.1
10
1.0
34.0
13.4
11
1.1
37.4
14.7
12
1.2
40.8
16.1
13
1.3
44.2
17.4
14
1.4
47.6
18.8
15
1.5
51.0
20.1
16
1.6
54.4
21.4
17
1.7
57.8
22.8
18
1.8
61.2
24.1
19
1.9
64.6
25.5
20
2.0
68.0
26.8
21
2.1
71.4
28.1
22
2.2
74.8
29.5
23
2.3
78.2
30.8
24
2.4
81.6
32.2
25
2.5
85.0
33.5
26
2.6
88.4
34.8
27
2.7
91.8
36.2
28
2.8
95.2
37.5
29
2.9
98.6
38.9
30
3.0
102.0
40.2
31
3.1
105.4
41.5
32
3.2
108.8
42.9
33
3.3
112.2
44.2
34
3.4
115.6
45.6
35
3.5
119.0
46.9
36
3.6
122.4
48.2
37
3.7
125.8
49.6

Delay Number
Time Difference (ms)
Distance (cm)
Distance (inch)
38
3.8
129.2
50.9
39
3.9
132.6
52.3
40
4.0
136.0
53.6
41
4.1
139.4
54.9
42
4.2
142.8
56.3
43
4.3
146.2
57.6
44
4.4
149.6
59.0
45
4.5
153.0
60.3
46
4.6
156.4
61.6
47
4.7
159.8
63.0
48
4.8
163.2
64.3
49
4.9
166.6
65.7
50
5.0
170.0
67.0
51
5.1
173.4
68.3
52
5.2
176.8
69.7
53
5.3
180.2
71.0
54
5.4
183.6
72.4
55
5.5
187.0
73.7
56
5.6
190.4
75.0
57
5.7
193.8
76.4
58
5.8
197.2
77.7
59
5.9
200.6
79.1
60
6.0
204.0
80.4
61
6.1
207.4
81.7
62
6.2
210.8
83.1
63
6.3
214.2
84.4
64
6.4
217.6
85.8
65
6.5
221.0
87.1
66
6.6
224.4
88.4
67
6.7
227.8
89.8
68
6.8
231.2
91.1
69
6.9
234.6
92.5
70
7.0
238.0
93.8
71
7.1
241.4
95.1
72
7.2
244.8
96.5
73
7.3
248.2
97.8
74
7.4
251.6
99.2
75
7.5
255.0
100.5

Delay Number
Time Difference (ms)
Distance (cm)
Distance (inch)
76
7.6
258.4
101.8
77
7.7
261.8
103.2
78
7.8
265.2
104.5
79
7.9
268.6
105.9
80
8.0
272.0
107.2
81
8.1
275.4
108.5
82
8.2
278.8
109.9
83
8.3
282.2
111.2
84
8.4
285.6
112.6
85
8.5
289.0
113.9
86
8.6
292.4
115.2
87
8.7
295.8
116.6
88
8.8
299.2
117.9
89
8.9
302.6
119.3
90
9.0
306.0
120.6
91
9.1
309.4
121.9
92
9.2
312.8
123.3
93
9.3
316.2
124.6
94
9.4
319.6
126.0
95
9.5
323.0
127.3
96
9.6
326.4
128.6
97
9.7
329.8
130.0
98
9.8
333.2
131.3
99
9.9
336.6
132.7
About the Crossover
Crossover (X-OVER):
This unit is equipped with an active crossover. The crossover limits the frequencies delivered to the outputs. Each channel is controlled
independently. Thus, each speaker pair can be driven by the frequencies for which they have been optimally designed.
The crossover adjusts the HPF (high pass filter) or LPF (low pass filter) of each band, and also the slope (how fast the filter rolls off the
highs or lows).
Adjustments should be made according to the reproduction characteristics of the speakers. Depending on the speakers, a passive network
may not be necessary. If you are unsure about this point, please consult your authorized Alpine dealer.
Active 2-way mode
Cut-off frequency
(1/3 octave steps)
Slope
Level
HPF
LPF
HPF
LPF
Low range
speaker
----
20Hz - 200Hz
----
FLAT, 6, 12
dB/oct.
0 to −12 dB
Rear high
range speaker
20Hz - 200Hz
----
FLAT, 6, 12
dB/oct.
----
0 to −12 dB
Front high
range speaker
20Hz - 200Hz
----
FLAT, 6, 12
dB/oct.
----
0 to −12 dB
Table of contents
Other Alpine Media Player manuals

Alpine
Alpine IVA-D100 User manual

Alpine
Alpine IVE-W535BT User manual

Alpine
Alpine IVA-D900R User manual

Alpine
Alpine UTX-M06 User manual

Alpine
Alpine IVA-D106E User manual

Alpine
Alpine IVE-W530BT User manual

Alpine
Alpine UTX-M08S User manual

Alpine
Alpine INA-W910R User manual

Alpine
Alpine iXA-W404R User manual

Alpine
Alpine IVE-W560BT User manual