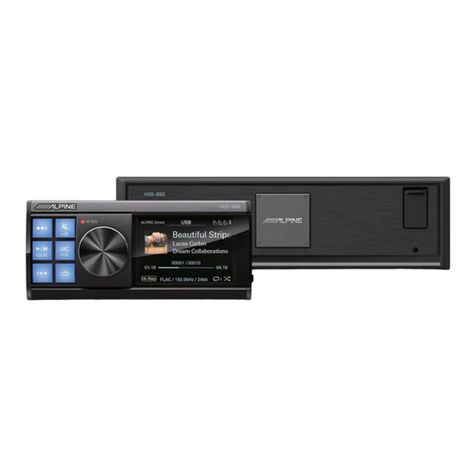
Alpine HDS-990 User manual

Owner′s Manual
HDS-990
HI-RES AUDIO MEDUA PLAYER

1 EN
Contents
Instructions
Instructions ...................................................................1
Warning ..................................................................1
Points for Safe Use .............................1
Copyright Notice .................................................4
Preparation work ................................................5
Accessory List ......................................5
Connections and Functions ............6
Connections and Functions ............7
Location of Button .............................8
Power On or Off .................................. 8
Starting the System for the First
Time ........................................................8
Controller Display ..............................8
Play .................................................9
Search for t he Song ...................9
Volume Adju stment ........................ 10
Decrease th e Volume Quickly ......10
Switch Audio Source .......................10
Set the Mixing Mode ....................... 10
Remote S en s i n g ............................... 11
Setup .................................................................... 11
Setup O peration ...............................11
Preset EQ Settings ................................... 11
Sound Settings ......................................... 12
Treble/Bass Setting .........................12
Subwoofer Settings ........................ 12
Turn on/Off the Subwoofer ..12
Setting the Subwoofer Pha s e 13
Setting the Subwoofer Level 13
Parametric EQ Setting ....................13
Select Band ............................... 13
Left and Righ t Bal ance Setting of
Speaker Output ................................13
Front and Rear Balance Settings of
Speaker Output ................................14
Input Source Vol. Setting .............. 14
Select USB Audio .....................14
Select BT Audio ........................14
Select Hi-Level Audio ............. 14
Select AUX ..................................14
Select USB Audio .....................14
Time Cor rection Settings .............. 14
X-Over Settings .................................15
Frequency Switch i n g ............. 15
2-way Frequency ..................... 15
3-way freque n cy ......................16
Sound me mory .................................16
Dealer Settings .........................16
User Settings .............................16
Defeat Settings ......................................... 17
Bluetooth ....................................................17
General Settings .......................................17
Mix Source Settings .........................17
Main Source Attenuation ...... 18
Mix Source Selection ..............18
Language Settings ...........................18
Artwork di s pl ay ................................18
Dimmer Control ............................... 18
Dimmer .......................................19
Dimmer level .............................19
Blackout Settings .................... 19
Alpine System ................................... 19
External Power AMP S wit ch .19
Master Volume ..........................19
Main Source ...............................19
Mix Source ................................. 19
Subwoofer ................................. 19
Sound Ef fect ..............................19
Steering wheel control .................. 20
Built-in AMP ....................................... 20
SPDIF/Opt Settings ..........................20
Sampling Rate Settings ................. 21
Clear all Settings ..............................21
About ................................................... 21
DIAG Mode ..........................................21
About the X-Over ..............................22
About Time Cor rection .................. 23
English

2 EN
USB mem ory (optional) ................................. 24
About USB Play ba ck Format ........24
Bluetooth operation ........................................24
About Bluetooth ...............................24
Connect Blu etooth ..........................25
Bluetooth Music ............................... 25
Information ........................................................ 25
About the Formats Supported by
this Nn i t .............................................. 25
About
MP3/WMA/AAC/M4A/WAV/FLA
C/APE/DSD ................................. 25
When Something g oes Wrong ..... 28
When this Messa ge Appears .........29
Specifications ....................................................32

1 EN
Instr uc ti on s
Warning
Points for Safe Use
Please read t h is manua l carefully before
using the mac hine and system components.
This manual contains instructions on how to
use t his product safely and effectively. If
failure to follow the i n structions in this
manual causes malfunctions, Alpine will not
assume any responsibility.
This manual uses various icons to explain
how to use t his product safely, a n d reminds
you to pay attention to th e dangers t h at may
be caused by improper connection and
operation. The meaning of these icons will be
explained below. A complete understanding
of t h e meaning of t hese icons is very
important for the correct use of this manual
and this system.
Do not use a n y features that will d istract yo u
while driv i n g
Any function that affects your concentration
should on ly be used after the car has come to a
complete stop. To use these functions, please
park your vehicle i n a safe place first.
Otherw is e, an accident may result.
Do n ot disasse mble or mo dify
Otherw i s e, it may cause an accident, fire or
electric sh ock.
The vo lume must be mai nt ained at a le vel
where the noise ou t s ide the c ar can b e h e ard
while driv i n g
Inaudible emergency vehicle si rens a n d road
warning signals (train intersections, etc.) are
very dan gerous a n d may cause a ccidents. In
addition, excessive volume may ca use hearing
loss.
This product is o n l y s uitable fo r cars with 12V
negative gro und ing
Otherw i s e, it may cause a fire and other
accidents.
Smal l obje cts s u c h as bolts or scr ews sho uld be
kept out o f the r each of c h ild ren
Swallowing small objects may cause serious
injury. Once swallowed by mistake, please
immediately med i ca l.
When repla cin g the fuse , yo u must c hoose a
fuse with t h e co rrect am pere val ue
Otherw i s e, it may cause a fire or electric shock.
Do n ot blo ck the ventilation hole s or heat sink
Otherw i s e, it may cause internal heat build-up
and may cause a fire.
This pr od uct can only be use d in 12V mob ile
appl ications
If used in non-de signed applicat i ons , it may
cause fire, electric s hock or other injuries.
Make th e correct conn ect ion
If it is not connected properl y, it may cause fire
or product damage.
Before wiring, disconnect the cabl e fr om the
negative termi na l o f the b attery
Otherw i s e, i t may cause electric sh ock or injury
due to ele ctrical s h ort circuit.
Warning
It is very dangerous to operate t his
system while driving. The user should
stop before operating the software.
Road conditions a n d laws take
precedence over the information
displayed on t he map: When driving, you
should abide by actual traffic restrictions
and conditions.
This software is s pecia l ly desig n e d for
this mac h ine and cann ot be used in
combination with other h a rdware.
Warning
This symbol indicates important
instructions. Failure to heed thes e
instructions can result in seriou s in j ury or
even death.

2 EN
Do not let the cable be entang led with
sur roun d ing ob jects
Arrange th e wires a n d cables in accordance
with the requirement s of the manua l to
prevent t h em from becoming obstructive while
driving. Cables or wires that obstruct or hang
on the steering whee l, shi ft lever, brake pedal,
etc. are extremely dan gerous.
Do n ot spl ice c ables
Do not cut the cable insula tion to sup pl y power
to other equipment. Otherwise, the current
carrying capacity of the wire will be exceeded,
resulting i n fire or elect ric shock.
Do n ot damage the pipe or wir ing w hen d rillin g
When drilling holes in the chassis for
installation, be careful not to touch, damage or
obstruct the pipes, fuel lines, fuel tanks or
wires. If you don't pay attention, it can cause
fire.
Do not use b o l ts or nuts in brakes o r steering
systems fo r groundin g connectio ns
Never use bolts or nuts used in brakes or
steering systems (or any other safety-related
systems) or fuel tanks for installation or
grounding connections. The use of such parts
will cause the car controller to fail, resulting i n
fire an d so on.
Do not in stall on the stee ring whe e l or g ear
leve r, etc., which may h ind e r the op e ration of
the c ar
Otherw i s e, i t will obstruct the front line of sight
or obstruct moving pa rts, etc., causing s erio us
accidents.
When there is a problem, pl ease stop using it
imme d iately
Otherw i s e, it may cause personal injury or
damage to the product. Please return this
product to an authorized Alpine dealer or the
nearest Alpine service center for repair.
As k professio nals f or wiri n g and installation
The wiring a n d in stallation of this product
require professional skills a n d experience. For
safety reasons , please contact the dealer where
you purchased the product for installation.
Use d esig nated a ccessorie s and install sec u rely
Make sure to use only designa ted accessories.
The use of non-design ated parts may cause
internal da m age to t h e device, or it may not be
securely installed in place. This can cause parts
to loosen and cause da n ger or product failure.
Arrange the wires to avoid cri m ping or be i n g
sq uee zed b y s h ar p m e tal ed ges
The arrangement of wires and cables sh ould be
far away from mov in g parts (such as seat tracks)
or sharp edges or corners. This will avoid
crimping and damage to t h e wires. If the wiring
passes t hrough a metal h ole, a rubber gasket
should be use d to prevent the wire in sulation
from being cut by t h e edge of the metal hole.
Do n ot install in high humid ity o r du sty
location s
Avoid installing t he device in a locati on with
high humidity or dust. Moisture or dust invades
the devi ce and ca n cause product failure.
Precautions
Prod u ct c l eaning
Please use a dry soft cloth to clean the product
regularly. If the dirt is difficult to remove, soak
a soft cloth with water only. Any other solvent
may dissol ve.
temperature
Before turning on the machine, please make
sure that the temperature in th e car is between
+60°C and -20 °C.
Maintai n
If you encounter a problem, do not repair it
yourself. Please return this product to an
authorized Alpine dealer or the nearest Alpine
service center for repair.
Notice
This symbol indicates important
instructions. Failure to heed these
instructions may result in injury or major
property damage.

3 EN
Installation locatio n
This machin e cann ot be i n stalled in a n y of t he
following places:
Near direct sunlight and h eat sources
Places wit h high humidity a n d near water
sources
Dusty places
Locations subject to severe vi bration
Protect t he USB co n n ector
The mach i n e provides three front a n d rear
USB ports to support the connection and use
of USB storage. When the front and rear
ports are connected to t h e charging device at
the same time, the normal operation of t h e
machine cannot be guaranteed.
Only USB storage can be connected to the
USB terminal of this unit. The use of other
USB products cannot guarantee normal use.
If you use a USB connector, be sure to use
the USB extension cable (included).
Depending on the connected USB memory
device, t h is unit may not work or som e
functions may not be performe d.
The file system sup por ted by this machine is
FAT16/32, NTFS, exFAT.
Please make sure that the number of songs
in t he connected USB storage (the maximum
number of songs that can be played in th e
front and rear USB) does not exceed 10 ,00 0,
otherwise it will not play normal ly.
The audio fi le format t hat t h is machi ne c
an play is MP 3 / WMA /AAC/M4 A /WA V/FL A C /A
PE/DSD.
It can display performer's name/song
name/song album, etc. Some specia l
characters may not be displa y ed correctly.
Abo u t using USB s torage
In order to prevent malfunction or damage,
please pay attention to t he following point s.
Please read the user manual of the USB
memory th orough ly.
Do not touch t h e terminals with your hands
or metal.
Do not sub ject the USB memory to severe
vibrations.
Do not bend, drop, disassemble, modify, or
immerse in water.
Avoid using or storing in the following
situations.
In a car exposed to di rect sunlight or high
temperature.
There may be places with hi gh humidity or
corrosive objects.
Install th e USB memory in a location where it
will n ot h inder t he driver's operation.
USB storage may not work properly in high
or low temperature places.
Only use approved USB memory. Please note
that even if it i s an approved USB me m ory, it
may not work properly depending on its type
or status.
The function of t h e USB memo ry cannot be
guaranteed. Please use USB storage in
accordance wit h t h e terms of the agreement.
Depending on th e USB memory type,
memory status or encoding software settings,
this unit may not be able to play or dis pl a y
correctly.
Files that are copy-protected (copyright
protection) can n ot be played.
The USB me mory may take some time to
start playing. If there are special fil es other
than audio in the USB storage, it may take
longer before the file is played or searched
for.
This unit can play files with "mp3", "w ma",
"acc", "m4a", "wav", "flac", "ape", "dsd"
("dff" and "dsf") extensions.
Do not add th e above extensions to
non-audio data. Such non-a u dio data cannot
be recognized. The playba ck result may
contain noise that can damage speakers
and/or amplifiers.
It is recommended to back up important
data on a personal computer.
Do not remove the USB device during
playback. Chan ge SOURCE to somet h i n g
other than USB, and then remove the USB
device to prevent damage to its memo ry.
Notice
Alpine is not responsible for lost data, etc.,
even if it occurs while using this product.

4 EN
Copyright N ot ice
The Bluetooth® word mark and logo are registered trademarks held by Bluetooth SIG, Inc. Alpine
Electronics has obtained permission to use the word mar k and logo, and other trademarks a n d trade
names belong to their respective owners.
This product is conformed to Hi gh -Resolution Audio standard defined by Japan Audio S ociet y. Alpine
Electronics h a s been authori zed to use the High-Resolution Audio logo from Japan Audio Society.
*Appropriate recycling channels should be adopted for the disposal of electronic products to reduce electronic waste poll ution.

5 EN
Preparation w o rk
Accessory List
Power cable
High Level Input cable
USB Exten sion cable (1.5 m)
Commander Extension cable (2.5
m)
Multiple Line cable
Mounting B rackets ×4
Self-tapping Screw×20
Machine Screw×8
Commander case
Commander
Main unit
Alpine system communication
cable

6 EN
Connections and Functions

7 EN
Connections and Functions
① Front USB Co nnector
Used to connect U disk, mobile hard disk or
USB HUB.
② Res et Button
Press and hold for 3 s econds to restart the
host.
③ Rear Do u b le USB Co n ne ctor
Connect the USB or mobil e hard disk
through th e attached USB extension wire.
④ Co mmand er Conne ctor
It can be connected to th e controller for
play control, volume adjustment, and audio
source selection.
⑤ Power Ind icator
The power-on light is a lways on, and t h e
power-off light is off.
⑥ Mul t iple Li n e Co n n e ctor
Including 1 set of 3.5mm socket audio input,
3 sets of RCA audio output , optical output,
coaxial output interface, steering control
interface, Alpine s y stem matching in terface
(for DSP product connection) and USB audio
input.
⑦ Hig h Level Input co nnector
Connect to th e power output of the ca r
audio player.
⑧ Inp u t S e le ct Sw itch
When dialed to the "ACC" end, ACC starts
the mac h i ne; when dialed to the "HO ST"
end, the high level input signal FL-/FL+
starts the machine.
⑨ Power Ou tput C o nnector
Connect t h e car battery.
⑩ Spea ker Outp ut
Connect an speakers.
⑪ Mul t iple Lin e
External function expansion interface.
⑫ Car Audi o P laye r (So l d s eparately)
Connect t h e car aud i o player.
⑬ Co m m a nde r
To prevent external noise from entering the audio system.
The installation position of the machine and t he wiring arrangement should be at least 10cm
away from the automobile wiring harness.
Try to keep the batter y power cord away from other wires.
Securely connect the ground wire to th e bare metal contacts of the car chassis (remove any
paint, dirt or grease if n ecessary ).
If y ou want to attach an optional noise s up presso r, please tr y to keep it away from t h e
machine when connecting. Your Alpine dealer has various t ypes of noise suppressors, please
contact them for details.
Your Alpine dealer is proficient in n oi s e prevention methods, please consult your dealer for
details.

8 EN
Locat ion of Bu tton
① Key
Short press to mute; long press for more
than 2 seconds to shut down.
*You can press any key to boot.
② Key
USB: Short press to select the next song;
long press for more than 2 seconds to fast
forward.
Bluetooth audio: select t h e next song.
③ Key
Short press to switch pause/play; long press
for more than 2 seconds to switch random
play/single cycle.
④ Key
USB: Short pre s s to sele ct t he previous son g;
long press for more than 2 seconds to
rewind.
Bluetooth audio: select t h e previous song
⑤ Key
Return to t h e previous level.
⑥ Key
Short press to sele ct t h e main audio source:
USB, Bluetooth audio, hi g h level , AUX or
USB Audio ( Default USB ) ; long press for
more than 2 seconds to turn on/off the
mixing mode.
⑦ Kno b Key
Main interface: Rotate left and right to
adjust the volume; s h ort press to enter t h e
song list; long press for more than 2 seconds
to enter t h e Setup mo de.
Song list or Setup mode: Short press to
confirm the selection.
⑧ Hi- Res ind icator
The light is only on when the Hi-Res format
song is currently playing, a n d th e light is not
on in other formats.
⑨ Rem ote co n trol se nsor
Power On or Off
Press any button on the controller to turn on
the unit .
Press and hold for at least 2 seconds to turn off
the unit .
When the power is turned on for t h e first
time, t h e volume starts from level 12.
Starting t h e System for the First T i me
Press an d hold t h e RESET switch for 3 seconds
to restart th e host.
1Turn off the power of thi s unit.
2Press RESET with a ballpoint pen or similar
pointed object.
Controller Display
USB source screen
① Display the status of Mix source.

9 EN
ALPINE Direct: Turn off the mix source.
BT Audio: Th e mix source is BT Audio.
High.Level: T h e mix source is High.Level.
AUX: The mix s ou rce is AUX.
USB Audio: The mix s ou rce is USB Audio.
② Display the current audio sou rce.
USB, BT A udio, high level, AUX,USB Audio.
③ Input audio source icon
Input audio
source
USB1
USB2
USB3
Bluetooth
Icon
④ Total volume icon.
Display the current volume value.
⑤ Hi-Res icon.
Indicates that Hi-Res format songs are
currently playing.
⑥ Display the current music format.
⑦ Play mode icon.
Icon
Description
Only the current song is played
in a loop.
Only the files in a folder are
played i n a loop.
The folders are played
randomly.
All songs a re played randomly.
⑧ Show total song duration, playback
progress and current track number/total
number of songs.
⑨ Show song information: song title, s i n ger,
lyrics, etc.
Play
1Press to select the USB mode by
default.
2Press or to select t he desired track
(file).
Long press or to rewind or fast
forward.
3Press to switch between pause
and play.
4Turn the k n ob to adju st the volume, increase
the volume clockwi se and decrease the
volume counterclockwise.
Press the knob to enter t h e track search
interface, you can choo se USB1, USB 2 , USB3 ,
etc. to select songs to play, or turn the knob
to ent er the search list to search for the song
you want to play.
5Press to return to th e previous level.
Depending on the files stored in the USB, it
may take some time to start playing.
The format of the file to be played will be
displayed on t he screen during playback.
When playing Hi-R es files, the HR i con will be
displayed on t he screen.
Any file protected by DRM (Digital Rights
Management) copy protection ca n n ot be
played on this machine.
When playing VBR (variable bit rate)
recorded documen t s , th e playback t ime may
not be dis played correctly.
If there i s tag in format i on , the s ong
name/artist name/album name will be
displayed.
Unsupported characters are displ a y ed with
"
" i nstead.
Search for t he Song
The USB memo r y can hold many songs.
Quickly find th e song you want by searching.
1Press t he knob to enter the song list interface,
and select "Search" to start the search
mode.
2Turn the knob to select th e category list
"Artists", "Albums", "Songs", "Format",
"Date" or "Si ze".
1.1 Select Artists
*1
, short press to enter the
artist list, turn th e knob to select t h e
desired artist, short press to enter the
song list.
1.2 Select Albums
*1
, short press to enter the
album list, turn t h e kn ob to select the
desired album, short press to enter t h e
song list.
1.3 Select Songs
*1
, short press to enter the
song list.

10 EN
1.4 Select Format
*1
, short press to enter the
file format list, turn t h e knob to s elect the
desired file format, short press to enter
the s on g list.
1.5 Select Date
*2
, short press to ent er the
song list.
1.6 S ele ct Size
*3
, sh ort press to en t er th e song
list.
*1 Sort by num bers 0 → 9, A → Z
alphabetically (first by numbe rs, then by
letters, uppercase a nd lowercase letters
are indistinguisha ble).
*2 The date is arranged in the order of new
→ old of t h e actual modification date of
the file, and there is no rule for the sa me
time.
*3 File sizes are arranged in th e order of
largest→s m alle s t occupi e d storage space,
and t h ere are no rules for th e same size.
3Under the song list, turn the knob to select
the desired song, and short press to start
playing the selected song.
Press to return to the previous level.
Empty files or files with no valid play files
will n ot be displ a yed.
When th ere are a lot of songs stored in the
USB, the search may be slower.
Volume Adjustment
Turn the knob until you get the desired volume.
Volume: 0~35
Decrease the Volume Quickly
The mute funct ion can instantly reduce the
volume to 0.
1Press the (M ute) button to a ct ivate the
mute mode.
The volum e wil l be 0.
2Press the (Mute) bu tton a gain to
restore the previous volum e.
Switch Audio Source
Short press to switch the s i gn a l sou rce.
USB
*1
(default audio source) ↔ BT Audio
*2
↔ High
level↔AUX↔USB Audio
*3
*1 When th ree USB stora ge devices are
connected to this unit, the audio fil es in
them will be combined and played in t h e
same USB audio source.
*2 Only display ed wh en "Bluetooth" is
connected, see "Connecting to
Bluetooth".
*3 USB Audio an d BT Audio are mutually
exclusive and cannot be superimp osed,
otherwise the auxiliary source wil l be
invalid.
Set the Mi xing Mode
This machine is preset with a high-quality
audio processing chip. You can choose ALPINE
Direct mode to enjoy the high -qu ality signal
source of this unit , and you can also choose
AUX Mix mode to listen to the sound of the
original car equipment (such as navigation)
while enj oy i n g t h e signal source of this unit .
Long press to switch th e mixing mode,
take AUX Mix as an example:
AUX Mix↔ALPINE Direct
AUX Mix:
When the machine i s playing music, the music
that the original car a udio is playing, the
navigation prompt sound, etc. are mixed and
played together.
ALPINE Direct:
Only enjoy t h e hi gh -qua lity music brought to
you by HDS-99 0.
When the same sound source is
superimposed, the auxiliar y sound source is
invalid. That is, when the current signal
source is AUX, th e AUX mixing mode is
invalid.
Before using this function, you need to
correctly connect th e a ud io output of t h e
original car audio to t he AUX IN interface of
the unit .

11 EN
Remote Sensing
Setup
Setup Operation
<Setting item>
setup
Preset EQ
Sound settings
Defeat settings
Bluetooth
General
1Long press the encoder for at least 2 seconds
to enter the setting interface.
2Turn t h e encoder to select th e setting item,
and then short press t h e encoder to enter
the n ext layer.
3Press to return to the previous menu
mode.
4Press to release the setting mode.
Preset EQ Settings
Select [Preset EQ] from the main s ettings pa ge.
Refer to step 2 of "Setup Operation" (page 12).
<Setting item>
Preset EQ
Flat
Pop
Rock
News
Jazz
Electronics
Hip hop
Easy L i stening
Country
Classical
Preset EQ page
① Display the current sound.
② List of s ound.
③ Scroll up and down to select sound.
1On the preset EQ page, rotary encoder to
select the desired EQ preset;
2Short press the encoder to recall the EQ
preset.
Use the optional remote control for control.
Point the remote control transmitter to the remote
control sensor window.
Can be connected to the remote control interface box
Through the optional Alpine steering wheel remote
control interface box, the vehicle steering wheel
controller can be used to control the machine. Please
contact your Alpine dealer for details.

12 EN
10 kin ds of typical equalizer settings are preset
at the factory for a variety of audio sources.
After adjusting the ba ss /treble or the
parametric equalizer, the "Custom" item will
be display ed.
Only one preset sound effect ca n be sele cted
at a ti me.
Sound Settings
Select [Sou nd S ettings] from the main settings
page. Refer to step 2 of "Setup Operation"
(page 11).
<Setting item>
Sound s ettings
Treble
Bass
Subwoofer
Parametric EQ
Balance
Fader
Input source volume
Time correction
X-Over
Sound memory
Sound setting page
1Rotate the encoder up and down to select the
target item, th en short press th e encoder to
select the target item to adjust.
2Press to return to t h e previous menu
mode.
3Press to release the setting mode.
Treble/Bass Setting
Select [Treble or Bass] from the sound setting
page. Refer to step 1 of "Sound Settings" (page
11).
Treble/bass page
1Turn the encoder to the left to select [<] to
decrease t h e level, a nd turn the encoder to
the righ t to select [>] to increase the level.
You can s ele ct t h e treble or bass adjustment
level according to y our preferences.
Setting item: treble/bass
Setting content: -7~+7 (in i t ial value: 0)
Subwoofer S ettings
Select [Subwoofer] from the sound setting
page. Refer to step 1 of "Sound Settings" (page
11).
<Setting item>
Subwoofer
ON/OFF
Phase
Level
Subwoofer page
1Rotate t h e encoder to select the target item,
then sh ort press the encoder to select the
target item to adjust.
2Turn the encoder to the left to select [<]
operation, and turn t h e encoder to the right
to select [>] operation.
Turn on/Off the Subwoofer
When th e subwoofer is turned on, you can
adjust the phase output level of the subwoofer.
Setting items: heavy bass
The following steps 1 to 3 are common to each
"setting item" in the "sound effect setting".

13 EN
Setting content: OFF/ON (i n i t ial setting)
Setting the Subwoofer Pha s e
The subwoofer phas e is set to 0 ° (normal
phase) or 180 ° (reverse phase). To adjust the
phase, turn t h e knob.
Setting items: subwoofer phase
Setting content: 0°(init ial s etting)/18 0°
Setting the Subwoofer Level
When th e subwoofer is turned on, you can
adjust the output level of th e subwoofer.
Setting item: subwoofer level
Setting content: 0~ +15 (init ial value: 9)
Parametric EQ Setting
Select [Parametric EQ] from the sound setting
page. Refer to step 1 of "Sound Settings" (page
11).
Parametric EQ page
1Rotate t h e encoder to select the target item,
then short press the encoder to select th e
target item to a djust.
2Turn the encoder to the left to select [<]
operation, and turn the encoder to t h e right
to select [>] operation.
3If you need to adjust another band, press to
return to ba n d selection, and then t urn th e
knob to select a band.
You can modify the equalizer settings to make
the response curve more in line with your
preferences.
Select Band
Setting content: Band 1 → Band 2 → ... → Band
9/Band 10→Band 1
Adjust frequency
Rotate the encoder, select "Frequency", and
then press the knob momentarily.
Adjustable frequency band: 20 H ~20kHz
Band1: 20Hz~63Hz (31Hz )
Band2: 31Hz~125H z(63 Hz )
Band3: 63Hz~315H z(12 5H z)
Band4: 125Hz~ 500H z(25 0Hz )
Band5: 250Hz~ 1kHz (500 Hz )
Band6: 500Hz~ 2kHz(1kHz)
Band7: 1kHz~4kHz(2 k H z )
Band8: 2kHz~7.2kH z(4 k Hz )
Band9: 5.8kHz~ 12kH z(8kHz)
Band10: 9kHz~20k H z (16kHz)
Adjust Q value
Rotate the encoder, select "Q value", an d then
short press th e knob.
Setting content:0.404~28.85 (Ini ti al value:
3.056)
Adjust the gain
Rotate the encoder, select "Gain", an d then
press the knob momentarily.
Setting content:-12dB~+12d B(Initial value:0)
The frequency setting value of each band
cannot exceed the frequency value of
adjacent bands.
When adjusting th e parametric equalizer, t h e
frequency response of the connected
speakers should be considered.
When adjusting th e parametric equalizer, t h e
preset equalizer that ha s been a dju sted will
be invalid.
After adjusting the parametric equalizer, the
preset equalizer displays "Custom".
Left and Right Balance Setting of
Speaker Output
Select [Balan ce] from the sound setting page.
Refer to step 1 of "Sound Settings" (page 11).
Left and right balance page

14 EN
1Turn th e encoder to the left to select [<]
operation, and turn the encoder to t h e right
to select [>] operation.
Setting item: left and right balance
Setting content: L15 ~0 ~R15 (initial value: 0)
Front and Rear Balance Settings of
Speaker Output
Select [Balance] from th e sound setting page.
Refer to step 1 of "Sound Settings" (page 11).
Front and ba ck balance page
1Turn th e encoder to the left to select [<]
operation, and turn t h e kn ob to the right to
select [>] operation.
Setting item: front and back balance
Setting content: L15 ~0 ~R15 (initial value: 0)
Input Source Vol. Setting
Select [ Inpu t source vol.] from the sound
setting page. Refer to step 1 of "Sound
Settings" (page 11).
<Setting item>
Input source vol.
USB
BT Audio
High level
AUX
USB Audio
Input audio sou rce volume page
1Rotate t h e encoder to select the target item,
then sh ort press the encoder to select the
target item to adjust.
2Urn th e encoder to the left to select [<]
operation, and turn t h e encoder to the right
to select [>] operation.
Select USB Audio
Setting content:-60dB~0dB(in itial value: 0dB)
Select BT Audio
Setting content:-60dB~0dB(in itial value: 0dB)
Select Hi-Level Audio
Setting content:-60dB~0dB(in itial value: 0dB)
Select AUX
Setting content:-60dB~0dB(in itial value: 0dB)
Select USB Audio
Setting content:-60dB~0dB(in itial value: 0dB)
Time Correction Settings
Select [Time Correction] from th e sound
setting page. Refer to step 1 of "Sound
Settings" (page 12).
<Setting item>
Time correction
Front left s peaker (F-L)
Front right speaker (F-R)
Rear left s peaker (R-L)
Rear right speaker (R-R)
Left subwoofer (SW-L)
Right subwoofer (SW-R)

15 EN
Time correction page
1Rotate t h e encoder to select the target item,
then short press the encoder to select th e
target item to a djust.
2Turn the encoder to the left to select [<]
operation, and turn the encoder to t h e right
to select [>] operation.
Setting content: Delay /delay unit
Adjust the delay
Turn the encoder to sele ct the speaker to be
adjusted, and then press t h eencoder shortly.
Setting items:
Front left speaker (F-L)/front right speaker
(F-R)/rear left speaker (R-L)/rear right
speaker (R-R)/left subwoofer (SW-L)/right
subwoofer (SW-R)
Setting content:
Milliseconds:0.000ms ~10.00 0ms
(0.01ms/set up )
Centimeter:0 ~346c m (0.3cm/setup)
Inch:0~136inch (0.1inch/set up )
Adjust the delay unit
Turn th e encoder to adjust the distance or time
correction unit of th e sele cted s peaker, then
press t he encoder shortly.
Setting items:
Delay unit
Setting content:
Milliseconds/centimeter/inch
When t h e subwoofer mode is turned off, th e
left/right subwoofer ca n n ot be adjusted.
The sum of the adjustment distances of all
speakers should be less t h an 510 cm /2 01
inches/15 milliseconds.
The time correcti on un it that can be sel e cted:
ms (milliseconds)/cm (centimeters)/inch
(inches)
X-Over Settings
Before performing the followin g steps, refer to
"About Frequency Dividers".
Select [X-Over] from the sound s etting page.
Refer to step 1 of "Sound Settings" (page 12).
<Setting item>
X-over settings
2-way
3-way
Frequency divider swit ch page
1Press and hold a song, play/pause, and the
previous song to call out the crossover
switch, turn the encoder to select, and then
short press the encoder to enter the s ele cted
crossover page.
Setting content:
Divider switch 2-way/3-way
Frequency Switch i n g
Setting items:Divider switching
Setting content:2-way/3-way
2-way Frequency
2-way frequenc y page
Setting items:
Front speakers/rear speakers/subwoofer
Setting content: Frequency/slope

16 EN
3-way freque ncy
3-way page
Setting items: Treble/Mid Hig h Pass/Mid Low
Pass/Bass
Setting content:Frequency/slope
2After selecting the corresponding frequency
division, turn the kn ob to select th e target
item, then short press the knob to select the
target item to adjust, and enter th e
frequency di v i s i on an d slope .
adjustment page.
3Turn the encoder to the left to select [<]
operation, and turn the encoder to t h e right
to select [>] operation.
Adjust frequency
2-way freque ncy
Setting content:
Frequency:20/25/32/4 0 /50/ 63/8 0( in it ial
setting)/100/125/160 /2 0 0 (Hz )
3-way freque ncy
Setting content:
Woofer/Mid-range low-pass speaker*:
20/25/32/40/50 /63 /8 0/ 100/ 125 /1 60/2 0 0/25 0/
315/400/500 (initia l setting)/630/800 (Hz)
Mid-range high-pass speaker:
20/25/32/40/50 /63 /8 0/ 100/ 125 /1 60/2 0 0/25 0/
315/400/500/6 30/8 00/1 k /
1.2k/1.6k/2k/ 2. 5k/ 3.2k/4k/5k (initi a l setting)/
6.3k/8k/10k/1 2.5k/ 16 k/2 0 k (Hz)
Tweeter:
1k/1.2k/1.6k/ 2k/ 2.5k/3.2k/4 k /5 k(initial
setting)/6.3k/8k/10k /12 .5 k/1 6k/ 20k (Hz)
Adjust the slope
Setting content: 6/12 (in i t ial setting)/18/
24/30/36/42 /48 (dB/Oct.) or off.
When t h e subwoofer mode is turned off, the
subwoofer cannot be adjusted.
The cut-off frequency s etting value of the
mid-woofer speaker cannot be higher th a n
that of the mid- and tweeter speaker.
Sound memory
Select [Sound memory ] from the sound setting
page. Refer to step 1 of "Sound Settings" (page
11).
<Setting item>
Sound memory
Dealer settings
User settings
Sound s ettings stora ge page
Setting content:
Dealer settings/User settings
Dealer Settings
After purchasing a n d installing th i s product at
the design a ted Alpine a uthorized dealer,
professional technicians will debug and store
the parameters related to the sound setting to
the "Deale r settings" for you.
1Turn th e encoder to select "Dealer Settings",
and then sh ort press t h e encoder to recall
the a djusted sound setting parameters.
User Settings
In addition to "Dealer settings", if you have

17 EN
your own settings preferences.
1After setting t he preset equali zer, bass, treble,
crossover settings and other sound
parameters, select "User Settings".
2Press and hold th e encoder for more than 2
seconds to store the adjusted sound
parameters to the "User settings".
3Turn th e encoder to select "Dealer Settin g s ",
and then short press th e encoder to recall
the adjusted sou n d setting parameters.
Defeat Settings
Select [Defeat settings] from th e main settings
page. Refer to step 2 of "Setup Operation"
(page 11).
Defeat page
When this option is turned on, th e settings
related to sound effects such as t h e default
equalizer will be in valid. Turn off this option to
restore the previous sound settings.
Setting items: Sou nd effect clear settings
Setting content: OFF (Initial setting)/ON
Bluetooth
Select [Bluetooth] from the main settings page.
Refer to step 2 of "Setup Operation" (page 12).
Bluetooth connection page
Setting items: connect and disconnect
operations.
Setting content: Conne ct/Disconnect (Initi a l
setting)
General S ettings
Select [General] from the main settings page.
Refer to step 2 of "Setup Operation" (page 11).
<Setting item>
General
Mix source
Language
Artwork di splay
Dimmer
Alpine system
Steering wheel control
Built-in AMP
SPDIF/Opt
Sampling Rate
Clear all settings
About
General page
1Rotate the encoder up and down to select the
target item, then sh ort press the encoder to
select the target item to adju st.
2Press to return to the previous menu
mode.
3Press to release the setting mode.
Mix Sou rce Settings
Select [Mix sou rce] from the common page.
Refer to step 1 of "Gen eral Settings" (page17).
<Setting item>
Mix source
Main source attenuation
Mix source selection
The following steps 1 to 3 are common to
each "setting item" in "General".
Other manuals for HDS-990
1
Table of contents
Other Alpine Media Player manuals

Alpine
Alpine HDS-990 User manual

Alpine
Alpine IVA-D100 User manual

Alpine
Alpine UTX-M08 User manual

Alpine
Alpine INA-W910R User manual

Alpine
Alpine UTX-A09 User manual

Alpine
Alpine UTX-M06 User manual

Alpine
Alpine iXA-W404R User manual

Alpine
Alpine IVE-W530BT User manual

Alpine
Alpine IVE-W535BT User manual

Alpine
Alpine UTX-M08S User manual
Popular Media Player manuals by other brands

Shenzhen Rikomagic Tech
Shenzhen Rikomagic Tech DS03 user manual

PIONEER DJ
PIONEER DJ CDJ-3000 Connection guide

Triotech
Triotech clear stream K5C quick start guide

iMGS
iMGS iMGS-MTP02T2 operating instructions

Califone
Califone 2385-03 owner's manual

Conceptronic
Conceptronic Media Giant System backup & recovery