Alpine EZi-DAB-ONE User manual

EZi-DAB-ONE
Digital Radio Interface


Safety
Before you use your EZi-DAB-ONE, read the following safety instructions.
1. Follow the operating instructions provided and take note of any warnings.
2. If you do not follow the operating instructions provided, it may compromise the safety of your product and this may invalidate the warranty.
3. Only use the supplied 12V power adapter with your product.
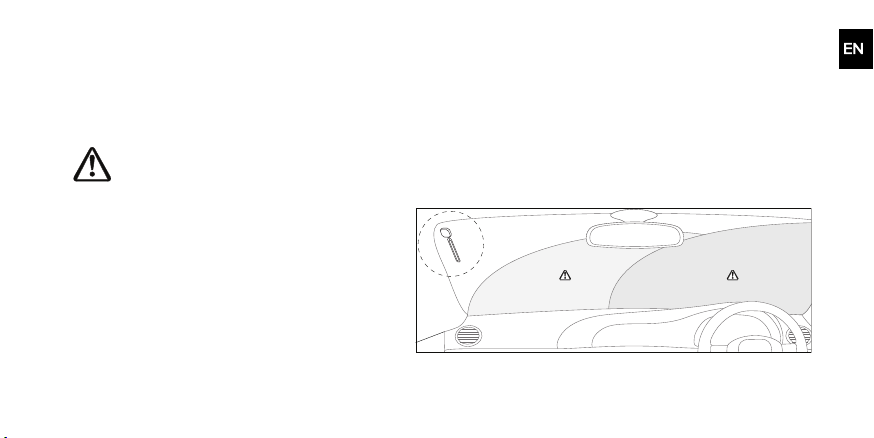
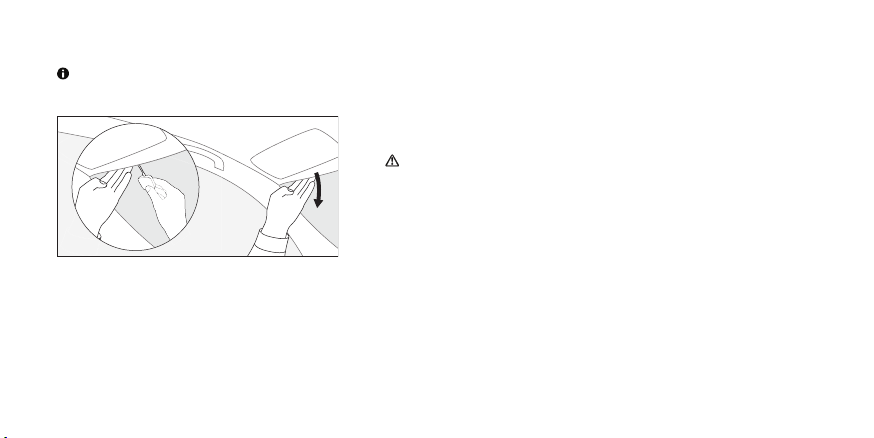
4. Do not install your product in a way that may interfere with the safe operation of the vehicle, or affect the deployment of air bags or other safety items.
Do not install cables and wires near the steering wheel.
5. Do not place your product on or near sources of your vehicle's heat or ventilation.
6. Do not use your product in a way that may cause careless driving or improper control of your vehicle.
7. Keep your product dry and only clean with a dry cloth.
8. Do not expose your product to naked flames.
9. Do not use your product in extremely hot or cold temperature.
10. If you need to connect your product to the rear of your vehicle's head unit, remove any power before you start to install your product. When you have
safely installed your product, you can reconnect the power. See your vehicle's owner's manual for more information.
11. Do not use the product if it is damaged.
12. Product repairs should only be carried out by authorised personnel.
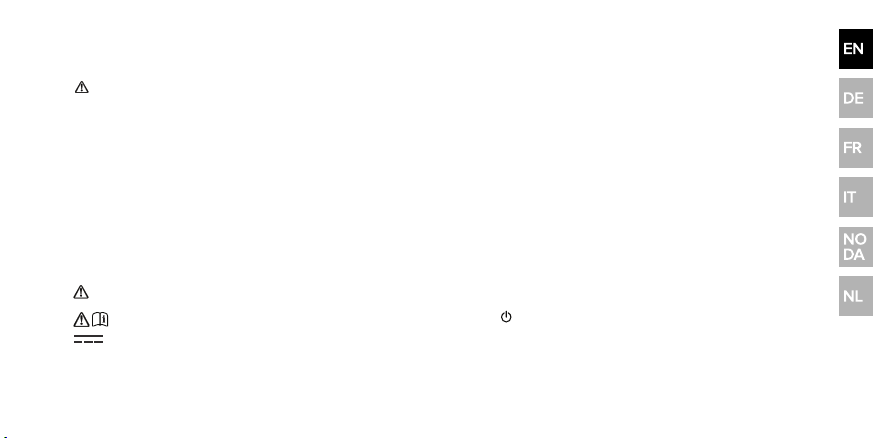
Symbols on the product and in the user manual
Potentially serious risk to your personal safety. To avoid possible injury or
death, obey all safety notices with this symbol.
1A
USBsocket rated at 1amp maximum.
Caution. Read the user manual before use. Where to switch on or off the product, or put it in standby.
12V DC
12V DC power supply.
1

2
Safety 1
Contents 2
Overview 3
What's in the box 3
Display icons 4
Controls 5
Getting started 6
Installing your EZi-DAB-ONE 6
Where to install your EZi-DAB-ONE 7
Positioning the antenna 8
Positioning the controller 10
Connecting the antenna to the controller 11
Connecting the controller to your vehicle 12
Switching your EZi-DAB-ONE on for the first time 13
Switching your EZi-DAB-ONE on and off 13
Digital radio 14
Listening to digital radio 14
Digital radio presets 14
FM transmission frequencies 15
Auxiliary input 16
Listening to music on a mobile device 16
Settings 17
Changing between the Line Out cable and FM
transmission 17
Setting your EZi-DAB-ONE to enter standby
automatically 17
Switching phantom power to the aerial on and off 18
Radio settings 18
Display settings 19
Updating the software 21
Troubleshooting 22
Contents

Overview
What's in the box
Before you get started, check you have everything below.
123
6
4
7
5
3

1Antenna, with magnetic grounding tail attached 5Cleaning cloth
2DAB film aerial 612V power adapter (dual USB port)
3Controller with USBpower and audio connectors 7Self-adhesive cable clips
4Controller bracket
Display icons
The icons below appear on the screen of the controller.
4
13
256
1Digital radio mode 4Auxiliary input mode
2Digital radio signal strength 5FMtransmit enabled
3Traffic announcements enabled 6FM transmit frequency
4

Controls
1 Presets Press to view your digital radio presets. When in this menu,
press and hold to save the current station to a preset number.
2Select Press to select a radio station or menu option.
3 Power /
Back
Press to switch your EZi-DAB-ONE on. Press and hold to put
your EZi-DAB-ONE in standby. Press to go back to the previous
screen or cancel an action.
4 Previous Press to choose the previous radio station or menu option.
5 Next Press to choose the next radio station or menu option.
6 Home Press to open the main menu.
7 FMChannel Press to view stored FM transmission frequencies. When in this
menu, press and hold to store the current FM frequency to an
FMchannel.
5

Getting started
Installing your EZi-DAB-ONE
Before you can start using your EZi-DAB-ONE, you need to do the following:
1. Position the antenna in your vehicle.
2. Position the controller in your vehicle.
3. Connect the antenna to the controller.
4. Connect the controller's power and audio cables to your vehicle.
5. Switch your EZi-DAB-ONE on for the first time.
Vehicle requirements
lFitted audio system with auxiliary (3.5mm) port or FM receiver.
lStandard 12V negative earth power supply. Your EZi-DAB-ONE is not suitable for use with a 24V power supply.
Getting the best DAB signal
As with FMradio, DAB signal coverage changes depending on your location. As you use the EZi-DAB-ONE in your vehicle, you
may travel through areas where DAB signal coverage is poor.
6

To help get the best DAB signal when coverage is poor or there is a weak signal:
lFollow the installation instructions carefully.
lUse the supplied 12V power adapter, as other third-party adapters can cause interference.
lSwitch off other devices in your vehicle that aren't in use. Devices such as satellite navigation systems and dashboard
cameras can cause interference.
Where to install your EZi-DAB-ONE
It's important to install your EZi-DAB-ONE in a safe location in your vehicle. Do not fit any components in
locations that may interfere with safe operation of the vehicle, or affect the deployment of air bags or other safety
products. Keep cables and wires away from the steering wheel.
Where to install the antenna
We recommend you install the antenna for your EZi-
DAB-ONE in the top corner of the windscreen, on
the passenger's side of your vehicle.
Install the antenna so that it is not within the swept
area of the windscreen. Make sure the antenna and
wireless controller do not obstruct the view of the
driver.
7

If you have a heated windscreen in your vehicle, or the windscreen contains metallic UVfilters, it can cause interference for
the DAB signal. Install the antenna on a part of the windscreen that does not contain heating elements or UV filters.
For more information on where to safely install your EZi-DAB-ONE in your vehicle, contact your local dealer.
Positioning the antenna
1. Choose a position for the antenna, so that it's as high as possible on
the windscreen and at least 4cm from the side of the screen.
Make sure the antenna does not obstruct the view of the driver.
2. Gently pull down the front of the roof liner in your vehicle, until there is
a small gap.
3. Push the magnetic grounding tail through the gap, with the
silver-coloured magnet facing upwards. Make sure the magnet
touches your vehicle's metal bodywork.
8

4. Clean the chosen area of the windscreen with a cleaning cloth and
wait for it to dry.
5. Unpeel the backing from the antenna and stick the antenna onto your
windscreen.
6. Insert the DAB film aerial into the slot in the antenna.
7. Gently unpeel the backing from the DAB film aerial and stick the
aerial onto your windscreen. Take care not to fold or twist the aerial.
9

Positioning the controller
1. Choose an area on your vehicle's dashboard where you want to install
the controller. Clean the surface with a cleaning cloth and wait for it to
dry.
Make sure the controller does not obstruct the view of the driver.
2. Peel off the backing from the controller bracket and gently stick it
onto your dashboard. Gently press the bracket to ensure it's attached
securely.
3. Slide the controller onto the bracket, until it clicks into place.
10

Connecting the antenna to the controller
1. Place the antenna cable so that it follows a path to the controller on
your vehicle's dashboard.
Note: To prevent interference to the DAB signal, keep cables away
from display units such as LCD screens.
2. If possible, tuck the cable behind the trim down the side of your
windscreen. Alternatively, secure the cable to your windscreen and
dashboard with self-adhesive clips.
3. Insert the antenna cable into the connector on the rear of the
controller.
Note: Push the antenna cable in firmly, to ensure it's fully inserted.
11

Connecting the controller to your vehicle
1. If required, gently pull apart the controller's power and audio cables to
separate them.
Note: To prevent interference to the DAB signal, keep cables away
from display units such as LCD screens.
2. Insert the USB power cable into the supplied 12V power adapter, then
insert the power adapter into your vehicle's power socket.
3. If you're connecting your EZi-DAB-ONE with the Line Out cable, insert
the cable into your vehicle's auxiliary socket. If you're connecting
your EZi-DAB-ONE by FM radio, you can store the Line Out cable so
it's out of the way.
We recommend you connect your EZi-DAB-ONE with the Line
Out cable to get the best audio quality.
12

Switching your EZi-DAB-ONE on for the first time
After you've installed your EZi-DAB-ONE, switch it on to finish setting it up.
1. Turn on your vehicle’s ignition to make sure your EZi-DAB-ONE is switched on.
2. Press and to change the display language, then press Select to choose it.
3. Press and Select to choose how to connect your EZi-DAB-ONE to your vehicle.
•If you've connected your EZi-DAB-ONE with the Line Out cable, choose 'Line out'. Then press and Select to
choose 'Normal gain'. If you later find that audio is distorted, you can change the gain setting. Read more on
page17.
•If you're connecting your EZi-DAB-ONE by FM radio, choose ‘FM transmit' and then choose an FM frequency.
Ensure a radio station isn't using the frequency you choose.
Tune your vehicle’s audio system to the same FM frequency as your EZi-DAB-ONE. To easily find the FM
frequency in the future, save it as a preset on your vehicle’s audio system.
After you’ve chosen how to connect your EZi-DAB-ONE, it starts tuning to digital radio stations. When the autotune is
complete, you can start listening to digital radio.
Switching your EZi-DAB-ONE on and off
•To switch on your EZi-DAB-ONE, press .
•To put your EZi-DAB-ONE in standby and use less power, press and hold .
Note: By default, the controller automatically enters standby after 4hours. To change the delay, see page17.
13

Digital radio
Listening to digital radio
1. Press .
2. Press and Select to choose 'Digital radio'.
3. To change to another radio station, press to choose a station and then press Select.
Digital radio presets
You can save up to 20 of your favourite digital radio stations in the presets list.
Storing a radio station as a preset
1. When listening to a digital radio station, press Presets.
2. Press to choose a preset number. You can overwrite previous radio stations.
3. Press and hold Select or Presets to save the current digital radio station to the preset number.
Listening to a preset
1. Press Presets.
2. Press to choose the preset you want to listen to, then press Select.
You can also listen to a preset using only the Presets button. Press Presets multiple times, until the preset you want
to listen to is displayed. After 3 seconds, your EZi-DAB-ONE tunes to that radio station.
14

FM transmission frequencies
If you connect your EZi-DAB-ONE to your vehicle's audio system using FMradio, local radio stations may broadcast at the
same FMfrequency as your EZi-DAB-ONE. To quickly change the FMtransmission frequency on your EZi-DAB-ONE, you can
store up to nine frequencies as FMchannels.
The FMtransmission frequency is displayed in the top-right of the screen. If you're using the 'Line out' setting, the
FMtransmission frequency is not displayed and the FMChannel button is disabled.
Storing an FMtransmission frequency
1. Press FMChannel.
2. Press to choose an FMchannel. You can overwrite previous FMfrequencies.
3. Press and hold Select or FMChannel to save the current FMradio frequency to the FMchannel.
4. If required, you can press to edit the FMfrequency, then press Select to update the FMchannel.
Changing the FM transmission frequency
1. Press FMChannel.
2. Press to choose a stored FM transmission frequency, then press Select.
You can also change the FM transmission frequency using only the FMChannel button. Press FMChannel multiple
times, until the FM tranmission frequency you want to use is displayed. After 3 seconds, your EZi-DAB-ONE
changes to that FM transmission frequency.
15

Auxiliary input
Listening to music on a mobile device
You can use the controller's Aux In cable to listen to music on a mobile device through your vehicle's audio system.
1. Connect a mobile device to your EZi-DAB-ONE using the Aux In
cable.
2. Press .
3. Press and Select to choose 'Auxiliary input'. Your EZi-DAB-ONE is
now ready to play music from the connected device.
16

Settings
Changing between the Line Out cable and FM transmission
You can choose how your EZi-DAB-ONE is connected to your vehicle's audio system.
1. Press .
2. Press and Select to choose 'Settings' > 'Audio out'.
3. Press and Select to choose how to connect your EZi-DAB-ONE to your vehicle.
•If you've connected your EZi-DAB-ONE with the Line Out cable, choose 'Line out'. Then press and Select to
choose a gain setting of 'Low gain' or 'Normal gain'. If the audio sounds distorted, choose 'Low gain'.
•If you're connecting your EZi-DAB-ONE over FM radio, choose ‘FM transmit' and then choose an FM frequency.
Ensure a radio station isn't using the frequency you choose.
Setting your EZi-DAB-ONE to enter standby automatically
By default, your EZi-DAB-ONE enters standby after 4hours, but you can change the delay.
1. Press .
2. Press and Select to choose 'Settings' > 'Auto standby'.
3. Press and Select to choose a delay between 1 and 8 hours.
17

Switching phantom power to the aerial on and off
By default, your EZi-DAB-ONE powers the DAB film aerial through the antenna's cable. If you're using the DAB film aerial that
came with your EZi-DAB-ONE, keep this setting on. If you're using an aerial from a different manufacturer, check the aerial's
user manual to see whether you need to change this setting.
1. Press .
2. Press and Select to choose 'Settings' > 'Digital radio' > 'Phantom power'.
3. Press and Select to choose 'On' or 'Off'.
Radio settings
Performing an autotune
If you can't find any digital radio stations, try retuning your EZi-DAB-ONE.
lTo perform an autotune, press and hold Select when you are in digital radio mode.
Listening to alternative stations when the signal is weak
If the current radio station has a weak signal, your EZi-DAB-ONE automatically tries to find a stronger signal. If your EZi-DAB-
ONE can't find a stronger signal for the current radio station, it can automatically tune to a similar radio station when
supported by the broadcaster.
1. Press .
2. Press and Select to choose 'Settings' > 'Digital radio' > 'Alt stations'.
3. Press and Select to choose 'On' or 'Off'.
18
Table of contents
Languages:
Other Alpine Recording Equipment manuals

Alpine
Alpine PXE-H650 - System Integration Audio... User manual

Alpine
Alpine 3321 User manual

Alpine
Alpine KCX-C2600B User manual

Alpine
Alpine PXA-H100 User manual

Alpine
Alpine APF-V100GM User manual

Alpine
Alpine PXA-H100 User manual

Alpine
Alpine KCX-C250MC User manual

Alpine
Alpine ERA-G311 User manual

Alpine
Alpine 3362 User manual

Alpine
Alpine KCE-250BT User manual