Alpine KCE-250BT User manual

FOR
CAR
USE
ONLY/NUR
FOR
AUTOMOBIL
GEBRAUCH/POUR
APPLICATION
AUTOMOBILE
UNIQUEMENT/PARA
USC
EN
AUTOMOVILES/SOLO
PER
L'UTILlZlO
IN
AUTOMOBILE/ENDAST
FOR
BILBRUK/
ALLEEN
VOOR
GEBRUIK
IN
DE
AUTO/TOnbKO
AllA Hcnonb30BAHHA BABTOM06HnAX/DO uiYCIAlYLKO WSAMOCHODZIE/riA XPHIH
MONO
IE
AYTOKINHTO/
~=t!f!wm
BLUETOOTHINTERFACE
KCE-250BT I
I
I
I
I
I
I
I
I
I
I
ALPINE
ITAlIA S.p.A.
Viale
C.
Colombo
8,
20090 Trezzano
Sui Naviglio (MI), Italy
Phone 02-484781
ALPINE
ELECTRONICS
DE
ESPANA.
SA
Portal de Gamarra 36, Pabellon, 32
01013 Vitoria (Alava)-APDO 133, Spain
Phone 945-283588
ALPINE
ElECTllONICS
(BENELUX)
GmbH
Leuvensesteenweg 510-B6,
1930 Zaventem, Belgium
Phone 02-725-1315
•INSTRUKCJA OBSLUGI
Prosimy zapoznac siyzt'l instrukcj'l
przed
przyst'lpieniem
do
uzytkowania urz,!dzenia.
•
ErXEIPI~I
0
XPHITH
IlaQaxaAoufl£
('iLa~ao'tE
'to
JtQLV
XQ1')OLIlOJtOLijoE'tE
't1')
o'Uox£'UlJ·
•PYKKOBOOBO,IJ,CfBO
no
3KCnnY
AT
AIJ;1111
npOQqTRTeTRTe
HaCTOSl~ee
PYKOBOKOBO~CTBO
nepe~
HaQaJIOM
I1CnOJIh30BaHRSI
o6opy~oBaHHSI.
•GEBRUIKERSHANDLEIDING
Lees deze aanwijzingen aandachtig alvorens dit
toestel
te
gebruiken.
•
ffi
P
-3'-
fffi
.~@ffi~m~2M~~~ffip~fffi·
ALPINE
ELECTRONICS
FRANCE
S.A.R.l.
(RCS PONTOISE B338101 280)
98,
Rue
de
la
Belle Etoile,
Z.1.
Paris Nord
II,
B.P. 50016, 95945 Roissy Charles de Gaulle
Cedex, France
Phone 01-48638989
ALPINE
ELECTRONICS
OF
AUSTRALIA
PTY.
LTD.
161-165 Princes Highway, Hallam
Victoria 3803, Australia
Phone 03-8787-1200
ALPINE ELECTRONICS
GmbH
Wilhelm-Wagenfeld-Str. 1-3,80807 MOnchen.
Germany
Phone 089-32 42 640
ALPINE
ElECTllONICS
OF
U.K.
LTD.
Alpine House
Fletchamstead Highway, Coventry CV4 9TW, U.K.
Phone 0870-33 33 763
ALPINE
ELECTllONICS
MARKETING.
INC.
1-1-8 Nishi Gotanda,
Shinagawa-ku,
Tokyo 141-0031, Japan
Phone 03-5496-8231
ALPINE
ELECTllONICS
OF
AMERICA, INC.
19145 Gramercy Place, Torrance,
California 90501, U.S.A.
Phone 1-800-ALPINE-l (1-800-257-4631)
ALPINE
ElECTRONICS
OF
CANADA, INC.
777 Supertesf Road, Toronto,
Onfario M3J 2M9, Canada
Phone 1-800-ALPINE-l (1-800-257-4631)
o
Bluetooth@
•
ANVANDARHANDLEDNING
Innan
du
anvander
utrustningen
bor
du
Hisa
igenom
denna
anvandarhandledning.
•
ISTRUZIONI
PER
L'USO
Si
prega
di
leggere
prima di utilizzare
i1
attrezzatura.
•BEDIENUNGSANLEITUNG
Lesen Sie diese Bedienungsanleitung bitte vor
Gebrauch
des
Gerates.
•MODE D'EMPLOI
Veuillez lire avant d'utiliser
cet
appareil.
•
MANUAL
DE
OPERACION
Lealo
antes
de
utilizar
este
equipo.
•OWNER'S
MANUAL
Please
read
before
using
this equipment.
SUZHOU CRESTEC PRINTING CO., LTO.
596-598 Chang Jiang Road, Suzhou, Jiangsu, P.R.China Printed
in
China (V)
68-16909Z21-A

Contents
Operating Instructions
~
WARNING
WARNING 2
CAUTION 2
Setup Before Using
About BLUETOOTH 3
Before Using Hands-Free Function 3
How to connect
to
aBLUETOOTH compatible
device (Pairing) 3
BLUETOOTH SETUP
BLUETOOTH Setup Operation 4
Setting the BLUETOOTH Device 4
Registering the BLUETOOTH Device
(AV
Head Unit only) 5
Deleting aBLUETOOTH Device from the
list 5
Displaying the phone service provider
name 5
Setting the Search Mode 5
Answering Calls Automatically 5
Selecting the output speaker 5
Adjusting the volume for the microphone
input 6
Displaying the firmware version 6
Updating the firmware 6
Hands-Free Phone Control
About the Hands-Free Phone 7
Answering aCall 7
Hanging up the Telephone 7
Adjusting the volume during an active
phone call 7
Redial Function 8
ENGLISH
Audio Switching Operation 8
Call History 8
Redialing aNumber in Dialed Calls
History 8
Dialing aNumber in Received Calls
History 8
Dialing aNumber in Missed Calls History 8
Dialing aNumber In the Phone Book
(Phone Book) 9
Dialing aNumber Using Direct Dial Input
(AV
Head Unit Only) 9
Voice Dial Operation 9
Dialing aNumber from aCD Head Unit!
Digital Media Receiver 9
Accessories 10
Installation
Velcro fastener Mounting
10
Mounting the Microphone
10
Connections
Connecting the BLUETOOTH INTERFACE to a
compatible Alpine Unit
11
Specifications 13
LIMITED WARRANTy
WARRANTY·EN
•Setting items, operations, etc., may be modified
or
removed
without notice depending on the connected Alpine
BLUETOOTH compatible unit.
•
BT
Audio source is not available with KCE-250BT.
I
I.EN

Operating
Instructions
WARNING
&
WARNING
This symbol means important instructions.
Failure to heed them can result
in
serious
injury or death.
DO
NOT
DISASSEMBLE
OR
ALTER.
Doing so may result
in
an accident, fire
or
electric shock.
KEEP
SMALL
OBJECTS
SUCH
AS
BATTERIES
OUT
OF
THE
REACH
OF
CHILDREN.
Swallowing them may result
in
serious injury. If swallowcd,
consult aphysician immediately.
USE
ONLY
IN
CARS
WITH
A
12
VOLT
NEGATIVE
GROUND.
(Check with your dealer if you are not sure.) Failure to do so may
result
in
fire, etc.
BEFORE
WIRING,
DISCONNECT
THE
CABLE
FROM
THE
NEGATIVE
BATTERY
TERMINAL.
Failure to do so may result
in
electric shock or injury due to
electrical shorts.
DO
NOT
SPLICE
INTO
ELECTRICAL
CABLES.
Never cut away cable insulation to supply power
to
other
equipment. Doing so will exceed the current carrying capacity
of
the wire and result
in
fire
or
electric shock.
DO
NOT
DAMAGE
PIPE
OR
WIRING
WHEN
DRILLING
HOLES.
When drilling holes
in
the chassis for installation, take
precautions so as not to contact, damage
or
obstruct pipes, fuel
lines, tanks or electrical wiring. Failure to take such precautions
Illay result
in
fire.
DO
NOT
USE
BOLTS
OR
NUTS
IN
THE
BRAKE
OR
STEERING
SYSTEMS
TO
MAKE
GROUND
CONNECTIONS.
Bolts or nuts used for the brake or steering systems (or any other
safety-related system), or tanks should NEVER be used for
installations or ground connections. Using such parts could
disable control
of
the vehicle and cause fire etc.
DO
NOT
ALLOW
CABLES
TO
BECOME
ENTANGLED
IN
SURROUNDING
OBJECTS.
Arrange wiring and cables
in
compliance with the manual to
prevent obstructions when driving. Cables
or
wiring that obstruct
or hang up on places such as the steering wheel. shift lever. brake
pedals, etc. can be extremely hazardous.
USE
THIS
PRODUCT
FOR
MOBILE
12V
APPLICATIONS.
Use for other than its designed application may result
in
fire,
electric shock
or
other injury.
MAKE
THE
CORRECT
CONNECTIONS.
Failure to make the proper connections may result
in
fire or
product damage.
2.EN
&
CAUTION
This symbol means important instructions.
Failure to heed them can result
in
injury or
material property damage.
USE
SPECIFIED
ACCESSORY
PARTS
AND
INSTALL
THEM
SECURELY.
Be sure to use only the specified accessory parts. Use
of
other
than designated parts may damage this unit internally or may not
securely install the unit in place. This may cause parts to become
loose resulting in hazards or product failure.
DO
NOT
INSTALL
IN
LOCATIONS
WITH
HIGH
MOISTURE
OR
DUST.
Avoid installing the unit
in
locations with high incidence
of
moisture
or
dust. Moisture
or
dust that penetrates into this unit
may result
in
product failure.
HAVE
THE
WIRING
AND
INSTALLATION
DONE
BY
EXPERTS.
The wiring and installation
of
this unit requires special technical
skill and experience. To ensure safety, always contact the dealer
where you purchased this product to have the work done.
ARRANGE
THE
WIRING
SO
IT
IS
NOT
CRIMPED
OR
PINCHED
BY
A
SHARP
METAL
EDGE.
Route the cables and wiring away from moving parts (like the
seat rails) or sharp or pointed edges. This will prevent crimping
and damage to the wiring.
If
wiring passes through ahole
in
metal, use arubber grommet to prevent the wire's insulation from
being cut by the metal edge
of
the hole.

Setup
Before
Using
About
BLUETOOTH
BLUETOOTH
is
awireless technology allowing
communication between amobile device
or
personal
computer over short distances. This enables ahands-free call
or data transmission between BLUETOOTH compatible
devices. BLUETOOTH transmission is available in the
unlicensed 2.4 GHz spectrum
if
the distance between devices
is
within 10 meters. For details, refer to the BLUETOOTH
Homepage (http://www.bluetooth.com/).
•Depending on the BLUETOOTH version, aBLUETOOTH
compatible device may not be able
to
communicate with
this adapter.
•Properfunction
of
this adapter with all BLUETOOTH
compatible devices is not guaranteed.
For
handling
of
the
BT
compatible device, consult yourALPINE dealer
or
ALPINE website.
•Depending on the surroundings, BLUETOOTH wireless
connection may be unstable.
•When you place acall, or perform setup operations, be
sure to stop your car in asafe place.
•For details on the control (selection, enter, cancel) from the
connected unit, refer
to
the Owner's Manual
of
the
respective unit.
•Depending on the connected BLUETOOTH compatible
device(s), the function may differ. Also refer
to
the Owner's
Manual
of
the connected device(s).
Before
Using
Hands-Free
Function
Before using the hands-free phone function, the following
settings need to be made.
1Be sure to set "INT MUTE" (in the setup
function of the connected CD Head Unit or
Digital Media Receiver) to OFF.
•
To
enable sound pass-through
of
the BLUETOOTH
compatible device, make sure that
INT
MUTE
is
turned
OFF (Initial setting on the unit
is
OFF).
2Set "BLUETOOTH IN" (BT IN) to Adapter
(ADPT) or HFP*. (Refer to the Owner's Manual
of the connected units.)
3Turn the ignition key off (ACC OFF) and on
again (ACC ON).
Before using ahands-free phone, it must be paired with the
adapter. Refer to "BLUETOOTH SETUP" (pages 4-6).
•
If
"BLUETOOTH IN"
(BT
IN) setting is turned OFF at
any time, adapter communication is canceled.
To
resume
communication: repeat Steps Ithrough 3above.
*Depending on the head unit, the "BLUETOOTH IN (BT
IN) setting" may differ.
Refer to the follwing head unit types:
Type 1<"Adapter" is displayed as aselection>
Adapter (ADPT):
This option allows the head unit to recognize
connection with this adapter. (Hands-free
Phone
is
available, and the 8T Audio source
can be displayed, but cannot be used.)
Off: This option does not allow the head unit to
recognize connection with this adapter.
Type 2<"Adapter" is not displayed as aselection>
HFP: This option allows the head unit to recognize
connection with this adapter. (Hands-free
Phone
is
available, but the 8T Audio source
is
not displayed.)
HFP+Audio (+AUDIO):
8T Audio
is
not available with the adapter, so
please do not select this option.
Off: This option does not allow the head unit to
recognize connection with this adapter.
How
to
connect
to
a
BLUETOOTH
compatible
device
(Pairing)
Refer to the Owner's Manual
of
your BLUETOOTH
compatible device for details on its operation.
1Set aBLUETOOTH connection from a
BLUETOOTH compatible device.
2The PIN code ("0000") is displayed on the
connected unit.
•The PIN code i.l'fixed as "0000".
3Input the PIN code ("0000")
in
aBLUETOOTH
compatible device.
4If the connected unit is successfully paired to
aBLUETOOTH compatible device, apaired
device name is displayed on the unit, and
then the unit returns to normal mode.
•
If
aBLUETOOTH compatible device is successfully paired.
the next time the vehicle
'.I'
ignition is turned
on.
pairing is
done automatically. Should the automatic pairing fail.
repeat the steps above.
•
Set"
Setting the Search Mode" (page
5)
to
ON
to
enable
the KCE-250BT
to
be recognized by amobile phone.
For
mobile phone passkey (passcode) input operation, refer
to
the mobile
'.I'
Owner's Manual. Additionally, the mobile
phone can be searched directly from an AV Head Unit.
Refer to "Registering the BLUETOOTH Device (AV Head
Unit only)" (page
5).
I
3.EN
BLUETOOTH
SETUP
•
The
explanations
in
this Owner's Manual mainly describe
the following operations from the
AV
Head Unit.
BLUETOOTH
Setup
Operation
The
following steps Ito 5are common to the various
BLUETOOTH functions. For details, refer to each individual
function.
•When placing
or
receiving acallfrom the BLUETOOTH
device, BLUETOOTH Setup operation cannot be
performed.
•Refer to the Owner's Manual
of
the CD Head Unit, AV
Head Unit
or
Digital Media Receiver,
and
set
"BLUETOOTH
IN"
(BT IN) to Adapter (ADPT)
or
HFP,
and
then perform BLUETOOTH SETUP operation.
1Touch
[SETUP]
or
["JJ
]on the main source
screen.
The
SETUP
selection
screen
is
displayed
2Touch the title bar of Source Setup.
The
SOURCE
SETUP
screen
is
displayed.
3Touch the title bar of BLUETOOTH Setup.
The
BLUETOOTH
setup
is
displayed.
4Touch [
....
],
[~
]or the title bar of the desired
item to change its setting.
Setting items:
Paired Devices /Device Search /Clear Device /Service
Provider /Visible Mode /Auto Answer/Speaker Select/
MIC Input/Firmware Version /Firmware Update
5Touch
[RETURN]
or
[~]
to return to the
previous screen.
Controlling from aCD Head Unit IDigital Media
Receiver:
1Press and hold SETUP for at least 2seconds.
2Turn the Rotary encoder or the Double Action
encoder to select the desired setting items and
press ENT.
Setting items:
PAIR DEVICEHVISIBLE
MODE
HAUTO
ANSWER
HCLEAR DEVICEHSERVICE
NAME
HMIC
INPUTHSPEAKER
SELECT
H
FW
VERSION H
FWUPDATE
•Depending on the connected unit, some setting items
may not be displayed.
3Turn the Rotary encoder or the Double Action
encoder to
change
the settings and press ENT.
4Press and hold ESC (or SETUP) or
~
for at
least 2seconds.
The SETUP mode
is
canceled.
4.EN
~ttlng
theBLUETOOTH
Device
Select one
of
5connected BLUETOOTH compatible devices
that you previously registered.
Setting item: Paired Devices
Touch aBLUETOOTH compatible device to use
(change connection) from the Paired Device list.
•
If
the connection is successfully changed, "Connected!
(Device name)" is displayed
for
2seconds, and then the
display returns
to
the Setup screen.
•
If
you input the wrong passcode
or
communicationsfail,
"Failed" is displayed.
•When amobile phone is paired with the unit, up to 1,000
telephone numbers will automatically be obtained
in
the
telephone book (PHONE BOOK). Also, when the mobile
phone is reconnected, new information on the mobile
phone will automatically be updated.
•Depending on the connected mobile phone, the telephone
book (PHONE BOOK)
may
not be automatically obtained.
If
the telephone book cannot be automatical!.)! obtained, it
can be manually transferred to the adapter by referring to
the Owner's Manual
of
the mobile phone.
•
If
you want to connect another BLUETOOTH compatible
device, after disconnecting the current BLUETOOTH
compatible device, connect the BLUETOOTH compatible
device you want
to
change
to.
•The registration number 5is deleted when you set ignition
from
ACC
to
OFF.
If
all the 5positions have been
registered, you cannot register the 6th device.
To
register
another device, you need
to
delete one
of
the devicesfrom
position 1to 5first.
Controlling from aCD Head Unit IDigital Media
Receiver:
Turn the Rotary encoder or the Double Action
encoder to select aBLUETOOTH
compatible
device you want to use (you want to
change
connection), and then press ENT.

When aBLUETOOTH compatible device
is
searched or
registered, it appears
in
the BLUETOOTH Device listing.
Setting item: Device Search
1When Device Search is selected, "Now
Searching" is displayed, and searching
starts.
2Touch the device name to be paired from the
Device Search list.
3If the adapter is successfUlly paired to a
BLUETOOTH compatible device, adevice
name and aregistered number (No.1 to 5) are
displayed, and then the unit returns to normal
mode.
o
If
amobile phone
is
registered
for
thefirst time:
Input apasscode when the numeric keypad screen is
displayed, then input the same passcode in the
BLUETOOTHcompatible device to make the pairing. After
the pairing is completed, the unit will automatically
connect to the BLUETOOTH compatible device.
o
If
you input the wrong passcode or communicationsfail,
"Failed" is displayed.
oApasscode input on aAV Head Unit is maximum 4-digit.
If
apasscode on the BLUETOOTH compatible device
exceeds 4digits, reset the passcode
and
make this setting
again.
oWhen adevice is connected at the moment,
if
you select
another devicefrom the Device Search list
to
make
connection, the connection willfail
and
the selected device
will not be added into the Pair Devices list.
:,~lettnga'BLU~TOOTH
Device
from
theUst
You
can delete the history
of
apreviously connected
BLUETOOTH compatible device.
Setting item: Clear Device
1Touch the BLUETOOTH compatible device
you want to delete from the Clear Device list.
Amessage
is
displayed,
2Touch
[Yes]
if you want to delete.
oTouching [No] will cancel the setting.
oThe registration number 5is deleted once the ignition key
goesfrom
ACC
to
OFF.
Controlling from aCD Head Unit IDigital Media
Receiver:
Turn the Rotary
encoder
or
the
Double
Action
encoder
to
select
the BLUETOOTH
compatible
device
to
be
deleted,
and
then
press
ENT
Setting
item:
Service Provider
The service provider name
of
the connected BLUETOOTH
compatible device will be displayed.
If
aBLUETOOTH
compatible device is not connected, "ID
UNSENT'
will be
displayed.
oDepending on the character type some phone service
provider names cannot be displayed.
You
can set whether the KCE-250BT can be recognized or
not from aBLUETOOTH compatible device. Normally set
this to ON.
Setting item: Visible Mode
ON:
Enable recognition of the KCE-250BT from the
BLUETOOTH compatible device.
OFF: Disable recognition of the KCE-250BT from the
BLUETOOTH compatible device.
tAnsweril'i'g
••
OSlls.'.AotomatlcallY
When acall is received, you can set whether to answer
it
automatically or not.
Setting item: Auto Answer
ON: When acall
is
received, it is answered
automatically after about 5seconds.
OFF: When acall is received,
it
will not be answered
automatically.
If
amessage
is
displayed and
[\t]
is
touched when acall
is
received, you
can answer the call. (When aCD Head Unit /
Digital Media receiver
is
connected, press
../
or
\..
to answer acall.)
o
If
the received call setting on the mobile phone
is
on, the
call will be answered automatically even though this
setting is set to
OFF.
seleCting
tbe
Qutput
speaker
Select which speaker
in
the vehicle will output the audio from
the BLUETOOTH compatible device.
Setting
item:
Speaker Select
All: The sound is output from all of speakers
in
car.
F-L: The sound is output from the front left speaker
only.
F-R:
The sound is output from the front right
speaker only.
F-LR: The sound
is
output from the front left and front
right speaker.
oThe setting cannot be adjusted during aphone call. Adjust
the setting before placing acall.
oWhen an IMPRINTaudio processor (PXA-H100)
or
External Audio processor (PXA-H701, etc.) is connected,
the default setting All will be set
and
cannot be adjusted.
I
5.EN

Adjusting
the
volume
for
the
microphone
input
You can raise
or
lower the microphone input volume level.
Setting item: Mic Input
Touch [
....
]or
[~
]to select the desired volume
level
(0-7).
(When aCD Head Unit/Digital Media
Receiver is connected, turn the
Rotary
encoder
or
Double
Action
encoder
to select the
volume level.)
•The setting can he adjusted only when the BLUETOOTH
compatihle del'ice is connected.
•The setting cannot be adjusted during a
phone
call. Adjust
the setting before placing acall.
Displaying
the
firmware
version
Setting item: Firmware Version
Thc current firmware version will be displayed.
•When
rhe
BLUETOOTHfirmware I'ersion is abol'e 2SS,
l't!rsion information
may
nor be correctly displayed. For
details, please refer to Alpine home page.
Updating
the
firmware
Setting item: Firmware Update
With this setting, the
BLUETOOTH
firmware update function
can he activated.
For European users:
Future BLUETOOTH firmware update (for phone
compatibility) at customer end will be available for
Alpine products listed at
(*')
For information to update your BLUETOOTH firmware,
please visit your local Alpine web site or choose your
country from Alpine Europe top page
(http!/
www.alpine-europe.com). For the products, which are
NOT listed at (*'), please contact your local official
Alpine dealer or Alpine support for your country.
*':Example
for
unirs that can be updated:
IVA-DSII
RlRB,
iXA -W404R. iDA
-XJ/J/JII
IJII
RlJoSSI30SIJoJ/JoII
30lRR,
CDE-W20JRi,
CDE-112RiIIIIRlIIIRMII02Ril
IOIRilOlRM
For American users:
Future BLUETOOTH firmware update (for phone
compatibility) at customer end will be available for
Alpine products listed at (*2)
For information to update your BLUETOOTH firmware,
please visit Alpine America home
page
(http://
www.alpine-usa.com).
For the products, which are NOT listed at (*2), please
contact your local official Alpine dealer or Alpine
support for your country.
*2:
Example
for
units rhat can be updated: INA- W900,
IVA-NAV-Io, iXA-W404, iDA-XJoSS/JoSIJoJ, CDA-118MI
1/7IIOS, CDE-102
6.EN
For Asian users:
Future BLUETOOTH firmware update (for phone
compatibility) at customer end will be available for
Alpine products listed at (*3).
For information to update your BLUETOOTH firmware,
please visit Alpine Asia home
page
(http!/
www.alpine-asia.com).
For the products, which are NOT listed at
(~),
please
contact your local official Alpine dealer or Alpine
support for your country.
~:
Examplefor
units that can be updated:
IVA-DSII
E,
iXA-W404E, iDA-XJ05S1305IJ03. CDA-117El105E,
CDE-W203E,
CDE-I02EIIOIEIIOIEM

Hands-Free
Phone
Control
About
the
Hands-Free
Phone
Hands-free calls are possible when using aHSP (Head Set
Profile) and HFP (Hands-Free Profile) compatible mobile
phone with aALPINE BLUETOOTH compatible CD Head
Unit,
AV
Head Unit or Digital Media Receiver.
oAvoidperforming ahands-free call in heavy traffic or on
narrow
or
winding streets.
oClose the windows while calling
to
reduce background
noise.
o
If
both calling parties are using hands-free devices,
or
the
call is made in anoisy location, difficulty hearing the other
person's voice is normal.
oDepending on telephone line conditions
or
certain mobile
devices used, voices may sound unnatural.
oWhen using amicrophone, speak as directly as you can
into the microphone
to
pick up the best sound quality.
oCertain mobile phonefeatures are dependent on the
capabilities
and
settings
of
your service provider's
network. Additionally, certain features may not be
activated by your service provider, and/or the provider's
network settings may limit thefeature's functionality.
Always contact your service provider aboutfeature
availability andfunctionality.
Allfeatures, functionality,
and
other product specifications,
as well as the information contained in the Owner's
Manual are based upon the latest available information
and
are believed
to
be accurate at the time
of
printing.
Alpine reserves the right to change
or
modify any
information or specifications without notice or obligation.
•
The
explanations
in
this Owner's Manual mainly describe
the following operations
from
the
AV
Head Unit.
Answering
a
Call
Incoming calls are announced by the received call ring tone
and adisplayed message (Caller name/PHONE No.).
Touch
[\.].
The call starts.
oIndicator'i.,1I1 (Signal Strength): I
While calling, the indicator will display the current signal
strength
of
mobile phone. While
in
the mode other than
Calling, the unit cannot read the signal strength
of
the
mobile phone exactly.
In
this case, the indicator displays
the signal strength
of
last call.
oWhen "Answering Calls Automatically" (page
5)
is set
to
ON,
you can receive acall automatically.
oWhile calling, the source sound on the unit is muted. After
calling, playback will resume.
CD
Head Unit/Digital Media Receiver:
Press
.J
or
\...
.
Hanging
up
the
Telephone
Touch [
".
].
The call finishes.
CD
Head
Unit
/Digital Media Receiver:
Press
.J
or
\...
.
Adjusting
the
volume
during
an
active
phone
call
While calling, you can adjust the volume. The adjusted
volume level
is
stored.
Press v
1/\
or
turn
the
Rotary
encoder
to
adjust
the
volume.
CD Head Unit /Digital Media Receiver:
Turn the Rotary encoder or the Double Action
encoder to adjust the volume.
o
You
may need to increase volumefrom your regular audio
listening source level. However, increasing the volume
excessively may result
in
feedback.
If
feedback
is
noticed as
feedback is directly related
to
the \'olume, turn down the
volume as low as acceptable
to
eliminate
it.
Positioning the
microphone
in
adirection awayfrom the main car speakers
(e.g. clipped on sun visor) may also reduce feedback at
high volume.
7-EN

Redial
Function
You
can redial the person you have previously called.
After finishing acall, touch
[\.
]*'
on the screen
within 5seconds.
The telephone
is
redialed.
*'
CD Head Unit/Digital Media Receiver: Press
./
or
'-..
Audio
Switching
Operation
While making acall, this function allows you to initiate the
transfer
of
the audio between the mobile phone and the
speakers
in
the car.
While calling, touch
[~»))
..
\.]~
to switch the call
sound between the unit and mobile phone.
*2
CD Head Unit/Digital Media Receiver: Press
and
hold
ENT
for
at least 2seconds.
•Depending on the mobile phone and the connected unit.
this operation may not be performed.
Call
History
Call History
is
recorded for the last dialed/received/missed
calls. There are various ways
of
making calls based on the
"Call History." The following steps 1to 4are common to the
various ways
of
making these calls. For details, refer to each
individual category for making calls.
1Press SOURCElQ).
The SOURCE selection screen
is
displayed.
2Touch
[Phone]
or
[\.
].
The Telephone Menu screen
is
displayed.
3Touch the title bar of the desired item to
place the call.
Setting items:
Dialed Calls /Received Calls /Missed Calls /Phone
Book/Dial
Input
/
Voice
Dial
•The adapter will update the information
in
the Call History
automatically each time amobile phone is connected
or
receiving/dialing acall.
At
this time.
if
you select any
outgoing mode. "Now Updating" will be displayed.
•It may take some time
for
the list
to
be displayed. and also
directly after connection, the list may not be brought up to
date.
4Touch
[~]
to return to the previous screen.
Touch [Exit) to return to the main source screen that
was displayed before the setup operation was
started.
•
If
you place acall directly from the paired mobile phone.
the phone number is not displayed. you cannot redialfrom
the unit
in
this case.
8.EN
Redialing
a
Number
in
Dialed
Calls
History
Previously dialed telephone numbers are stored
in
dialed calls
history.
You
can redial anumber by searching from dialed
calls history.
Setting item: Dialed Calls
Touch
[Call]
of the person name or the
telephone number you want to call from the
Dialed Calls list.
The call
is
placed.
Dialing
aNumber
in
Received
Calls
History
Telephone numbers from received calls are stored
in
the
received calls history.
You
can redial these numbers by
searching here.
Setting item: Received Calls
Touch
[Call]
of the person name or the
telephone number you want to call from the
Received Calls list.
The call
is
placed.
Dialing
a
Number
in
Missed
Calls
History
Telephone numbers for received calls that are missed, are
stored
in
the missed calls history.
You
can redial these
numbers by searching here.
Setting item: Missed Calls
Touch
[Call]
of the person name or the
telephone number you want to call from the
Missed Calls list.
The call is placed.

Up to 1,000 telephone numbers are downloadable to the
BLUETO<JfH compatible unit from amobile phone. Dial a
call by selecting aperson from the phone book list.
Setting item: Phone
Book
Touch
[Call]
of
the person name
or
the
telephone number
you
want
to
call
from
the
Phone
Book
list.
The
call
is
placed.
•
If
one name has several numbers registered in the
telephone book, choose
and
touch [Call]
of
the desired
number after touching the name, the telephone will be
called. Touch [Call]
of
the name directly, the default
number
of
the name will be called. Not all mobile phones
support thisjUnction.
•The names in Phone Book are listed alphabetically. The
listing can be skipped to the next alphabetical character.
e.g. touch
ALPHABET
[~
]
to
move to the names
beginning with Bfrom those beginning with A. (Only
applicable to English alphabetic characters.)
•
If
aname cannot be obtained via the phone book, only the
telephone number (default number) is displayed.
If
both
name and number cannot be obtained, "ID UNSENT" will
be displayed.
•
If
the call history orphonebook
of
the mobile phone is
added ordeleted while it is connected
to
the unit, the list
displayed on the unit may not be brought up
to
date.
Ifit
is
not updated, you cannot correctly place acall.
ii:)laling a
N.umber
Using
Direct
Dial
In
..
(~V
HeadUnltO"iYf·
'.
.
..
You
can place acall by inputting the telephone number
directly by the numeric keypad screen on the
AV
Head Unit.
Settingitem: Dial
Input
The
numeric
keypad screen
is
displayed.Touch
(input) the telephone number, and then
touch
[Call].
The
call
is
placed.
•About the numeric keypad
[X):
closes the numeric keypad input screen.
[Delete All}: deletes all input numbers.
[
...
]:
deletes aprevious number.
You
can call the telephone by performing voice operation.
Setting item: Voice Dial
1Touch the
title
bar
of
Voice Dial.
Amessage
is
displayed.
2Touch
[Yes]
to
activate the voice dial mode. I
The voice dial mode
is
activated, and "Speak"
is
displayed.
•Touch [No] will return
to
the Telephone Menu screen.
3Say
the
telephone number*, name* you want
to
call
into
the microphone.
*The number and name depend on the voice dial
information stored
in
the mobile phone.
•
If
the voice dialfails, the unit will return
to
normal mode
in
30 seconds.
•
You
can perform this operation only when avoice dial
compatible mobile phone
is
connected.
If
the mobile phone
is not compatible with the voice dial, "Failed" is displayed
for
2seconds.
•The Voice Dialfunction performance depends on the
recognition range
of
the mobile phone and mounting
location
of
the microphone. Note when the microphone
is
mounted.
•Voice dial operation depends on the function
of
the mobile
phone.
For
details, refer to the Owner's Manual
of
the
mobile phone.
CD Head UnitIDigital Media Receiver:
Press and hold
\...
or
,./
for
at
least 2seconds
The speak mode
is
activated, and "SPEAK"
is
displayed.
2Say the telephone number, name you want to
call into the microphone.
frq",a
CD
Head
UnitlDigltal
1Press [PHONE].
2
Turn
the Rotary encoder or the Double Action
encoder to select the desired settings (DIALED /
RECEIVED
/
MISSED
/PHONE BOOK), and
press ENT.
The list
is
displayed.
3
Turn
the Rotary encoder or the Double Action
encoder to select the telephone number
you
want to call, and then press
ENT.
The call
is
placed.
9.EN

Accessories
Check accessory parts.
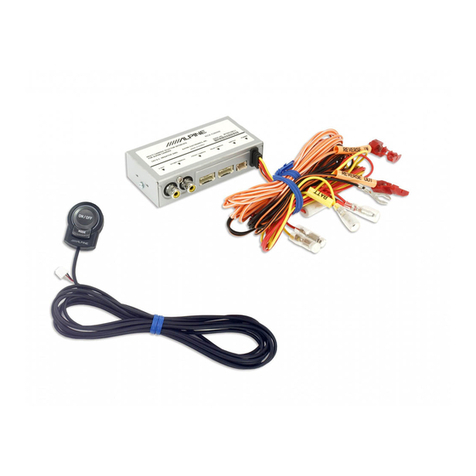
KCE·250BT Module Power Cable
B
~
xl xl
Microphone BLUETOOTH Interface
Cable
,
~
xl
xl
Velcro Fastener Microphone Mounting
Brackets
~
D
br
x2
xl
lO.EN
Installation
Velcro
lastener
Mounting
For the sake
of
safety, follow the guidelines below
in
choosing the mounting location.
•Do not mount the adapter under your feet. Do not step on
the adapter,
or
apply excessive pressure on it.
Before mounting the adapter, leave enough space above
the unit to prevent possible malfunction due to radiated
data noise.
Depending on the adapter mounting location noise may
occur when using aBLUETOOTH compatible device.
This may cause interference resulting in errors
in
the
BLUETOOTH data being sent or received. Should this
happen, the BLUETOOTH device may have problems
in
pairing or functioning normally.
In
this case, mount the
adapter
in
another location.
Attach one side of the Velcro fastener to the box.
Remove the backing from the other side of the Velcro
strip. Gently press the adapter onto its selected
mounting location.
Velcro
~~%----4Lii>
fastener
Mounting
the
Microphone
For the sake
of
safety, mount the microphone
in
the following
location.
In
astable and secure location.
In
alocation that does not inhibit safely driving the
vehicle.
Mount the microphone
in
alocation where the driver's
voice can easily be picked up.
Choose alocation for the microphone that can easily pick up
the drivers voice. Requiring the driver to move towards the
mic for audibility causes adistraction that could
be
dangerous.
Mount the microphone using the supplied Velcro
fastener or the bracket.

Connections
Connecting
the
BLUETOOTH
INTERFACE
to
a
compatible
Alpine
Unit
Before the operation, be sure to set "INT MUTE" and "AUX+" (in the setup function of the connected
head unit*) to OFF.
*Head unit includes CD Head Unit, AV Head Unit and Digital Media Receiver:
•When the KCE-250BT is connected
to
ahead unit, the [NT MUTE setting may not be possible, depending
on
the head unit.
•The AUX+setting may not be possible. depending on the head unit.
•For details, refer
to
the Owner's Manual
of
the head unit.
Connections for the head unit with Full Speed connector IBLUETOOTH INTERFACE connector
Example for BLUETOOTH compatible unit:
INA-W900, IVA-NAV-10. IVA-D511 Series, iXA-W404 Series, iDA-X313/311/305/303/301 Series, CDA-118M/117/105 Series,
CDE-W203/112Ri/111/102/101 Series
•About information
of
BLUETOOTH compatible units other than the above mentioned. please contact your local official Alpine
dealer
or
visit Alpine home page.
BLUETOOTH
compatible Unit
(Sold separately)
r.:::=.--
--
i\ I
It--------lJI
t-----.::=:@~lHj
®
(If the BLUETOOTH INTERFACE
is
t----""?"'".;;;;:®~lllj
connected, you cannot use a
device connected to the INT lead
Fuse (7.5 A)
_~~
(voice interruption, etc.).)
I
CD
To Full Speed connector IBLUETOOTH
INTERFACE connector
®BLUETOOTH INTERFACE Cable (Included)
@Microphone (Included)
@Audio Interrupt Out lead (Pink/Black)
Be
sure to connect only when power is turned off,
as
amalfunction may result.
@)
Audio Interrupt
In
lead (Pink/Black)
®ACC (Ignition) lead (Red)
To
the ACC Power lead.
(j) Battery lead (Yellow)
Connect this lead to aterminal that constantly
provides power (to the positive (+) post of the
battery).
@Ground lead (Black)
Connect to ametal part of chassis body with screw.
II.EN

Connections for the head unit with iPod Direct Connector
BLUETOOTH compatible unit:
IVA-D106/D105 Series, IVA-W505/W502/W205/W202 Series, iDA-X300/X200/X100/X001 Series, CDA-988* Series, CDE-9882Ri,
CDE-9880R. CDE-9874/9872 Series
•The head units CDE-9872 and CDE-9872L purchased
in
the America are not BLUETOOTH compatible.
BLUETOOTH
compatible Unit
(Sold separately)
~----
,
!
I--
M
-,c
-HE-AO-UN-,y
---P-",,-ER-iJj
-1
,
i ' I
IJi
I® '
~
J@®
Fuse (7.5 A)
(If the BLUETOOTH INTERFACE
t-
--..,_®;:;;;:6;".,qjjiiIDj
is connected, you cannot use a
device connected to the INT
'---{!@J
lead (voice interruption, etc.).)
®
CD
To
iPod Direct Connector
®Interconnection Cable (KWE-460E) (Sold
separately)
@Microphone (Included)
@Audio Interrupt Out lead (Pink/Black)
Be sure to connect only when power is turned off.
as
amalfunction may result.
12.EN
®Audio Interrupt In lead (Pink/Black)
®ACC (Ignition) lead (Red)
To
the ACC Power lead.
!J) Battery lead (Yellow)
Connect
this
lead
to aterminal
that
constantly
provides power (to the positive (+) post ofthe battery).
@Ground lead (Black)
Connect to ametal part of chassis body with screw.

Specifications
BLUETOOTH SECTION
BLUETOOTH Specification BLUETOOTH V2.0
Output Power
+4
dBm Max. (Power class
2)
Profile HFP (Hands-Free Profile)
HSP
(Head Set Profile)
GENERAL
Power Requirement
Weight
CHASSIS SIZE
Width
Height
Depth
13.5V DC
(10-16 Vallowable)
96
g
95
mm (3-3/4")
25 mm (1")
77 mm (3")
I
•The BLUETOOTlf® word mark and logos are registered
trademarks owned
by
the Bluetooth SIC,
Inc.
and
any use
of
such marks
by
Alpine Electronics, Inc. is under license.
13.EN

~LPINE®
LIMITED
WARRANTY
ALPINE ELECTRONICS OF AMERICA, INC. AND ALPINE OF CANADA INC. ("Alpine"), are dedicated to quality
craftsmanship and are pleased to offer this Warranty. We suggest that you read it thoroughly. Should you have any
questions, please contact your Dealer or contact Alpine at one of the telephone numbers listed below.
•
PRODUCTS
COVERED:
This Warranty covers Car Audio Products and Related
Accessories ("the product"). Products purchased
in
the
Canada are covered only
in
the Canada. Products
purchased
in
the U.S.A. are covered only
in
the U.S.A.
•
LENGTH
OF
WARRANTY:
This Warranty is in effect for one year from the date of the
first consumer purchase.
•
WHO
IS
COVERED:
This Warranty only covers the original purchaser of the
product, who must reside
in
the United States, Puerto Rico
or Canada.
•
WHAT
IS
COVERED:
This Warranty covers defects
in
materials or workmanship
(parts and labor)
in
the product.
•
WHAT
IS
NOT
COVERED:
This Warranty does not cover the following:
CD
Damage occurring during shipment of the product to
Alpine for repair (claims must be presented to the
carrier).
®Damage caused by accident or abuse, including burned
voice coils caused by over-driving the speaker (amplifier
level
is
turned up and driven into distortion or clipping).
Speaker mechanical failure (e.g. punctures, tears or
rips). Cracked or damaged LCD panels. Dropped or
damaged hard drives.
@Damage caused by negligence, misuse, improper
operation or failure to follow instructions contained in the
Owner's manual.
@Damage caused by act of God, including without
limitation, earthquake, fire, flood, storms or other acts of
nature.
Any cost or expense related to the removal or
reinstallation of the product.
®Service performed by an unauthorized person, company
or association.
®Any product which has the serial number defaced,
altered or removed.
(j)
Any product which has been adjusted, altered or
modified without Alpine's consent.
@Any product not distributed by Alpine within the United
States, Puerto Rico or Canada.
®Any product not purchased from an Authorized Alpine
Dealer.
@You must supply proof of your purchase of the product.
@You must package the product securely to avoid
damage during shipment. To prevent lost packages it
is
recommended
to
use acarrier that provides atracking
service.
•HOW
WE
LIMIT
IMPLIED
WARRANTIES:
ANY IMPLIED WARRANTIES INCLUDING FITNESS FOR
USE AND MERCHANTABILITY ARE LIMITED
IN
DURATION TO THE PERIOD OF THE EXPRESS
WARRANTY SET FORTH ABOVE AND NO PERSON
IS
AUTHORIZED TO ASSUME FOR ALPINE ANY OTHER
LIABILITY
IN
CONNECTION WITH THE SALE
OF
THE
PRODUCT.
•HOW
WE
EXCLUDE
CERTAIN
DAMAGES:
ALPINE EXPRESSLY DISCLAIMS LIABILITY FOR
INCIDENTAL AND CONSEQUENTIAL DAMAGES
CAUSED BY THE PRODUCT. THE TERM "INCIDENTAL
DAMAGES" REFERS TO EXPENSES OF
TRANSPORTING THE PRODUCT TO THE ALPINE
SERVICE CENTER, LOSS OF THE ORIGINAL
PURCHASER'S TIME, LOSS OF THE USE OF THE
PRODUCT, BUS FARES, CAR RENTALS OR OTHERS
COSTS RELATING TO THE CARE AND CUSTODY OF
THE PRODUCT. THE TERM "CONSEQUENTIAL
DAMAGES" REFERS TO THE COST
OF
REPAIRING OR
REPLACING OTHER PROPERTY WHICH
IS
DAMAGED
WHEN THIS PRODUCT DOES NOT WORK PROPERLY.
THE REMEDIES PROVIDED UNDER THIS WARRANTY
ARE EXCLUSIVE AND
IN
LIEU OF ALL OTHERS.
•HOW
STATE/PROVINCIAL
LAW
RELATES
TO
THE
WARRANTY:
This Warranty gives you specific legal rights, and you may
also have other rights which vary from state to state and
province to province.
In
addition, some states/provinces do
not allow limitations on how long an implied warranty lasts,
and some do not allow the exclusion or limitation of
incidental or consequential damages. Accordingly,
limitations as to these matters contained herein may not
apply to you.
.IN
CANADA
ONLY:
This Warranty is not valid unless your Alpine car audio
product has been installed
in
your vehicle by an Authorized
Installation Center, and this warranty stamped upon
installation by the installation center.
Or visit our website at; http://www.alpine-usa.com
CAR AUDIO 1-S00-ALPINE-1 (1-S00-257-4631)
NAVIGATION1-888-NAV-HELP (1-888-628-4357)
•HOW
TO
CONTACT
CUSTOMER
SERVICE:
Should the product require service, please call the following
number for your nearest Authorized Alpine Service Center.
•HOW
TO
OBTAIN
WARRANTY
SERVICE:
CD
You are responsible for delivery of the product to an
Authorized Alpine Service Center or Alpine for repair
and for payment of any initial shipping charges. Alpine
will, at its option, repair or replace the product with a
new
or
reconditioned product without charge. If the
repairs are covered by the warranty, and if the product
was shipped to
an
Authorized Alpine Service Center or
Alpine, Alpine will pay the return shipping charges.
®You should provide adetailed description of the
problem(s) for which service
is
required.
ALPINE ELECTRONICS OF AMERICA, INC., 19145 Gramercy Place, Torrance, California 90501, U.S.A.
ALPINE ELECTRONICS OF
CANADA,
INC., 777 Supertest Road, Toronto, Ontario M3J 2M9, Canada
Do
not send products to these addresses.
Call the toll free telephone number or visit the website to locate aservice center.
WARRANTY·EN

~/iLPINE®
GARANTIE
LlMITEE
Fideles aleur engagement de ne fournir que des produits de qualite, ALPINE ELECTRONIQUE DE L'AMERIQUE, INC. et
ALPINE ELECTRONIQUE
DU
CANADA, INC. (Alpine) sont heureuses de vous offrir cette garantie. Nous vous suggerons de
Ie
lire attentivement et en entier.
Si
vous avez la moindre question, veuillez contacter I'un de nos concessionnaires ou appeler
directement Alpine aux numeros listes ci-dessous.
@Vous devez donner une description detaillee des
problemes qui sont aI'origine de votre demande de
reparation.
@Vous devez joindre la preuve de votre achat du produit.
@Vous devez embailer soigneusement
Ie
produit pour eviter
tout dommage durant son transport. Pour eviter la perte
de I'envoi,
il
est conseille de choisir un transporteur qui
propose un service de suivi des envois.
•
LIMITATION
DES
GARANTIES
TACITES
LA DUREE DE TOUTES LES GARANTIES TACITES, Y
COMPRIS LA GARANTIE D'ADAPTATION AL'UTILISATION
ET LA GARANTIE
DE
QUALITE LOYALE ET MARCHANDE,
EST
L1MITEE
ACELLE DE LA GARANTIE EXPRESSE
DETERMINEE CI-DESSUS. PERSONNE N'EST AUTORISE
AENGAGER AUTREMENT LA RESPONSABILITE D'ALPINE
EN
VERTU
DE
LA VENTE D'UN PRODUIT.
e
EXCLUSIONS
DE
LA
GARANTIE
ALPINE STIPULE EXPRESSEMENT QU'ELLE N'EST PAS
RESPONSABLE DES DOMMAGES-INTERETS ET
DOMMAGES INDIRECTS PROVOQUES PAR
LE
PRODUIT.
LES DOMMAGES-INTERETS SONT LES FRAIS
DE
TRANSPORT
DU
PRODUIT VERS
UN
CENTRE
DE
SERVICE ALPINE, LA PERTE
DE
TEMPS
DE
L'ACHETEUR
ORIGINAL, LA PERTE D'UTILISATION
DU
PRODUIT, LES
BILLETS D'AUTOBUS, LA LOCATION
DE
VOITURES ET
TOUS LES AUTRES FRAIS LIES ALA GARDE
DU
PRODUIT.
LES DOMMAGES INDIRECTS SONT LES FRAIS
DE
REPARATION OU DE REMPLACEMENT D'AUTRES BIENS
ENDOMMAGES SUITE
AU
MAUVAIS FONCTIONNEMENT
DU
PRODUIT.
LESRECOURS
PREVUS PAR LES PRESENTES
EXCLUENT ET REMPLACENT TOUTE AUTRE FORME
DE
RECOURS.
e
LIEN
ENTRE
LA
GARANTIE
ET
LA
LOI
La
garantie vous donne des droits specifiques, mais vous
pouvez aussi jouir d'autres droits, qui varient d'un etat ou
d'une province aI'autre.
En
outre, certains
€ltats
et certaines
provinces interdisent de limiter la duree des garanties tacites
ou
d'exclure les dommages accessoires
ou
indirects. Dans ce
cas, les limites et les exclusions de la garantie peuvent ne pas
s'appliquer avous.
e
CLAUSE
APPLICABLE
AU
CANADA
SEULEMENT
Pour que la garantie soit valable,
il
faut
qU'un
centre
d'installation autorise ait installe
Ie
systeme audio pour I'auto
dans votre vehicule et
qU'il
ait ensuite appose son cachet sur
la garantie.
e
NUMEROS
D'APPEL
DU
SERVICE
A
LA
CLIENTELE
Si
vous avez besoin de nos services, veuillez appeler Alpine
aux numeros ci-dessous pour
Ie
centre de service autorise
Alpine
Ie
plus proche.
e
PRODUITS
COUVERTS
PAR
LA
GARANTIE
Cette garantie couvre les produits audio de voiture et les
accessoires connexes
(OOle
produit
OO
).
Elle ne couvre les
produits que dans
Ie
pays
ou
ils ont ete achetes.
e
DUREE
DE
LA
GARANTIE
Cette garantie est en vigueur pendant un
an
apartir de la date
du premier achat du client.
e
PERSONNES
PROTEGEES
PAR
LA
GARANTIE
Seul I'acheteur original
du
produit, s'il resisde aux Etats-Unis,
aPorto Rico
ou
au
Canada, peut se prevaloir de la garantie.
e
CE
QUI
EST
COUVERT
Cette garantie couvre tous les defauts de materiaux et de
fabrication (pieces et main d'reuvre) du produit.
eCE
QUI
N'EST
PAS
COUVERT
Cette garantie ne couvre pas ce qui suit:
CD
Les dommages survenus durant
Ie
transport des produits
renvoyes aAlpine pour etre repares (Ies reclamations
doivent etre adressees au transporteur);
@Les degats provoques par un accident ou une mauvaise
utilisation, ycompris des bobines acoustiques grillees
suite aune surexcitation
des
enceintes (augmentation
du niveau de I'amplificateur jusqu'a atteindre un effet de
distorsion ou d'ecretage), une defaillance mecanique
des enceintes (perforations, dechirures ou fentes),
panneaux LCD fissures ou endommages, disques durs
endommages ou ayant subi une chute.
@Tout degat provoque par negligence, usage inapproprie,
mauvaise utilisation ou par
Ie
non-respect des
instructions indiquees dans Ie manuel de I'utilisateur.
@Les dommages dus ala force majeure, notamment aux
tremblements de terre,
au
feu, aux inondations, aux
tempetes
ou
aux autres cataclysmes naturels;
Les frais ou les depenses relatifs aI'enlevement
ou
ala
reinstallation du produit;
®Les services rendus par une personne, physique ou
morale non autorisee;
®Les produits dont
Ie
numero de serie aete efface, modifie
ou
retire;
CD
Les produits qui ont ete adaptes ou modifies sans
Ie
consentement d'Alpine;
®Les produits qui ne sont pas distribues par Alpine aux
Etats-Unis, aPorto Rico
ou
au
Canada;
®Les produits qui n'ont pas ete achetes par I'entremise d'un
concessionnaire Alpine autorise;
eCOMMENT
SE
PREVALOIR
DE
LA
GARANTIE
CD
II
vous faut remellre
Ie
produit necessitant des reparations
aun centre de service autorise Alpine ou aAlpine meme et
en assumer les frais de transport. Alpine a
Ie
choix entre
reparer
Ie
produit
ou
Ie
remplacer par un produit neuf
ou
revise, Ie tout sans frais pour vous.
Si
les reparations sont
couvertes par la garantie et
si
Ie
produit a
€lte
envoye a
un
centre de service Alpine
ou
aAlpine,
Ie
paiement des frais
de reexpedition
du
produit incombe Alpine. AUDIO
DE
VOITURE
NAVIGATION 1-80o-ALPINE-1 (1-800-257-4631)
1-888-NAV-HELP (1-888-628-4357)
Ou
visitez notre site Web aI'adresse hllp://www.alpine-usa.com
ALPINE
ELECTRONIOUE
DE
L'AMERIOUE,
INC., 19145 Gramercy Place, Torrance, California 90501, U.S.A.
ALPINE
ELECTRONIOUE
DU
CANADA,
INC., 777 Supertest Road, Toronto, Ontario M3J 2M9, Canada
N'envoyez aucun produit
aces
adresses.
Appelez notre numero gratuit ou visitez notre site
Web
si
vous recherchez un centre de service.
WARRANTY.FR

About
the
Rules
of
Bluetooth
Electromagnetic
Radiation
Regulation
11J~~~Ir9~)~
)n~j!AE~*
Country
11iIli:
Rules of Electromagnetic Radiation Regulation /
~iEUHjtfE
USA/Canada This device complies with Part 15 of the FCC Rules and RSS-Gen of IC Rules. Operation is subject to
the following two conditions: (1) this device may not cause interference, and
(2)
this device must
accept any interference, including interference that may cause undesired operation of this device.
FCC WARNING
Changes or modifications not expressly approved by the party responsible for compliance could void
the user's authority to operate the equipment.
Europe
(E:
Declaration of Conformity
~.
1tWJ$~vUliiljfi'11~t!~J~WRr:t
(930322)
~+=fl~
R~rt~mftM~m~$H.~t!'#R~m'0~·
•••
~m~~~mM~~~.$·
ro*~$.~~~m~~Mtt&~no
~+l1Efl~
m~$H.~t!~~m~m~.M.~~&~mft$am;RB~W~~~.M'.~~~
m'~&g~~~~MnmW~~mo
M~ft$am,m~~m$.~w.~~.~amo
m~$H.~t!~~~ft$am.I.·M.&g.m
••
~Htt.t!m.~~mo
Australia! Declaration of Conformity
New Zealand
UAE Approved by TRA

SINO.
LABEL
MERCURY
LABEL

To
customers
purchasing
KCE·400BT/KCE·250BT/Fiir
Kunden,
die
das
KCE-400BT/KCE-250BT
erworben
haben/A
I'attention
des
utilisateurs
avant
achete
Ie
modele
KCE·400BT/KCE·250BT/lnformacion
para
los
clientes
que
hayan
adquirido
el
modelo
KCE·400BT/KCE·250BT/lnformazioni
per
iclienti
KCE·400BT/
KCE·250BT/Till
kunder
som
kiiper
KCE·400BT/KCE·250BTNoor
klanten
met
de
KCE·400BT/KCE·250BT/,QIlR
nOKynaTelleM
MO,QelleM
KCE-400BTI
KCE-250BT/Do klient6w kupujClcych modut KCE-400BT/KCE-250BTlnpoC;
TOUC;
neAim:c; nou ayopaaav
TO
IJOVT&AO
KCE-400BTI
KCE-250BTli&.~
KCE·400BT/KCE·250BT
ll'9~p/~~~
KCE·400BT/KCE-250BT
tr-.J~p
English
Be sure
to
complete setting up
of
the head
unit
functions
as
follows":
INT MUTE setting: OFF
AUX+ setting: OFF*2
BLUETOOTH
IN
(BT IN) setting: Adapter (ADPT), HFP or HFP+Audio (+AUDIO),3
*1 After setting,
be
sure to set ACe to
OFF,
then set to ON again.
*2
Depending on the head unit, "AUX+ setting" may not be available.
•For delails, refer to the Owner's manual of the head unit
'3
Depending on the
head
unit, the "BLUETOOTH
IN
(BT IN) setting" may differ.
Refer to the following head unit types:
Type
1<"Adapter"
is
displayed
as
aselection>
Adapter (ADPT): This option allows the head unit to recognize connection with this adapter. (Hands-
free Phone is available, and the
8T
Audio source is displayed.) In the case of KCE-250BT, the
8T
Audio
source is displayed
but
cannot be used.
Off: This option
does
not allow the head unit to recognize connection with this adapter.
Type 2<"Adapter" is not displayed as aselection>
HFP: This option allows the head unit to recognize connection with this adapter. (Hands-free Phone is
available.
but
the
BT
Audio source is not displayed.)
HFP+Audio (+AUDIO): This option allows the head unit to recognize the connection with this adapter.
(Hands-free Phone is available. and the BT Audio source is displayed.) Do not select this when using
KCE-250Bl
Off: This option does not allow the head unit to recognize connection with this adapter.
•
8T
Audio source is not available with KCE-250BT.
•About the availability of the
8T
Audio source with KCE-4008T, refer to the Owner's manual of the
BLUETOOTH®
compatible
device.
Espafiol
Es importante finalizar la configuraci6n de las funciones de la unidad principal
del modo
siguiente":
Ajuste INT MUTE: OFF
Ajuste AUX+: OFF,2
Ajuste BLUETOOTH
IN
(BT IN): Adapter (ADPT), HFP 0HFP+Audio
(+AUDIO),3
*1
Una vez ajustado. es importante establecer ACC en OFF ydespues volverlo aajustar en ON.
*2
Segun la unidad principal, es posible
que
el ajuste uAUX+" no esM disponible.
•Para obtener mas informaci6n, consulte el Manual del propietario
de
la unidad principal.
'3
Segun la unidad principal,
el
ajuste "BLUETOOTH
IN
(BT IN)"
puede
variar.
Consulte los siguientes tipos de unidad principal:
Tipo 1<"Adapter" aparece como opci6n>
Adapter (ADPT): con esta opci6n, la unidad principal reconoce la conexi6n can este adaptador.
(Telefono manos libres disponible yfuente
8T
Audio visible.)
En
caso
del modelo KCE-2508T, la fuente
BT
Audio esta visible pero no se puede usar.
Off: can esta opci6n, la unidad principal no
puede
reconocer la conexi6n can este
adaptadar
Tipo 2<"Adapter" no aparece como opci6n>
HFP: can esta opci6n, la unidad principal reconoce la conexi6n con este adaptador. (Eltelefono
manos Jibres esta disponible, pero la fuente
8T
Audio no aparece.)
HFP+Audio (+AUDIO): esta opci6n permite
que
la unidad principal reconozca la conexi6n can este
adaptador. (Telefono manos libres disponible yfuente
8T
Audio visible.) No seleccione esta opci6n
si
utiliza
el
modelo
KCE-250Bl
Off:
can esta opci6n, la unidad principal no
puede
reconocer la conexi6n can este
adaptador
•La fuente BT Audio
no
esta disponible en
el
modelo KCE-2508T.
•Para obtener informaci6n sobre la disponibilidad
de
la fuenle BT Audio can el modelo KCE-400BT,
consulte
el
Manual
del
propietario del dispositive
compatible
con BLUETOOTH®.
Deutsch
Achten Sie darauf, die Einrichtung
der
Funktionen des Hauptgerats wie folgt
abzuschlieBen" :
INT MUTE-Einstellung: OFF
AUX+-Einstellung: OFF,2
BLUETOOTH
IN
(BT IN)-Einstellung: Adapter (ADPT), HFP oder HFP+Audio (+AUDIO),3
*1
Achten Sie darauf, nach
der
Einstellung die Zundung aus- und dann wieder einzuschalten.
*2
Abhangig yom Hauptgerat ist
die
Einstellung "AUX+" m6glicherweise nicht verfOgbar
•Weitere Informationen finden Sie in der Bedienungsanleitung
des
Hauptgerats.
'3
Abhangig vom Hauptgerat kann die Einstellung "BLUETOOTH
IN
(BT IN)" abweichen.
Schlagen Sie unter
den
folgenden Hauptgerattypen nach
Typ
1<"Adapter" wird als Auswahl angezeigt>
Adapter (ADPT): Diese Option erm6glicht, dass das Hauptgerat
die
Verbindung mit diesem Adapter
erkennl. (Die Freisprecheinrichtung
tOr
das
Telefon ist verfugbar und
die
Quelle
BT
Audio wird
angezeigt.) Beim KCE-250BT wird die Quelle
BT
Audio angezeigt, kann aber nicht verwendet werden.
Off: Diese Option erm6glicht nicht, dass das Hauptgerat
die
Verbindung mit diesem Adapter erkennt.
Typ
2<"Adapter" wird nicht als Auswahl angezeig!>
HFP: Diese Option erm6glicht, dass das Hauptgerat
die
Verbindung mit diesem Adapter erkennt. (Die
Freisprecheinrichtung
fOr
das
Teleton ist verfOgbar, aber die Quelle BT Audio wird nicht angezeigt.)
HFP+Audio (+AUDIO): Diese Option erm6glicht, dass das Hauptgerat die Verbindung mit diesem
Adapter erkennt. (Die Freisprecheinrichtung
fOr
das Telelon ist verfOgbar und
die
Quelle 8T Audio wird
angezelgt.) Wahlen Sie diese Option nicht beim KCE-250BT.
Off: Diese Option erm6ghcht nicht, dass
das
Hauptgerat
die
Verbindung mit diesem Adapter erkennt.
•Die Quelle
BT
Audio ist beim KCE-250BT nlcht verlOgbar.
•Informalionen zur VerfUgbarkeit
der
Quelle
BT
Audio beim KCE-400BT finden Sie in der
Bedienungsanleitung
des
mit BLUETOOTH@ kompatiblen Gerats.
ItalUlnO
Accertarsi di completare I'impostazione delle funzioni dell'unita principale nel
modo
seguente":
Impostazione INT MUTE: OFF
Impostazione AUX+: OFF*2
Impostazione BLUETOOTH IN (BT IN): Adapter (ADPT), HFP 0HFP+Audio (+AUDIO),3
* 1 Dopo aver completato I'impostazione, accertarsi di impostare ACC
su
OFF,
quindi impostarlo
nuovamente
su
ON.
*2
Aseconda dell'unita principale, I"'impostazione AUX+
~
potrebbe non essere disponibile.
•Per ulteriori informaziani, consultare
Ie
istruzioni per ruso dell'unita principale.
*3
Aseconda dell'unita principale, I"'impostazione BLUETOOTH
IN
(8T
IN)~
potrebbe essere diversa
Fare riferimento ai tipi seguenti di unita principale:
Tipo 1<"Adapter" viene visualizzato come selezione>
Adapter (ADPT): questa opzione consente alrunita principale di riconoscere il collegamento can
questa adattatore, (La funzione vivavoce
deltelefono
adisponibile ela sorgente
BT
Audio viene
visualizzata). Nel
casa
di
KCE-2508T, la sorgente
8T
Audio viene visualizzata, rna non
pub
essere
utilizzata.
Off: questa opzione non consente all'unita principale di riconoscere
iI
collegamento can questa
adattatore.
Tipo 2<"Adapter" non viene visualizzato come selezione>
HFP: questa opzione consente all'unita principale
di
riconoscere
il
coJlegamento can questa
adaltatore. (La funzione vivavoce
del
telefono adisponibile, rna la sorgente
BT
Audio non viene
visualizzata).
HFP+Audio (+AUDIO): questa opzione consente all'unita principale di riconoscere
il
collegamento can
questo adattatore, (La funzione vivavoce del telefono adisponibile ela sorgente 8T Audio viene
visualizzata). Non selezionare
quando
si
utilizza KCE-250BT.
Off: questa opzione non consente all'unita principale di riconoscere
il
collegamento con questa
adattatore.
•La sargente BT Audio non adisponibile con KCE-2508T.
•Per informazioni sulla disponibilila della sorgente BT Audio con KCE-400BT, consultare
Ie
istruzioni
per I'uso del dispositivo compatibile BLUETOOTH®.
Francais
Veillez aproceder ala configuration des
fonctions
de I'unite principale, en
suivant les etapes ci-dessous" :
Reglage INT
MUTE:
OFF
Reglage AUX+ :OFF,2
Reglage BLUETOOTH IN (BT
IN):
Adapter
(ADPT), HFP ou HFP+Audio
(+AUDIO),3
*1
Une fois les reglages termines, veillez aregler ACC sur
OFF,
puis anouveau sur ON.
*2
Selon I'unite principale,
il
est possible
que
Ie
reglage «AUX+ »ne soit pas disponible.
•Pour plus
de
details, reportez-vous au
mode
d'emploi de I'unite principale.
'3
Selon I'unile principale,
II
est possible
que
Ie
reglage
><
BLUETOOTH
IN
(BT IN) "differe.
Reportez-vous aux types
d'unitE:!s
principales suivants
Type 1
<<<
Adapter»
s'affiche comme selection>
Adapter (ADPT) :cette option
permet
aI'unite principale de reconnaitre la connexion avec cet
adaptateur. (La fonction Telephone mains libres est disponible et la source BT Audio s'affiche.) Dans
Ie
cas
du modale KCE-250BT, la source
8T
Audio s'affiche, mais
il
est impossible de l'utiliser.
Off :
celie
option ne permet pas aI'unite principale
de
reconnaitre la connexion avec cet adaptateur.
Type 2
<<<
Adapter»
ne s'affiche pas comme selection>
HFP :cette option permet aI'unite principale
de
reconnaitre la connexion avec cet adaptateur (Ia
fonction mains libres est disponible, mais la source
8T
Audio n'est pas affichee).
HFP+Audio (+AUDIO) :cette option permet aI'unite principale de detecter la connexion acet
adaptateur, (La fonction Telephone mains Iibres est disponible et la source BT Audio s'affiche,) Ne
selectionnez pas cette option lorsque vous utilisez Ie modele KCE-250BT.
Off :celte option ne permet pas aI'unite principale
de
reconnaitre la connexion avec cet adaptateur.
•La source BT Audio n'est
pas
disponible avec Ie modele KCE-250BT.
•Pour savoir
si
la source BT Audio est disponible avec
Ie
modele KCE-400BT. reportez-vous
au
mode
d'emploi du peflpherique compatible BLUETOOTH@
Svenska
Se
till
att huvudenhetens funktioner stalls in pa foljande
satt":
INT MUTE-installning: OFF
AUX+-insUilining: OFF*2
BLUETOOTH
IN
(BT IN)-installning: Adapter (ADPT), HFP eller HFP+Audlo
(+AUDIO),3
*1
Etter installningen ska du kontrollera atl ACC ar
OFF.
Stall sedan in
pa
ON igen.
*2
Beroende pa huvudenhet kan
det
handa
alt "AUX+-installningen" inte ar tillganglig.
•Ylterligare information
Hnns
ihuvudenhetens bruksanvisning.
*3
Beroende pa huvudenheten kan
det
handa atl "BLUETOOTH
IN
(BT IN)-installningen" varierar.
Relerera till f61jande typer av huvudenheter:
Typ 1<"Adapter" visas sam val>
Adapter (ADPT): Med
della
alternativ kan huvudenheten identifiera anslutningen med denna adapter.
(Hands!reetele!on ar ltllganglig
och
BT Audio-kalla visas). For KCE-250BT visas
BT
Audio-kallan, men
den
kan inte anvandas
Off: Med detta alternativ kan inte huvudenheten identifiera anslutningen
med
denna adapter.
Typ 2<"Adapter" visas inte sam val>
HFP: Med deUa alternativ kan huvudenheten identifiera anslutningen
med
denna
adapter, (Hands-free-
telefon tinns tillgangligt men BT-Ijudkallan visas inte,)
HFP+Audio (+AUDIO): Tack yare
delta
alternativ kan huvudenheten identifiera anslutningen till denna
adapter (handsfreetelefon ar tillganglig
och
8T
Audio-kalla visas). Valj inte deUa nar KCE-250BT
anvands.
Off: Med delta alternaliv kan inte huvudenheten identifiera anslutningen
med
denna adapter.
•
BT
Audio-kalla ar inte tillganglig
fOr
KCE-250BT.
•
Om
du
viII
veta mer om BT Audio kallans tillganglighet f6r KCE-400BT ska du referera
till
den
BLUETOOTH®-kompatibla enhetens bruksanvisning.
68-16909Z20-A

Nederlands
Zorg
ervoor
dal
u
hel
inslellen
van
de
funclies
van
de
headunil
als
volgl
vollooil":
INT
MUTE-instelling:
OFF
AUX+ installing: OFF*2
BLUETOOTH
IN
(BT
IN)-instelling:
Adapter
(ADPT),
HFP
of
HFP+Audio
(+AUDI0),3
*1Siel na het instellen ACe in
op
OFF en daarna opnieuw
op
ON.
*2
Afhankelijk van
de
headunit
is
de
'AUX+
instelling'
mogelijk
niel
beschikbaar.
•Meer informatie
kunl
uvinden in
de
gebruiksaanwijzing van
de
headunil.
*3
Afhankelijk van
de
headunil, kan
de
'SLUETOOTH IN
(8T
IN)-instelling" verschillen.
Zie
de
volgende types headunits:
Type 1<"Adapter" word! weergegeven als selectie>
Adapter (ADPT): Met
deze
optie kan
de
headunit een
verbinding
met
deze
adapter
herkennen. (De
handenvrije telefoon
is
beschikbaar
en
de
8T
Audio-bran word! weergegeven,)
In
hat geval van
KCE·250BT,
wordt
de
8T
Audio-bran
weergegeven,
maar
kan
deze
niet
worden
gebruikt.
Off: Met
deze
optie
kan
de
head
unit
geen
verbinding
met
deze
adapter
herkennen.
Type 2
<-Adapter-
wordt
niet weergegeven als selectie>
HFP: Met
deze
optje
kan
de
headunit
een
verbinding
met
deze
adapter
herkennen. (De
handenvrije
telefoon is
beschikbaar,
maar
de
8T
Audio-bron
wordt
niet
weergegeven.)
HFP+Audio (+AUDIO); Met
deze
optie
kan
de
head
unit een
verbinding
met
deze
adapter
herkennen.
(De
handenvrije
telefoon is
beschikbaar
en
de
8T
Audio-bron
wordt
weergegeven.)
Selecteer
dit
niet
als u
KCE-250BT
gebruikt.
Off: Met
deze
optie
kan
de
head
unit
geen
verbinding
met
deze
adapter
herkennen.
•
8T
Audio·audiobron
is niet
beschikbaar
bij
de
KCE·250BT.
•Voor
meer
informatie
over
de
beschjkbaarheid
van
de
8T
Audio-bron
bij
de
KCE·400BT, kunt u
de
gebruikershandleiding
raadplegen
van
het
apparaat
dat
BLUETOOTH@ ondersteunt.
EMT/Vt"ti.
CllpOVTioTC
VO
oAoKAIlPWOCTC
Til
Pu91l101l
TWV
ACITOUPYIWv
TIlC;
Kuplac; Ilovallac;
wc;c~ric;":
pue~lcr~
INT
MUTE:
OFF
PUe~l"'l
AUX+:
OFF,2
PUe~l"'l
BLUETOOTH
IN
(BT
IN):
Adapter
(ADPT),
HFP
i] HFP+Audio (+AUDI0),3
*1
METa
ana
Til
pU81lLOT]
cppovTlan:
va
pu8lliaET£
Tllv
£mAoytl
ACC
a£
OFF
KQI,
aTTl
OUVEX£LO,
va
TTl
PU8j.lLO£T£
~avo
a£
ON.
*2
AvaAoya
\..1£
TTlV
KUPIO
lJovaoo,
11
"PU8IJlOT]
AUX+"
£VOEX£TOL
va
IJTlv
eiVOL
OLo8EOl\..lTl.
o
na
A£ffiO\..lEpeLec;,
OVoTpE~Te
aTO
EVX£lpioLO
KaTaxou
TTlC;
KUPLOC;
IJOVOOOC;.
*3
H
"pU8j.lLOTJ
BLUETOOTH
IN
(BT
IN)"
£VOEXETOL
va
OlO$EpeL
avaAoyo
\..1£
TTlV
KUPLO
1l0Vaoo.
AvaTpE~T£
aTOUC;
nopoKciTw
Tlinouc:
KUPIWV
\..Iovaowv:
TunoS
1
<H
PUSllLan
-Adapter-
£1..I$avil;eTOl
ws
£mAoyrJ>
Adapter
(ADPT): AUTtl
Tl
emAoytl
£mTpEn£t
aTTlV
KUPLO
IJOVaOO
va
ovoyvwpim::1
TTl
auvo£OTJlJe
OUTDV
TOV
\..IeTOTponEo. (H
emAoytl
TTlA£epWVOU
11£
AeLToupyio
hands-free
eiVOL
OLOSEOlj.lTl
KOl
£1l$avi~ETOL
Tl
nTlytl
BT
Audio.)
LTo
1l0VTEAO
KCE-250BT
Tl
nTlytl
BT
Audio
elJepovl~£TOL
OAAO
oev
Ilnopei
va
XPTlOllJonoLTl8£L
Off: AUTtl
Tl
£mAoytl
OEV
emTpEn£1
aTTlV
KUPtO
IJOVaOa
va
avayvwpio£L
TTl
OUVOEOT]
IJ£
OUTav
TOV
ll
eTaTponEo.
TunoS
2
<H
pU8IJlOl)
~
Adapter~
o£v
elJpovil;£TOl
ws
emAoyD>
HFP:
Aun;
Tl
emAoytl
£mTpEn£1
OTTlV
KUPLO
1J0VaOO
va
ovayvwpioeL
TTl
OUVO£OlllJe
oUTav
TOV
lJeTOTponEo. (H emAoyrJ
TTlA£epWVOU
Ile A£tTOUpyio
hands-free
eiVOl
OLo8EOIj.lTl,
OAAO
Tl
nTlytl
8T
Audio
oev
ql$ovi~ETaL.)
HFP+Audio
(+AUDIO): AUTtl
Tl
emAOyn £mTpEn£1 OTIlV
KUPLO
Ilovaoo
va
ovoyvwpia£L
TTl
OUVO£CJT]
IJE
OUTav
TOV
j.leTOTponEo. (H emAOyn
TIlAe$Wvou
Ile
A£LToupyia
hands-free
eiVOL
Ot08EOlIJT)
KOL
elJ¢)Qvi~£TOL
11
nTlYr,
8T
Audio.)
MTlv XPIlOlj.lOnOLeiTe
aUTtlv
TTlV
emAoyrJ
KOTa
Til
XPtlOTJ
TOU
IJOVTEAOU
KCE-250BT.
Off: AUTtl
11
£mAoyr,
oev
£nLTpEnet
aTTlV
KUP10
\..IOVooa
va
avoyvwpioeL
TTl
OUVO£OTJIJ£
aUTav
TOV
Il
ETO
TponEo.
oH
mlYn
BT
AUdio
oev
eiVOL
CSLo8EOlj.lTl
OTO
j.lOVTEAO
KCE-250BT.
•
no
nATlPO¢lOpiec:
OXETLKa
IJ£
TTl
oLa8cOIIJOTTlTO
T11<:
nllyn<:
8T
Audio
OTO
IJOVTEAO
KCE-400BT,
OVoTpE~Te
aTO
EVXClpioLO
KOTOXOU
tllC: OUj.lf3otric:
IJE
BLUETOOTH@
OUOKCUnc:.
PyCCKU"
06R3aTel1bHO
BblnOl1HMTe
HacTpoMKy
lIlYHK~MM
rnaBHoro
611oKa,
KaK
onMcaHO
Aal1ee",
HacTpo_Ka
INT
MUTE:
OFF
HacTpo~Ka
AUX+:
OFF*2
HacTpo_Ka
BLUETOOTH
IN
(BT
IN):
Adapter
(ADPT),
HFP
"n"
HFP+Audio
(+AUDI0),3
*1
nocne
HaCTpO~K\II
YCTaHOB\IITe.cJlA
napaMeTpa
ACe
3Hal.leHVle
OFF, asareM
CHOBa
ON.
*2
HacTpo~Ka
'I\UX+"
MO>KeT
OblTb
HeAocTYnHa B
3aS\IIClllMOCT\II
OT
maBHoro onOKa.
o
nnA
nony'-leHliIR
AOnOI1HIIITeJ1bHO~
\IIH¢OPMal...l\ll1ll
eM.
pyKOBO,QCTBO
no
3KcnnyaTaulil\ll rnaBHoro onoKa.
*3
HacTpo~Ka
"BLUETOOTH
IN (BT IN)"
MO>K6T
pa3m1l.1aTbCA
B
3aS\IICIIIMOCnl
OT
rrlaBHoro onOKa.
CM.
cne,nYlOlLI\II6
nmbl
rJ1aBHbIX
onOKOS:
TII'I"
1<"Adapter" oT06pa)f(aeTCR BKayeCTSe ,QocT)'nHoro AflA Bbl60pa
3J16M6HTa>
Adapter
(ADPT): :nOT napaMeTp
n03BOJlReT
rIlaBHoMy 6noKy pacn03HaBaTb
nO,QKIHO'-l6H\IIe
c
nOMOlLlblO
3TOre
a,namepa.
(AOCTYneH
TeneQ:>oH
C
epyHKU\lle~
"Ce060AHble
PYK"~
a
\IICTO'-lH\IIK
8T
Audio
oT06pa>KaeTcR.)
nplo1
\IICn0J1b30SaH\II1II
MOAerWI
KCE·250BT
IIICTO'-lHIIIK
BT
Audio
oT06pa>t<aeTcR,
HO
era
He
y.tlaCTCA
\IICn0l1b30BaTb.
Off:
3TOT
napaMeTp
He
n03BOllAeT
rJ1aBHoMy
onoKy pacn03HaeaTb
nOAKJlIO'-leHlIle
C
nOMOlLlblO
3TOro
a,nanTepa.
T\II"
2<"Adapter"
He
oT06pa>KaeTCA
B
Kal.J8CTB8
AOCl)fnHoro
AJlA
Bbioopa 3JleMeHTa>
HFP:
3TOT
napaMeTp n03BOIlReT rIlaBHoMy onoKy pacn03HaeaTb
nO,QKJlIO'-leH\IIe
c
nOMOU-lblO
:noro
a,nanTepa. (AOCtyneH T6ne¢OH C
¢yHKUlo1e~
"CBo60AHble
PYK~1':
HO
\IICTO'-lHIIIK
BT
Audio
He
OTOOpa>KaeTCA.)
HFP+Audio
(+AUDIO):
3TOT
napaMBTp n03BonAeT rnaBHoMy 6noKy pacn03HaBaTb
nO,QKJlI04eH\IIB
C
nOMOl.LlblO
3Toro a,namepa.
C[loCTYneH
T6neepoH C
¢yHKUlo1e~
"CeoooAHble
PYK\II~
a
IIICTO'-lH\IIK
BT
Audio
oT06p8.)f(aeTcA.) He
BbI6~pa~Te
3TO
3H8'-ieH~e
np~
~CnOJlb30BaH~VI
MOAeIlYI
KCE-250BT.
Off:
3TOT
nap8MeTp
He
n03BOIlAeT rIl8BHOMy 6IlOKy pacn03H8B8Tb
nOAKIlIO'-ieH~e
C
nOMOLllblO
3Toro
8A8nTep8.
o
lt1CTO'-IHYlK
BT
Audio
6YAeT
HeAoctyneH
npYl
Y1CnOIlb30BaHYlYI
MOAeIl~
KCE-250BT.
olt1HepopMauYlIO
0
B03MO>KHOCTVllo1CnOIlb30BaHYIA
~CTO'-iH~Ka
8T
Audio c
MOAeJlblO
KCE-400BT
CM.
8
pyKOBoAcTse
no
3KCnJlyaTau~101
BLUETOOTH®-COBMecT~Moro
YCTpO~CTBa.
rfix
(lr)
Bl~~Illtp"'("'Fot.J;1]tlIi!!l:~
"
INT
MUTE
,2lE '
OFF
AUX+
~lE
'OFF,2
BLUETOOTH
IN
(BT
IN)
,2lE
'Adapter (ADPT)'
HFP;j\(
HFP+Audio
(+AUDIO),3
'1
~'iE1Jt
'
,*£,~!j
ACC
,2'iE~
OFF
•
~iJtl'i~'iE~
ON
•
'2
lll±:lJiiJfjj'iE
•
"AUX+
,2'iE"
iiTiltlllli'Ofll!lfI
•
'~~~~'~~OO±:~~fflF*$'
'3111±:~jfjj'iE'
"BLUETOOTH
IN
(BT
IN)
,2'iE" iiTiifrr5J 0
lIWB!l~JT±:~~~~
:
~!!:i
1<"Adapter"
MiJ'ff.lill]j1j
>
Adapter
(ADPT):
tltillJj:jit,'f±:~~~llJttm~~iI'J~~'
(!'.ll""i'm'~iiTUill!ffl
•
jjftllfj",
BT
Audio
m'lJt
£\ 0 )
~D*ill!ffl
KCE-250BT
'
BT
Audio
m~,££\l'Illfj",
'
f!:!!!!\i*iiEffl
•
Off:
tltJl!.<J1'fit'U~~~IJtt~jj(~it'J~jj(
0
~~~
2<
"Adapter"
1'~~~JjH~
>
HFP:
tltjlFJl:fd'f±:~~)jIJtltl,m~it'J~~·
(!'.llI'i'il!'~iiT~JilI!ffl
'f§it:
BT
Audio
m'lli'ilHllfj",,, )
HFP+Audio
(+AUDIO)
tltJl!'Jjitl'f±:~'IlI;l\~IJtt~jj(~'it'J~~·
(!'.llji';i1I'~iiTUf!Effl
•
jjftllfj",
BT
Audio
m'lit£\ ' )
IlI!lfI
KCE-250BT
Hi';
•
,i'l?iJjJ!~tlt'j1j
•
Oft:
tltJl!.<J1'fit"HlJiWll~llttl\Jjj(illHIJ~jj(
,
•
BT
Audio
m'l!t~¥.'fjj!jlfl""
KCE-250BT
'
•
~M""@jlfl",,
KCE-400BT
it'J
BT
AudlO
m~'£~~
,
,i'l1i1ilJ
BLUETOOTH@I!I'l'l!lliii'lit'JIfIF*IHl'
Polski
Nalezy
pami~tac
0
skonfigurowaniu
funkcji
jednostki
g/6wnej
w
nast~pujllCY
spos6b":
Ustawienie
INT
MUTE: OFF
Ustawienie AUX+; OFF*2
Ustawienie
BLUETOOTH
IN
(BT
IN):
Adapter
(ADPT),
HFP
lub
HFP+Audio
(+AUDI0),3
*1
Po zakonczeniu konfiguracji nalei:y
pamiEi1tae
0ustawieniu
opcji
ACC
na
OFF, a
nast~pnie
ponownym
jest
przestawieniu na ON.
*2
Wzalei:nosci od
jednostki
gt6wnej
"ustawienie
AUX+" moi:e nie bye
dost~pne.
oSzczegOtowe
informacje
zawiera
instrukcja
ui:ytkownika
jednostki
gt6wnej.
*3
Wzalei:nosci od
jednostki
gt6wnej
"ustawienie
BLUETOOTH IN (BT IN)"
moi:e
si~
r6i:nie.
Zobacz
informacje
0nastEi1pujqcych
typach
jednostek
gt6wnych:
Typ 1
<"Adapter"
jest
wyswietlany
jako
opcja
do
wyboru>
Adapter
(ADPD:
Ta
opcja
umoi:liwia
rozpoznanie
potqczenia z
adapterem
przez
jednostkQ gt6wnq.
(Zestaw
gfosnom6wiqcy
jest
dost~pny
i
wyswietlane
jest
ir6dto
BT
Audio). W
przypadku
urzqdzenia
KCE-250BT,
opcja
ir6dta
BT
Audio
jest
wyswietJana, ale nie
moi:na
jej uzy6.
Off:
Ta
opcja
uniemoi:liwia
rozpoznanie
potqczenia z
adapterem
przez
jednostk~
gl6wnq.
Typ 2
<"Adapter"
nie
jest
wyswietlany
jako
opcja
do
wyboru>
HFP:
Ta
opcja
umoi:liwia
rozpoznanie
potqczenia zadapterem przez jednostkQ gt6wn(\. (dostQpny
jest
zestaw gtosnomowiqcy,
ale
opcja
ir6dta
8T
Audio
nie
jest
wyswietlana)
HFP+Audio
(+AUDIO):
Ta
opcja
umoi:liwia
rozpoznanie
potqczenia z
adapterem
przez
jednostk~
gt6wnq. (Zestaw
gtosnom6wi(\cy
jest
dost~pny
j
wyswietlane
jest
ir6dto
BT Audio).
Opcji
nie
naleiy
wybierac,
jeieli
uiywane
jest
urz(\dzenie KCE-250BT.
Off:
Ta
opcja
uniemoi:liwia
rozpoznanie
pot(\czenia z
adapterem
przez jednostkQ gt6wnq.
•
Opcja
ir6dla
BT
Audio
nie
jest
dost~pna
wurz<:j,dzeniu KCE-250BT.
oInformacje
na
temat
dost~pnosci
ir6dta
BT
Audio
wurz<:j,dzeniu
KCE-400BT
zawiera
instrukcja
obstugi urz<:j,dzenia
zgodnego
ze
standardem
BLUETOOTH®.
lfIx (/'J!)
i!~!0YD"'FjEJiJGot~J1.J:)]fjg~il!:J:E
" :
INT
MUTE
i!ilE'
OFF
AUX+
i2lE, OFF,2
BLUETOOTH
IN
(BT
IN)
i2lE, Adapler
(ADPT),
HFP
""
HFP+Audlo
(+AUDIO),3
'1
il!ltFo. ""£'¥!
ACC
il!ltj]
OFF, !:!\Fol'iil!ltj] ON,
'2l'l\±:!Iljfjjlt,
iiTliE7i:itdll!1fI
"AUX+
il!lt"
..
•
mWijl,lIJj,
ilimffl3.'.flliI'JIflP'fIJ/J,
'3
l'l\Hlliliilt,
"BLUETOOTH
IN
(BT
IN)
,jilt"
iiTilEHiJ
..
ilimffl~~T±:!Il'l!'~,
~1l!1
1<"Adapter"
!m;j<1Jiltl1li
>
Adapter
(ADPT):
*jMmiti'F3.'.fllif\~UEjtltia!ftllili(J<Ji!I&.
(iiT~~l~lfI~m!J!ili,
Jr-R'"
BT
Audio
iW.
)
~D!l!1ll!1fI
KCE-250BT,
i:;"",
BT
Audio
ff~f!!7iJtill!lfI
..
Off:
*i1!;rm'f:fci'F±:!Il'f\~IJEjtltiaftCliliit'Ji!jj(
..
~1l!1
2<"Adapter"
~!m;j<1Jiltl1li>
HFP:
*i2\;Jm:fci'F±:!Ilif\~IIEjtltiallOliliiI'Ji!jJ1'.
(iiTrJill!Ifl~jH!J!ili,
i§'f"",
BT
Audio
iW.)
HFP+Audio
(+AUDIO):
*i1!;rmiti'F±:fllif\~IJEjtlt@ftCliliiI'Ji!jJ1',
(iiTrJill!IfI~m!J!ili,
Jr-"",
BT
Audio
V~.
)
ill!1fI
KCE-250BT
lit,
ii'i?iJi1!;!'i'tltrm.
Off:
*i1!;rm'f:fci'F±:!Ilif\~IJEjtltiailO1l§(J<Ji!IJ1'"
•
BT
Audio
iW'fiJ1iIflT
KCE-250BL
•
*T
BT
Audio
iJitE
KCE-400BT
J:il'JiiTlfltt, ill,"rffl BLUETOOTH@:Il!'l'liJlil,(J<Jlflp'fllll,
Table of contents
Other Alpine Recording Equipment manuals

Alpine
Alpine KCX-C2600B User manual

Alpine
Alpine KCX-C250MC User manual

Alpine
Alpine PXA-H100 User manual

Alpine
Alpine PXE-0850S User manual

Alpine
Alpine ERA-G311 User manual

Alpine
Alpine EZi-DAB-ONE User manual

Alpine
Alpine APF-V100GM User manual

Alpine
Alpine PXE-H650 - System Integration Audio... User manual

Alpine
Alpine 3007 User manual

Alpine
Alpine PXE-0850X User manual