Catalogue
Foreword................................................................................................................................................................................3
1. Machine parameters......................................................................................................................................................3
2. Flow Diagram for Quick Use Manual.............................................................................................................................4
3.Important Notice and Attentions......................................................................................................................................4
4. Preparatory Work...........................................................................................................................................................5
4.1 Tool and kit preparing..........................................................................................................................................5
4.2. Prompt.....................................................................................................................................................................5
5. Preinstallation Checklist ..................................................................................................................................................5
5.1 Step Way of Opening Box.....................................................................................................................................5
5.2 Take an account of kits..........................................................................................................................................6
6.Assembly and Calibration for M508...............................................................................................................................6
6.1 The main machine struct.......................................................................................................................................6
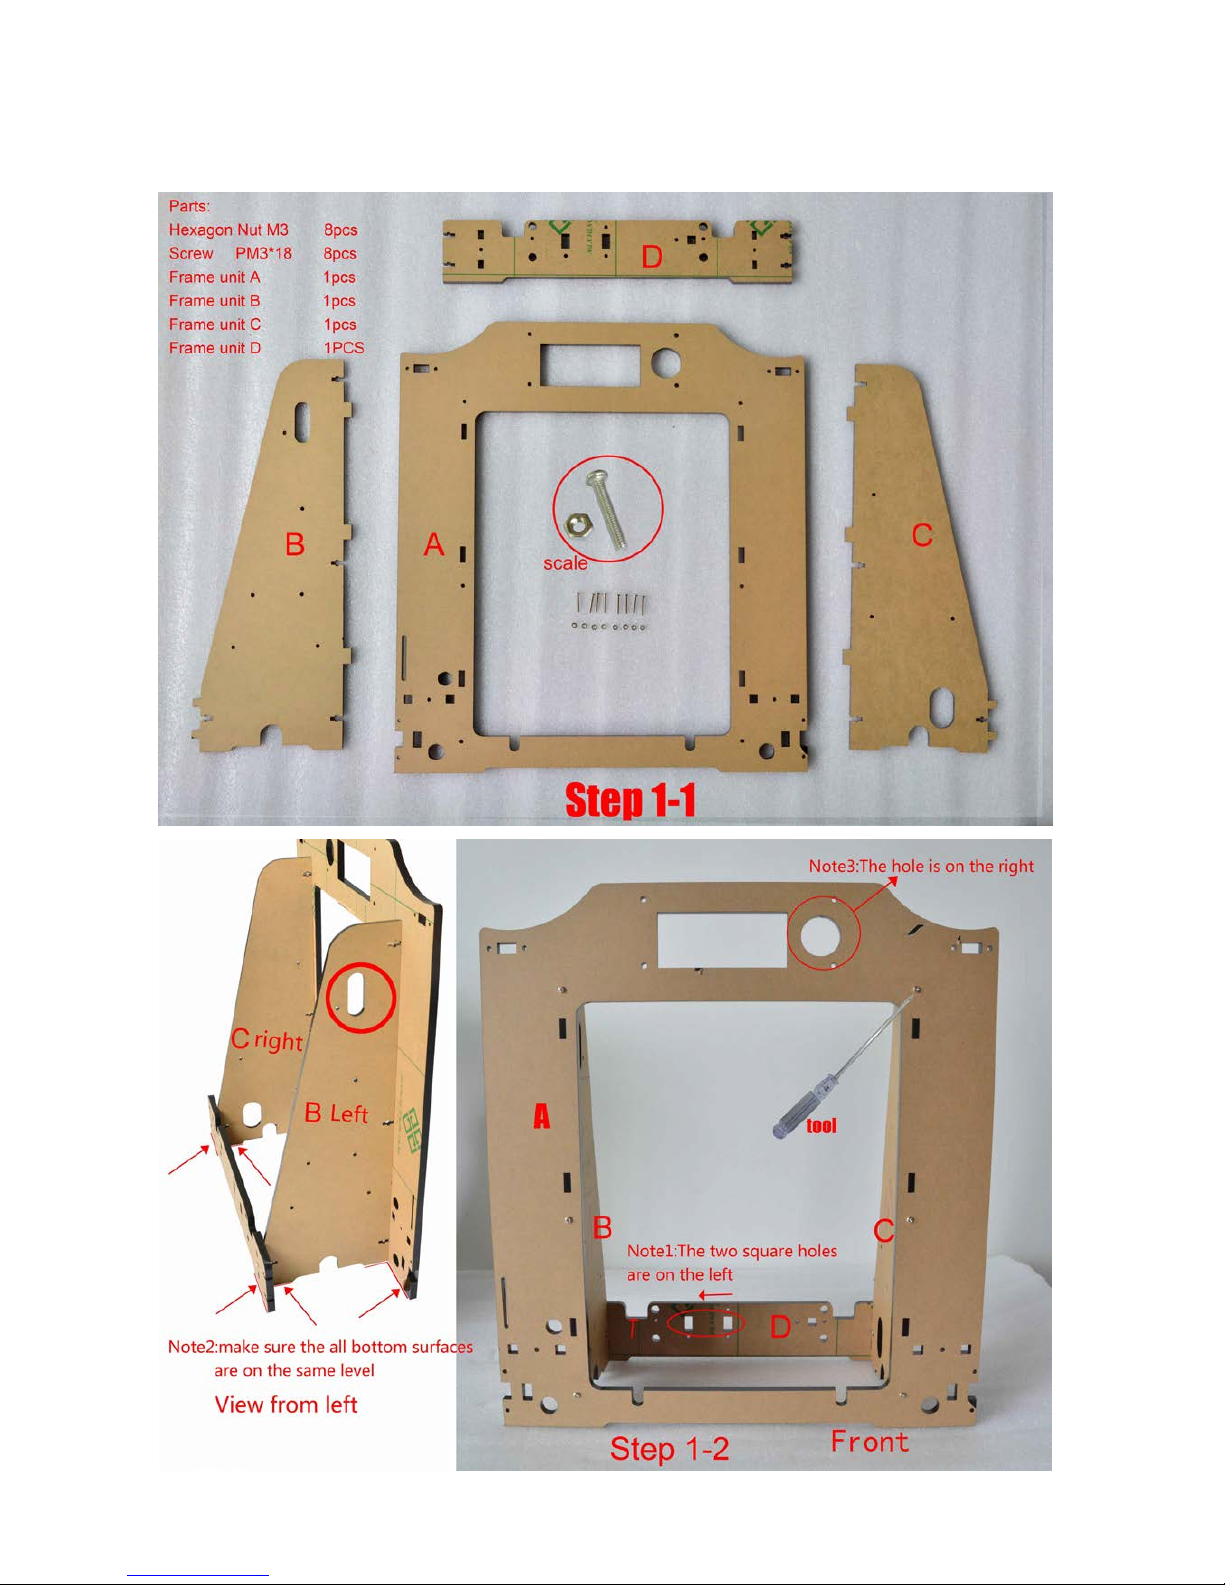
6.2 step1 Frame assembly.......................................................................................................................................7
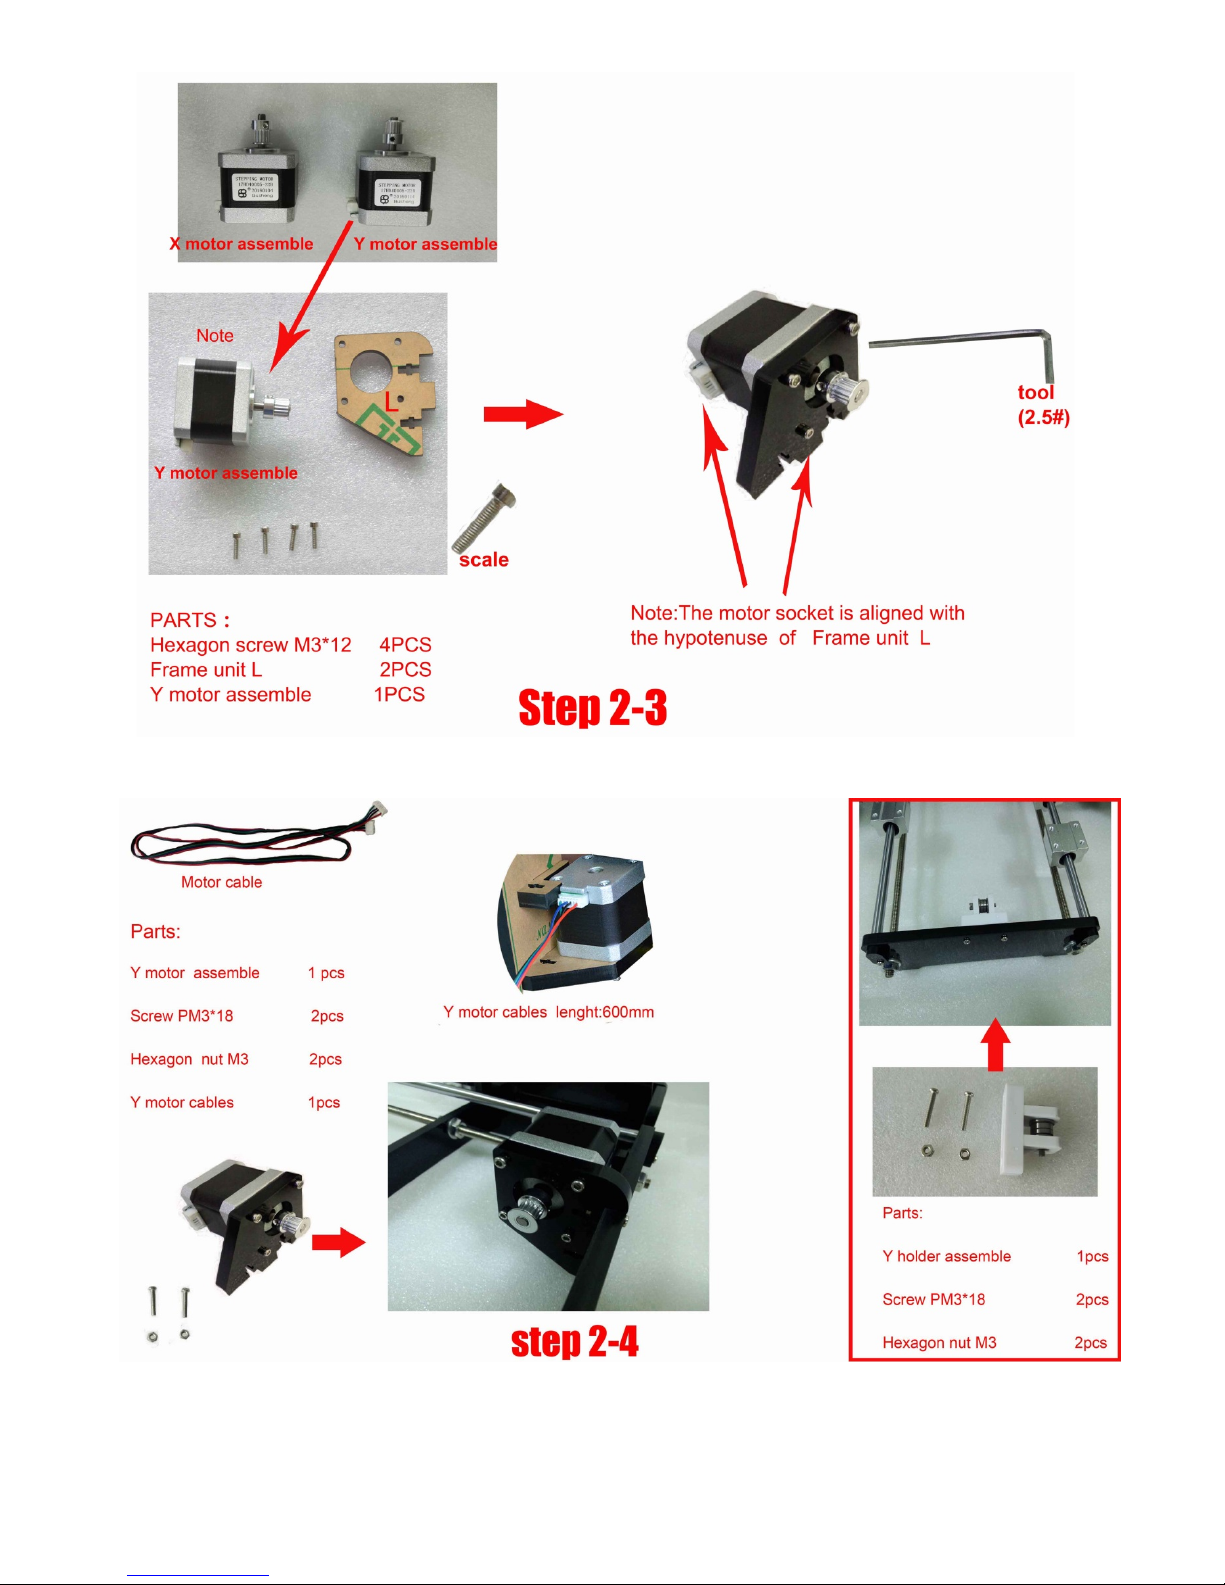
6.3 step2 Y axis assembly and hotbed assembly.................................................................................................8
6.5 Step4 Extruder assembly.................................................................................................................................14
6.6 Step5 LCD assembly .....................................................................................................................................17
6.7 Step6 power and mainboard assembly..........................................................................................................17
6.8 Step7 Filament rack assembly........................................................................................................................19
7. Testing and Commissioning..........................................................................................................................................19
7.1 Power on test........................................................................................................................................................19
7.1.1 Turn on the power switch, LCD display, as shown in Figure..............................................................19
7.1.2 Fan check...................................................................................................................................................20
7.1.3 Nozzle and hot bed heating inspection..................................................................................................20
7.1.4. Back to the origin inspection..................................................................................................................20
7.2 Hotbed leveling test: ............................................................................................................................................21
7.2.1 Rough Debugging to level hotbed..........................................................................................................21
7.2.2 Accurate Debugging .................................................................................................................................22
7.2.3 Fine Debugging When printing.............................................................................................................23
7.3 Change the Filament............................................................................................................................................23
7.3.1 Change the Filament When not Printing................................................................................................23
7.3.2. Change the Filament When Printing..................................................................................................24
7.4 Feature Demonstration........................................................................................................................................24
7.4.1 Instruction of Operation part for Off-line Printing...............................................................................25
7.4.2 The first Memo Interface..........................................................................................................................25
7.4.3 The secondary memo interface............................................................................................................26
7.4.4 Prepare for printing(prepare)................................................................................................................27
7.4.5 The ParameterAdjustment when not printing(Control)............................................................29
7.4.6. Realtime parameter adjustment (Tune)..........................................................................................30
7.4.6 Parameter adjustment when printing(Control)................................................................................31
7.4.7 Print from SD .............................................................................................................................................31
8. Printing Test.....................................................................................................................................................................32
9. Senior Instruction............................................................................................................................................................32
9.1 Off-line Printing.....................................................................................................................................................32
9.1.1 How to use Cura 15.04.............................................................................................................................32
9.1.2 Online Printing...........................................................................................................................................39