manuals.online logo
Brands
  1. Home
  2. •
  3. Brands
  4. •
  5. RAISE 3D
  6. •
  7. 3D Printer
  8. •
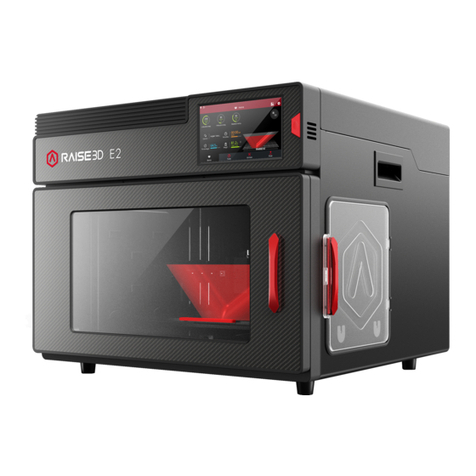
  9. RAISE 3D E2 User manual

RAISE 3D E2 User manual

How to Replace the Thermocouple –V1.0 Date:07/20/2020
- 1 / 17 -
www.raise3d.com
Manual E2 –How to Replace the Thermocouple –
V1.0
Tools:
①2 mm hex wrench
②1.5 mm hex wrench
③3 mm hex wrench
④Adjustable Wrench
How to Replace the Thermocouple –V1.0 Date:07/27/2020
- 2 / 17 -
www.raise3d.com
1. Before you start, please unload the filament from the extruder of which the thermocouple on the
hotend needs to be replaced first.
Note:
For the unload temperature,
please refer to the printing temperature of the filament or the
label on the filament spool.
2. Power off the printer.
3. Release the extruder connection cable retaining buckle.
How to Replace the Thermocouple –V1.0 Date:07/27/2020
- 3 / 17 -
www.raise3d.com
4. Remove the extruder connection cable from the board by pressing the small plastic
connector down, and gently pulling the connector out.
5. Use a 3mm hex wrench to remove the two screws retaining the extruder on the X-axis.
How to Replace the Thermocouple –V1.0 Date:07/27/2020
- 4 / 17 -
www.raise3d.com
6. Remove the extruder from X-axis, and put it on a working desk.
7. Use a 2mm hex wrench to remove the two screws retaining the extruder connection board
cover to the extruder, and remove the extruder connection board cover.
How to Replace the Thermocouple –V1.0 Date:07/27/2020
- 5 / 17 -
www.raise3d.com
8. Use a 2mm hex wrench to remove the two screws retaining the front cover to the extruder, and
remove the front cover.
9. Use a 2mm hex wrench to remove the two screws retaining the extruder connection board to the
extruder.
How to Replace the Thermocouple –V1.0 Date:07/27/2020
- 6 / 17 -
www.raise3d.com
10. Gently pull out the extruder connection board in the direction of the arrow shown below. Be
careful not to break the small protrusion.
11. Remove the thermocouple cable and heating rod power cable from the extruder connection board
on the print head.
Note: The positions of thermocouple cable and heating rod power cable connector on the left and
right print head are different, please distinguish between them according to the marks in the
following figure.
How to Replace the Thermocouple –V1.0 Date:07/27/2020
- 7 / 17 -
www.raise3d.com
12. There are two rows of sharp welding pins on the back of the board. Cover the sharp welding pins
with thick insulation tape to prevent it from injuring the nylon covering of the hotend cable, or it
may cause short circuit.
How to Replace the Thermocouple –V1.0 Date:07/27/2020
- 8 / 17 -
www.raise3d.com
13. Loosen the hotend retaining screw with the 2mm hex wrench.
How to Replace the Thermocouple –V1.0 Date:07/27/2020
- 9 / 17 -
www.raise3d.com
14. Pull the entire hotend assembly out.
15. Remove the thermocouple on the hotend with an adjustable wrench.
Note: It may be more difficult to disassemble the thermocouple If there are any filament
remaining on it. If this happens, please reconnect the print head and heat the hotend to melt the
filament. And be careful not to damage the heating rod power cable when removing the
thermocouple.
How to Replace the Thermocouple –V1.0 Date:07/27/2020
- 10 / 17 -
www.raise3d.com
16. Prepare a new thermocouple, and then screw it back on the hotend.
Note:
Please make sure that the thermocouple is fully screwed. If the thermocouple is not fixed
completely, the printer will report a board error.
How to Replace the Thermocouple –V1.0 Date:07/27/2020
- 11 / 17 -
www.raise3d.com
17. Insert the hotend back to the print head.
18. After the hot end is fully inserted, reinstall the retaining screw.
How to Replace the Thermocouple –V1.0 Date:07/27/2020
- 12 / 17 -
www.raise3d.com
19. Bend the cable around the motor.
20. Place these cables into the cable management slots of the extruder controller board.
How to Replace the Thermocouple –V1.0 Date:07/27/2020
- 13 / 17 -
www.raise3d.com
21. Plug the small protrusion of the board into the hole on the extruder.
22. Plug the thermocouple cable and heating rod power cable back to the extruder connection board
on the print head.
Note:
The positions of thermocouple cable and heating rod power cable connector on the left and
right print head are different, please distinguish between them according to the marks in the
figure.
How to Replace the Thermocouple –V1.0 Date:07/27/2020
- 14 / 17 -
www.raise3d.com
23. Reinstall the two screws with a 2mm hex wrench and fix the extruder connection board to
the extruder.
24. Put the front cover back to the extruder, and use the 2mm hex wrench to reinstall the two
screws.
How to Replace the Thermocouple –V1.0 Date:07/27/2020
- 15 / 17 -
www.raise3d.com
25. Put the extruder connection board cover back to the extruder, and use the 2mm hex wrench to
reinstall the two screws.
26. Put the extruder back to the X-axis, and reinstall the two screws retaining the extruder on the X-axis.
How to Replace the Thermocouple –V1.0 Date:07/27/2020
- 16 / 17 -
www.raise3d.com
27. Insert the extruder connection cable back into the extruder, and press the retaining buckle to hold
the cable in place.
28. Turn on the printer and run the five-step wizard. It is recommended to adjust the height of the left
and right nozzles as well. (For more information please refer to the tutorial: Manual E2 –How to
Adjust the Height of Left and Right Nozzle –V1.0).
Note:
You can find the “Offset Calibrations” at “Settings>Machine>Maintenance>Offset
Calibration”.
–END –
How to Replace the Thermocouple –V1.0 Date:07/27/2020
- 17 / 17 -
www.raise3d.com
America | Asia | Europe
Sales & Business: sales@raise3d.com
Technical Support: help.raise3d.com
For any other inquiries: [email protected]

Other manuals for E2

3

Other RAISE 3D 3D Printer manuals

RAISE 3D E2CF User manual

RAISE 3D

RAISE 3D E2CF User manual

RAISE 3D Pro3 Series User manual

RAISE 3D

RAISE 3D Pro3 Series User manual

RAISE 3D PRO2 Series User manual

RAISE 3D

RAISE 3D PRO2 Series User manual
RAISE 3D E2 User manual

RAISE 3D

RAISE 3D E2 User manual

RAISE 3D E2 User manual

RAISE 3D

RAISE 3D E2 User manual

RAISE 3D PRO2 Series User manual

RAISE 3D

RAISE 3D PRO2 Series User manual

RAISE 3D Pro2 Series User manual

RAISE 3D

RAISE 3D Pro2 Series User manual
RAISE 3D Pro2 Series User manual

RAISE 3D

RAISE 3D Pro2 Series User manual

RAISE 3D N-Series User manual

RAISE 3D

RAISE 3D N-Series User manual

RAISE 3D N-Series User manual

RAISE 3D

RAISE 3D N-Series User manual

RAISE 3D Pro2 Series User manual

RAISE 3D

RAISE 3D Pro2 Series User manual

RAISE 3D PRO2 Series User manual

RAISE 3D

RAISE 3D PRO2 Series User manual

RAISE 3D Pro2 Series User manual

RAISE 3D

RAISE 3D Pro2 Series User manual

RAISE 3D N2 User manual

RAISE 3D

RAISE 3D N2 User manual

RAISE 3D N-Series User manual

RAISE 3D

RAISE 3D N-Series User manual

RAISE 3D Pro2-401 User manual

RAISE 3D

RAISE 3D Pro2-401 User manual

RAISE 3D Pro3 Series User manual

RAISE 3D

RAISE 3D Pro3 Series User manual

RAISE 3D E2 User manual

RAISE 3D

RAISE 3D E2 User manual

RAISE 3D Pro2 Series User manual

RAISE 3D

RAISE 3D Pro2 Series User manual
RAISE 3D Pro2 Hotend User manual

RAISE 3D

RAISE 3D Pro2 Hotend User manual

RAISE 3D Pro2 Series User manual

RAISE 3D

RAISE 3D Pro2 Series User manual
RAISE 3D E2 User manual

RAISE 3D

RAISE 3D E2 User manual
RAISE 3D Pro2 Series-105 XY User manual

RAISE 3D

RAISE 3D Pro2 Series-105 XY User manual

RAISE 3D Pro2-400 User manual

RAISE 3D

RAISE 3D Pro2-400 User manual
Popular 3D Printer manuals by other brands

Stratasys FDM Vantage Series user guide

Stratasys

Stratasys FDM Vantage Series user guide

Variquest Trifecta 800 Troubleshooting tips

Variquest

Variquest Trifecta 800 Troubleshooting tips

Renkforce RF1000 manual

Renkforce

Renkforce RF1000 manual

Renkforce 1538778 Replacement instructions

Renkforce

Renkforce 1538778 Replacement instructions

Stratasys Eden260V user guide

Stratasys

Stratasys Eden260V user guide

TRAK 3ntr Series quick start guide

TRAK

TRAK 3ntr Series quick start guide

Folger Technologies FT-6 Assembly guide

Folger Technologies

Folger Technologies FT-6 Assembly guide

SINTERIT LISA user manual

SINTERIT

SINTERIT LISA user manual

iFactory3D One Pro Assembly instructions

iFactory3D

iFactory3D One Pro Assembly instructions

Flashforge Cura Setup

Flashforge

Flashforge Cura Setup

Noztek Xcalibur user manual

Noztek

Noztek Xcalibur user manual

XYZ Printing da Vinci Jr.1.0 user manual

XYZ Printing

XYZ Printing da Vinci Jr.1.0 user manual

Mycusini 220516 manual

Mycusini

Mycusini 220516 manual

Creality Ender-3 V3 KE user manual

Creality

Creality Ender-3 V3 KE user manual

MiiCraft 125 SERIES operating manual

MiiCraft

MiiCraft 125 SERIES operating manual

KLIC-N-KUT KLIC-N-PRINT 3D user manual

KLIC-N-KUT

KLIC-N-KUT KLIC-N-PRINT 3D user manual

Prusa Research Original Prusa SL1 user manual

Prusa Research

Prusa Research Original Prusa SL1 user manual

Creality K1 Max user manual

Creality

Creality K1 Max user manual

manuals.online logo
manuals.online logoBrands
  • About & Mission
  • Contact us
  • Privacy Policy
  • Terms and Conditions

Copyright 2025 Manuals.Online. All Rights Reserved.