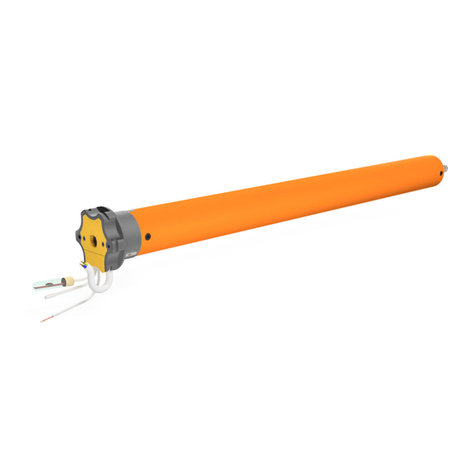
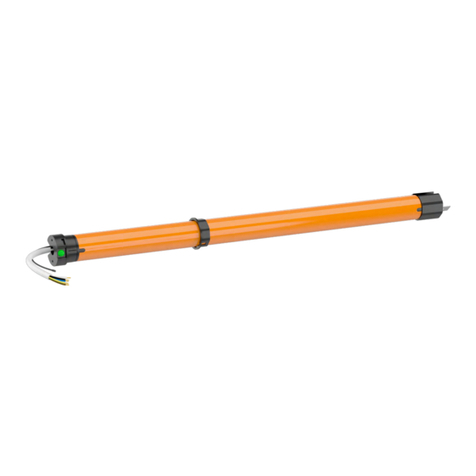
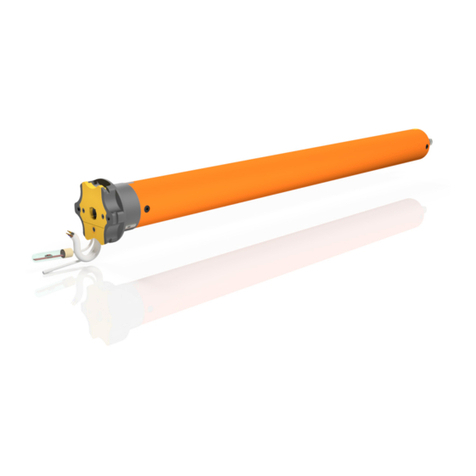
Aluprof ER-P Series User manual

1
AM45-10/17-ER-P

2
Nieprzestrzeganie niniejszej instrukcji może stanowić zagrożenie dla życia i zdrowia.
Instrukcję należy zachować.
Failure to comply with this Manual may result in injury or death.
Keep the Manual for reference.
Die Nichtbeachtung dieser Anleitung kann Ihr Leben und Ihre Gesundheit gefährden.
Die Anleitung ist zum bewahren.
PROGRAMING MANUAL FOR AM45 MOTORS, SERIES ERP
PROGRAMMIERANLEITUNG FÜR AM45 ANTRIEBE DER SERIE ERP
1. Specykacja techniczna / Technical specications / Technische Spezikation
PLENDE
INSTRUKCJA PROGRAMOWANIA SIŁOWNIKÓW RUROWYCH AM45 SERII ERP
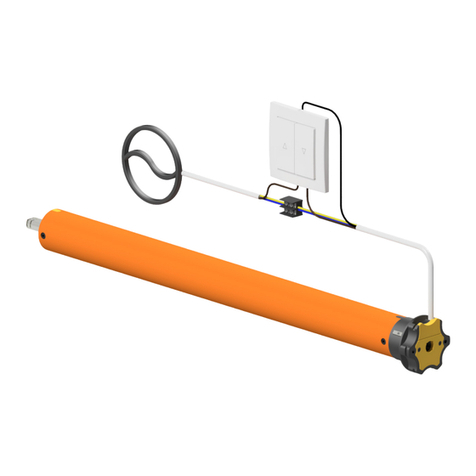
2. Poglądowe podłączenie siłownika / Electrical connections / Beispielhafter Anschluss des Motors
Zasilanie:
Wyłączniki krańcowe:
Stopień ochrony:
Częstotliwość transmisji:
Współpracuje ze wszystkimi nadajnikami serii AC znajdującymi się w ofercie ALUPROF S.A.
Producent zastrzega sobie tolerancję danych katalogowych ze względu na użytkowanie w różnych warunkach.
230 VAC / 50 Hz
Elektroniczne
IP44
433.92 MHz
Temperatura użytkowania: ~ -10°C - ~ +60°C
Pobór mocy: 115 W, 135 W, 170 W
Zasięg transmisji:
Możliwość zaprogramowania do 20 nadajników, kolejne nadajniki powodują nadpisywanie ostatniego zaprogramowanego.
80 metrów (teren otwarty), 20 metrów (teren zabudowany)
Power supply:
Limit swiches:
Protection degree:
Frequency:
Works with all AC series transmitters included in the ALUPROF S.A. offer.
Company reserves the tolerance of catalog data due the different conditions usage.
230 VAC / 50 Hz
Electronic
IP44
433.92 MHz
Operating temperature: ~ -10°C - ~ +60°C
Power consumption: 115 W, 135 W, 170 W
Average range:
Ability of programming up to 20 transmitters. Each next transmitter will overwrite the last programmed one.
80 meters (in open space), 20 meters (inside buildings)
Stromversorgung:
Endschalter:
Schutzart:
Frequenz:
Funktioniert mit allen Sendern der AC-Serie die sich im Angebot Aluprof S.A. befinden.
Der Hersteller behält die Toleranz von Katalogdaten vor aufgrund von Verwendung in verschiedenen Bedingungen.
230 VAC / 50 Hz
Elektronische
IP44
433.92 MHz
Betriebstemperatur: ~ -10°C - ~ +60°C
Übertragungsstärke: 115 W, 135 W, 170 W
Übertragungsreichweite:
Die Möglichkeit zur Programmierung von bis zu 20 Sendern, Die nächsten Sender überschreiben den zuletzt programmierten.
80 meter (in Freien), 20 meter (in Gebäuden)
230V / 50Hz
Reaguje na przeszkody.
Obstacle detection.
Reagiert auf Hindernisse.

3
UP
STOP
DOWN
K-
K+
P2
P2
P2
UP
STOP
DOWN
K-
K+
UP
STOP
K+
K-
DOWN
AC127-01 AC127-06 AC127-16 AC140-16 AC140-06 AC140-01
AC129-04 AC129-01
AC136-01 AC136-06 AC136-16
AC134-06
AC134-02
AC134-01 AC133-01
AC133-02
AC133-05
P2
AC116-04
K2
K4
K1
K3
P2
AC116-03
DOWN
UP
STOP
UP
DOWN
K-
- aktywacja przycisku spowoduje ruch pancerza w górę.
- aktywacja przycisku spowoduje ruch pancerza w dół.
- aktywacja przycisku przełącza nadajnik na poprzedni kanał.
K1/K2/K3/K4 - przyciski poszczególnych kanałów.
STOP - aktywacja przycisku spowoduje zatrzymanie pancerza.
K+ - aktywacja przycisku przełącza nadajnik na następny kanał.
P2 - aktywacja przycisku wywołuje funkcję programowania.
- Das betätigen der Taste schaltet den Sender auf den vorherigen Kanal um.
UP
DOWN
K-
- activation of this button will move curtain up.
- activation of this button will move curtain down.
- activation of this button will switch to the previous channel.
K1/K2/K3/K4 - individual channel buttons.
STOP - button activation stops the curtain.
K+ - activation of this button will switch to the next channel.
P2 - activation of this button will switch to programming mode.
UP
DOWN
K-
- Das betätigen der Taste beweirkt, dass sich der Rollladenpanzer nach oben bewegt.
- Das betätigen der Taste beweirkt, dass sich der Rollladenpanzer nach unten bewegt.
K1/K2/K3/K4 - Tasten der jeweiligen Kanäle.
STOP - Das betätigen der Taste bewirkt das der Panzer stoppt.
K+ - Das betätigen der Taste schaltet den Sender auf den nächsten Kanal um.
P2 - Das betätigen der Taste ruft die Programmierfunktion aus.
DE
PLEN
3. Opis nadajników / Remote controllers / Beschreibung der Sender

4
4. Przełączenie w tryb programowania / Switch to programming mode / Umschaltung in den Programmiermodus
4
1. Włączyć zasilanie siłownika.
2. Nacisnąć i przytrzymać przez 2 sekundy przycisk programowania znajdujący się przy głowicy siłownika.
3. Siłownik wykona krótki ruch DÓŁ - GÓRA.
4. Aktywowano tryb programowania.
PLENDE
1. Turn on the motor’s power supply.
2. Press and hold the programming button on the motors head for 2 seconds.
3. The motor will make a short move DOWN - UP.
4. Programming mode activated.
1. Stromversorgung anschalten.
2. Die Programmiertaste die sich auf dem Kopf des Motors befindet 2 sekunden lang gedrückt halten.
3. Der Antrieb wird eine kurze Bewegung AB-AUF machen.
4. Der Programmiermodus wurde aktieviert.
3
1. Włączyć zasilanie siłownika.
2. Naciśnąć i przytrzymać przez 5 sekund przycisk “STOP”.
3. Siłownik wykona krótki ruch DÓŁ - GÓRA.
4. Aktywowano tryb programowania.
PLENDE
1. Turn on the motor’s power supply.
2. Press and hold the“STOP”button for 5 seconds.
3. The motor will make a short move DOWN - UP.
4. Programming mode activated.
1. Stromversorgung anschalten.
2. Die STOP-Taste 5 sekunden lang gedrückt halten.
3. Der Antrieb wird eine kurze Bewegung AB-AUF machen.
4. Der Programmiermodus wurde aktieviert.
2
1. Nacisnąć i przytrzymać przycisk “GÓRA”.
2. Po 2 sekundach włączyć zasilanie siłownika. Puścić przycisk.
3. Siłownik wykona krótki ruch DÓŁ - GÓRA.
4. Aktywowano tryb programowania.
PLENDE
1. Press and hold“TOP”button.
2. After 2 seconds, turn on power of the motor. Release the button.
3. The motor will make a short move DOWN - UP.
4. Programming mode activated.
1. Die AUF-Taste gedrückt halten.
2. Nach 2 sekunden die Stromversorgung des Motors anschalten. Die Taste loslassen.
3. Der Antrieb wird eine kurze Bewegung AB-AUF machen.
4. Der Programmiermodus wurde aktieviert.
Uwaga:
- Montaż siłownika powinien być wykonany przez osoby uprawnione (posiadające uprawnienia SEP do 1kV).
- Siłownik przeznaczony jest do zastosowania w pomieszczeniach suchych i nie powinien być wystawiony na bezpośrednie działanie warunków atmosferycznych.
- Siłownik powinien być zasilony osobnym obwodem i zabezpieczony bezpiecznikiem o zadziałaniu szybkim np. wyłącznik nadprądowy typu B10.
DE PL
Note:
- Installation of the motor should be carried out by authorized persons.
- The motor is designed for use in dry rooms and should not be exposed to direct weather conditions.
- The motor should be powered by a separate circuit and protected by a quick fuse for example: circuit breaker type B10.
EN
Achtung:
- Die Montage des Antriebs sollte durch befügtes Personal durchgeführt werden(die entsprechende Befugnisse besizten).
- Die Anwendung des Motors ist für trockene Räume bestimmt und sollte nicht den direkten Witterungsverhältnissen ausgesetzt werden.
- Der Motor sollte über eine separate Leitung versorgt und durch einen Leitungsschutzschalter B10 abgesichert werden.
II
III
I
21
4
1
4
1
3
2
3

5
5. Dodawanie nadajnika / Memorizing the transmitter / Speicherung des Senders
1. Przełączyć w tryb programowania według punktu 3.
2. Naciśnąć przycisk“GÓRA”.
3. Siłownik wykona krótki ruch DÓŁ - GÓRA.
4. Nadajnik został dodany.
PLENDE
1. Switch to programming mode according to point 3.
2. Press the“UP” button.
3. The motor will make a short move DOWN - UP.
4. The transmitter has been added.
1. In den Programmiermodus umschalten gemäß dem Punkt 3.
2. Die AUF-Taste drücken.
3. Der Antrieb wird eine kurze Bewegung AB-AUF machen.
4. Der Sender wurde hinzugefügt.
1 2
43
6. Manualne ustawianie pozycji krańcowych / Manual settings of limit positions / Manuele einstellung der Endpositionen
GÓRNA / UPPER / OBERE
1. Nacisnąć przycisk “P2”.
2. Siłownik wykona krótki ruch DÓŁ - GÓRA.
3. Nacisnąć przycisk“GÓRA”i trzymać przez 2 sekundy.
4. Kiedy roleta osiągnie położenie krańcowe nacisnąć przycisk P2.
5. Siłownik wykona krótki ruch DÓŁ - GÓRA.
6. Górna pozycja krańcowa została ustawiona.
PLENDE
5
1. Press the„P2”button.
2. The motor will make a short move DOWN - UP.
3. Press the„UP” button and hold it for 2 seconds.
4. When the curtain reaches the limit position, press P2.
5. The motor will make a short move DOWN - UP.
6. The upper limit position has been set.
1. Die P2-Taste drücken.
2. Der Antrieb wird eine kurze Bewegung AB-AUF machen.
3. Die AUF-Taste 2 sekunden lang gedrücken halten.
4. Wenn der Rollladen die Endposition erreicht die P2-Taste betätigen.
5. Der Antrieb wird eine kurze Bewegung AB-AUF machen.
6. Die obere Endposition wurde eingestellt.
2
3
6
1. Nacisnąć przycisk“DÓŁ” i trzymać przez 2 sekundy.
2. Kiedy roleta osiągnie położenie krańcowe nacisnąć przycisk P2.
3. Siłownik wykona krótki ruch DÓŁ - GÓRA.
4. Ponownie nacisnąć przycisk P2.
5. Siłownik wykona krótki ruch GÓRA - DÓŁ.
6. Dolna pozycja krańcowa została ustawiona.
PLENDE
5
1. Press the„DOWN”button and hold it for 2 seconds.
2. When the curtain reaches the limit position, press P2.
3. The motor will make a short move DOWN - UP.
4. Press the P2 button again.
5. The motor will make a short move DOWN - UP.
6. The lower limit position has been set.
1. Die AB-Taste 2 sekunden lang gedrücken halten.
2. Wenn der Rollladen die Endposition erreicht die P2-Taste betätigen.
3. Der Antrieb wird eine kurze Bewegung AB-AUF machen.
4. Die P2-Taste wieder betätigen.
5. Der Antrieb wird eine kurze Bewegung AB-AUF machen.
6. Die untere Endposition wurde eingestellt.
3
1
6
DOLNA / LOWER / UNTERE
W przypadku nadajnika AC116-04, zamiast przycisku “GÓRA”, 2 razy nacisnąć wybrany numer kanału.
For AC116-04 transmitter, instead of the“UP”button, press the selected channel number twice.
Bei dem Sender AC116-04 statt der Taste AUF zwei mal die gewählte Numer de Kanals drücken.
1
4
2
4

6
PLENDE
7. Automatyczne ustawianie pozycji krańcowych / Automatic limit position setup / Automatische einstellung der Endpositionen
1. Nacisnąć przycisk“GÓRA”i trzymać przez 2 sekundy.
2. Po zadziałania mechanizmu przeciążeniowego siłownik zatrzyma się.
3. Nacisnąć przycisk“DÓŁ”. Roleta zamknie się na około 15 cm.
4. Nacisnąć przycisk“GÓRA”i trzymać przez 2 sekundy.
5. Po zadziałania mechanizmu przeciążeniowego siłownik zatrzyma się.
6. Siłownik wykona krótki ruch DÓŁ - GÓRA.
7. Górna pozycja krańcowa została ustawiona.
1. Die AUF-Taste 2 sekunden lang gedrücken halten.
2. Nach dem aktivierung des Überlastungsmechanismus wird der Antrieb stoppen.
3. Die AB-Taste betätigen. Der Rolladen wird sich ca. um 15cm schließen.
4. Press the„UP” button and hold it for 2 seconds.
5. Nach dem aktivierung des Überlastungsmechanismus wird der Antrieb stoppen.
6. Der Antrieb wird eine kurze Bewegung AB-AUF machen.
7. Die obere Endposition wurde eingestellt.
1. Press the„UP” button and hold it for 2 seconds.
2. After detection mechanism react, motor will stop.
3. Press the DOWN button. The roller shutter will go down approximately 15 cm.
4. Press the„UP” button and hold it for 2 seconds.
5. After detection mechanism react, motor will stop.
6. The motor will make a short move DOWN - UP.
7. The upper limit position has been set.
2
6
GÓRNA / UPPER / OBERE
1
3 4
5
7
DOLNA / LOWER / UNTERE
PLENDE
1. Nacisnąć przycisk“DÓŁ” i trzymać przez 2 sekundy.
2. Po zadziałania mechanizmu przeciążeniowego siłownik zatrzyma się.
3. Nacisnąć przycisk“GÓRA”. Roleta otworzy się na około 15 cm.
4. Nacisnąć przycisk“DÓŁ” i trzymać przez 2 sekundy.
5. Po zadziałania mechanizmu przeciążeniowego siłownik zatrzyma się.
6. Siłownik wykona krótki ruch GÓRA - DÓŁ.
7. Dolna pozycja krańcowa została ustawiona.
1. Die AB-Taste 2 sekunden lang gedrücken halten.
2. Nach dem aktivierung des Überlastungsmechanismus wird der Antrieb stoppen.
3. Die AUF-Taste betätigen. Der Rolladen wird sich ca. um 15cm schließen.
4. Press the„UP” button and hold it for 2 seconds.
5. Nach dem aktivierung des Überlastungsmechanismus wird der Antrieb stoppen.
6. Der Antrieb wird eine kurze Bewegung AB-AUF machen.
7. Die untere Endposition wurde eingestellt.
1. Press the„DOWN”button and hold it for 2 seconds.
2. After detection mechanism react, motor will stop.
3. Press the“UP” button. The roller shutter will go down approximately 15 cm..
4. Press the„UP” button and hold it for 2 seconds.
5. After detection mechanism react, motor will stop.
6. The motor will make a short move DOWN - UP.
7. The lower limit position has been set.
2
6
1
3
5
7
4

7
8. Kasowanie pozycji krańcowych / Erasing the limit positions / Das Löschen der Endpositionen
1. Nacisnąć przycisk“P2” i trzymać przez 7 sekundy.
2. Po 1 sekundzie siłownik wykona krótki ruch DÓŁ - GÓRA.
3. Po 7 sekundach siłownik wykona dwa krótkie ruchy DÓŁ - GÓRA.
4. Pozycje krańcowe zostały usunięte.
PLENDE
1. Press the„P2”button and hold it for 7 seconds.
2. After 1 second the motor will make a short move DOWN - UP.
3. After 7 second the motor will make a two short moves DOWN - UP.
4. The limit positions have been deleted.
1. Die P2-Taste 7 sekunden lang gedrücken halten.
2. Nach einer Sekunde wird der Antrieb eine kurze AB-AUF Bewegung machen.
3. Nach sieben Sekunden wird der Antrieb zwie kurze AB-AUF Bewegung machen.
4. Die Endpositionen wurden entfernt.
43
Siłownik NIE MOŻE znajdować się na pozycjach krańcowych podczas kasowania.
The motor CAN’T be in the limit positions during reset.
Der Motor DARF SICH NICHT auf den Endpositionen befinden wenn się gelöscht werden.
2
9. Kasowanie jednego nadajnika / Erasing one transmitter / Einen Sender löschen
1. Przełączyć w tryb programowania według punktu 3.
2. Nacisnąć przycisk“P2” i trzymać przez 1 sekundę.
3. Siłownik wykona krótki ruch DÓŁ - GÓRA.
4. Nadajnik został usunięty.
PLENDE
1. Switch to programming mode according to point 3.
2. Press the„P2”button and hold for 1 second.
3. The motor will make a short move DOWN - UP.
4. The transmitter has been removed.
1. In den Programmiermodus umschalten gemäß dem Punkt 3.
2. Die P2-Taste eine sekunde lang gedrücken halten.
3. Der Antrieb wird eine kurze Bewegung AB-AUF machen.
4. Der Sender wurde entfernt.
1
43
10. Zmiana bazowego kierunku obrotów siłownika / Programming the direction of movement / Änderung der Basis Drehrichtung des Antriebs
1. Przełączyć w tryb programowania według punktu 3.
2. Naciśnąć przycisk“DÓŁ”.
3. Siłownik wykona krótki ruch DÓŁ - GÓRA.
4. Ustawienie zostało zapisane.
PLENDE
1. Switch to programming mode according to point 3.
2. Press the“DOWN”button.
3. The motor will make a short move DOWN - UP.
4. The setting has been saved.
1. In den Programmiermodus umschalten gemäß dem Punkt 3.
2. Die AB-Taste drücken.
3. Der Antrieb wird eine kurze Bewegung AB-AUF machen.
4. Die Einstellung wurde geschpeichert.
1 2
43
11. Aktywacja trybu impulsowego / Activation of the impulse mode / Aktivierung des Impuls Modus
1. Przełączyć w tryb programowania według punktu 3.
2. Naciśnąć przycisk“STOP”.
3. Siłownik wykona krótki ruch DÓŁ - GÓRA.
4. Ustawienie zostało zapisane.
PLENDE
1. Switch to programming mode according to point 3.
2. Press the“STOP”button.
3. The motor will make a short move DOWN - UP.
4. The setting has been saved.
1. In den Programmiermodus umschalten gemäß dem Punkt 3.
2. Die STOP-Taste drücken.
3. Der Antrieb wird eine kurze Bewegung AB-AUF machen.
4. Die Einstellung wurde geschpeichert.
1 2
43
1
2

8
12. Przywracanie ustawień fabrycznych / Return to factory settings / Zurück zu den Werkeinstellungen
1. Przełączyć w tryb programowania według punktu 3.
2. Nacisnąć przycisk“P2” i trzymać przez 7 sekund.
3. Siłownik wykona krótki ruch DÓŁ - GÓRA.
4. Przywrócono ustawienia fabryczne.
PLENDE
1. Switch to programming mode according to point 3.
2. Press the„P2”button and hold it for 7 seconds.
3. The motor will make a short move DOWN - UP.
4. Factory settings restored.
1. In den Programmiermodus umschalten gemäß dem Punkt 3.
2. Die P2-Taste 7 sekunden lang gedrücken halten.
3. Der Antrieb wird eine kurze Bewegung AB-AUF machen.
4. Die Werkeinstellungen wiederhergestellt.
1
Przywrócenie ustawień fabrycznych powoduje usunięcie pozycji krańcowych oraz nadajników.
This procedure is erasing the whole memory from the motor including limit positions and all remote controllers.
Durch das Wiederherstellen der Werkseinstellungen werden die Endpositionen und die Sender gelöscht.
PLENDE
1. Nacisnąć jednocześnie przyciski“GÓRA”oraz“DÓŁ” i trzymać przez 5 sekund.
2. Siłownik wykona krótki ruch DÓŁ - GÓRA.
3. Nacisnąć jednocześnie przyciski“STOP” oraz“DÓŁ”.
4. Siłownik wykona krótki ruch DÓŁ - GÓRA.
5. Naciśnąć i przytrzymać przez 2 sekundy przycisk “STOP”.
6. Siłownik wykona krótki ruch DÓŁ - GÓRA.
7. Ustawienie zostało zapisane.
1. Gleichzeitig die Tasten AUF und AB betätigen und 5 Sekunden lang gedrückt halten.
2. Der Antrieb wird eine kurze Bewegung AB-AUF machen.
3. Gleichzeitig die Tasten STOP und AB gedrückt halten.
4. Der Antrieb wird eine kurze Bewegung AB-AUF machen.
5. Die STOP-Taste 2 sekunden lang gedrücken halten.
6. Der Antrieb wird eine kurze Bewegung AB-AUF machen..
7. Die Einstellung wurde geschpeichert.
1. Press the“UP”and “DOWN”buttons simultaneously and hold for 5 seconds.
2. The motor will make a short move DOWN - UP.
3. Press the“STOP”and “DOWN”buttons simultaneously.
4. The motor will make a short move DOWN - UP.
5. Press the„STOP”button and hold it for 2 seconds.
6. The motor will make a short move DOWN - UP.
7. The setting has been saved.
2
6
1
3
5
4
7
13. Zmniejszenie czułości mechanizmu przeciążeniowego / Reducing the sensitivity of the overload system / Reduzierung der Empndlichkeit des Überlastungsmechanismus
Zakres czułości 1 (najmniejsza) - 10 (największa). Domyślnie ustawiona na 3. Zmniejszenie powoduje zmianę o 1 poziom.
Sensitivity range 1 (lowest) - 10 (highest). Default set to 3. Decreasing it changes by 1 level.
Empfindlichkeitsbereich 1 (die kleinste) - 10 (die größte). Standardmäßig eingestellt auf 3. Die Reduzierung ändert um eine Stuffe.
43
2

9
PLENDE
Zgodnie z przepisami Dyrektywy Parlamentu Europejskiego i Rady 2012/19/UE z dnia 4 lipca 2012 r. w sprawie zużytego sprzętu elektrycznego i elektronicznego (WEEE) zabronione
jest umieszczanie łącznie z innymi odpadami zużytego sprzętu oznakowanego symbolem przekreślonego kosza. Obowiązkiem użytkownika jest przekazanie zużytego sprzętu do
wyznaczonego punktu zbiórki w celu właściwego jego przetworzenia. Oznakowanie oznacza jednocześnie, że sprzęt został wprowadzony do obrotu po dniu 13 sierpnia 2005 r. Powyższe
obowiązki prawne zostały wprowadzone w celu ograniczenia ilości odpadów powstałych ze zużytego sprzętu elektrycznego i elektronicznego oraz zapewnienia odpowiedniego
poziomu zbierania, odzysku i recyklingu. W sprzęcie nie znajdują się składniki niebezpieczne, które mają szczególnie negatywny wpływ na środowisko i zdrowie ludzi.
In accordance with the provisions of the Directive of the European Parliament and of the Council 2012/19 / EU of 4 July 2012 on waste electrical and electronic equipment (WEEE),
it is prohibited to place of used equipment together with other wastes, marked with crossed out wheeled bin symbol. The users are obliged to transfer their used equipment to a
designated collection point for proper processing. The marking means, at the same time, that the equipment was put on the market after 13 August 2005. These legal obligations have
been introduced to reduce the amount of waste generated from waste electrical and electronic equipment and to ensure an appropriate level of collection, recovery and recycling. The
equipment does not contain any dangerous components, which would have any particularly negative impact on the environment and human health.
Gemäß der Richtlinie 2012/19/EU des Europäischen Parlaments und des Rates vom 4. Juli 2012 über Elektro- und Elektronik-Altgeräte (WEEE) ist es verboten, Elektro- und Elektronik-
Altgeräte, gekennzeichnet durch das Symbol der durchgestrichenen Mülltonne, mit anderen Abfällen zu verwerten. Der Nutzer ist verpflichtet, die Elektro- und Elektronik-Altgeräte an
gekennzeichneten Sammelstellen zur entsprechenden Verwertung abzugeben. Die Kennzeichnung deutet auch darauf hin, dass das Gerät nach dem 13. August 2005 auf den Markt
eingeführt wurde. Die oben genannten Verpflichtungen wurden eingeführt, um Abfälle von Elektro- und Elektronikgeräten zu vermeiden und Wiederverwendung, Recycling und andere
Formen der Verwertung zu sichern. Diese Geräte bestehen aus Materialien, deren gefährliche Inhaltsstoffe zu besonderen Umwelt- und Gesundheitsrisiken führen können
Technische Änderungen vorbehalten. Stand 2021.04.21
Zastrzegamy sobie prawo do zmian technicznych. Stan na dzień 2021.04.21
We reserve the right to any technical change. Valid on 2021.04.21
PLENDE
1. Nacisnąć jednocześnie przyciski“GÓRA”oraz“DÓŁ” i trzymać przez 5 sekund.
2. Siłownik wykona krótki ruch DÓŁ - GÓRA.
3. Nacisnąć jednocześnie przyciski “STOP” oraz “GÓRA”.
4. Siłownik wykona krótki ruch DÓŁ - GÓRA.
5. Naciśnąć i przytrzymać przez 2 sekundy przycisk “STOP”.
6. Siłownik wykona krótki ruch DÓŁ - GÓRA.
7. Ustawienie zostało zapisane.
1. Gleichzeitig die Tasten AUF und AB betätigen und 5 Sekunden lang gedrückt halten.
2. Der Antrieb wird eine kurze Bewegung AB-AUF machen.
3. Gleichzeitig die Tasten STOP und AUF gedrückt halten.
4. Der Antrieb wird eine kurze Bewegung AB-AUF machen.
5. Die STOP-Taste 2 sekunden lang gedrücken halten.
6. Der Antrieb wird eine kurze Bewegung AB-AUF machen.
7. Die Einstellung wurde geschpeichert.
1. Press the“UP”and “DOWN”buttons simultaneously and hold for 5 seconds.
2. The motor will make a short move DOWN - UP.
3. Press the“STOP”and “UP” buttons simultaneously.
4. The motor will make a short move DOWN - UP.
5. Press the„STOP”button and hold it for 2 seconds.
6. The motor will make a short move DOWN - UP.
7. The setting has been saved.
2
6
1
3
5
7
4
14. Zwiększenie czułości mechanizmu przeciążeniowego / Increasing the sensitivity of the overload system / Erhöhung der Empndlichkeit des Überlastungsmechanismus
Zakres czułości 1 (najmniejsza) - 10 (największa). Domyślnie ustawiona na 3. Zwiększenie powoduje zmianę o 1 poziom.
Sensitivity range 1 (lowest) - 10 (highest). Default set to 3. Increase Decreasing it changes by 1 level.
Empfindlichkeitsbereich 1 (die kleinste) - 10 (die größte). Standardmäßig eingestellt auf 3. Die Erhöhung ändert um eine Stuffe.
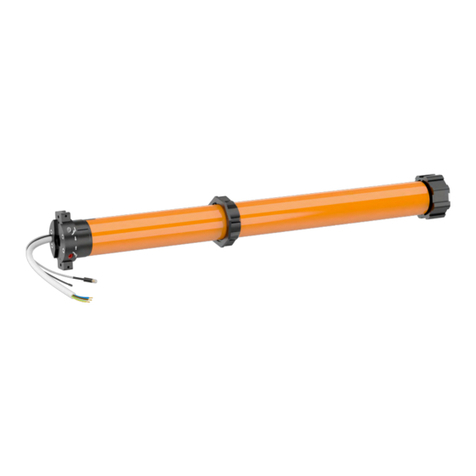
Other manuals for ER-P Series
1
This manual suits for next models
2
Other Aluprof Engine manuals

Aluprof
Aluprof AM45 User manual

Aluprof
Aluprof EV/Y Series User manual

Aluprof
Aluprof DM S Series User manual

Aluprof
Aluprof AM45 User manual

Aluprof
Aluprof R Series User manual

Aluprof
Aluprof S Series User manual

Aluprof
Aluprof R Series User manual

Aluprof
Aluprof BD Series User manual

Aluprof
Aluprof DM35R-10/17 User manual

Aluprof
Aluprof ER-P Series Owner's manual