14 15
Waschbecken:
Empfehlungen zur Pflege der
Sanitätstechnik.
Das Klosett, der Spülkasten, der Klosettsitz
und der Klosettdeckel sind mit einem
weichen und feuchten Tuch abzuwischen.
Vermeiden Sie Benutzung der Schleifmittel
und der harten Stoffe. Es empfiehlt sich, die
Fabrikate regelmäßig mit Seifenlösung zu
spülen. Auf keinen Fall dürfen aggressive
Bleichmittel verwendet werden. Sollte auf
die Oberfläche der Sanitäranlagen eine
säurehaltige Flüssigkeit gelangt sein, so ist
sie mit einem weichen Tuch unverzüglich zu
entfernen.
BLISS SCANDI
УНИТАЗ
Внимание!
Сборку унитаза-компакта следует
производить на ровной игладкой
поверхности. Во избежание повреждения
поверхности сливного бачка, впроцессе
установки арматуры иболтов крепления
кчаше, рекомендуется постелить ткань.
Давление вводопроводной сети холод-
ного водоснабжение должно находиться
вдиапазоне 1,5–5 Атм. При отклонении
фактического давления от указанного диа-
пазона требуется установка оборудования
для понижения/повышения давления.
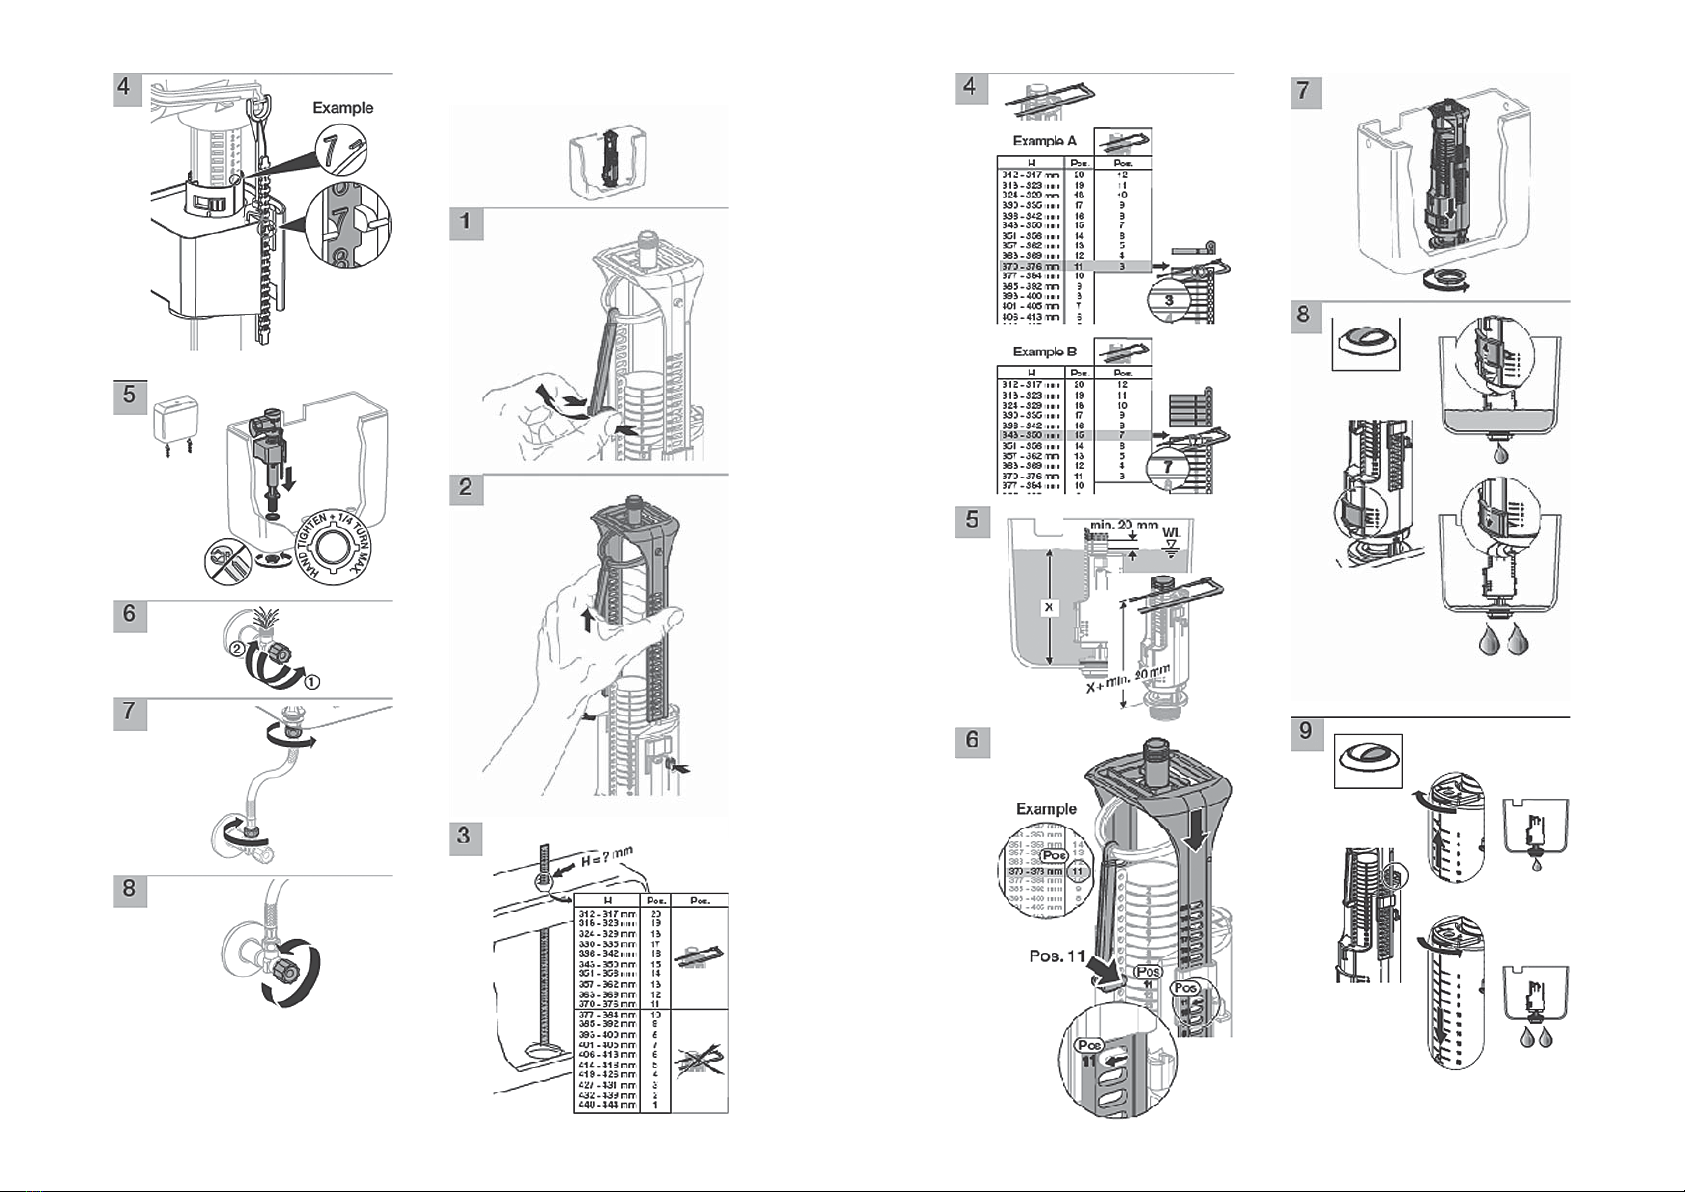
1. Сборка бачка:
ВНИМАНИЕ! Арматура бачка (заливной
исливной механизмы) поставляется
спредустановленными настройками!
Требуется только выполнить установку
механизмов внутрь бачка.
- настройка заливного механизма:
ИНСТРУКЦИЯ ПО СБОРКЕ ИУСТАНОВКЕ
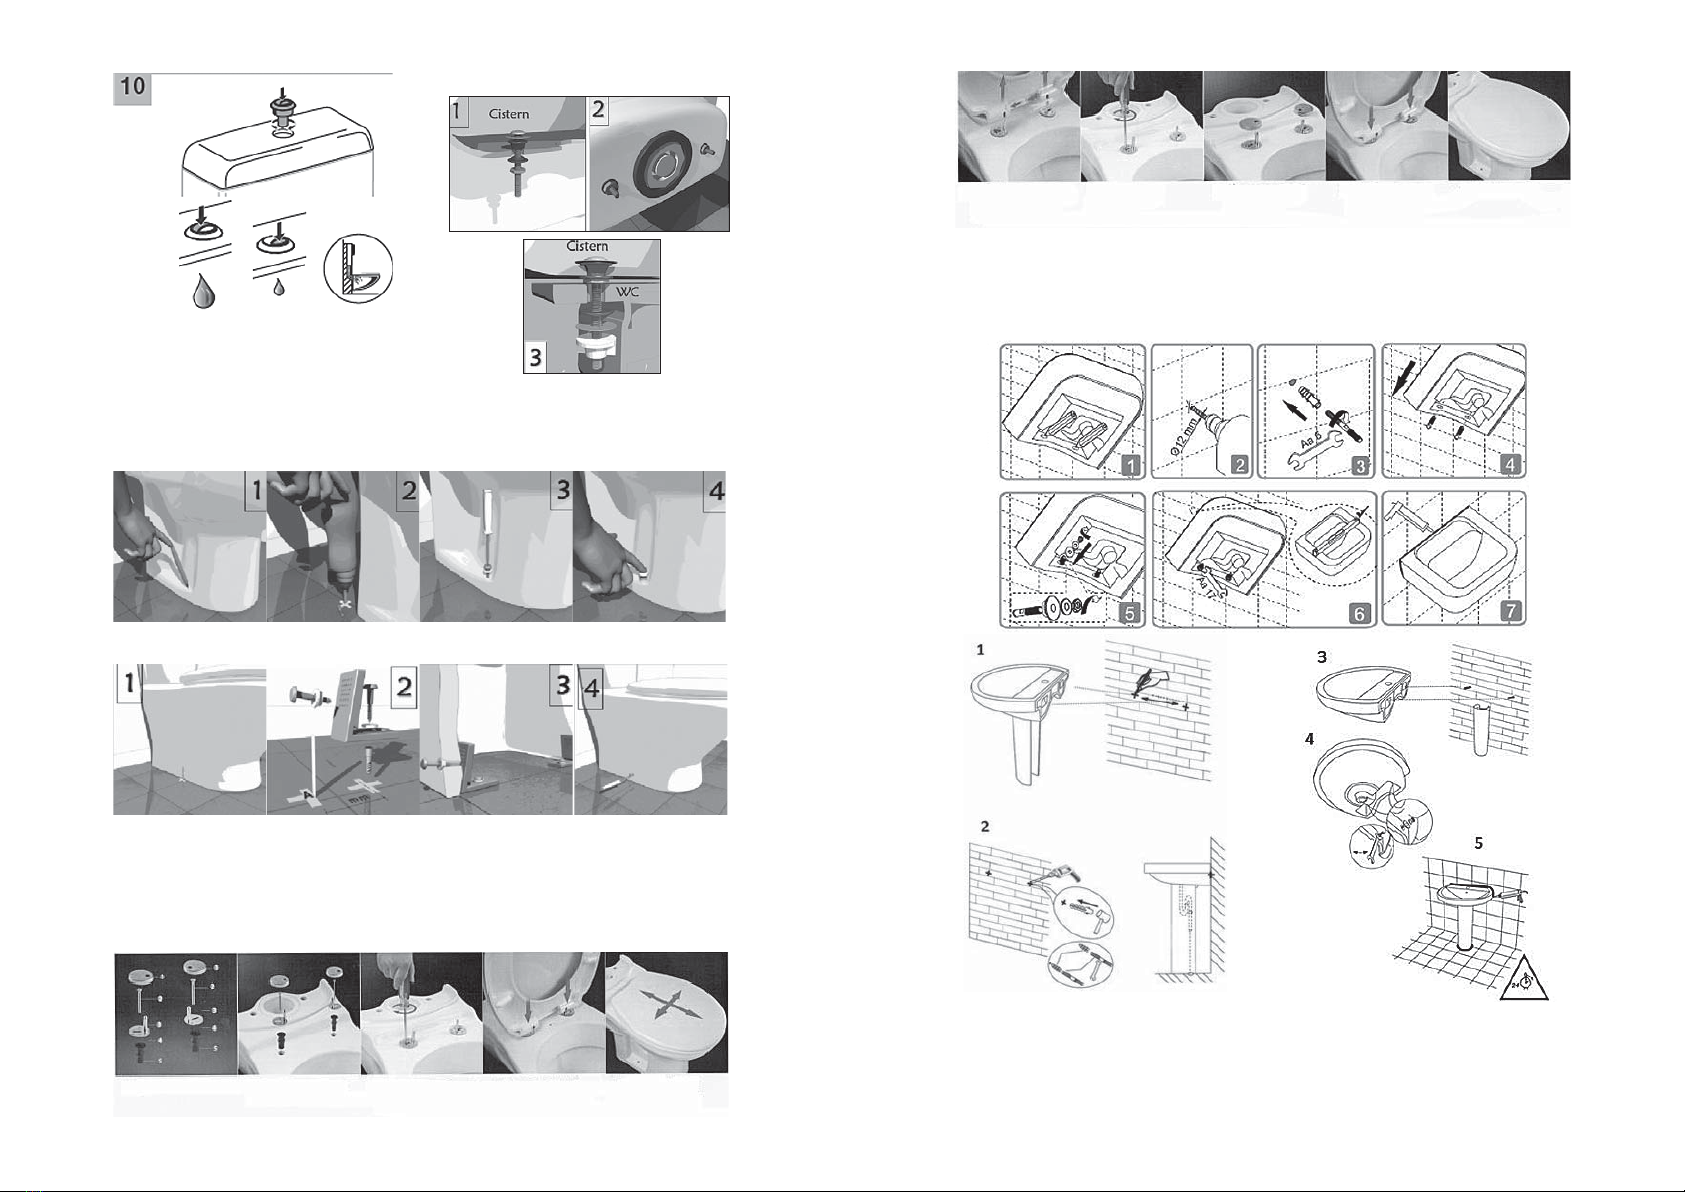
5) Lift the seat cover
by pressing two
pushbuttons.
6) Tighten the srews. 7) Place covering
caps on the hinges.
8) Insert the seat cover
onto the toilet.
9) Finished
Hinweis: Montieren Sie das Wand-WC an das Montagesystem gemäß der beigefügten
Herstelleranleitung. Montieren Sie den Sitz mit Deckel gemäß P. 4 der vorliegenden Anleitung.