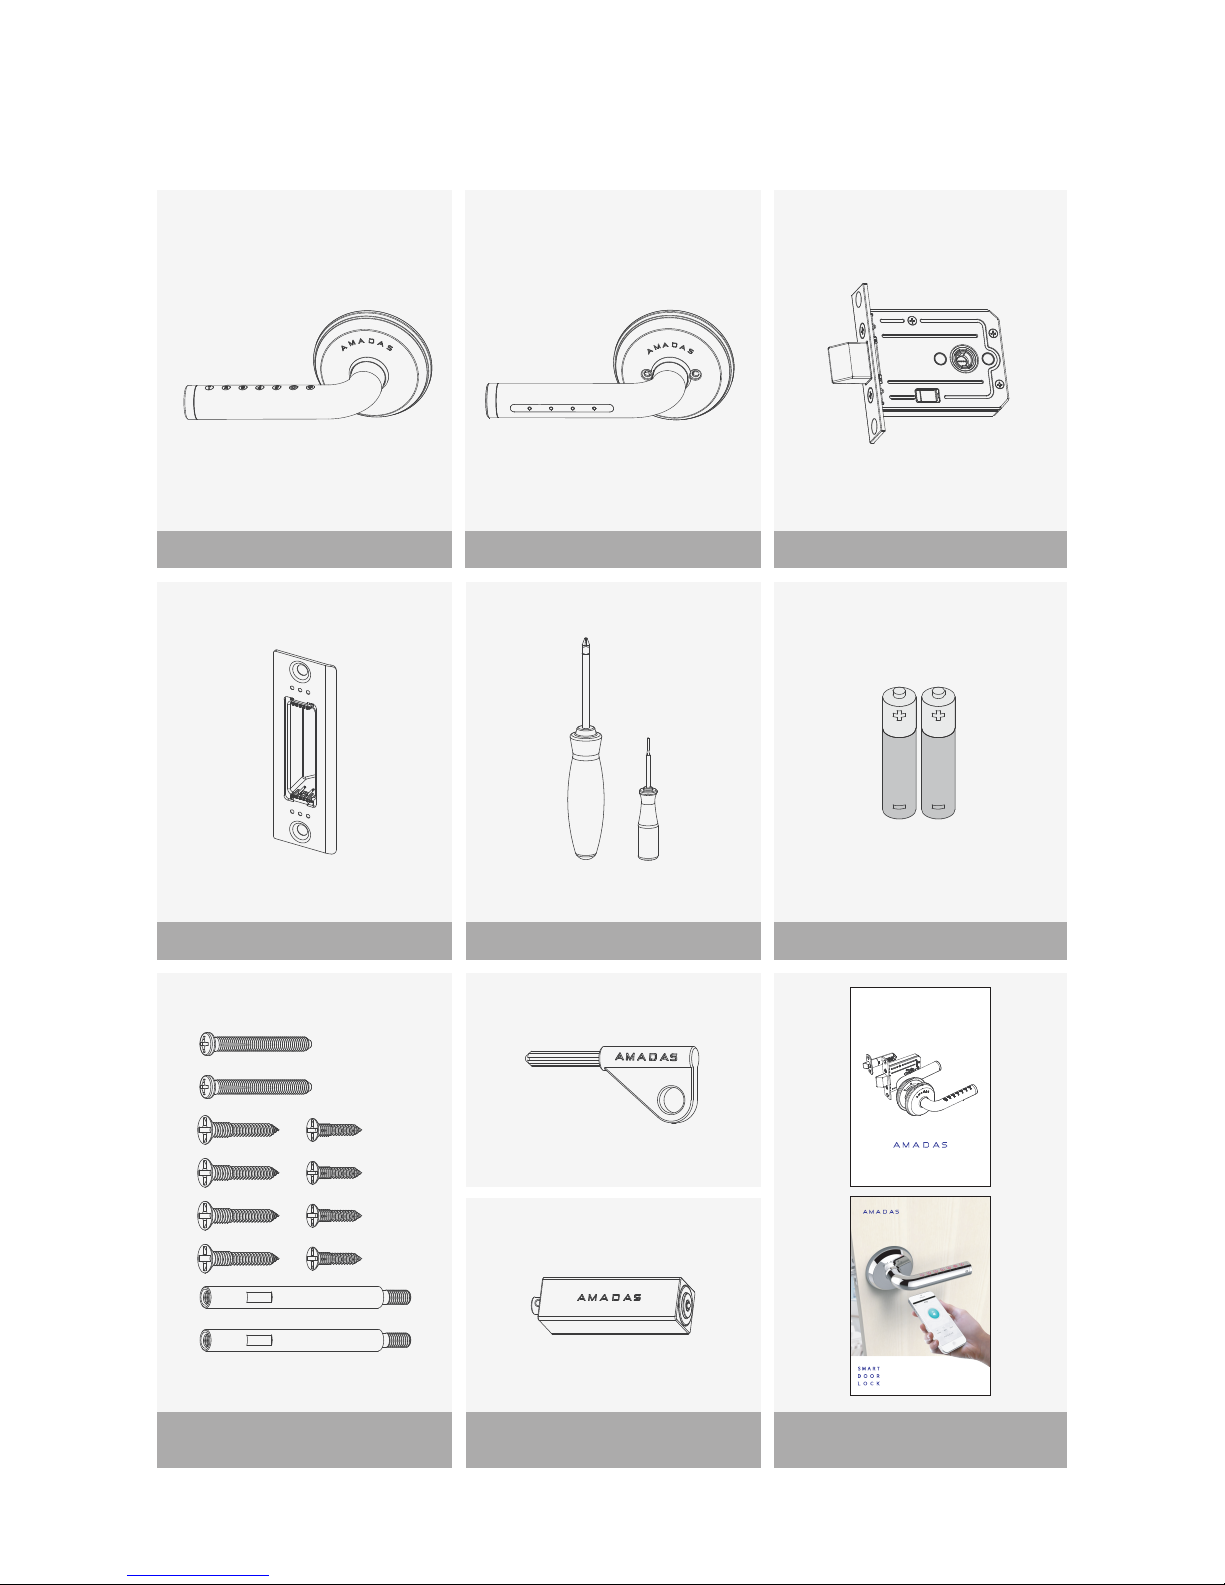
Installing the Product
07AMADAS Operation Manual
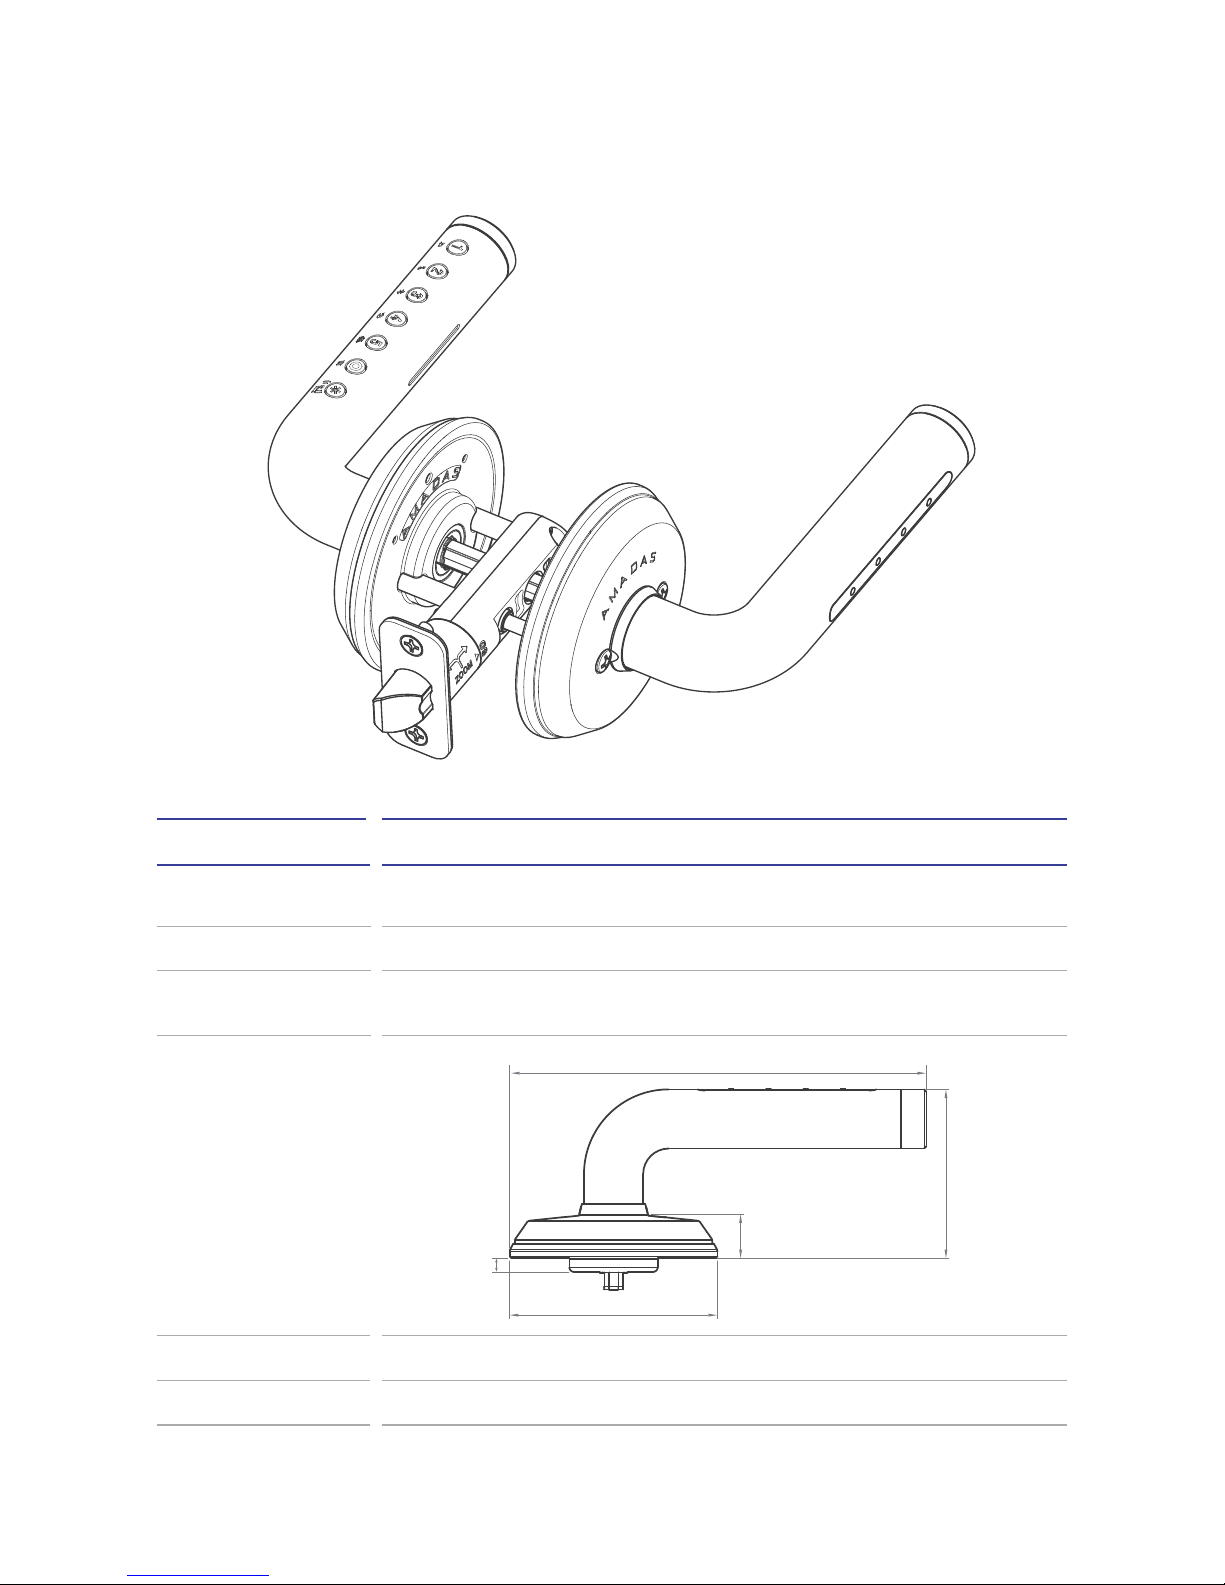
Installing the Tubular
- Insert the inclined face of the latch/dead bolt to the tubular
door in the closing direction of door.
- Fasten the screw.
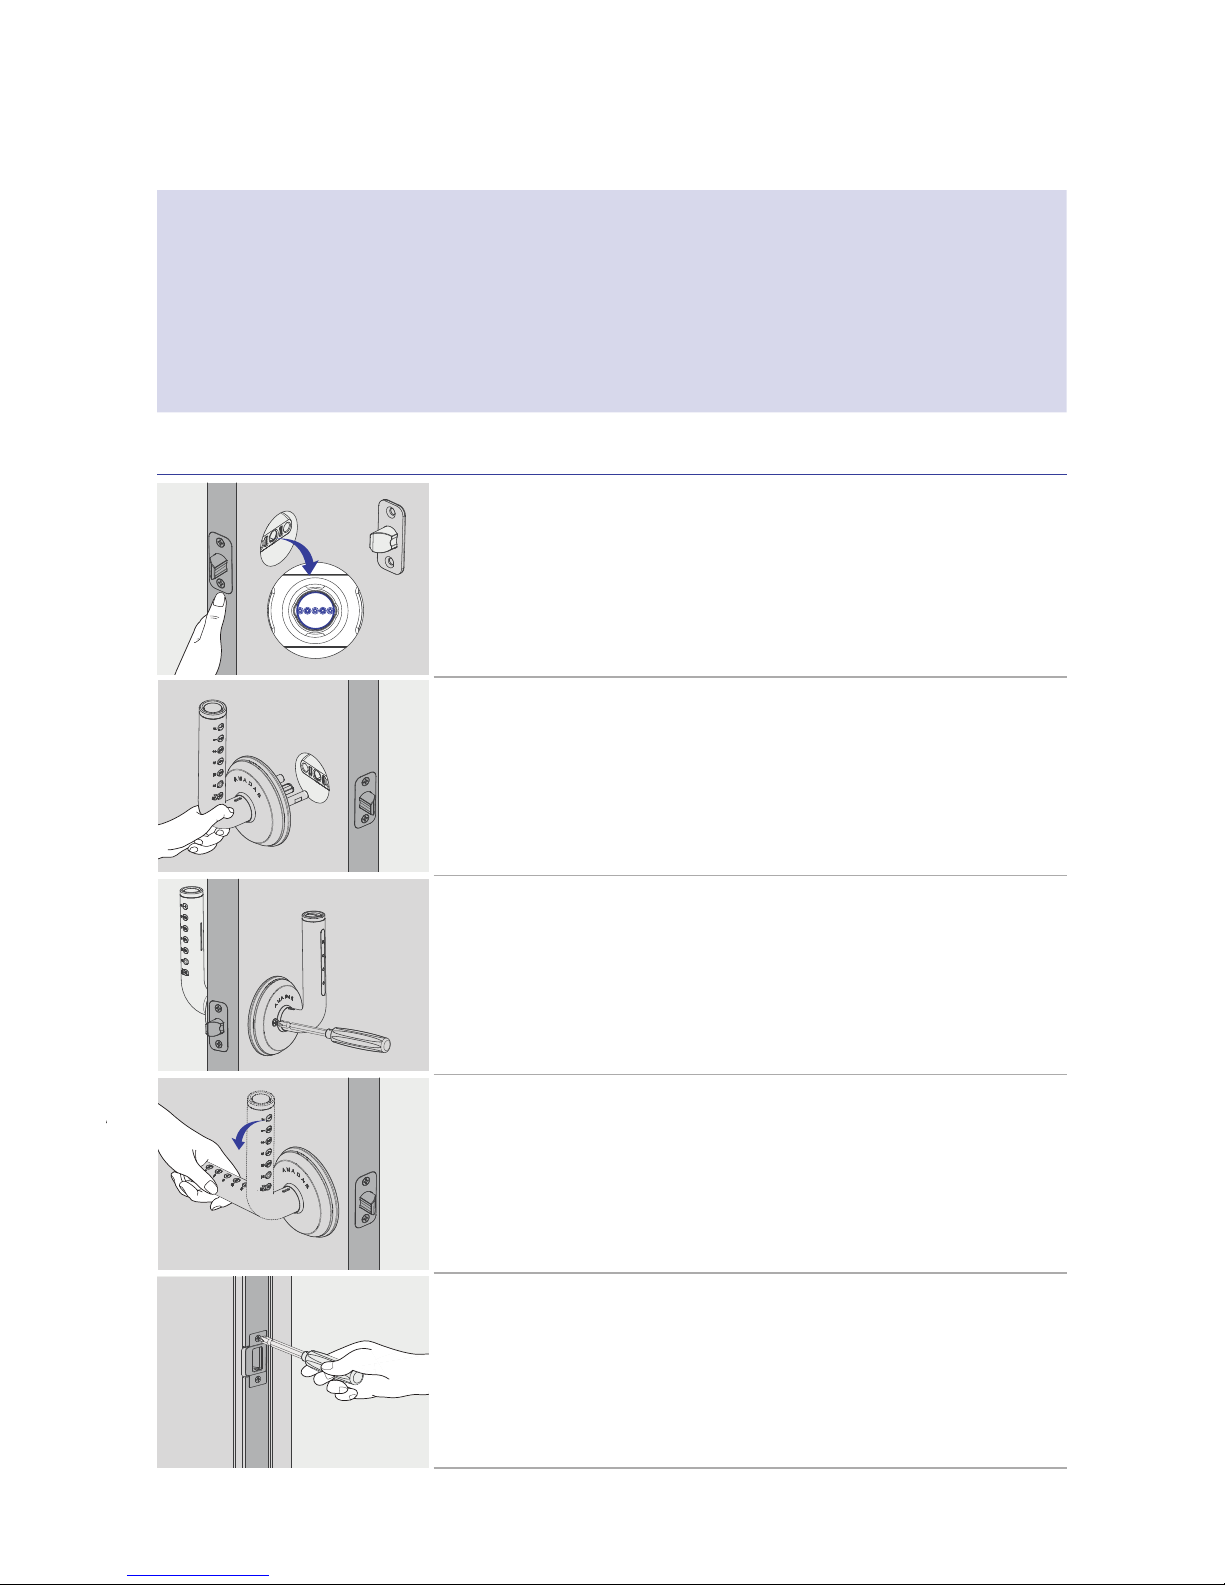
Installing the Outer Lever Module
- Insert the outer lever module joint bolt into the tubular
tightening hole and fasten it to the door.
Installing Inner Lever Module
(Insert the batteries after completing installation)
- After inserting the inner lever module, tighten the two fastening
bolts clockwise onto the outer lever module joint bolt using a
screwdriver, for the left and right side, respectively.
Checking Lever Operation (after installation is complete)
- Move the lever down in the direction of usage
(left or right),
then it automatically gets fixed.
- Operate the lever down to check that the latch works properly.
- Insert the batteries into the lever.
(Refer to page 16 of the Operation Manual)
- Refer to page 14 of the Operation Manual to complete the
registration process.
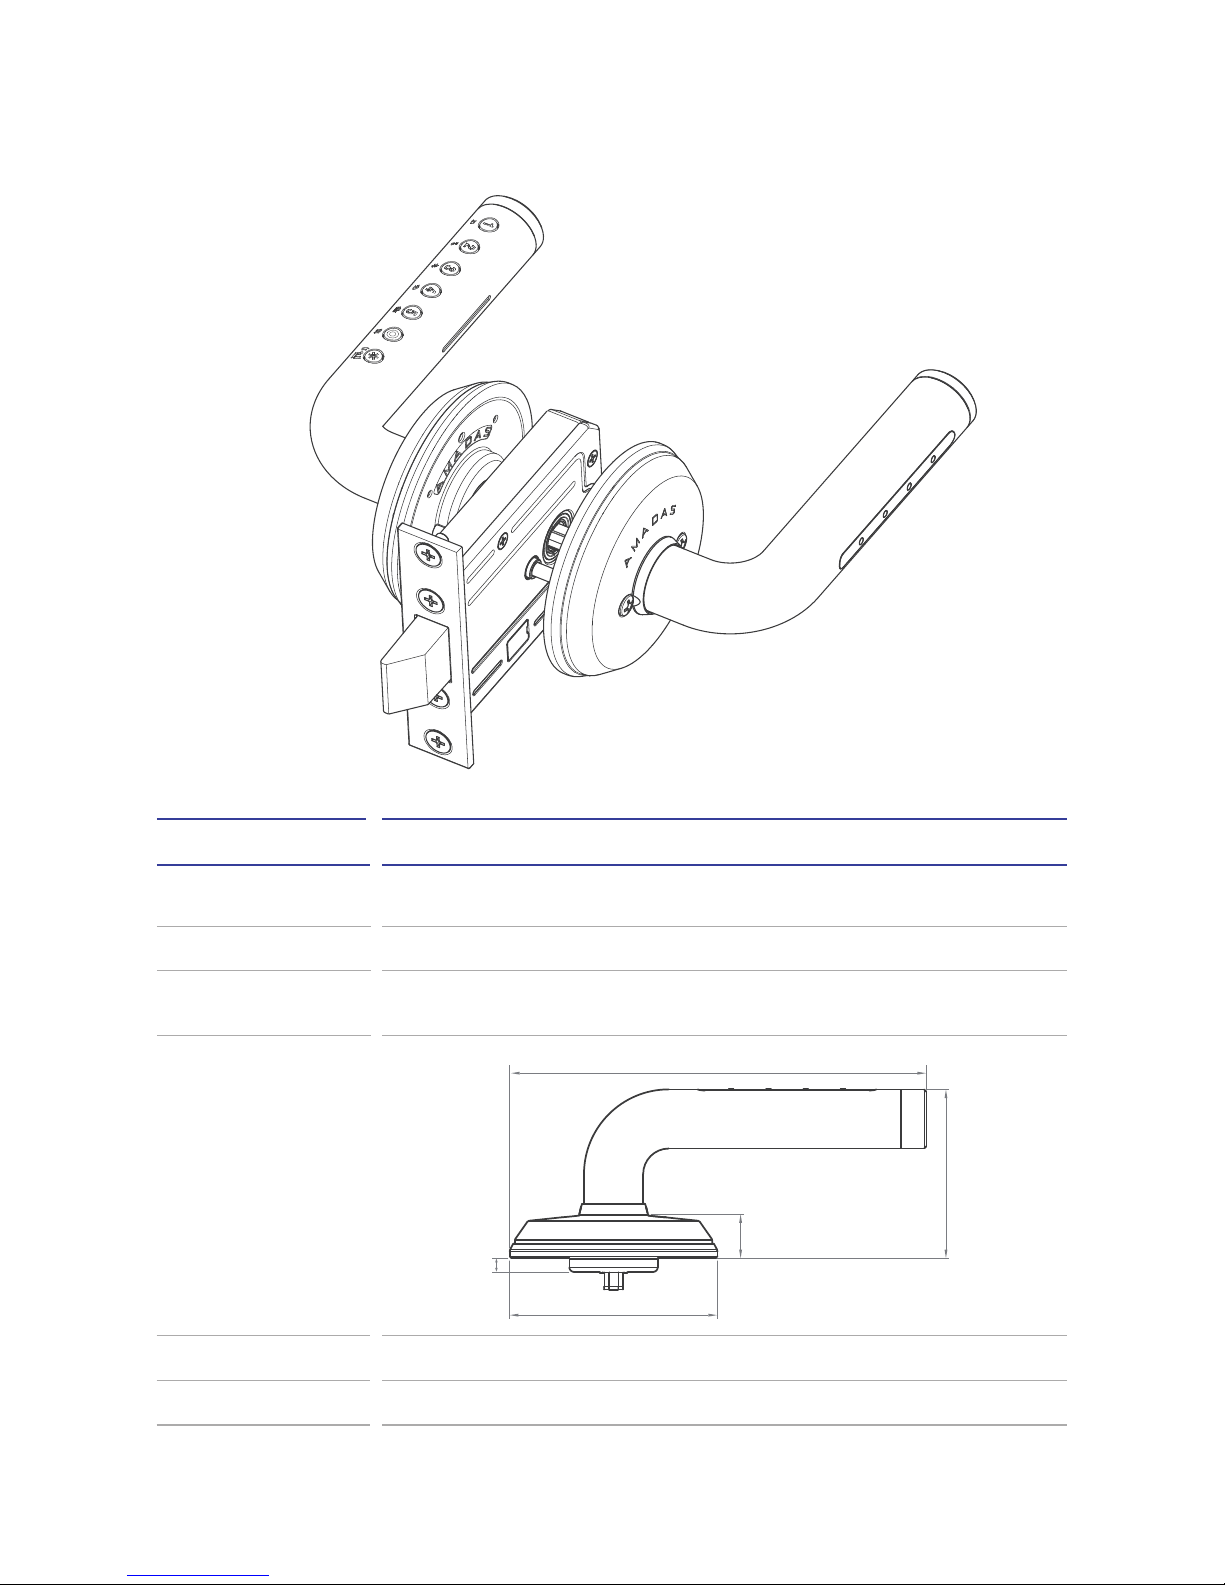
Installing the Door Trim and Adjusting the Door Shake
- Install the door trim.
- Adjust the door shake by adjusting the inner pocket after
installing the door trim.
*Be sure to set the power terminal(Arrow Section) horizontally
before installing.
Installation Method
- The physical key must be removed completely before installing the lock.
(Applied model : ADSL-0101TK/ADSL-0101MK)
- Please refer to the installation video on the website (www.amadas.kr).
- After completing the registration procedure, make sure that rhe door opens and closes
using the access code, then close the door.
- Register an access code after installation or a factory reset. After registering, the initial
access code will be deleted. Please note that if the key is used unregistered, others may
access the system by using the initial access code.