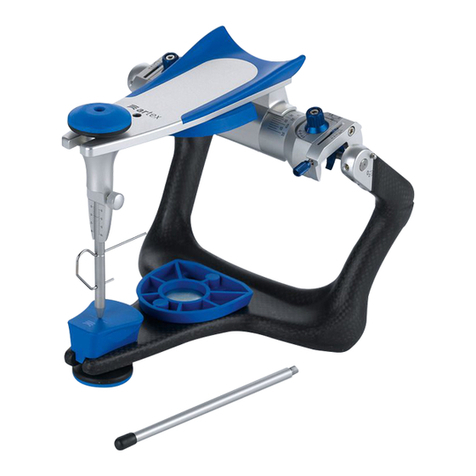
Amanngirrbach ARTEX cpr User manual

DE Bedienungsanleitung 4-5
EN User manual 6-7
FR Mode d’emploi 8-9
IT Istruzioni d’uso 10-11
ES Modo de empleo 12-13


4
!
#
%
&
(
@
$
^
*
BL

BEDIENUNGSANLEITUNG BEDIENUNGSANLEITUNG
DE
4
BEWEGUNGSABLAUF
Kondylenkugel in zentrischer Position und in
Bewegung bei unterschiedlichem Bennettwinkel
(Einsicht in die Kondylen)
ACHTUNG
Die Bewegungsabläufe in Arcon-Artikulatoren müs-
sen unter steter Berührung der Kondylen-kugeln
(Artikulatoren-Unterteil) zum Kondylar-gehäuse
(Artikulatoren-Oberteil) durchgeführt werden. Nur
so sind sie reproduzierbar.
(10) Bennettwinkel auf 0° eingestellt.
Kondylenkugel in zentrischer Position =
Startposition für den Bewegungsablauf.
(11) Bennettwinkel auf 0°. Kondylenkugel wird un-
ter permanenter Berührung des Kondylarele-ments
in allen 3 Raumebenen geführt: Die Kondylenkugel
darf in keiner Bewegungsphase den Kontakt zur
Fossa, weder kranial noch mesial, verlieren.
(12) Bennettwinkel auf 30° eingestellt.
Kondylenkugel in zentrischer Lage = Startposition
für den Bewegungsablauf.
(13) Bennettwinkel auf 30°. Kondylenkugel wird un-
ter permanenter Berührung des Kodylar-gehäuses
in allen 3 Raumebenen geführt.
ARBITRÄRSTIFT / ACHSMITTELPUNKT
Die schädel-/achsorientierte Übertragung des
Oberkiefers kann durch Adaption des Gesichts-
bogens direkt am Artikulator erfolgen. Dabei kann
sowohl der Arbiträrstift (14) - er gibt die Position
der Ohröffnung bzw. die Bohrung der Porusknöpfe
wieder - als auch der Achsmittelpunkt - als
Referenz benutzt werden.
DISTRAKTION
Schraube von frontal lösen.
(15)
Distraktion auf
gewünschten Wert (0-3 mm) einstellen und mit
Schraube fixieren
(16)
.
ZENTRIK ÖFFNEN
Schwenkhebel (2) auf Anschlag nach oben führen.
Die Zentrierachsen (2 Halbachsen) werden nach
innen geführt und geben die Zentrik frei.
Die Zentrik (3) ist geöffnet. Die Fixierung der
Kondylenkugel ist aufgehoben. Das Oberteil kann
frei bewegt werden.
ZENTRIK SCHLIESSEN
Schwenkhebel (4) auf Anschlag nach unten führen.
Die beiden Halbachsen werden nach außen geführt,
bis sie weich am Kondylenzentrum anschlagen und
das Artex-Oberteil in zentrischer Position fixieren.
Zentrik geschlossen (5). Sichbare Fixierung um
Kondylenzentrum durch die Halbachse.
BENNETTWINKELEINSTELLUNG
Zentrik öffnen. Feststellschraube des Bennett-
winkels mit Inbusschlüssel lösen (6). Mit dem
Drehknopf ist das Kondylenelement von -5° bis
+30° einstellbar.
Abb.: Bennettwinkel = 0°.
Mit dem Drehknopf (7) wird der Bennettwinkel auf
den gewünschten Skalenwert gedreht, dann mit
dem Inbusschlüssel fixiert.
Abb.: Bennettwinkel = 30°.
EINSTELLEN DER KONDYLENBAHNNEIGUNG
HKN-Stellschraube (8) mit Inbusschlüssel lösen.
Gewünschten Winkel durch Drehen des Kondylar-
gehäuses einstellen. Danach HKN-Stellschraube mit
Inbusschlüssel fixieren.
Einstellmöglichkeit der HKN (9) von -20° bis +60°.
Der Neigungswinkel ist an der Vorderkante des
Rückenteils abzulesen (wird mit der Skalierung in
Deckung gebracht).
Abb.: HKN = +60°.

BEDIENUNGSANLEITUNG BEDIENUNGSANLEITUNG
DE
5
RETRUSION
(17) Zentrik öffnen. Festellschraube des Retrusions-
Einsatzes mit Inbusschlüssel lösen. Retrusions-
Einsatz (18) auf den gewünschten individuellen Wert
führen, dann mit Inbusschlüssel wieder fixieren.
Abb.: Retrusion = 2 mm.
WARN- UND
SICHERHEITSHINWEISE:
_ Frontzahnführung
Winkel der Protrusionsspur = 0°
_ Allgemeine Hinweise
Artikulatoren sind Präzisionsinstrumente,
deshalb sollten einige Hinweise im Umgang
mit Artikulatoren beachtet werden.
_ Artikulator nicht in Ausbrühgerät, Druck-
topf oder Ultraschallbad stellen
_ Zur Reinigung und Pflege nur Reinigungs-
mittel verwenden, die für Leichtmetalle
geeignet sind.
Verwendung der Reinigungsmittel nur nach
Herstellerangaben.
Reinigungsmittel mit pH <5 und >8 dürfen
nicht eingesetzt werden, da diese die
Eloxalflächen beschädigen können.
!

USER MANUAL USER MANUAL
EN
6
OPEN CENTRIC
Guide pivoting lever (2) up to stop, moving the
centering axes (2 semi-axes) in, thus releasing the
centric.
Centric opened (3). Fixing of condyle balls released.
The top may be freely moved.
CLOSE CENTRIC
Move pivoting (4) lever down to stop. The two semi-
axes are guided out until softly stopping against
the condylar centre, fixing the Artex top section in
centered position. Centric closed. Visible fixation on
condylar centre by semi-axis. 2 Support in inclined
Centric closed (5). Visible fixation on condylar cen-
tre by semi-axis.
ADJUSTMENT OF BENNETT ANGLE
Open centric (6). Release locking screw of Bennett
angle with allen key. Adjust condylar unit from –5°
to +30° by rotary button.
Fig.: Bennett angle = 0°.
Rotate Bennett angle (7) to required scale setting
by means of the rotary knob, then lock by allen key.
Fig.: Bennett angle = 30°.
ADJUSTMENT OF CONDYLE PATH INCLINATION
Release condyle (8) path inclination (HCI) set screw
with allen key. Adjust required angle by rotating the
condylar box. then fix HCI set screw with allen key.
Adjustment (9) of HCI from -20° to +60°.
Read angle of inclination from front edge of rear
section (congruent with the scale).
Fig.: HCI = +60°.
SEQUENCE OF MOVEMENT
Condyle balls in centered position and during mo-
vement with different Bennett angles (view into
condyle)
ATTENTION
Sequences of movement in Arcon articulators must
be performed in permanent contact of condyle
balls (bottom part of articulator) with the condylar
box (top part of articulator). Only thus they can be
reproduced.
(10) Bennett angle adjusted to 0°. Condylar spheres
in centered position = initial position for move-
ments.
(11) Bennett angle adjusted to 0°. Condyle ball gui-
ded in all three dimensions in permanent contact
with the condylar unit. The condyle ball may never
lose contact with the fossa, neither in cranial nor
mesial direction.
(12) Bennett angle adjusted to 30°. Condyle ball in
centered position = initial position for movements.
(13) Bennett angle adjusted to 30°. Condyle ball
guided in all three dimensions in permanent contact
with the condylar box.
ARBITRARY PIN / CENTRE OF AXIS
Maxillary cranium/axis-based transfer of the maxilla
can be effected directly on the articulator by adap-
ting the facebow. Both the arbitrary pin (14) (which
reproduces the position of the ear opening/bore of
the porus buttons) and the axis mean point can be
used as a reference.
DISTRACTION
Loose screw from frontal. (15) Install distraction
to the desired value (0-3 mm) and fix it with the
screw (16).

USER MANUAL USER MANUAL
EN
7
RETRUSION
(17) Open centric, release locking screw of retrusion
insert using allen key. Guide retrusion insert (18)
to required individual value, then relock using allen
key.
Fig.: Retrusion = 2 mm.
WARNINGS AND
SAFETY ASPECTS:
_ Anterior guidance
Angle of protrusion track = 0°
_ General information
Articulators are precision instruments.
Therefore, it is important to handle them
with care. Please read the following notes:
_ Do not place the articulator in a boil-out
unit, a pressure pot or an ultrasonic bath.
_ For cleaning and care, use only cleaning
agents that are suitable for light metals.
Regarding the use of the cleaning agent,
please follow the instructions of the
according manufacturer. Do not use clean-
ing agents with a pH <5 or >8 since those
might damage the anodized surfaces.
!

MODE D’EMPLOI MODE D’EMPLOI
FR
8
OUVREZ LA CENTRIQUE
Poussez le levier (2) pivotant vers le haut sur la
butée. Les axes de centrage (2 demis axes) se dépla-
cent vers l‘intérieur et libèrent la centrique.
La centrique est ouverte (3). La pièce condylienne
n‘est plus maintenu de façon fixe. La partie supéri-
eure peut être déplacée librement.
FERMEZ LA CENTRIQUE
Poussez le levier pivotant (4) vers le bas sur la
butée. Les deux demis axes se déplacent vers
l‘extérieur jusqu‘à ce qu‘ils butent légèrement con-
tre l‘axe condylien et arrêtent la partie supérieure
du dispositif Artex en position centrée.
La centrique est fermée (5). Fixation visible de l‘axe
condylien par le demi axe.
RÉGLAGE DE L‘ANGLE DE BENNETT
Ouvrez la trajectoire/la centrique (6). Desserrez la
vis de verrouillage de l‘angle de Bennett à l‘aide de
la clé d‘alêne. Le bouton rotatif permet de régler
l‘élément condylien de -5° à +30°.
Illustration : Angle de Bennett = 0°.
A l‘aide du bouton (7) rotatif, tournez l‘angle de
Bennett sur la valeur d‘échelle souhaitée et fixez-la
à l‘aide de la clé d‘alêne.
Illustration : Angle de Bennett = 30°
RÉGLAGE DE L‘INCLINAISON DE LA TRAJEC-
TOIRE CONDYLIENNE
Desserrez la vis de verrouillage I.T.C (8) à l‘aide
de la clé d‘alêne. Sélectionnez l‘angle souhaité en
tournant le boîtier condylien. Fixez ensuite la vis de
verrouillage I.T.C à l‘aide de la clé d‘alêne.
Possibilité de réglage I.T.C. (9) de -20° à +60°. On
peut lire l‘angle d‘inclinaison sur le bord antérieur
de la partie postérieure (il est mis en concordance
avec l‘échelle).
Illustration: I.TC = +60°
DÉROULEMENT DU MOUVEMENT
Pièce condylienne en position centrée et en mou-
vement avec des angles de Bennett différents (vue
plongeante sur les condyles)
ATTENTION
Les mouvements dans les articulateurs Arcon
doivent se dérouler avec contact permanent
des pièces condyliennes (partie inférieure de
l‘articulateur) avec le boîtier condylien (partie supé-
rieure de l‘articulateur). Ils ne seront reproductibles
que de cette manière.
(10) Angle de Bennett réglé sur 0°.
Pièce condylienne en position centrée = position de
départ pour le déroulement du mouvement.
(11) Angle de Bennett sur 0°.
La pièce condylienne est guidée, en contact perma-
nent de l‘élément condylien, dans les 3 niveaux de
l‘espace. La pièce condylienne ne doit en aucune
phase du mouvement perdre le contact avec la
fosse, ni en direction du crâne, ni en direction des
maxillaires.
(12) Angle de Bennett réglé sur 30°.
Pièce condylienne en position centrée = position de
départ pour le déroulement du mouvement.
(13) Angle de Bennett réglé sur 30°.
La pièce condylienne est guidée, en contact perma-
nent avec le boîtier condylien, dans les 3 niveaux de
l‘espace.
TIGE ARBITRAIRE/CENTRE DE L‘AXE
Le transfert du maxillaire supérieur, orienté (14) en
fonction de l‘axe crânien, peut s‘effectuer directe-
ment sur l‘articulateur par adaptation de l‘arc facial.
Pour ce faire on pourra utiliser aussi bien la tige
arbitraire elle reproduit la position de la capsule au-
riculaire et/ou la cavité des boutons poreux à titre
de référence.
MODE D’EMPLOI MODE D’EMPLOI
FR
9
ECARTEMENT CONDYLIEN
Dévisser la vis frontale (15). Régler l‘écartement
condylien sur la valeur souhaitée (0-3 mm) puis blo-
quer avec la vis (16).
RÉTRUSION
(17) Ouvrez la centrique. Desserrez la vis de ver-
rouillage du bouton de rétrusion à l’aide de la clé
d’alêne. Guidez le bouton de (18) rétrusion jusqu’à
la valeur individuelle désirée et fixez ensuite à l’aide
de la clé d’alêne.
Illustration : Rétrusion = 2 mm.
MISES EN GARDE ET
CONSIGNES DE SÉCURITÉ:
_ Guide antérieur
Angle du trajet de propulsion : 0°
_ Indications d’ordre général
Un articulateur étant un appareil de préci-
sion, il convient de respecter certaines règles
quant à son utilisation. Ces règles sont les
suivantes :
_ Ne pas mettre l’articulateur dans une
ébouillanteuse, dans un polymérisateur ou
un bac à ultrasons.
_ Pour nettoyer l’articulateur, en faire l’en-
tretien, utiliser uniquement des produits
nettoyants prévus pour les alliages légers.
Bien utiliser ces produits conformément
aux instructions du fabricant.
Ne pas utiliser de produits nettoyants pré
sentant un pH < 5 ou > 8 car ils abîmerai-
ent les parties anodisées de l’appareil.
!

ISTRUZIONI D’USO ISTRUZIONI D’USO
IT
10
SBLOCCARE LA CENTRICA
Sollevare la levetta (2) orientabile fino a fine corsa
per muovere verso l‘interno gli assi di centrica (2
semiassi) e sbloccare la centrica.
La centrica è aperta (3): la sfera condiloidea non
è più bloccata e la parte superiore dispone ora di
libertà di movimento.
BLOCCARE LA CENTRICA
Abbassare la levetta (4) orientabile fino a fine corsa
per spostare verso l‘esterno i due semiassi. Quando
questi ultimi toccano il centro condiloideo, la parte
superiore dell‘Artex viene fissata nella posizione
centrica.
La centrica è chiusa (5): si vede chiaramente come
il semiasse blocca la sfera condiloidea nella centrica.
REGOLAZIONE DELL‘ ANGOLO DI BENNETT
Sbloccare la centrica (6). Svitare la vite di fissaggio
dell‘angolo di Bennett con la chiave a brugola. Con
la manopola è possibile regolare l‘elemento condilo-
ideo entro i valori -5° e +30°.
Fig.: Angolo di Bennett =0°.
Con la manopola (7) impostare l‘angolo di Bennett
al valore desiderato e fissarlo con la vite a brugola.
Fig.: Angolo di Bennett =+30°.
REGOLAZIONE DELLA PENDENZA DEL TRAGIT-
TO CONDILOIDEO (PTC)
Sbloccare la vite di regolazione PTC (8) con la chia-
ve a brugola. Impostare il valore desiderato girando
la scatola condiloidea. Fissare la vite di regolazione
PTC con la chiave a brugola.
La gamma (9) della pendenza del tragitto condilo-
ideo va da -20° a +60°.
La pendenza si legge sulla scala apposita, sulla qua-
le viene indicata dal margine anteriore dell‘elemento
posteriore.
Fig.: PTC = +60°.
LA SIMULAZIONE DEI MOVIMENTI
Sfera condiloidea nella centrica e in movimento con
diversi angoli di Bennett (vista dell‘interno della sca-
tola condiloidea)
ATTENZIONE
Durante tutti i movimenti negli articolatori Arcon
deve essere garantito il contatto permanente delle
sfere condiloidee (parte inferiore dell‘articolatore)
con le scatole condiloidee (parte superiore
dell‘articolatore). Solo in questo modo i movimenti
sono riproducibili.
(10) L‘angolo di Bennett è impostato a 0°.
La sfera condiloidea si trova in posizione centrica
=posizione prima della simulazione dei movimenti.
(11) Angolo di Bennett: 0°.
La sfera condiloidea viene spostata nelle tre dimen-
sioni dello spazio senza perdere mai il contatto con
la superficie di guida condiloidea: la sfera condilo-
idea non deve mai staccarsi dalla fossa glenoidea,
né sul lato craniale né su quello mesiale.
(12) L‘angolo di Bennett è impostatoa 30°.
La sfera condiloidea si trova in posizione centrica
=posizione prima della simulazione dei movimenti.
(13) Angolo di Bennett: 30°.
La sfera condiloidea viene spostata nelle tre dimen-
sioni dello spazio senza perdere mai il contatto con
la superficie di guida condiloidea.
PERNO ARBITRARIO I CENTRO DELL‘ASSE
Il trasferimento della mascella superiore in base alla
relazione cranico-assiale può avvenire (14) adattan-
do l‘arco facciale direttamente all‘articolatore. Come
punto di riferimento dell‘articolatore può essere
utilizzato il centro dell‘asse come anche il perno
arbitrario il quale riproduce la posizione del meato
acustico, rispettivamente il foro del pomello.

ISTRUZIONI D’USO ISTRUZIONI D’USO
IT
11
DISTRAZIONE
Allentare la vite frontalmente. Impostare la distra-
zione (15) sul valore desiderato (0-3 mm) e fissarlo
con la vite (16).
RETRUSIONE
(17) Sbloccare la centrica e svitare la vite di fis-
saggio dell’elemento di retrusione con la chiave a
brugola. Portare l’elemento di retrusione (18) al
valore individuale desiderato e fissarlo con la chiave
a brugola.
Fig.: Retrusione = 2 mm.
AVVERTENZE DI
SICUREZZA:
_ Guida incisal
Angolo del tragitto protrusivo = 0°
_ Indicazioni generali
Articolatori sono strumenti di precisione,
quindi, per il loro utilizzo, è necessario seguire
alcune indicazioni:
_ non inserire l’articolatore nell’autoclave, nella
pentola a pressione oppure nel bagno ad
ultrasuoni
_ per la pulizia e la cura dell’articolatore utiliz
zare solo detergenti adatti ai metalli leggeri;
per l’impiego dei detergenti seguire le indi-
cazioni del produttore;
non usare detergenti con pH <5 e >8 perché
potrebbero danneggiare le superfici anodizzate.
!

MODO DE EMPLEO
ES
12
ABRIR EL CENTRAJE
Llevar la palanca orientable (2) hacia arriba hasta
el tope. Los ejes de centraje (2 semiejes) se llevan
hacia adentro y dejan libre el centraje.
CERRAR EL CENTRAJE
Llevar la palanca orientable hacia abajo (4) hasta
el tope. Los dos semiejes se llevan hacia el exterior
hasta que hagan tope suavemente en el centro de
los cóndilos y fijen la parte superior del Artex en
posición centrada.
Centraje cerrado (5). Fijación visible en el centro de
los cóndilos mediante el semieje.
REGULACIÓN DEL ÁNGULO DE BENNETT
Abrir el centraje (6). Aflojar el tornillo de inmoviliza-
ción del ángulo de Bennett mediante la llave Allen.
El elemento de cóndilo se puede regular de -5° a
+30° mediante el mando giratorio.
Figura: Ángulo de Bennett =O°.
Mediante el mando (7) giratorio se sitúa el ángulo
de Bennett en el valor de escala deseado y a conti-
nuación se inmoviliza con la llave Allen.
Figura: Ángulo de Bennett = 30°.
REGULACIÓN DE LA PENDIENTE DE LA PISTA
DE CÓNDILOS
Aflojar el tornillo de posicionado HKN (8) con la
llave Allen. Ajustar el ángulo deseado girando la car-
casa condilar. A continuación inmovilizar el tornillo
de posicionado HKN con la llave Allen.
Posibilidad de regulación (9) de los HKN desde -20°
a +60°. El ángulo de inclinación se puede leer en el
borde anterior de la parte posterior (se hace coinci-
dir con la escala).
Figura: HKN = +60°.
DESARROLLO DE LOS MOVIMIENTOS
Esfera condilar en posición centrada y en movimi-
ento para distintos ángulos de Bennett {vista de los
cóndilos}
ATENCIÓN
El desarrollo de los movimientos en los articulado-
res Arcón se han de realizar con constante contacto
entre las esferas condilares (parte inferior de los ar-
ticuladores) y la carcasa condilar (parte superior de
los articuladores). Solamente así son reproducibles.
(10) Ángulo de Bennet regulado a O°.
Esfera condilar en posición centrada = posición
inicial para el desarrollo del movimiento.
(11) Ángulo de Bennet a O°.
La esfera condilar se va conduciendo en los tres pla-
nos del espacio manteniendo permanentemente el
contacto con el elemento condilar. En ninguna de las
fases del movimento debe perder la esfera condilar
el contacto con la fosa, ni craneal ni mesial.
(12) Ángulo de Bennet regulado a 30°.
Esfera condilar en posición centrada = posición
inicial para el desarrollo del movimiento.
(13) Ángulo de Bennet a 30°.
La esfera condilar se conduce en los tres planos del
espacio manteniendo permanentemente el contacto
con el alojamiento condilar.
ESPIGA ARBITRAL/PUNTO CENTRAL DEL EJE
La transmisión orientada axiall cranealmente del
maxilar puede efectuarse mediante adaptación
del arco (14) facial directamente en el articulador.
Para ello se puede utilizar como referencia tanto la
espiga arbitral, que reproduce la posición del orificio
auricular o el orificio de los botones de poros, como
también el punto central del eje.

MODO DE EMPLEO
13
ES
MODO DE EMPLEO
DISTRACCIÓN
Suelte el tornillo desde la parte delantera (15).
Ajuste la distracción al valor deseado (0-3 mm) y
fíjela mediante tornillo (16).
RETRUSIÓN
(17) Abrir el centraje. Soltar con la llave Allen el
tornillo de inmovilización del postizo de retrusión.
Situar el postizo de (18) retrusión en el valor indivi-
dual deseado y volver a inmovilizarlo
con la llave Allen.
Figura: Retrusión = 2 mm.
ADVERTENCIAS Y
CONSEJOS DE SEGURIDAD:
_ Guía anterior
Ángulo de la huella del movimiento
protrusivo = 0°
_ Indicaciones generales
Articuladores son instrumentos de precisión,
por este motivo se deberían observar algu-
nas indicaciones en cuanto a su manejo.
_ No ponga el articulador ni en un aparato
de escaldamiento por agua hirviente ni en
una olla a presión ni en un baño ultrasónico.
_ Utilice para la limpieza y el entretenimiento
sólo productos de limpieza apropiados para
metales ligeros.
Use los productos de limpieza tan sólo
según las indicaciones del fabricante. No
deberán emplearse productos de limpieza
con un valor pH <5 y >8, puesto que éstos
podrían dañar las superficies anodizadas.
!

BM
BO
BQ
BS
BN
BP
BR
BT


33782-FB_BA_Artex CPR_v05_160419 2016-04-20 07:20
hellblau.com 33782-FB 2016-04-19
Made in the European Union
Manufacturer | Hersteller
Distribution | Vertrieb
Amann Girrbach AG
Herrschaftswiesen 1
6842 Koblach | Austria
Fon +43 5523 62333-105
Fax +43 5523 62333-5119
www.amanngirrbach.com
ISO 9001
Q
U
A
L
I
T
Ä
T
S
M
A
N
A
G
E
M
E
N
T
Table of contents
Languages:
Other Amanngirrbach Medical Equipment manuals

Amanngirrbach
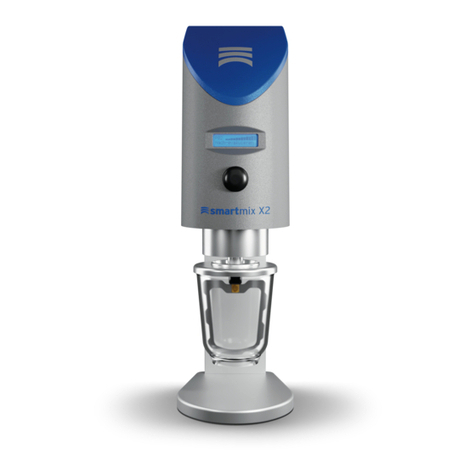
Amanngirrbach smartmix X2 User manual

Amanngirrbach
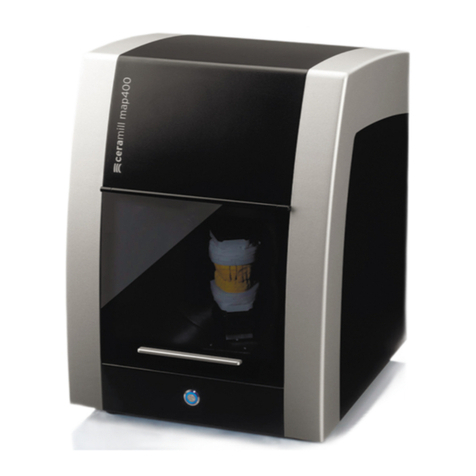
Amanngirrbach Ceramill Map400 User manual

Amanngirrbach
Amanngirrbach PL900S User manual

Amanngirrbach
Amanngirrbach ARTEX CT User manual

Amanngirrbach
Amanngirrbach artex cr User manual

Amanngirrbach
Amanngirrbach Artex User manual

Amanngirrbach
Amanngirrbach Centrofix User manual
Popular Medical Equipment manuals by other brands

Summit Medical
Summit Medical Instrucsafe Instructions for use

Neater
Neater Eater Robot quick start guide

LINET
LINET Virtuoso User manual and technical description

Pronk Technologies
Pronk Technologies SimSlim SL-8 Operator's manual

Beurer
Beurer AFTER 60 quick start guide

NDS
NDS ZeroWire Mobile user manual