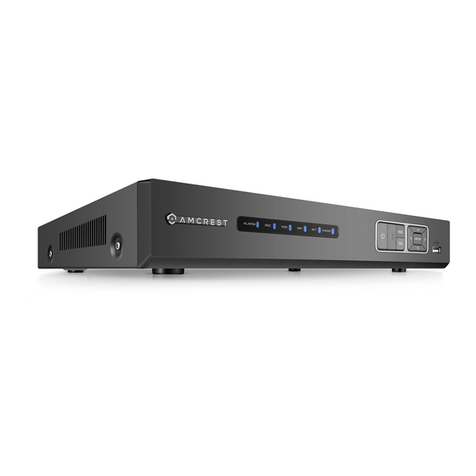
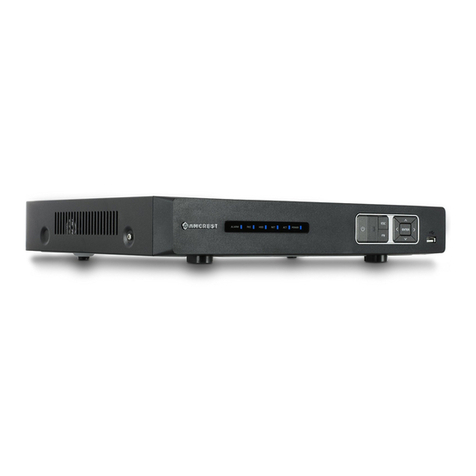
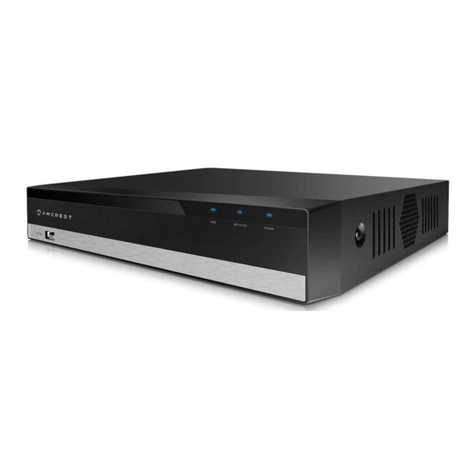
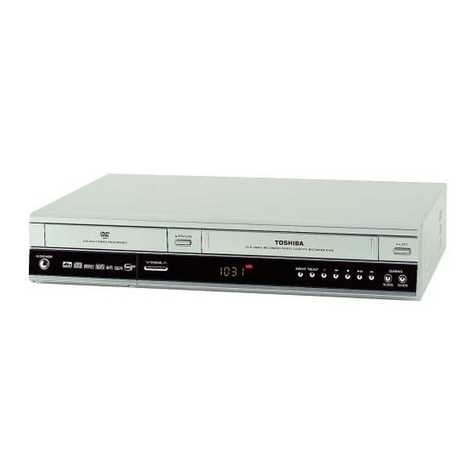
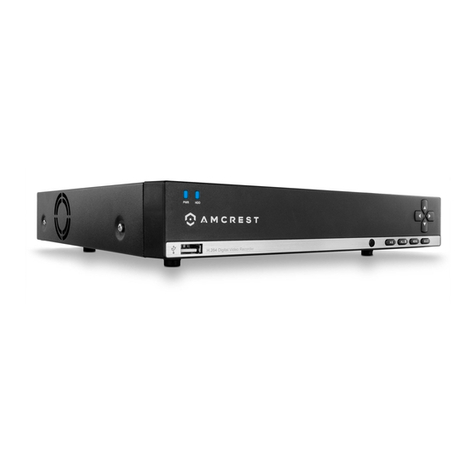
Amcrest NV42 EI Series User manual

NVR Quick Start Guide
Version 1.0.0
April 21st, 2023

2
Contents
Hardware Setup.....................................................................................................................6
NVR Initialization...................................................................................................................7
Main Menu Overview...........................................................................................................11
Adjusting Camera Settings for Maximum Resolution, FPS, and Bitrate.............................12
IVS, Motion Detection, and Recording Setup .....................................................................13
Setting Up Email Alerts .......................................................................................................15
Setting Up AI Events...........................................................................................................19
Playback..............................................................................................................................25
Computer Access Setup......................................................................................................26
Remote access not working? (Troubleshooting steps).......................................................28
Amcrest View Pro Setup .....................................................................................................28
References & Contact Information......................................................................................31

3
Welcome
Thank you for purchasing an Amcrest NVR.
Before installation and operation, please read the below safeguards and warnings carefully.
This document provides a quick setup and overview of your Amcrest NVR and its features. For
access to a full user manual or further information regarding your device please visit:
http://amcrest.com/support
Important Safeguards and Warnings
●All installations and operations of the device should conform to your local electrical safety
codes.
●We assume no liability or responsibility for any of the fires or electrical shocks caused by
improper handling or installation.
●We are not liable for any problems caused by unauthorized modifications or attempted
repair.
●Do not submerge the device in water or install in areas with high levels of moisture or
humidity.
●Handle with care, avoid dropping or placing the device in unsecure areas.
●The NVR does not have rack mount compatibility and should be used on flat surfaces.
Check Packaging
When you receive the NVR system in the packaging, unpack it, and check all sides of the NVR to
see if there is any physical damage. The protective materials used for the packaging of the NVR
will protect most accidental damage during transportation, but to ensure that your equipment is
operating as expected, it is recommended to inspect the product before proceeding.
On the NVR, check that the label on the bottom is not damaged. The serial number and model
number of the unit is needed to add the device to other Amcrest applications.
Please note that most Amcrest cameras come defaulted to H.264 encoding for maximum
compatibility when accessing your device in a web browser, or other third-party applications.
However, for optimal performance, the device’s compression and bitrate can be updated to
H.265 compression after the device has been initialized.
H.265 provides a more advanced technology than H.264 and allows the device to reduce file
sizes which in turn helps to reduce required bandwidth without sacrificing frames per second
(FPS) or resolution.
For more information on adjusting compression and bitrates, please refer to page 18, “Adjusting
Camera Settings for Maximum Resolution, FPS, and Bitrate”.

4
Front Panel
NV42XXX-EI Series
Button
Icon
Description
Power Button
Press and hold this button for five seconds to shut off or power on the
NVR. Use the switch on the back of the NVR to initially power the
device.
USB
Front panel USB 2.0 Port.
Up/1,
Down/4
Activate current control, modify setup, move up and down in a menu
Increase/decrease numeric functions.
Tilt camera up and down using PTZ menu (if applicable).
Left/2,
Right/3
Move left or right in a menu.
When viewing playback, use these buttons to scan forwards or
backwards.
Enter
OK
Confirm a current operation
Go to default button
Go to menu
Escape
ESC
Go to previous menu or cancel a current operation.
When using playback, used to restore real-time monitor mode.
Record
REC
Manually stop/start a recording. Use the directional keys or numeric
keys to select the recording channel.
Shift
SHIFT
I In a textbox, click this button to switch between numeric characters or
provide capitalization to a word, etc.
Play/Pause/5
Click this button to pause or resume playback. In text mode, input
number 5.
Reverse
Playback/
Pause/6
During playback or pause mode, click this button to reverse playback.
In reverse playback, click this button to pause. In text mode, input
number 6.
Fast Forward/7
Various fast speeds and normal playback. In text mode, input
number 7
Slow Motion/8
Multiple slow play speeds or normal playback. In text mode, input
number 8.
Next/9
In playback mode, press to playback the next video. In menu setup,
go downward in a dropdown list. In text mode, input number 9.
Previous/0
In playback mode, press this button to playback the previous video.
In text mode, input number 0.

5
Function
FN
One-window monitor mode, click this button to display assistant
function: PTZ control and image color.
Backspace function: in numeric control or text control, press and hold
for 2 seconds to delete the previous character before the cursor.
In motion detection setup, working with FN and direction keys to
realize setup.
In text mode, press this button to switch between numeric,
capitalization, etc.
Rear Panel
The rear panel of the NVR may differ from model to model. Below is a representation of the rear
panel for the NV42XX-EI.
Non-PoE ports
PoE Ports.
USB 2.0 port
USB 2.0 port. Connect a mouse, USB storage device, etc.
Network port
10M/100Mbps self-adaptive Ethernet port.
HDMI
HDMI Output
High-definition audio and video signal output port.
VGA
VGA video
output port
VGA video output port. Outputs analog video signal. This
connects to the monitor to view analog video.
GND
Ground end
Power Port
DC12V, DC48V Depending on model.
MIC IN
Audio input port
Bidirectional talk input port. This is used to receive the analog
audio signal from the device such as a microphone.
MIC Out
Audio output
port
Audio output port. This is used to output the analog audio
signal to devices such as an external RCA speaker.
⚫Bidirectional talk output.
⚫Audio output on 1-window video monitoring.
⚫Audio output on 1-window video playback.
PoE Ports
PoE ports
Built-in switch on certain compatible devices.
For PoE series products, you can use this port to provide
power to a PoE camera.

6
Hardware Setup
Before setting up the NVR, you will need the following items. These items may not be included:
A computer monitor, or TV with either an HDMI or VGA input
A power strip with room for 4 large power plugs
A hard drive for storing video recordings.
A USB flash drive formatted to FAT 32 for importing/exporting configure or image files.
It is recommended to connect all components before mounting any of the cameras. This is to
ensure all components are working properly before they are physically installed. If any
components are not functioning, please contact Amcrest Support: https://amcrest.com/contact
There will be two parts to this section:
Hard drive installation
Setting up the cable connections
A hard drive must be installed to record or save any footage. If no hard drive is installed, you
can only view the cameras from the NVR. If a microSD card is installed in the camera, you can
still view the recordings from the microSD card using the Amcrest View Pro application and
accessing the camera directly, however, no recordings will be retained to the NVR if a hard drive
is not installed.
Hard drive installation
A hard drive can be installed if you want to record and save data to the NVR. Having a hard drive
allows you to configure and use the recording functionality of the NVR to store and view AI
events.
The hard drive used in these NVRs must be no larger than 16TB (Terabytes). For more
information, please review the technical specifications or visit: https://amcrest.com/support
To install your hard drive, the following is needed:
A medium sized (regular) Phillips-head screwdriver - not included.
A hard drive - not included.
Four hard drive fastening screws –included.
Note: Before installing the hard drive, make sure the NVR is powered off with the power
cable disconnected.
1. Loosen the screws of the upper cover and side panel using a Phillips head screwdriver.
2. Attach the four screws hard drive screws to the hard drive (sold separately). Do not
overtighten, only turn a max of three times.
3. Place the hard drive into the NVR in accordance with the four holes at the bottom of the NVR
casing.
4. Turn the NVR upside down and tighten the hard drive screws firmly to the casing of the NVR.
5. Connect the hard drive cabling and power cables to the hard drive.
6. Put the cover back onto the NVR in accordance with the clip and secure it back onto the NVR.
Setting Up the Cables
The following instructions will show you how to set up the cables for the NVR, cameras, as well
as a monitor or TV screen.
To set up the cable connections, there are 5 steps:

7
1. Connect a monitor or TV screen to your NVR. The NVR is compatible with any monitor or screen
that uses a VGA or HDMI connection. For the purposes of this guide, we will use a VGA
connection. Take a VGA cable and connect one end to the VGA port on your monitor/screen and
the other end to the VGA port on the back panel of your NVR.
2. Connect an Ethernet cable to your router.
Then, connect the other end of the cable to the Ethernet port on the back of the NVR.
3. Connect the cameras to the same network as the NVR ensuring the cameras are properly
connected and powered via the network. Please note, if using a model with POE connections on
the back, connect the POE cameras directly to the back of the NVR using an Ethernet cable.
4. Connect the NVR’s power adapter into the power port on the back of the NVR.
Note: If your NVR has a 3-prong power cord, connect the input of the cord into the power input of
the NVR.
5. Connect the other end of the power cable into a wall outlet or power strip to turn on the NVR.
Some models may feature a power switch on the back which may need to be turned on to power
the device.
NVR Initialization
After applying power to the NVR, the system will turn on. Allow the NVR to finish loading. The
Device Initialization screen will appear. Please note, the initialization screen may be different
than what is displayed based on the model you are using however the same concepts will apply.
Select your location, language, and video standard then click Next to continue.
Select your time zone as well as current date and time. Click Next to continue.
Enter Password
Create a new admin password for your NVR. The password for your device should be between 8
and 32 characters. A combination of letters, numbers, and symbols are recommended when
setting up your password.
Note: Please do not use special symbols like ‘ ‘ ; : &
Once you have entered a new password for your device, confirm the password in the next field.
Lastly, you will be asked to enter a prompt question for your account. This is useful if you have
forgotten your password and would like an easier way of recovering your password. Please use a
prompt question that will help you remember the password for your device.
After you have completed this section, click Next to continue.
Unlock Pattern

8
This is an optional security measure for your device and is only available in the local user
interface. To set an unlock pattern, use your mouse to draw a design that you will remember.
Draw the pattern again to confirm. If you do not want to assign an unlock pattern, you can click
‘Skip’ to skip this process.
If you have been assigned an unlock pattern, you will need to draw the pattern again to confirm
your assigned unlock pattern.
Password Protection
Additional means of password protection and retrieval can be set up in this menu. If you would
like to reset your password using your email, make sure the email address checkbox is enabled
and enter a valid email address in the Email Address field. The email address will be retained in
the system.
If you do not want to use an email address, you can disable the email address option. As a
secondary means of recovering your password, you can apply security questions to your NVR.
To add a question, select a question from the drop-down menus for Question 1, Question 2,
and Question 3 and enter the answers to those questions in the Answer fields.

9
Once this section is complete, click on the Save or Next button to save your information to the
device.
Startup Wizard Walkthrough
The first page of the Startup Wizard will appear which allows you to setup any General, Network,
Remote Devices, and Record Control Settings for the NVR. By default, the NVR’s IP address will
be set to DHCP which means your network has already automatically assigned an IP address to
the NVR. For optimal performance it is highly recommended to set the device IP to static to
ensure the IP of the device does not change. To set the device to a static IP, click on the Modify
(pencil icon) for the NIC card and disable the DHCP toggle switch to set the NVR’s network
mode to static. Click OK then click Next to continue.
Note: Most Amcrest products are H.265 compatible. H.265 provides more advanced technology
than H.264 and allows the device to reduce file sizes which in turn helps to reduce required
bandwidth without sacrificing frames per second (FPS) or resolution. However, for maximum
compatibility when accessing your device in a web browser, or other third-party applications, our
H.265 compatible products will come factory default to H.264.
For optimal performance, the device's compression can be upgraded to H.265 during the camera
registration process.

10
Network
Unless you have a specific reason to change these settings, it is best to leave them as they are.
Please note, the IP address for the NVR will be the address used to access your NVR’s
web user interface on a laptop or PC, please disable DHCP to set the NVR to a static IP.
Click the Test to test the overall health and status of your network connection once complete,
click the Back button to return to the previous menu.
To continue with the startup wizard, click Next.
P2P
The next screen that appears is the P2P screen. This screen allows you to connect your NVR to
your mobile device via the Amcrest View Pro app. The P2P status should read as “Online”. To
download the app, use your mobile device’s camera and scan the Cell Phone Client QR code.
When using the app, use the SN QR Code for quick access to the serial number for your NVR.
Click the Next to continue.
Add Camera
The next screen that appears is the Add Camera screen. This is where you can begin adding
cameras to the NVR. If the cameras are not directly connected to the back of the NVR, please
make sure they are active and on the same network as the NVR before proceeding.
To begin adding a device, click on Device Search to allow the NVR to scan for connected
devices on your network.

11
A list of applicable connected devices will show on the screen. Select your devices by clicking on
the checkbox next to the device and click Add to add the device into the Added Devices menu.
If the status of your camera is red, it indicates the camera is not properly connected to the NVR.
This could be because the password for the camera is not entered properly in the system.
To modify the password for your camera, click on the edit icon (pencil) located in the Edit column
in the Added Device menu.
Select the Password field and use the onscreen keyboard to enter the password for your
camera. Once the password has been entered, click Connect then click Save to continue.
Note: If this is a new device and a password has not been added the password will be admin.
Once the password has been properly set the Status indicator will turn green indicating the
camera has been properly added.
As previously stated, our H.265 compatible products will come factory defaulted to H.264
compression, but for increased performance, the camera's settings can be automatically
switched to H.265 compression. Switching to H.265 compression reduces bandwidth without
sacrificing frames per second or resolution. To activate H.265 compression, click on the
H.265 Auto Switch.
For more information on H.265 compression, please visit: amcrest.com/support
Click on Next to proceed.
HDD Manager
The HDD manager may not be applicable to all models however this screen allows you to view
the status or format any hard drives that are connected inside the NVR. This is typically used for
devices that have multiple hard drives.
To format a hard drive, select a hard drive from the list and click Format. Select the Clear HDD
database toggle switch and click OK to proceed. Enter the NVR’s password that you created
previously and click OK. The NVR will then format the selected hard drive. If you would like to
format other hard drives, please select the drive from the list and repeat the process.
The next screen you will see will be the video wall screen which will display all connected
devices. Right click on the video wall and click on the ‘Main Menu’ from the selections to access
the main menu.
Main Menu Overview
The screenshot below is the main menu screen for the Amcrest NVR console interface:

12
Below are short descriptions for each of the menu items on the main menu:
SEARCH: View, search, and play recorded videos.
AI: Manage and view artificial intelligence and face recognition information and settings.
ALARM: View and search for live alarm information. Configure alarm event actions.
MAINTAIN: View system information, system updates. Import/export configuration files, etc.
BACKUP: Search and backup files using a USB flash drive.
DISPLAY: Configure resolution and display settings.
AUDIO: Configure audio announcements and import audio files.
Management
CAMERA: Add, search, review or edit settings for each camera, including video settings (e.g.
quality, bit rate, color, etc.).
NETWORK: Review and edit TCP/IP, connection, DDNS, Email settings, etc. (e.g., P2P, UPnP,
Multicast, etc.)
STORAGE: Set motion detection IVS schedules, as well as access the hard drive management
interface, FTP, etc.
SYSTEM: Review and edit general system settings such as, video standards, date & time, as
well as adjust firewall settings.
ACCOUNT: Add or remove shared user settings, groups, as well as ONVIF users. Reset security
questions and update reset password email.
Adjusting Camera Settings for Maximum Resolution, FPS, and Bitrate
Most Amcrest products are H.265 compatible. H.265 provides more advanced technology than
H.264 and allows the camera to reduce file sizes which in turn helps to reduce required

13
bandwidth without sacrificing frames per second (FPS) or resolution. However, for maximum
compatibility when accessing your device in a web browser, or other third-party applications, our
H.265 compatible products will come factory default to H.264. For optimal performance, the
device's settings can be upgraded to H.265 compression if needed.
Please note, for higher performance as well when using H.265 compression it is recommended
to adjust bitrate. The bitrate is the number of bits that are processed per unit time by the system
and helps the system to create a tradeoff between bandwidth and image quality.
How to Adjust to H.265 Compression
If the auto switch for H.265 compression was not selected in the camera registration process, the
setting can be adjusted manually. On the Main Menu, under Management, click on Camera.
In the Camera menu, select Encode and click on the Compression drop down menu and select
H.265.
Click Apply to save your settings.
Adjusting Bitrate
Since H.265 compression uses roughly 30% less resources than H.264, the camera will typically
come defaulted to a preset bitrate when switching to H.265. For instance, when switching to
H.265 on a 4K camera, the bitrate may be defaulted to 8192 Kb/S, however, adjusting the bitrate
to a lower value may help to increase the overall efficiency of the camera while viewing playback
or watching live view.
To adjust the bitrate, access the Encode menu and click on the Bit Rate (Kb/S) dropdown
menu. A list of preset bitrates will be displayed as well as a Customized selection which will
allow you to set a customized bitrate if needed.
Please note, when using a 4K camera, it is recommended to keep the bitrate around 1792 Kb/S,
however, different values may be applicable depending on your specific network requirements.
Please refer to the table below regarding recommended resolution and bitrates and custom
thresholds.
Resolution
Recommended Bitrate
Custom Bitrate Threshold
2MP (1080P)
Default Settings
Default Settings
3MP
Default Settings
Default Settings
4MP
Default Settings
Default Settings
5MP
1536 Kb/S
1792 Kb/S
8MP (4K)
1792 - 2048 Kb/S
1825 Kb/S
Note: Adjusting the bitrate to anything lower than the recommended bitrates above may result in
degradation to recordings or to live view. For the best results, if you are adjusting multiple
cameras, it is highly recommended to adjust each camera individually. This may be a trial-and-
error process since most network environments are unique and may vary, however, the bitrate
should range between 1792-2048 Kb/S if using a 4K camera. An optimal customized bitrate
should be around 1825 Kb/S. Click Apply to save the new bitrate settings.
IVS, Motion Detection, and Recording Setup
This section will cover how to set up a recording schedule for your NVR. This is applicable to
regular (24/7 recordings), motion detection, and IVS recordings. IVS stands for intelligent video
system analytics and is the basis for all AI rules associated with your device. This section will
also cover how to set up a recording schedule, email alerts with snapshots, etc.

14
Note:The NVR can only be set up to save recordings or IVS information if a hard drive has
already been installed. However, email alerts with snapshots can still work without a hard
drive installed.
The following setup processes will be shown using the NVR’s built-in interface. However, these
same steps can also be done through the web interface on a computer. For more information on
how to access your device from a web browser, please refer to section, “Computer Access
Setup”. Despite the difference in appearance, the settings pages have similar organizational
structures.
Enabling Recording Options
This menu should be verified to ensure that all recording protocols are enabled. This menu
details, per channel, which streams are enabled or disabled in the NVR. Please note, the
interface shown may differ model to model, however the same concepts will apply. To access
this menu, please refer to the information provided below.
1. On the main menu, click on Storage.
2. Click on Record or Record Mode. This menu displays all active channels and streams being
used for recording. If using snapshots, ensure the Snapshot radio button is enabled on each
stream. To apply the settings to all channels, click on the All radio button.
3. Click on Apply to save the settings to your device.
Setting Up Recording Schedules
1. From the Main Menu, click on STORAGE in the MANAGEMENT section:
Make sure you are on the SCHEDULE > REC page. This is where you can configure your video
recording schedules. To configure a snapshot schedule, click on the Snapshot tab. All video
events will be saved and accessible via the playback menu, if a hard drive is installed, whereas
snapshot events can be emailed. For more information on how to set up Email snapshots, please
refer to section, “Setting Up Email Alerts”. By default, Regular (24/7), MD (Motion Detection) and
IVS recording types willbe activated for all daysas indicated by the different colored bars available
in this menu.
To choose a channel (or camera) for which to configure, click the number next to Channel, then
select either a single channel or All if you would like the schedule to apply to all channels
currently connected to your NVR:
By default, the NVR will have the schedule for each recording type to record 24/7. Also note that
the NVR uses military time from 00:00 to 24:00 hours instead of 12 a.m. to 12 a.m.

15
To edit a recording schedule, select a recording option from the colored boxes. Each recording
option is color coded: Green: Regular (24/7 recording), Yellow: MD (Motion Detection), Red:
(Alarm), Orange: MD&Alarm (a combination of motion detection and alarm recordings), and IVS.
Select which recording type you would like to modify and then use your mouse to adjust the time
via the time bar for your specific recording type.
Click the eraser icon to the right of any day if you would like to clear the entire row of blocks.
To add or remove motion detection blocks to the grid, mark the yellow checkbox next to MD, then
click individual cells or click-and-drag for multiple blocks.
To the left of each day, there are small boxes which can be marked to ‘link’ days together. This is
useful if you want to save time by instantly making changes to multiple days simultaneously.
In the below example, Sunday and Monday are linked, so any blocks that are added or removed
for Sunday will automatically and immediately reflect the same for Monday and vice versa.
The same concept applies when configuring other recording schedule types such as IVS.
Another way to configure recording schedules is by manually setting time periods. Click the
“gear‟ icon to the far right of any day to open the Period page.
Here, the periods (Periods 1 - 6) will be displayed in chronological order. You can set either
Regular, MD, Alarm, MD&Alarm or IVS, checkboxes. You can also copy the period settings
over to other days by checking them individually or checking All. Make sure to click Save when
finished.
Now that you have finished configuring the recording schedules, you may need to copy these
settings over to other channels (or cameras). By default, D1 (Channel 1) will be selected unless
you immediately selected All in the channel window previously. Please note, you can copy these
settings directly over to another channel by clicking Copy.
In the Copy window, you can select individual channels for any cameras you have added to the
NVR or select All:
Click Save when finished.
When finished on this screen, click Apply to save your changes.
Setting Up Email Alerts
Setting up Email alerts will allow you to receive snapshots of events via your email. These events
can be motion detection, IVS, Face Detection, or other events captured by your device. Each
event type must have the “Send Email” option enabled to allow the feature to send snapshots to
your email. To set up email alerts, please refer to the information provided below.
1. On the Main Menu, click on Network located in the Management section.
2. Select Email and Enable the toggle switch.
3. Enter the SMTP information for your email. In this example we will be using Gmail, however
other email services can also be used. If using Gmail, type in “smtp.gmail.com”
4. Enter a port number. This is based on the type of encryption used by your email service. In
this example we will be using port 465, which uses an SSL encryption type. If using TLS, the port
number will be 587.
5. Enter the email address you will be using in the Username field.
6. Enter the password for the email address in the Password field.
7. In the Receiver field, enter your email address. Enter that same email address in the Sender
field.

16
8. Update the subject line for your alerts in the Subject field. The default subject line will be NVR
Alert however this can be changed to anything you would like to use.
9. Make sure the Attachment toggle switch is enabled to enable snapshots to be sent.
10. Click Apply and Test to verify connectivity. Once the test has been successfully sent, click
Save to continue.
11. Check your email to see if you received the email test.
Now, whenever your camera detects motion, you will get email alerts sent to the email that was
set up in the system.
This will include an email with a snapshot of what was seen when the event was triggered.
Setting Up Motion Alerts
Motion detection events are different from IVS or other AI events as they do not use AI
algorithms to function and can be used in conjunction with IVS or other rules as they are
separate features in the system. For more information on configuring motion detection, please
refer to the information below.
1. On the Main menu, click on Alarm
2. Select Video Detection to access the Motion Detect menu. This is the main configuration
page for your motion detection settings. Select which channel you are configuring from the
Channel drop down menu.

17
3. Ensure the toggle switch for motion detection is enabled and adjust any motion detection
settings or motion schedules accordingly.
Adjusting Region Settings
You can set up “regions‟ for motion detection using the region grid on your NVR. By default, the
entire area of view for your cameras will be highlighted with red blocks indicating that all areas of
the live view screen will have active motion detection. However, to prevent false events from
occurring, you can use your mouse to block out certain areas.
If you hover your mouse pointer over the top-center edge of this window, another small window
will appear with options to configure sensitivity and threshold settings as well as to choose
from up to four regions.
Sensitivity - is the measure of how many pixels on the screen need to change before being
considered motion. 0is the lowest value and 100 is the highest.
In plain English: Sensitivity is the difference between a squirrel running up a tree, versus a big
dog running up to and barking at that tree. A squirrel would trigger motion detection at a higher
sensitivity because it takes less change or movement to qualify as motion. But the dog would
trigger motion detection at a lower sensitivity because it takes more change or movement to
qualify as motion.
Threshold - is the degree of movement that needs to occur before the motion is defined as a
motion event and is triggered. 0 is the lowest value and 100 is the highest.
In plain English: Threshold is the difference between a car driving quickly on a street and a car
driving into the field of view, slowing down, and turning into a driveway. The car driving past
would not trigger motion detection based on a certain threshold setting, but the parking car would
trigger motion detection with that same threshold setting. The higher the threshold, the more time
motion needs to occur before motion detection is triggered. The lower the threshold, the less time
motion needs to occur before motion detection is triggered.

18
If sensitivity is set to 100 and threshold to 0, motion detection will be triggered by almost any
change in the field of view, large or small. But if sensitivity is set to 0 and threshold to 100,
motion detection will be extremely difficult to trigger.
The four regions are all different colors, so you can customize the field of view of any camera to
your specific preferences.
To choose another region, hover your mouse pointer near the top center of the region window,
and a small window will appear. Keep your mouse pointer inside that small window and select
either region 2, 3, or 4:
You will be able to click individual blocks or click-and-drag an area with the newly selected color
to highlight portions of the screen. Each new region (or color) has its own unique sensitivity and
threshold settings. The different regions/colors can also overlap one another. To exit the region
setting screen, right click your mouse on the interface.
Adjusting Motion Detection Schedules
Motion detection schedules work the same as the schedules outlined in section: “Setting Up
Recording Schedules.” To adjust a motion detection schedule, click on Period and use your
mouse to adjust the timeline. Click on the settings (gear) icon to set multiple periods. Click on
Save to save your schedule.
3. Click on the “Send Email” checkbox. To enable the NVR to send an email once a motion is
detected.
4. Click on Apply to save the settings to your system.
Once you have set up your settings for one channel, you can copy them to other channels in the
system. If you did not select All after clicking Channel as previously described, click Copy,
select channels to copy to, then click Save.
Click Save to save all the settings made on this page. Click Apply in the Motion Detect menu to
finish saving your motion detection settings to your device.

19
Setting Up AI Events
The AI menu allows the user to manage and view artificial intelligence, ANPR, IVS, face
recognition information, etc. AI features available on the device can be controlled either by the
device or using an AI camera depending on its features.
There are 2 AI types, AI by Camera, which allows the NVR to use the camera's built-in AI
features (if applicable), or AI by Device, which allows the system to use the NVR's built-in AI
features. Since most AI cameras differ model-to-model we will cover what is available via the
NVR using the AI by device protocol.
Note: If using a non-AI camera, please use the AI by Device protocol to set an AI function.
The NVR provides the following AI features built in; Face Detection, Face Recognition, IVS
features, such as tripwire and intrusion, SMD (human and vehicle detection), and heat map.
Other AI features such as people counting and ANPR (license plate reading) will be
controlled by an IPC only.
Set a Smart Plan
A Smart Plan will not be available if using a non-AI camera or an AI camera that supports
only certain features not supported by the NVR. AI features such as IVS and Heat Map can
be used simultaneously, however, Face Detection, People Counting, etc. will have to be used
separately. A smart plan must be enabled for an AI feature to be activated.
Setting Up Face Detection
Face detection is used to allow your device to detect face events. This feature can be used either
by the NVR or by the camera (if supported). For more information on setting up face detection,
please refer to the information provided below.
1: Access the Smart Plan menu and select the channel you would like to configure from the
Channel drop down menu. Click on the Face Detection icon and then click Apply. If using a
non-AI camera, or a camera that does not support face detection, a smart plan may not be
available for the specific channel.
2. Click on the Face Detection menu located in the Parameters section and select which
channel to configure from the Channel drop down menu. Next, choose which face detection type
you will be using from the Type drop down menu. In this example we will be using AI by Device,
however, you can choose AI by Camera to use the camera’s built-in face detection settings, if
applicable. Enable the face detection toggle switch.
3. It is best to leave the Rule settings as default, however, they can be adjusted by clicking on
the Setting button. Use your mouse to adjust the minimum (Min) and maximum (Max) size of the
face detection area.
4. When triggered, the face detection event will be retained in the face detection smart search
menu or snapshots of the event can be emailed to you. To have a snapshot of the event emailed
to you, set up email alerts as described in section: Setting Up Email Alerts and click on the
“Send Email” checkbox. Click Apply to save the setting.
Viewing Face Detection Data
All face detection data retained by the system can be accessed via the Face Detection option
located in the Smart Search menu. Enter a start and end date and time for the event you would
like to view in the Smart Search interface and click Smart Search.

20
A display of all face detection data will be displayed along with facial attributes. Click on the
event you would like to view, and a clip of the event will be displayed in the built-in player. Click
on the play icon to view the event.
Storing a Face Detection Event
Face detection events can be stored on a USB flash drive. Insert the flash drive into a USB port
on the device then click the check box next to the event you wish to store. If you would like to
store all files, click on the All checkbox at the top of the interface. Click Backup to store the
event, or multiple events to the USB flash drive. There will be a “File Type” drop down menu,
select MP4 from the file type menu and click Start.
Once the backup process is complete, click Save. The files will be stored onto your USB flash
drive and the MP4 recordings can be viewed on a computer.
Using Face Recognition
Face recognition is used in conjunction with face detection to locate and determine facial
similarities detected by the system. Images are registered in a face library, by the user, and
accessed via a face recognition smart search tool that is built into the NVR. A USB flash drive
with applicable images (in jpeg format) should be inserted into a USB port on the NVR if
you are importing images locally.
1. Ensure Face Detection is enabled and access the Face Recognition menu.
2. Click on the Face Recognition option in the Parameters menu and verify the correct channel
(camera) is being used. Click on the Enable toggle switch to enable the feature. Click on Apply.
Table of contents
Other Amcrest DVR manuals

Amcrest
Amcrest NVR11H Series User manual

Amcrest
Amcrest AMDV5M32-6TB User manual

Amcrest
Amcrest 960H User manual

Amcrest
Amcrest AMDV4M4 User manual

Amcrest
Amcrest H5 Series User manual

Amcrest
Amcrest AMDV960H4 User manual

Amcrest
Amcrest AMDVTENL8 User manual

Amcrest
Amcrest AMDV7204-2B2D User manual

Amcrest
Amcrest AMDV5M8 User manual

Amcrest
Amcrest General 720P(V2) Mini 1U Series User manual
Popular DVR manuals by other brands

Summit Systems
Summit Systems DIGITAL VIDEO RECORDER Operation manual

Comelit
Comelit AHDVR040 Series quick guide

Dish Network
Dish Network 622 guide Quick reference guide

Vitek
Vitek VT-DVR16000 user guide

MyDepots
MyDepots H.264 Network Embedded DVR instruction manual

Security Labs
Security Labs SLD 245 owner's manual