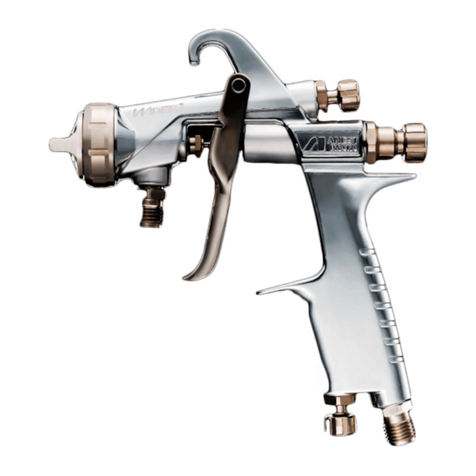
manuals.online logo
Brands
  1. Home
  2. •
  3. Brands
  4. •
  5. Anest Iwata
  6. •
  7. Paint Sprayer
  8. •
  9. Anest Iwata Wider1A User manual

Anest Iwata Wider1A User manual

- 1 -
INSTRUCTION MANUAL
Automatic Spray Guns
Besuretoobservewarning sand cautionsinthisinstruction manual.
Ifnot,itcan causepaintejection and seriousbodilyinjurybydrawingorganicsolvent.
Be sure toobserve following marked itemswhich areespeciallyimportant.
Indicates a potentially hazardous situation which, if not avoided, may result in serious injury or loss
of life.
Indicates a potentially hazardous situation which, if not avoided, may result in minor
or moderate injury or property damage.
Indicates notes which we ask you to observe. The safety precautions in this
instruction manual are the minimum necessary conditions. Follow national and
local regulations regarding fire prevention, electricity and safety as well as your own
company regulations.
Symbol Marking
on the Spray Gun:
II 2 G Ex h X
This ANEST
IWATA spray gun
complies with
2014/34/EU
Directive relating to
equipment and
protective systems
intended for use in
explosive
potentially
atmospheres.
II
2
G
Ex h
IIB
T6
Gb
X
T
Amb
+5°C +40°C
Complies
with
European
Directive
Specific
Marking for
Explosion
Protective
Group II
(Surface)
Category
(Zone 1&2)
Type of
Atmospher
e
(GAS)
Ignition
Protection
(not applied)
Explosion
Group
(Ethylene)
Temperatur
e Class
(≤85°C)
Explosion
Protection
level
(EPL)
Additional
conditions:
Any static
Electricity
should be
discharged
and needs to
be diverted to
the ground via
a conductive
air hose not
included.
Ambient
Temperatu
re
Important specifications
Max. Pressure
0.70MPa / 7.0bar / 100psi
Noise level
83dB(A)
Spray condition
Recommended
Measuring point
1m backwards from spray gun, 1.6m height
Max. temperature
Atmosphere: 5°C ~40°C (41°F~104°F)
Air and Fluid: 5°C ~43°C (41°F~109°F)
Main specifications
Model
Typeof
feed
Nozzleorifice
Φ mm (in)
Aircapassy
Mark
Recommended condition
Airconsumption
l/min(cfm)
Pattern width
mm (in)
Air&fluidconnection
Mass
g(lbs.)
*1Atomizingairpressure
MPa(bar/PSI)
Fluidoutput
ml/min
WIDER1A-08E2P
Pressure
0.8 (0.031)
E2P
0.29 (2.9/43)
150
270 (9.5)
190 (7.5)
【Air】
Atomizing air:Φ8
Operation air:Φ6
【Fluid】
WIDER1A:G1/4
WIDER2A:G3/8
400
(0.88)
WIDER1A-10E2P
1.0 (0.039)
200
220 (8.7)
WIDER1A-10E1
1.0 (0.039)
E1
100
90 (3.2)
140 (5.5)
WIDER1A-13H2
1.3 (0.051)
H2
250
260 (9.2)
230 (9.1)
WIDER1A-15H2
1.5 (0.059)
270
255 (10.0)
WIDER1A-05R
0.5 (0.020)
05R
20
40 (1.4)
35 (1.4)
WIDER2A-12G2P
1.2 (0.047)
G2P
500
530 (18.7)
400 (15.7)
420
(0.93)
WIDER2A-15K2
1.5 (0.059)
K2
270
330 (11.7)
340 (13.4)
WIDER2A-20R2
2.0 (0.079)
R2
400
360 (12.7)
320 (12.6)
WIDER2A-25W1
2.5 (0.098)
W1
500
360 (12.7)
330 (13.0)
*1. Atomizing air pressure means air pressure at spray gun inlet when trigger is pulled and air flows.
This manual contains IMPORTANT WARNINGS and
INSTRUCTIONS.
Equipment in this manual is exclusively for painting
purposes.
Do not use for other purposes.
The operator shall be fully conversant with the
requirements stated in this instruction manual
including important warnings, cautions and operation
and correct handling.
Read and understand the instruction manual, before
use and retain for reference.
Nozzle needle assy combination
Model
Fluid nozzle
Fluid needle
Mark
Orifice Φ
mm (in)
Mark
WIDER1A
Φ0.5
/W1/05
05H WIDER1A
Φ0.8
/W1/08
12H WIDER1A
Φ1.0
/W1/10
Φ1.3
/W1/13
15H WIDER1A
Φ1.5
/W1/15
WIDER2A
Φ1.2
/W2/12
12H WIDER1A
Φ1.5
/W2/15
15H WIDER1A
Φ2.0
/W2/20
20H WIDER2A
Φ2.5
/W2/25
25H WIDER2A
- 2 -

Parts list
◆Marked parts are wearable parts.
◎When ordering parts, specify spray gun’s model, part name with ref. No. and marked No. of air cap assy, fluid nozzle and fluid needle.
◎When replacing fluid nozzle or/and fluid needle, please replace both fluid nozzle and fluid needle assy together.
◎When receiving the spray gun, make sure that it has not been damaged during transport or storage and also check that all the above contents are inside the box.

Safety precautions
No.
Description
Q’ty
No.
Description
Q’ty
1
Air cap assy
1
6
Air valve seat assy
1
1-1
Air cap cover
1
◆
6-1
O ring
1
1-2
Air cap packing
1
7-1
Piston
1
1R
Air cap assy
1
◆
7-2
Piston packing
1
1-2R
Air cap packing
1
8
Needle spring
1
◆
2
Fluid nozzle-fluid needle assy
1
9
Piston Spring
1
・Fluidnozzle
10
Fluid adj. set assy
1
・Fluid needle ASSY
11
Cover
1
◆
3
Fluid needle packing set
1
12
Bolt set
2
5
Pattern Adj. assy
1
13
Brush
1
5R
Plug
1
14
Air nipple
1
15
Half union(Φ6)
1
16
Half union(Φ8)
1
Fire and explosion
1. Spark and open flames are strictly prohibited.
Paints can be highly flammable and can cause fire.
Avoid any ignition sources such as smoking, open flames,
electrical goods, etc.
2. Never use the following HALOGENATED HYDROCARBON SOLVENTS
which can cause cracks or dissolution on spray gun body (aluminum) by chemical reaction.
unsuitable solvents:methyl chloride, dichloromethane, 1.2-dichloroethane,carbon tetrachloride, trichloroethylene, 1.1.1-trichloroethane
(Be sure that all fluids and solvents are compatible with spray gun parts. We are ready to supply a material list used in the product)
3. Ground spray gun securely.
Use grounded gun stay. Ground resistance : Less than 1MΩ. Check the earth stability periodically.
If not, insufficient grounding can cause fire and explosion due to static electric sparking.
Improper use of equipment
1. Never point spray gun toward people or animal.
If done, it can cause inflammation of eyes and skin or
bodily injury.
2. Never exceed maximum operating pressure or temperature.
3. Be sure to release air and fluid pressures before cleaning,
disassembling or servicing.
If not, remaining pressure can cause bodily injury or property damage.
To release pressure, first shut off the supply of compressed air and fluid to the spray gun.
Then squeeze trigger, while the spray is pointed in a safe direction.
4. Tip of fluid needle and tip of fluid nozzle has a sharp point.
Avoid touching the tip of the fluid needle or fluid nozzle during maintenance to prevent injury.
Protection of human body
1.Use only in a well-ventilated area
(such as in a spray booth).
If not, poor ventilation can cause organic solvent poisoning
and fire hazard.
2.Always wear protective gear (safety glasses, mask, gloves).
If not, paint, solvents, etc., can cause irritation of eyes and skin.
If you feel something wrong with eyes or skin, immediately see
a doctor.
3.Wear earplugs if necessary.
Noise level can exceed 80dB(A), depending on operating conditions and painting site.
Other precautions
1. Never alter this spray gun.
If done, it can cause insufficient performance and failure.
2. Only enter the working areas of other equipment (robots, reciprocators, etc.) after machines have safely been shut down.
If not, contact with them can cause injury.
3. Never spray foods or chemicals through this spray gun.
If done, it can cause accident by corrosion of fluid passages or adversely affect health by mixed foreign matter.
4. If something goes wrong, immediately stop operation and find the cause. Do not use again until you have solved the problem.
- 3 -
How to connect
Step1
Fit the gun to fitting stay, aim at spraying direction and fix it.
Step2
Connect atomizing air hose to atomizing air side (Cap marked side) and operating air hose to operating air side( CYL marked side).
Step3
Connect fluid hose to fluid inlet side.
Step4
supply thinner to automatic gun. Spray and clean fluid passage with thinner.
Step5
supply paint to automatic gun and test spray and adjust air volume, fluid output and pattern width as necessary.
Maintenance and inspection
Use clean air filtered through air dryer and air filter. ・・・If not, dirty air can cause painting failure.
If you use this gun for the first time after purchasing, clean fluid passages spraying thinner and remove rust preventive oil.
If not, remaining preventive oil can cause painting failure such as fish eyes.
Use three-way solenoid valve of more than φ4 inner dia. cross-sectional area and air hose of overφ6 inner dia. and less than 10m length.
If not, small dia. of solenoid valve and longer air hose between three-way solenoid valve and gun can cause delay in operation.
Firmly fix hose to spray gun.・・・If not, disconnection of hose and drop of container can cause bodily injury.
First release air and pressure fully according to item No. 3 of “Improper use of equipment” of WARNING on page 2.
Only an experienced person who is fully knowledgeable of the equipment should perform maintenance and inspection.
Use neutral cleaner: pH value shall be 6 to 8, otherwise could cause corrosion.
Only use genuine ANEST IWATA parts for any maintenance or repairs.
Step-by-step procedure
1
Pour remainingpainttoanothercontainer. Cleanfluidpassagesand aircap assy.
Sprayasmallamountof thinner into fluid passagesto cleanthem.
1
Incompletecleaningcanresultin poorspraypatternandcontaminated paint.
Itisespeciallyimportant cleanthegunfullyandpromptlyafter usingtwo-componentpaint.
2
Clean eachsection withbrushsoakedwith thinnerandwipe outwithwastecloth.
2
Soaking whole spray gun in solvent may cause spraygun malfunction.Also soaking air cap assy. itself
forextendedperiodmay causeadefective spraypattern.
When cleaning,never scratchtheaircapassy., fluid nozzle,orfluidneedle.
Avoid touchingordamaging thetip ofthe fluidnozzleorneedle.
3
Beforedisassembly,fully cleanfluidpassages.
3
Duringdisassembly,donotscratch seatsection.
(1)
Disassemblefluidnozzle.
Useringspanner,boxwrenchoroptionalexclusivespanner(code No.035386000)
to disassemblefluid nozzle.
(1)
Remove fluid nozzle after removing fluid needle set or while keeping fluid needle pulled, in order to
protectseatsection.
(2)
Disassemblefluidneedleassy
Remove fluidadj. setandpulloutfluid needlesetfromgunbody.
Payattention so that spring does not suddenly fly outsince fluid adj. set is strongly pushedby fluid
needlespringandpiston spring.
(2)
Pull fluidneedle setafterloosening fluid needlepacking settoprotectfluid needlepacking set.
(3)
Disassemblepistonset
Screwrear sectionof fluidneedle setinto pistonand pullout pistonset.
(3)
Be carefulnot todamagepistonpackingwhen pullingoutpistonset.
(4)
Disassemblearivalveseatassy
Useacommerciallyavailableboxwrench(14mm).
(4)
Be carefulnotto damageOringand seatsection whendisassembleairvalveseatassy.
4
When you want to adjust fluid needle packing set, first tighten it by hand while fluid needle set
remainsinserted.Then tightenit further about1/6turn (60-degree) byspanner.
When you removeneedle packing set,donotleave
plastic pieceofneedlepackingsetin thegunbody
4
If youtightenfluid needlepacking settoomuch,fluid needle setwillnotmovesmoothly,resulting inpaint
leakage from tip of fluid nozzle. Try to adjust it carefully while pulling piston and confirming movement of
fluid needleset.
When you tightenit toomuch, firstfullyloosenit and then tighten itagain carefully.
5
Turn pattern adj. knob counterclockwise to fully open. And then tighten pattern adj.guide into gun
body.
5
Iffluid adj.setisnot fully opened,tipofit cancontactanddamagetipofgunbodysetand causeseizure
of thread.
6
Noteson theFluid adj.assy.
6
(1)
Howto installon thebody
To assemble the Fluid adj. assy, open the Fluid adj. assy
fullyand applysilicone-freegreaseoroilto thethreads.
To install/removetheFluidadj.assy,turnthe knurledpart.
(1)
If fluid adj. set is not fully opened, tip seat section of it can contact and damage fluid nozzle and cause
seizure ofthread.
(2)
Howtoadjust
To adjust the Fluid adj. assy, turn the groove on the knob
part.
The standard for fully closing the paintadjustment device is
thatthe gap between the guide and the knob is WIDER1A:
2mm,WIDER2A:1 mm:WIDER2A:1mm.
Do notovertighten.
(2)
Ifyou over-tighten,the nozzle will bedeformed.
(3)
Other
Do notdisassemble theFluid adj.assy.
(3)
Ifyou disassembleit,youmaynotbeable toreassemble itdue tolossofparts.
knurled part
knob part
Distance between guide and knob
- 4 -
How to operate
Step1
Adjust operating air pressure from 3 to 4 bar (43 to 57 PSI).
NOTE: Valve orifice inside three- way solenoid valve should be minimumφ4mm (0.157 in) and also operating air
hose length should be within 10m (32.8ft) with the inner diameter more than φ6mm 0.236in) to avoid delayed
operation and any kind of failure.
Step2
Although atomizing air pressure varies according to spray conditions, pulling the piston of the gun with the pattern
adj. set fully opened, adjust it normally 3 to 4 bar (43 to 57 PSI) with WIDER1A / WIDER1A-05R / WIDER2A.
Step3
Recommended paint viscosity differs according to paint property and painting conditions. 15 to 23 sec/Ford cup#4.
is recommendable.
Step4
Set the spray distance from the gun to the work piece as near as possible within the range of 150~200 mm (5.9
to 7.9 in) with WIDER1A / WIDER1A-05R, 200~250 mm (7.9 to 9.8 in) with WIDER2A.
Where to inspect
Parts replacement standard
1
Eachholepassage ofair cap and fluidnozzle
Replace if it is crushed or deformed.
2
Packing and O ring
Replace if it is deformed or worn out.
3
Leakage from seat section between fluid nozzle and fluid needle set
Replace them if leakage does not stop after fully cleaning fluid nozzle and fluid needle set. If you
replace fluid nozzle or fluid needle set only, fully match them and confirm that there is no leakage.
Spray Pattern
Problems
Remedies
Fluttering
(1)
Air enters between fluid nozzle and tapered
seat of gun body.
(1)
Remove fluid nozzle to clean seat. If it is damaged, replace nozzle.
(2)
Air is drawn from fluid needle packing set.
(2)
Tighten fluid needle packing.
(3)
Air enters at fluid container fitting nut or fluid
hose joint.
(3)
Fully tighten joint section.
Crescent
(1)
Paint buildup on air cap partially clogs horn
holes.
Air pressure from both horns differs.
(1)
Remove obstructions from horn holes with attached brush.
But do not use metal objects to clean horn holes.
Inclined
(1)
Paint buildup or damage on fluid nozzle
circumference and air cap center.
(1)
Remove obstructions. Replace if damaged.
(2)
Fluid nozzle is not properly fitted.
(2)
Remove fluid nozzle and clean seat section.
Split
(1)
Paint viscosity too low.
(1)
Add paint to increase viscosity.
(2)
Fluid output too high.
(2)
Tighten fluid adj. knob to reduce fluid output. Or turn pattern adj. valve set clockwise.
Heavy Center
(1)
Paint viscosity is too high.
(1)
Add thinner to reduce viscosity.
(2)
Fluid output is too low.
(2)
Turn fluid adj. valve knob counter-clockwise to increase fluid output.
Spit
(1)
Fluid nozzle and fluid needle set are not
seated properly.
(1)
Clean or replace fluid nozzle and fluid needle set.
(2)
The first-stage travel of trigger (when only
air discharges) decreases.
(2)
Replace fluid nozzle and fluid needle set.
(3)
Paint buildup inside air cap set.
(3)
Clean air cap set.
R1:retighten R2:adjust R3 : clean R4 : replace parts
Problem
Where it
occurred
Parts to be checked
Cause
Remedy
R1
R2
R3
R4
Paint leaks
Fluid nozzle
Fluid nozzle~fluid needle set
Dirt or damage, wear on seat surface
○
○
Loose fluid needle adj. knob
○
Wear on needle spring
○
Fluid nozzle~gun body
Insufficient tightening
○
Dirt or damage, wear on seat surface
○
○
Fluid needle packing set~needle set
Needle does not return due to packing set too
tight
○
○
Needle does not return due to paint set too tight
○
○
Needle packing
set
Needle packing set ~ Fluid needle
Wear
○
○
Needle packing set
Insufficient tightening
○
○
Paint does not
flow
Tip of gun
Fluid adj. knob
Insufficient tightening
○
Tip hole of nozzle
Clogged
○
Paint filter
Clogged
○
○
Insufficient tightening
○
Air leaks
(from tip of air
cap)
Piston
Piston
Dirt or damage, wear on seat surface
○
○
Air valve seat set
Wear on needle spring
○
○
Wear on air valve spring
○
O ring
Damage or deteriorated
○
Manual No. 03018710
Code No. T1076-02
3176, Shinyoshida-cho, Kohoku-ku, Yokohama, 223-8501, Japan

Other manuals for Wider1A

1

This manual suits for next models

11

Other Anest Iwata Paint Sprayer manuals

Anest Iwata WIDER2L-10G2P User manual

Anest Iwata

Anest Iwata WIDER2L-10G2P User manual

Anest Iwata WS400 Series User guide

Anest Iwata

Anest Iwata WS400 Series User guide

Anest Iwata ALS 423 TX Instructions for use

Anest Iwata

Anest Iwata ALS 423 TX Instructions for use

Anest Iwata LPH-80 User manual

Anest Iwata

Anest Iwata LPH-80 User manual

Anest Iwata WRA-M200 User manual

Anest Iwata

Anest Iwata WRA-M200 User manual

Anest Iwata NEW 77 User manual

Anest Iwata

Anest Iwata NEW 77 User manual

Anest Iwata COG1-H Series User manual

Anest Iwata

Anest Iwata COG1-H Series User manual

Anest Iwata MSA-200 User manual

Anest Iwata

Anest Iwata MSA-200 User manual

Anest Iwata ALS 333 C User guide

Anest Iwata

Anest Iwata ALS 333 C User guide

Anest Iwata LPH-80 User manual

Anest Iwata

Anest Iwata LPH-80 User manual

Anest Iwata TOF-5 User manual

Anest Iwata

Anest Iwata TOF-5 User manual

Anest Iwata AP-96-05 User manual

Anest Iwata

Anest Iwata AP-96-05 User manual

Anest Iwata TT-3B User manual

Anest Iwata

Anest Iwata TT-3B User manual

Anest Iwata WA-M220 User guide

Anest Iwata

Anest Iwata WA-M220 User guide

Anest Iwata W-61-0 User manual

Anest Iwata

Anest Iwata W-61-0 User manual

Anest Iwata N77 User manual

Anest Iwata

Anest Iwata N77 User manual

Anest Iwata Wider1A User manual

Anest Iwata

Anest Iwata Wider1A User manual

Anest Iwata MSGS-200 250L User manual

Anest Iwata

Anest Iwata MSGS-200 250L User manual

Anest Iwata WIDER2 Series User manual

Anest Iwata

Anest Iwata WIDER2 Series User manual

Anest Iwata DDP 90 E Series User manual

Anest Iwata

Anest Iwata DDP 90 E Series User manual

Anest Iwata MSG-200 User manual

Anest Iwata

Anest Iwata MSG-200 User manual

Anest Iwata W-71 User manual

Anest Iwata

Anest Iwata W-71 User manual

Anest Iwata MSU B193 User manual

Anest Iwata

Anest Iwata MSU B193 User manual

Anest Iwata Classic plus Series User manual

Anest Iwata

Anest Iwata Classic plus Series User manual

Popular Paint Sprayer manuals by other brands

Titan POWRLINER 4500 Service manual

Titan

Titan POWRLINER 4500 Service manual

Efco Sa 2026 Operators instruction book

Efco

Efco Sa 2026 Operators instruction book

IKA MS 3 basic operating instructions

IKA

IKA MS 3 basic operating instructions

Kremlin-Rexson XCITE AIRMIX manual

Kremlin-Rexson

Kremlin-Rexson XCITE AIRMIX manual

IKA Vortex 3 operating instructions

IKA

IKA Vortex 3 operating instructions

Fimco 9-200 owner's manual

Fimco

Fimco 9-200 owner's manual

Graco GTS-2500 B Series Instructions-parts list

Graco

Graco GTS-2500 B Series Instructions-parts list

DeVilbiss NEPTUNE Series Operation manual

DeVilbiss

DeVilbiss NEPTUNE Series Operation manual

Truper FUB-18 manual

Truper

Truper FUB-18 manual

WAGNER F230 owner's manual

WAGNER

WAGNER F230 owner's manual

Graco RTX 1500 Operation and Parts

Graco

Graco RTX 1500 Operation and Parts

Sumake SS-1140SS instruction manual

Sumake

Sumake SS-1140SS instruction manual

Binks Cub SLG quick start guide

Binks

Binks Cub SLG quick start guide

Husky HDS650 Operating instructions and parts manual

Husky

Husky HDS650 Operating instructions and parts manual

Villager PS 15 E Original instruction manual

Villager

Villager PS 15 E Original instruction manual

Mesto 3132 FE Technical data

Mesto

Mesto 3132 FE Technical data

Harvest TEC 675 owner's manual

Harvest TEC

Harvest TEC 675 owner's manual

Micron Herbidome 350 instruction manual

Micron

Micron Herbidome 350 instruction manual

manuals.online logo
manuals.online logoBrands
  • About & Mission
  • Contact us
  • Privacy Policy
  • Terms and Conditions

Copyright 2025 Manuals.Online. All Rights Reserved.