manuals.online logo
Brands
  1. Home
  2. •
  3. Brands
  4. •
  5. Anest Iwata
  6. •
  7. Paint Sprayer
  8. •
  9. Anest Iwata LPH 300 LV User manual

Anest Iwata LPH 300 LV User manual

Model Nozzle Air cap Air pressure Air pressure Fluid Air Pattern Weight
orifice set at gun inlet inside air cap output consumption width
(ø mm) Mark bar (PSI) bar (PSI) ml/min l/min(cfm) mm(in) g
LPH-300 LV Gravity feed
LPH-300-104LV 1.0 (0.039) 1.0 (14) 0.5 (7.1) *80 200 (7.1) 180 (7.1)
LPH-300-104LV 1.0 (0.039) 1.3 (18) 0.7 (10) 50 240 (8.5) 200 (7.9)
LPH-300-124LV 1.2 (0.047) 1.0 (14) 0.5 (7.1) *90 200 (7.1) *210 (8.3)
LPH-300-124LV 1.2 (0.047) 1.3 (18) 0.7 (10) 70 240 (8.5) 210 (8.3)
LPH-300-134LV 1.3 (0.051) 1.0 (14) 0.5 (7.1) *120 200 (7.1) *220 (8.7)
LPH-300-134LV 1.3 (0.051) 1.3 (18) 0.7 (10) 80 240 (8.5) 230 (9.1)
LPH-300-144LV 1.4 (0.055) 1.0 (14) 0.5 (7.1) *130 200 (7.1) *230 (9.1)
LPH-300-144LV 1.4 (0.055) 1.3 (18) 0.7 (10) 90 240 (8.5) 250 (9.8)
LPH-300-164LV 1.6 (0.063) 1.3 (18) 0.7 (10) 110 240 (8.5) 230 (9.1)
LPH-300-184LV 1.8 (0.070) 1.3 (18) 0.7 (10) 130 240 (8.5) 230 (9.1)
LPH-300-204LV 2.0 (0.078) 1.3 (18) 0.7 (10) 150 240 (8.5) 230 (9.1)
Manufactured by: ANEST IWATA Corporation 3176,Shinyoshida-cho, Kohoku-ku, Yokohama, 223-8501 Japan
Instruction Manual
MJ1688-01EREV.01
IMPORTANT
This spray gun should be operated only by an adequately trained operator, for safe use and maintenance of the equipment. Any
misuse or handling other than those indicated in this Instruction Manual is not covered by guarantee. ANEST IWATA disclaims
all responsibility for any accident or damage caused by failure to observe the operational and safety procedures in this manual.
In the interest of user friendliness, this manual contains information in a brief and concise form.
For any additional information you may require regarding spray gun operations, or if any missing parts or any damage during
transportation is found, please contact your nearest ANEST IWATA Company (see last cover page).
IMPORTANT SPECIFICATIONS
Be sure to observe warnings and cautions in this instruction manual.
If not, it can cause paint ejection and serious bodily injury by drawing organic solvent.
Be sure to observe following marked items which are especially important.
WARNING Indicates a potentially hazardous situation which, if not avoided, may result in serious injury or loss of life.
CAUTION Indicates a potentially hazardous situation which, if not avoided, may result in minor or moderate injury or pro-
perty damage.
IMPORTANT Indicates notes which we ask you to observe. The safety precautions in this instruction manual are the mini-
mum necessary conditions. Follow national and local regulations regarding fire prevention, electricity and
safety as well as your own company regulations.
TECHNICAL SPECIFICATIONS
Max. Pressure: 6.8 bar (98 PSI) Max. Temperature:
Noise Level (LAeqT) 70.1 dB (A) Atmosphere 5 ~ 40 °C
Spray conditions Recommended Air and fluid 5 ~ 43 °C
Measuring point 1m backwards from gun, 1,6 m height Air connection: G 1/4”
Fluid connection: G 1/4”
This ANEST IWATA spray guns kit complies to ATEX regulations 94/9/EC, protection level:
II 2 G X Suitable for using Zones 1 and 2.
X marking: Any static electricity discharge from the spray gun is to be diverted to the ground via the conductive air hose as stipulated.
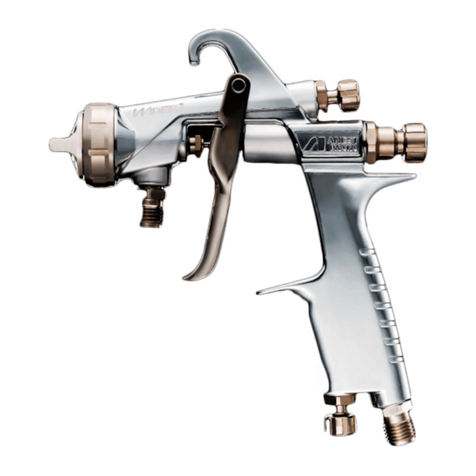
LPH 300 LV LOW PRESSURE SPRAY GUN
Before use, adjustment or maintenance, it is important to read this instruction manual very
carefully. This manual must be stored in a safe place for any future reference that may be necessary.
GB
* Tested with 12 sec/Ford cup #4 automotive repair paint.
LV4 320
ANEST IWATA Italia S.r.l.
Corso Vigevano, 46 - 10155, Torino (Italy)
Tel. diretto +39 011 - 24 80 868 - Fax: +39 011 - 85 19 44
[email protected] www.anest-iwata.it
ANEST IWATA Iberica
Calle de Les Teixidores, 3-5
08918 - Badalona (Barcelona)
Tel.:+34 93 32 05 993 - Fax.:+34 93 32 05 965
[email protected] www.anest-iwata.es
ANEST IWATA Deutschland
Mommsenstrasse 5
04329 Leipzig
Telefon: +49 (0)341 241 44 30 - Fax: +49 (0)341 252 55 95
[email protected] www.anest-iwata.de
ANEST IWATA Europe S.r.l.
Corso Vigevano, 46 - 10155, Torino (Italy)
Direct Tel. +39 011 - 22 74 402
Fax +39 011 - 22 74 000
[email protected]
www.anest-iwataeu.com
ANEST IWATA Scandinavia
Ögärdesvägen 6C, 433 30 PARTILLE - Sweden
Tel. +46 (0)31 - 340 28 60 - Fax +46 (0)31 - 340 28 69
[email protected] www.anest-iwata.se
ANEST IWATA France
25 rue de Madrid - 38070 St Quentin Fallavier - France
Tél. +33 (0)4 - 74 94 59 69 - Fax +33 (0)4 - 74 94 34 39
[email protected] www.anest-iwata.fr
ANEST IWATA U.K.
7 Chester Road, Colmworth Business Park, Eaton Soconn
St. Neots - CAMBRIDGESHIRE
PE19 8YT
Tel.: +44 (0) 1480 40 54 19 Fax: +44 (0) 1480 21 76 10
[email protected] www.anest-iwata.co.uk
European Sales Branches:
72
SAFETY WARNINGS
1. Sparks and open flames are strictly prohibited.
Paints can be highly flammable and can cause fire.
Avoid any ignition sources such as smoking, open flames, electrical goods, etc.
2. Never use the following HALGOGENATED HYDROCARBON SOLVENTS
which can cause cracks or dissolution on gun body (aluminium) by chemical reaction.
- Unsuitable solvents methyl chloride, dichloromethane, 1.2-dichloroethane,carbon tetrachloride, trichloroethylene, 1.1.1-
trichloroethane
- Be sure that all fluids and cleaners are compatible with gun parts.
We can supply a list of materials used to manufacture the product.
3. Securely ground spray gun by using air hose with built-in ground wire.
Ground wire : Less than 1MΩCheck the earth stability periodically.
If not, insufficient grounding can cause fire and explosion due to static electric sparking.
1. Never point gun towards people or animals.
If done, it can cause inflammation of eyes and skin or bodily injury.
2. Never exceed maximum operating pressure and maximum operating Temperature.
3. Be sure to release air and fluid pressures before cleaning, disassembling or servicing.
If not, remaining pressure can cause bodily injury due to improper operation or scattering of cleaning liquid.
In order to release pressure, first stop supply of compressed air, fluid and air to spray gun. Then remove fluid
adj. knob and pull fluid needle set towards you.
4. Tip of fluid needle set has a sharp point.
Do not touch the tip of fluid needle during maintenance for the protection of the human body.
1. Use in a well-ventilated site by using spray booth.
If not, poor ventilation can cause organic solvent poisoning and catch fire.
2. Always wear protective gear safety glasses, mask, gloves.
If not, cleaning liquid, etc., can cause inflammation of eyes and skin.
If you feel something wrong with eyes or skin, immediately see a doctor.
3. Wear earplugs if necessary.
Noise level can exceed 85 dB(A), depending on operating conditions and
painting site
4.If operators pull the trigger many times during operation, it may cause carpal tunnel syndrome.
Rest if you feel any discomfort in your hand.
1. Never alter this spray gun.
If done, it can cause insufficient performance and failure.
2. Enter working areas of other equipment (robots, reciprocators, etc.) after machines have been turned off.
If not, contact with them can cause injury.
COMMENTS
FIRE OR EXPLOSION HAZARD
IMPROPER USE OF EQUIPMENT
PROTECTION OF HUMAN BODY
OTHER PRECAUTIONS
Fluid nozzle Fluid needle set
Orifice Mark Mark
ø mm (in)
1.2 (0.047) 100LV/12 30008
1.4 (0.055) 100LV/14 10013
1.6 (0.063) 100LV/16 10013
36
SPARE PARTS LIST
Marked parts are wearable parts.
NOTE: When ordering parts, specify gun’s
model, part name with ref.No. and marked
No. of air cap set, fluid nozzle and fluid nee-
dle.
DESCRIPTION REF.PART
AIR CAP SET 1
FLUID NOZZLE + NEEDLE SET 2
FLUID NOZZLE 2-1
FLUID NEEDLE SET 2-2
NEEDLE PACKING CARTRIDGE 20
GUN BODY SET 5
AIR NIPPLE 5-1
FLUID NIPPLE 5-2
PATTERN ADJ. SET 6
AIR VALVE SEAT SET 7
O RING 7-1
AIR VALVE 8
AIR VALVE SPRING 9
FLUID ADJ. GUIDE 10
FLUID NEEDLE SPRING 11
FLUID ADJ. KNOB 12
AIR VALVE SHAFT 13
AIR ADJ. SET 14
TRIGGER STUD 15
TRIGGER 16
E STOPPER 17
BRUSH 18
FLUID NOZZLE
FLUID NEEDLE SET
COMBINATION
PARTS LIST
3. Never spray foods or chemicals through this gun.
If done, it can cause accident by corrosion of fluid passages or adversely affect health by mixed foreign matter.
4. If something goes wrong, immediately stop operation and find the cause. Do not use again until you have solved the
problem.
HOW TO CONNECT
1. Connect an air hose to air nipple tightly.
2. Connect a gravity cup, to fluid nipple tightly.
3. Flush the gun fluid passages with a compatible cleaner.
4. Pour paint into container, test spray and adjust fluid output as well as pattern width.
HOW TO OPERATE
Recommended paint viscosity differs according to paint property
and painting conditions. 12 to 23 sec. / Ford cup#4 is recommendable.
Keep fluid output as small as possible to the extent that the job will
not be hindered. It will lead to better finishing with fine atomization.
Set the spray distance from the gun to the work piece as near as
possible within the range of 100_200 mm (3.9_7.9 in).As this gun is
operated at low air pressure, high transfer efficiency will not be obtained
if the spray distance is too far.
The gun should be held so that it is perpendicular to the surface of the work
piece at all times. Then, the gun should move in a straight and horizontal line.
Arcing the gun causes uneven painting.
Pulling the trigger of the gun with the pattern adj. set fully opened adjust
the air regulator in the spray booth to obtain 1.0~1.3 bar ( 14~18 PSI) at the
gun inlet as issued on specifications table ahead.
In this way the gun will atomize within 0.7 bar (10 PSI) inside air cap.
NOTE: Using air hose 12m (39.4ft) long, the inner diameter must be
a minimum 8 mm (0.315 in) so the gun can have the correct air volume to atomize at 0.7 bar (10 PSI) inside air cap.
CAUTION
- Use clean air filtered through air dryer and air filter. If not, dirty air can cause painting failure.
- When you use this gun for the first time after purchasing, adjust fluid needle packing set.
Slowly tighten fluid packing seat and loosen a bit when fluid needle set does not return
smoothly, and adjust so that fluid needle set smoothly moves.
- When you use this gun for the first time after purchasing, clean fluid passages spraying
cleaner and remove rust preventive oil.
If not, remaining rust preventive oil can cause painting failure such as fish eyes.
- Firmly fix cup to spray gun. If not, disconnection and drop of cup can cause bodily
injury.
OTHER PRECAUTIONS
100.200 mm
3.9-7.9
in
Atomizing air pressure
Air regulator
outlet pressure
54
PROBLEMS AND REMEDIES
Problem Where it Parts to be Cause Remedy
occurred checked Retighten Adjust Clean Replace
Air leaks Air valve set Air valve *Dirt or damage on seat x x
(from tip
of air cap) Air valve seat set *Dirt or damage on seat x x
*Wear on air valve spring x
O ring *Damaged or deteriorated x
Paint Fluid nozzle - *Dirt, damage, wear
leaks fluid needle set on seat x x
*Loose fluid needle
adj. knob x
*Wear on needle spring x
Fluid nozzle Fluid nozzle - *Insufficient tightening x
gun body *Dirt or damage on seat x x
Fluid needle - *Needle does not return due
packing set to packing set too tight x x
*Needle does not return due
to paint buildup
on fluid needle x x
Fluid needle Needle packing *Wear x x
set, needle set
Packing seat *Insufficient tightening x
Paint does not Tip of gun Fluid adj. knob *Insufficient opening x
flow Tip hole of nozzle *Clogged x
Paint filter *Clogged x x
TROUBLESHOOTING
Spray Pattern Problems Remedies
1.Air enters between fluid nozzle and 1. Remove fluid nozzle to clean seat.
Fluttering tapered seat of gun body. If it is damaged, replace nozzle.
2.Air is drawn from fluid needle packing set 2. Tighten fluid needle packing.
3.Air enters at fluid container fitting nut. 3. Fully tighten joint section.
1.Paint buildup on air cap partially 1. Remove obstructions from horn holes with
Crescent clogs horn holes. Air pressure from attached brush. But do not use metal
both horns differs. objects to clean horn holes.
1.Paint buildup or damage on fluid nozzle cir- 1. Remove obstructions.
Inclined cumference and air cap center. Replace if damaged.
2. Fluid nozzle is not properly fitted. 2. Remove fluid nozzle, clean seated section
1.Paint viscosity too low. 1. Add paint to increase viscosity.
Split 2.Fluid output too high. 2. Tighten fluid adj. knob to reduce fluid output
or turn pattern adj. knob clockwise.
Heavy 1.Paint viscosity is too high. 1. Add thinner to reduce viscosity.
Center 2.Fluid output is too low. 2. Turn fluid adj. knob counter-clockwise to
increase fluid output.
1.Fluid nozzle and fluid needle set are 1. Clean or replace fluid nozzle and fluid
Spit not seated properly. needle set.
2.The first-stage travel of trigger 2. Replace fluid nozzle and fluid
(when only air discharges) decreases. needle set.
3. Paint buildup inside air cap set. 3. Clean air cap set.
MAINTENANCE AND INSPECTION
Step-by-step procedure Important
1.Pour remaining paint to another container. Clean fluid passages and air cap set. 1. Incomplete cleaning can fail pattern shape and uniform particles.
Spray a small amount of cleaner to clean fluid passages. Especially clean fully and promptly after use with two-component paint.
2.Clean each section with brush soaked with cleaner and wipe out with waste cloth. 2. Do not immerse the whole gun in cleaner. If done, it can damage parts.
When cleaning, never scratch any holes of air cap set, fluid nozzle, or
fluid needle set.
3.Before disassembly, fully clean fluid passages. 3. During disassembly, do not scratch seat section.
(1) Disassemble fluid nozzle. (1) Remove fluid nozzle after removing fluid needle set or while keeping
Use ring spanner, box wrench or optional exclusive spanner to remove fluid nozzle. fluid needle pulled, in order to protect seat section.
(2) Disassemble fluid needle set. (2) Be careful when handling tip of fluid needle set since it is sharp.
You do not need to remove fluid adj. guide set from gun body. Disassemble fluid adj. guide set as little as possible.
Remove fluid adj. knob and fluid needle spring, then pull out fluid needle
spring, and then pull out fluid needle set from back of fluid adj. guide set.
4.The fluid needle packing set, must be adjusted while the fluid needle set is inser- 4.Too much tightening of fluid needle packing set can cause bad movement
ted.Tighten fluid needle packing seat by hand and then tighten further by spanner. of fluid needle set and fluid leakage from the tip of fluid needle set.
5.In order to assemble air valve, first assemble air valve & air valve spring 5. If you try to fit air valve spring and air valve to gun body set without fluid
& fluid adj. guide set together. Next, insert fluid needle set into fluid adj. guide set, needle set, air valve will not be fitted correctly and packing inside fluid
then fit it to gun body set and screw fluid adj. guide set. adj. guide set will be damaged.
6.Turn pattern adj. knob counterclockwise to fully open. 6. If pattern adj.Knob is not fully opened, tip of it can brush against and
Then tighten pattern adj. set or air adj. set. damage fluid nozzle and cause seizure of thread.
Where to inspect Parts replacement standard
1. Each hole passage of air cap and fluid nozzle Replace if it is crushed or deformed.
2. Packings and O rings Replace if it is deformed or worn out.
3. Leakage from seat section between fluid nozzle and fluid needle set. Replace them if leakage does not stop after fully cleaning fluid nozzle and
fluid needle set. If you replace fluid nozzle or fluid needle only, fully
match them and confirm that there is no leakage.
WARNING
- First release air and fluid pressure fully according to item No. 3 of “Improper use of equipment” of WARNING on
page 2.
- Tip of fluid needle set has a sharp point. Do not touch the tip of needle valve during maintenance for protection of
the human body.
- Be careful not to damage the tip of the fluid nozzle or put your hand on it.
- Only an experienced person who is fully conversant with the equipment can do maintenance and inspection.
CAUTION
- Never use commercial or other parts instead of ANEST IWATA original spare parts.
- Never immerse the whole gun into liquid such as cleaner.
- Never damage holes of air cap, fluid nozzle or fluid needle.
This manual suits for next models

7

Other Anest Iwata Paint Sprayer manuals

Anest Iwata SER-24PA User manual

Anest Iwata

Anest Iwata SER-24PA User manual

Anest Iwata iCon-M233N Operator's manual

Anest Iwata

Anest Iwata iCon-M233N Operator's manual

Anest Iwata AIRGUNSA AZ1 HTE 2P Quick start guide

Anest Iwata

Anest Iwata AIRGUNSA AZ1 HTE 2P Quick start guide

Anest Iwata WIDER2L-10G2P User manual

Anest Iwata

Anest Iwata WIDER2L-10G2P User manual

Anest Iwata Air Gunsa AZ3 HTE User manual

Anest Iwata

Anest Iwata Air Gunsa AZ3 HTE User manual

Anest Iwata Wider1A User manual

Anest Iwata

Anest Iwata Wider1A User manual

Anest Iwata TOF-5B User manual

Anest Iwata

Anest Iwata TOF-5B User manual

Anest Iwata MSU-111N User manual

Anest Iwata

Anest Iwata MSU-111N User manual

Anest Iwata SuperNova LS-400-1301 User manual

Anest Iwata

Anest Iwata SuperNova LS-400-1301 User manual

Anest Iwata WIDER2-12G2P User manual

Anest Iwata

Anest Iwata WIDER2-12G2P User manual

Anest Iwata AL-96 User manual

Anest Iwata

Anest Iwata AL-96 User manual

Anest Iwata WIDER2L-10G2P User manual

Anest Iwata

Anest Iwata WIDER2L-10G2P User manual

Anest Iwata WS-400 EVO User manual

Anest Iwata

Anest Iwata WS-400 EVO User manual

Anest Iwata WS-400 EVO User manual

Anest Iwata

Anest Iwata WS-400 EVO User manual

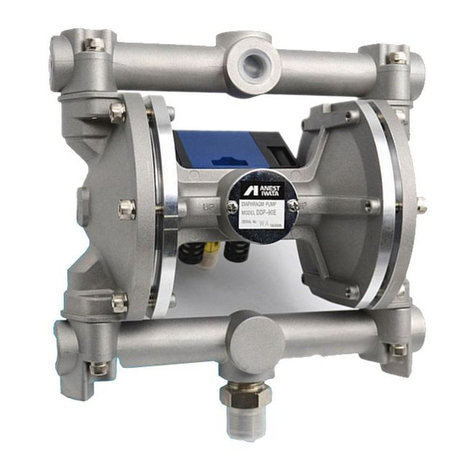
Anest Iwata DDP 90 E Series User manual

Anest Iwata

Anest Iwata DDP 90 E Series User manual

Anest Iwata W 400 User manual

Anest Iwata

Anest Iwata W 400 User manual

Anest Iwata AL-96 S5 User manual

Anest Iwata

Anest Iwata AL-96 S5 User manual

Anest Iwata NEW 77 User manual

Anest Iwata

Anest Iwata NEW 77 User manual

Anest Iwata MSU-113 N User manual

Anest Iwata

Anest Iwata MSU-113 N User manual

Anest Iwata W-101A User manual

Anest Iwata

Anest Iwata W-101A User manual

Anest Iwata LPH-80 User manual

Anest Iwata

Anest Iwata LPH-80 User manual

Anest Iwata Wider1A User manual

Anest Iwata

Anest Iwata Wider1A User manual

Anest Iwata WIDER2 Series User manual

Anest Iwata

Anest Iwata WIDER2 Series User manual

Anest Iwata WS-200 SP Operation instructions

Anest Iwata

Anest Iwata WS-200 SP Operation instructions

Popular Paint Sprayer manuals by other brands

Graco Ultra-Lite 240-200 Instructions-parts list

Graco

Graco Ultra-Lite 240-200 Instructions-parts list

Carlisle Binks AA4400M Service manual

Carlisle

Carlisle Binks AA4400M Service manual

Mi Swaco MONGOOSE PRO Installation and operation manual

Mi Swaco

Mi Swaco MONGOOSE PRO Installation and operation manual

VALVER MISTLAIR instruction manual

VALVER

VALVER MISTLAIR instruction manual

Titan LX-80 II instruction sheet

Titan

Titan LX-80 II instruction sheet

Hardi Front Tank user guide

Hardi

Hardi Front Tank user guide

Meec tools 082-207 operating instructions

Meec tools

Meec tools 082-207 operating instructions

WAGNER ProjectPro 117 owner's guide

WAGNER

WAGNER ProjectPro 117 owner's guide

Graco XM PFP repair parts

Graco

Graco XM PFP repair parts

AIRLESSCO 1200G Service & operation manual

AIRLESSCO

AIRLESSCO 1200G Service & operation manual

Feider Machines FSP600W user guide

Feider Machines

Feider Machines FSP600W user guide

Earlex HV4901 instruction manual

Earlex

Earlex HV4901 instruction manual

Graco Reactor A-20 Operation

Graco

Graco Reactor A-20 Operation

SCHABEN 6500 Series Operation & maintenance manual

SCHABEN

SCHABEN 6500 Series Operation & maintenance manual

Storch System HD operating manual

Storch

Storch System HD operating manual

Masterclean Products Penguin 200U user manual

Masterclean Products

Masterclean Products Penguin 200U user manual

3M Scotchkote HSS-450 User instructions

3M

3M Scotchkote HSS-450 User instructions

WALTHER PILOT PILOT TWIN operating instructions

WALTHER PILOT

WALTHER PILOT PILOT TWIN operating instructions

manuals.online logo
manuals.online logoBrands
  • About & Mission
  • Contact us
  • Privacy Policy
  • Terms and Conditions

Copyright 2025 Manuals.Online. All Rights Reserved.