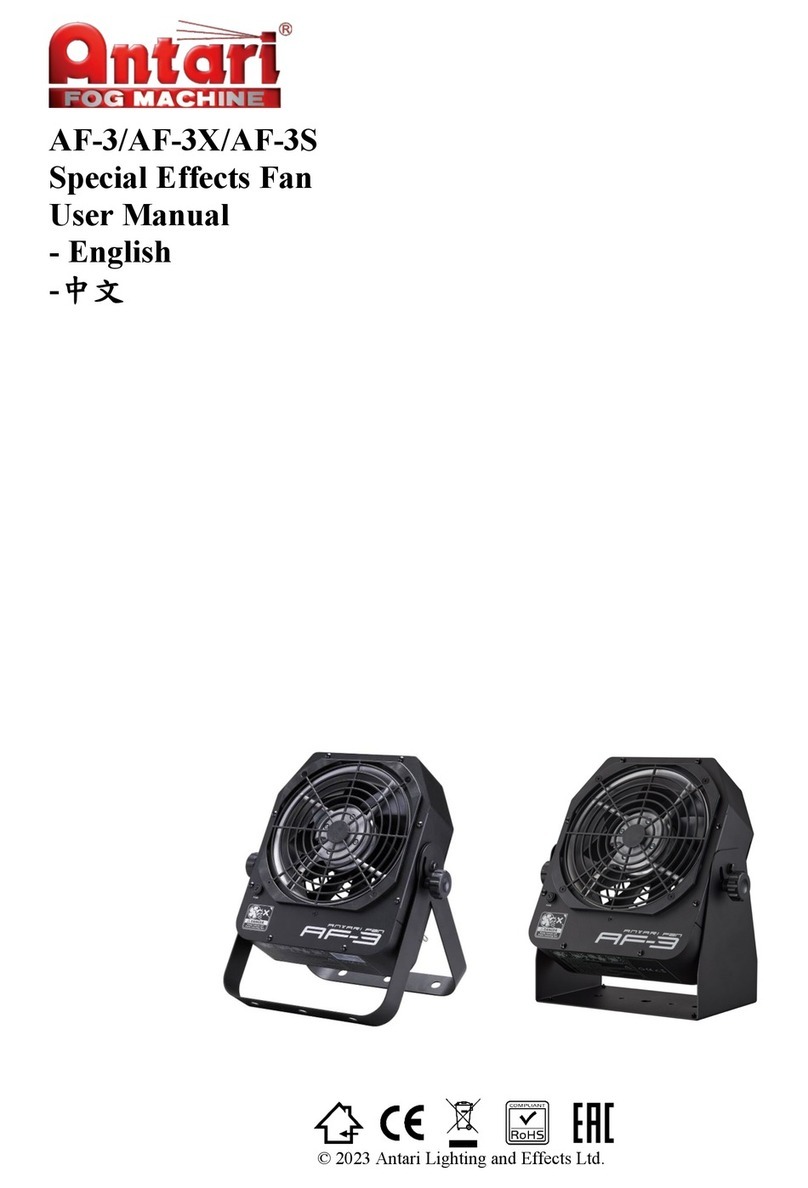
Antari AF-6 User manual

AF-6 / AF-6R
Special Effects Fan
User Manual
-English
-中文
© 2023 Antari Lighting & Effects Ltd.

1. Introduction ....................................................................................................................................1
2. Safety Information..........................................................................................................................1
3. Package Items.................................................................................................................................4
4. Product Overview...........................................................................................................................5
5. Technical Label Information ..........................................................................................................6
6. Setting Up.......................................................................................................................................6
7. Operation ........................................................................................................................................7
8. Machine Status Message ................................................................................................................9
9. DMX Connection ...........................................................................................................................9
10. RDM.............................................................................................................................................10
11. WTR-20 Wireless Control Operation (Optional) .........................................................................11
12. SC-2 Cable Remote Control Operation (Optional) ......................................................................13
13. Service and Maintenance..............................................................................................................13
14. Technical Specifications...............................................................................................................14
15. Machine Dimension .....................................................................................................................15
16. Exploded diagram.........................................................................................................................16
1. 前言..............................................................................................................................................18
2. 安全注意事項..............................................................................................................................18
3. 包裝內容......................................................................................................................................20
4. 機器外觀概述..............................................................................................................................22
5. 技術標籤資訊..............................................................................................................................23
6. 機器安裝操作步驟......................................................................................................................23
7. 操作說明......................................................................................................................................23
8. 機器狀態說明..............................................................................................................................25
9. DMX 說明....................................................................................................................................26
10. RDM 說明....................................................................................................................................27
11. WTR-20 無線控制模組配對及操作說明(選配)........................................................................28
12. SC-2 有線控制器操作說明 (選配)............................................................................................29
13. 機器維護保養..............................................................................................................................29
14. 技術規格......................................................................................................................................30
15. 機器尺寸圖..................................................................................................................................31
16. 機台爆炸圖..................................................................................................................................32
1
User Manual
1. Introduction
Please read this user manual carefully before operating the machine.
Please put this manual in a place where you can refer to it at any time.
If you encountered any problems, please contact your local Antari dealer for advice and assistance.
2. Safety Information
CAUTION!
Please read the following safety information carefully before operating the machine.
This information includes important safeguards about installation, usage and
maintenance. Pay attention to all warning labels and instructions in this manual and
printed on the machine.
DANGER!
Electrical shock
Always connect the machine to correct voltage. It will lead to electrical shock or
burned and may cause serious consequences if connecting to incorrect or improper
voltage.
WARNING!
Risk of electrocution
Always connect the machine to a protected circuit and ensure it is properly grounded
to avoid risk of electrocution.
※ Damage caused by the disregard of this user manual are not subject to warranty. Antari and its
dealer will not accept liability for any resulting defects or problems.

2
2.1 Installation
Keep this device dry. This machine is not waterproof. Do not expose the machine to water splashes.
Place the machine on a flat surface. Installed in a well ventilated area. Provide at least 50 cm space
around the machine.
Make sure there are no flammable materials close to the machine while operating. Never add
flammable liquid of any kind to the machine.
Before connecting the machine to power, always check the voltage indicate on the machine matches
to your local AC voltage. Do not use the machine if AC power voltage does not match.
If the supply cord is damaged, it must be replaced by a special cord or assembly available from your
local Antari dealer for replacement.
No user serviceable and modifiable parts inside. Never try to repair this product, an unauthorized
technician may lead the machine to damage or malfunction.
This product is for indoor use only! Do not expose to rain or moisture. If fluid is spilled, disconnect
AC power and clean with a damp cloth. If liquid is spilled onto electronic parts, immediately unplug
the machine and contact your local Antari dealer for advice.
Pay attention to all warning labels and instructions on the machine before operation.
2.2 Operation
Do not operate the machine with bundled power cables. It could be a fire hazard.
Do not operate the machine in an area with unstable voltage. This may burn out internal components
and cause machine fail to work.
Do not use the machine against human, animal or flame. Make sure there are no flammable materials
close to the machine.
For adult use only. The machine is not to be used by persons (including children) with reduced
physical, sensory or mental capabilities, or lack of experience and knowledge. Never leave the
machine running unattended.
Children being supervised not to play with the machine.
If you hear a strange sound or experience machine fails to work, stop use it immediately. Turn off
and unplug the machine, and contact your local Antari dealer for service.
Turn off and unplug the machine while it’s not in use.
Make sure the machine is turned off before unplug it.
Do not use the machine upside down or tilt it. It may damage the machine and make it malfunction.
Be sure to unplug the machine before filling snow fluid.
If the machine fails to work, unplug the machine and stop operation immediately. Contact your local
Antari dealer for help.

3
2.3 Grounding Instruction
This appliance must be grounded in the event of malfunction or breakdown, grounding provides a path of
least resistance for electric current to reduce the risk of electric shock. This appliance is equipped with a
cord having an equipment-grounding conductor and a grounding plug. The plug must be plugged into an
appropriate outlet that is properly installed and grounded in accordance with all local codes and ordinances.
DANGER – Improper connection of the equipment-grounding conductor can result in a risk of electric
shock. The conductor with insulation having an outer surface that is green with or without yellow stripes is
the equipment-grounding conductor. If repair or replacement of the cord or plug is necessary, do not connect
the equipment-grounding conductor to a live terminal. Check with a qualified electrician or servicemen if
the grounding instructions are not completely understood, or if in doubt as to whether the appliance is
properly grounded. Do not modify the plug provided with the appliance. If it will not fit the outlet, have a
proper outlet installed by a qualified electrician.
This appliance is for use on a nominal 120V circuit and has a grounding plug that looks like the plug
illustrated in sketch A in Figure 73.1. A temporary adaptor, which looks like the adaptor illustrated in
sketches B and C, may be used to connect this plug to a 2 pole receptacle as shown in sketch B if a properly
grounded outlet is not available. The temporary adaptor should be used only until a properly grounded
outlet can be installed by a qualified electrician. The green colored rigid ear, lug, and the like, extending
from the adaptor must be connected to a permanent ground such as a properly grounded outlet box cover.
Whenever the adaptor is used, it must be held in place by the metal screw.

4
3. Package Items
Immediately upon receiving the machine, carefully unpack the carton, check the content to ensure that all
parts are present and have been received in good condition. If any parts appear damaged or mishandled
from shipping, notify the shipper immediately and retain the packing material for inspection.
3.1 Standard Package
1 x AF-6 / AF-6R Special Effect Fan
1 x PowerCon True 1 Power Cord
1 x User Manual or scan QR code on technical label
3.2 Optional Accessories
Item Code
Description
SC-2
Cable Remote
WTR-20
W-2 Wireless Control Module (Includes W-2 Transmitter & W-2 Receiver)
If you purchase AF-6R, the receiver has been installed onto the machine

5
4. Product Overview
01. Air outlet
06. Wireless Receiver Antenna
02. Air inlet
07. SC-2 Remote Connector
03. Power switch
08. LCD Display control panel
04. True 1 PowerCon Connector
09. Hanging Bracket
05. XLR 5-Pin DMX Connector
10. Technical Label

6
5. Technical Label Information
Read the information on the technical label before operation.
Technical label is attached on one side of control panel.
1. Model Name
5. Breaker
2. Input Voltage
6. QR CODE for User Manual
3. Frequency
7. Serial No.
4. Rated Power
6. Setting Up
CAUTION!
Risk of injury caused by falling objects.
Make sure installation location, fastening connecting and rigging hardware can hold
at least 10 times the weight of the machine.
Make sure that the machine is installed securely and cannot fall down.
It will cause severe injuries if the machine falling down.
Step 1. Place the machine on a flat surface and in a suitably large area with at least 50 cm open space
around the machine.
Step 2. Connect the machine to a suitably rated power supply. To determine the power requirement for
the machine, refer to the label on the back of the machine.
Step 3. Turn on the machine, press the [VOLUME]/[DOWN] button on the control panel to start making
fan output. To stop making fan output, press the [STOP] /[■] button
Step 4. To turn off the machine, press the [STOP] /[■] button and put the power switch to the OFF
position.

7
7. Operation
AF-6 Special Effect Fan can be operated in the following modes. The machine can accept 1 kind of signal
at 1 time. When using different control modes at the same time, the machine will work according to built-
in control priority.
Manual: operation via control panel
Timer: operation via control panel
DMX 512
SC-2 Wired Remote (Optional accessory)
W-2 Wireless Transmitter (Optional accessory)
Priority: DMX512 > W-2 Wireless Transmitter (Optional accessory)> SC-2 Wired Remote (Optional
accessory) > Manual
Please see the following pages for instructions on your choice of operation.
7.1 Control Panel Operation
The machine can be operated in manual or timer modes with the onboard digital control interface
Button
Function
[MENU]
Scroll through setting menu
▲[UP]/[TIMER]
Increase setting value/Activate Timer function
▼[DOWN]/[VOLUME]
Decrease setting value/Activate Volume function
▓[STOP]
Deactivate Timer/Volume function
Confirm/Leave Setting Menu

8
7.2 Control Menu
Menu
Item
Description
Manual
Interval
Set 5s
Set interval time at timer mode from 5 to 999 seconds
Duration
Set 5s
Set duration time at timer mode from 5 to 999 seconds
Timer
Out XXX%
Set fan speed at timer mode from 1 to 100%
Volume
Out XXX%
Set fan speed at Volume mode from 1 to 100%
DMX
DMX512
Add: XXX
DMX-512 Address: 1-512
Setting
Wireless
On/Off
Wireless Remote: On / Off
W. Remote
Pair/Upair
Wireless Transmitter:Pair / Unpaired
Use ▲UP and ▼DOWN buttons to select Pair and
Unpair radio wireless remote
Quick
Start Off/On
Turn On or Off Quick Start mode
When it is turned on, once power up AF-6 fan, it will run
last setting.
Use ▲UP and ▼DOWN buttons to switch, and press
▓STOP/ENTER button to memorize settings.
KeySound
Set On/Off
Keypad Sound:On / Off
Turn On or Off the beep sound of pushing buttons
Use ▲UP and ▼DOWN buttons to switch, and press
▓STOP/ENTER button to memorize settings
Backlite
AlwaysOn/AutoOff
Screen Backlite: Always On /Auto Off
Use ▲UP and ▼DOWN buttons to switch, and press
▓STOP/ENTER button to memorize settings
Default
Proceed?
Reset to factory settings
Press ▓STOP button to reset AF-6 to Factory settings
UID 1ED8
06020001
To view RDM’s UID (Unique Identifier)
Run Time
0000000H
To view total how many minutes or hours this AF-6 has
been running

9
8. Machine Status Message
Screen
Description
AF-6
v1.0
Software Version
AC-120V
60Hz
Input Voltage
AF-6
Ready
Machine is ready to Operate
Remote
Out XXX%
SC-2 cable remote operating (only shows when SC-2 is connected)
Volume
Out XXX%
Running at volume mode
Interval
XXX min
Running at timer mode, Interval time
Duration
XXX min
Running at timer mode, Duration time
DMX-512
Add: XXX
Current DMX 512 channel
Wrong
Voltage!
Wrong input voltage
AC Power
Failure
AC Power Failure
9. DMX Connection
9.1 DMX Connector Pin Assignment
The machine provides a 5-pin XLR connector for DMX connection. The diagram below indicates pin
assignment information.
Pin
Function
1
Ground
2
Data-
3
Data+
4
N/A
5
N/A

10
The cap on the DMX IN port is a protection cover. Please remove it with your finger before operation.
9.2 DMX Channel Function
Each AF-6 occupied 1 DMX channel. Below is the DMX value and function table.
Channel
Mode
DMX Value
Function
Channel 1
Fan Speed
0-5
Fan Off
6-255
Fan Speed 1-100%
10. RDM
The AF-6 Special Effect Fan is RDM enabled, allowing control system to configure, monitor and manage.
See below table for supported RDM parameters.
GET Allowed
SET Allowed
Category
類別
RDM Parameter ID’s (Slot 21-22)
Value
Required
Network
Management
網路管理
DISC_UNIQUE_BRANCH
0x0001
O
DISC_MUTE
0x0002
O
DISC_UN_MUTE
0x0003
O
O
RDM Information
RDM 資訊
QUEUED_MESSAGE
0x0020
O
SUPPORTED_PARAMETERS
0x0050
O
O
PARAMETER_DESCRIPTION
0x0051
O
O
Product Information
產品資訊
DEVICE_INFO
0x0060
O
O
PRODUCT_DETAIL_ID_LIST
0x0070
O
DEVICE_MODEL_DESCRIPTION
0x0080
O
MANUFACTURER_LABEL
0x0081
O
O
DEVICE_LABEL
0x0082

11
O
SOFTWARE_VERSION_LABEL
0x00C0
O
O
O
DMX512 Setup
DMX512 設定
DMX_PERSONALITY
0x00E0
O
DMX_PERSONALITY_DESCRIPTION
0x00E1
O
O
DMX_START_ADDRESS
0x00F0
O
O
SLOT_INFO
(0x0120)
O
SLOT_DESCRIPTION
(0x0121)
O
DEFAULT_SLOT_VALUE
(0x0122)
O
Sensors
感應器
SENSOR_DEFINITION
0x0200
O
O
SENSOR_VALUE
0x0201
O
DEVICE_HOURS
0x0400
O
O
O
Control
控制
IDENTIFY_DEVICE
0x1000
O
11. WTR-20 Wireless Control Operation (Optional)
WTR-20 Wireless Control Module (Transmitter & Receiver) is an optional accessory for AF-6 Special
Effect Fan. If you purchase AF-6R Special Effect Fan, the Wireless Receiver attached onto AF-6R before
shipped from factory.

12
11.1W-2 Wireless Transmitter & Receiver
Battery:27A 12V
Effective distance:In a free open space, the effective
distance is about 50 meters, actual usage depends on
obstacle level; the effective distance varies.
W-2 Wireless remote control system equipped with 4 buttons
to activate, deactivate and adjust fan speed.
Button
Function
[A]
Turn on AF-6 fan
[B]
Turn off AF-6 fan
[C]
Raise fan speed
[D]
Lower fan speed
W-2 Wireless Transmitter
W-2 Wireless Receiver
11.2Registering a Transmitter
Transmitter can be paired or deleted from the receiver.
Each receiver can pair up to 5 transmitters.
Follow below steps to pair or delete transmitter.
Step 1. Press [MENU] button and select [Setting]. Screw the menu until [W.Remote] shows on display.
UP: Pair
DOWN:Unpair
Step 2A. Press [UP / ▲] button to select [Pair] to pair a new transmitter. Press [STOP / ■] button, and
press A button to pair it.
Step 2B. Press [DOWN / ▼] button to select [Unpair] to delete an existing transmitter.

13
12. SC-2 Cable Remote Control Operation (Optional)
Wired remote control SC-2 enables to control the machine from a remote location.
To operate the machine by remote control, connect the remote to the microphone jack located on the rear
of machine. Use the switch to turn wind on/off, and use the rotary knob to adjust the output volume from
0~100%.
Button/Knob
Function
[OUT PUT VOLUME] Rotary Knob
Adjust fan output volume from 0 to 100%
[SWITCH ON/OFF] Button
Turn On/Off wind
SC-2 Connector
SC-2 Cable Remote
13. Service and Maintenance
DANGER!
Disconnect from mains before starting maintenance operation!
Do not allow the machine to become contaminated.
Remove dust from air vents with air compressor, vacuum or a soft brush.

14
Only use a damp cloth to clean the casing.
It is recommended to run the machine on a monthly basis in order to achieve best performance and
output condition.
Excessive dust, liquid and dirt built up will degrade performance and cause overheating.
14. Technical Specifications
AF-6
Input voltage
US model : AC 100-120V, 50/60Hz 2.08A
EU model : AC 220-240V, 50/60Hz 1.04A
Rated power
250 Watt
Ambient temp/ range
5°C – 40°C (41°F – 104°F)
Air flow
2583 CFM (AC 120V/60Hz)
2550 CFM (AC 240V/60Hz)
Fan speed
1550 rpm (AC 120V/60Hz)
1530 rpm (AC 240V/60Hz)
Maximum noise level
81.5 dB
Control
Manual, Timer, DMX 512,
Wireless (Optional), Cable Remote (Optional)
DMX channels
1 channel
Connection
Neutrik Powercon (Power)
XLR 5-pin (DMX)
XLR 4-pin (Cable Remote)
Optional accessories
WTR-20 Wireless Remote Control Module
SC-2 Cable Remote
Dimension
L461.2 W596 H629.6 mm
(L18.2 W23.5 H24.8 inch)
Weight
22.3 kg (49.1 lbs)

15
15. Machine Dimension

16
16. Exploded diagram
16.1AC-120V
SPARE PARTS OF AF-6
1
C040039A0
Rocker switch/Power
8
AF-6-PCBC
Control P.C board
2
C04312621
Power socket (Inlet)
9
AF-6-PCB
Main P.C board
3
AF-6-PCBD5
P.C board DMX 5Pin
10
C01007010
socket head cap screw
4
W-2RA
Wireless Receiver
(Optional)
11
C02025000
Handle
5
C045E3000
Control Inlet Socket
12
AF-6-PC
Power cord & Plug
6
S60000100-AF
Steel
13
W-2A
Wireless transmitter (Optional)
7
C02000700
Acrylic
14
SC-2
Wired remote controller
(Optional)

17
16.2AC-230V
SPARE PARTS OF AF-6
1
C040039A0
Rocker switch/Power
8
AF-6-PCBC
Control P.C board
2
C04312621
Power socket (Inlet)
9
AF-6E-PCB
Main P.C board
3
AF-6-PCBD5
P.C board DMX 5Pin
10
C01007010
socket head cap screw
4
W-2RE
Wireless Receiver
(Optional)
11
C02025000
Handle
5
C045E3000
Control Inlet Socket
12
AF-6E-PC
Power cord & Plug
6
S60000100-AF
Steel
13
W-2E
Wireless transmitter
(Optional)
7
C02000700
Acrylic
14
SC-2
Wired remote controller
(Optional)

18
中文使用說明書
1. 前言
使用本產品之前,請務必詳加閱讀此說明書後正確使用。
請將本說明書放置在產品使用者可隨時查閱之處存放。
如果您有任何使用上的問題,請聯繫當地的 Antari 經銷商尋求清楚的說明與協助。
2. 安全注意事項
注意!
在使用機器以前,請仔細閱讀以下說明,此份說明書包含了如何在安全的情況下
安裝使用機器,且會說明機器上所有標示的標籤所代表的意義。
危險!
請務必使用正確電壓,使用危險電壓,您在接觸電線時可能會遭受危險的電擊!
警告!
請務必將機器連結到有保護的電路,並確保有正確地接地,以避免觸電的危險。
※ 因忽視本使用手冊而造成的損壞不在保修範圍內。經銷商將不對由此產生的任何損壞或問題
承擔任何責任。
2.1 安裝時
保 持 機 器 乾 燥,此機器不防水,請勿使其遭水潑濺。
請在穩定且堅固、通風良好及週邊無存放及使用可燃性氣體或易燃物質的地方安裝及使用機
器,勿遮蓋機器散熱部份,機器周邊至少應保留 50 公分的空間。
Other manuals for AF-6
1
This manual suits for next models
1
Table of contents
Other Antari Dj Equipment manuals

Antari
Antari S-100II User manual

Antari
Antari SW-300 User manual

Antari
Antari AF-3 User manual

Antari
Antari IP-1500 User manual

Antari
Antari S-600 Yeti User manual

Antari
Antari SW-250X User manual

Antari
Antari AF-5X User manual

Antari
Antari SW-250 User manual

Antari
Antari HZ-400 User manual

Antari
Antari S-500 User manual

Antari
Antari S-100X User manual

Antari
Antari SW-300 User manual

Antari
Antari SW-250XK User manual

Antari
Antari HZ-500 User manual

Antari
Antari W-101 User manual

Antari
Antari B-200 User manual

Antari
Antari S-500 User manual

Antari
Antari S Series II User manual

Antari
Antari W-101 User manual

Antari
Antari Silent 200 User manual