manuals.online logo
Brands
  1. Home
  2. •
  3. Brands
  4. •
  5. Anton/Bauer
  6. •
  7. Batteries Charger
  8. •
  9. Anton/Bauer TITAN T2 User manual

Anton/Bauer TITAN T2 User manual

Other manuals for TITAN T2

1

This manual suits for next models

13

Other Anton/Bauer Batteries Charger manuals

Anton/Bauer Interactive 2000 PowerCharger User manual

Anton/Bauer

Anton/Bauer Interactive 2000 PowerCharger User manual

Anton/Bauer Interactive 2000 PowerCharger User manual

Anton/Bauer

Anton/Bauer Interactive 2000 PowerCharger User manual

Anton/Bauer Interactive 2000 PowerCharger User manual

Anton/Bauer

Anton/Bauer Interactive 2000 PowerCharger User manual

Anton/Bauer LP-D 8475-0135 User manual

Anton/Bauer

Anton/Bauer LP-D 8475-0135 User manual

Anton/Bauer CINE VCLX/2 User manual

Anton/Bauer

Anton/Bauer CINE VCLX/2 User manual

Anton/Bauer TWIN User manual

Anton/Bauer

Anton/Bauer TWIN User manual

Anton/Bauer TWIN User manual

Anton/Bauer

Anton/Bauer TWIN User manual

Anton/Bauer Interactive 2000 PowerCharger User manual

Anton/Bauer

Anton/Bauer Interactive 2000 PowerCharger User manual

Anton/Bauer Interactive 2000 PowerCharger User manual

Anton/Bauer

Anton/Bauer Interactive 2000 PowerCharger User manual

Anton/Bauer GM2 User manual

Anton/Bauer

Anton/Bauer GM2 User manual

Anton/Bauer Dionic 26V LP4 Gold Mount Plus User manual

Anton/Bauer

Anton/Bauer Dionic 26V LP4 Gold Mount Plus User manual

Anton/Bauer Interactive 2000 PowerCharger User manual

Anton/Bauer

Anton/Bauer Interactive 2000 PowerCharger User manual

Anton/Bauer Interactive 2000 PowerCharger User manual

Anton/Bauer

Anton/Bauer Interactive 2000 PowerCharger User manual

Anton/Bauer Interactive 2000 PowerCharger User manual

Anton/Bauer

Anton/Bauer Interactive 2000 PowerCharger User manual

Anton/Bauer GM2 User manual

Anton/Bauer

Anton/Bauer GM2 User manual

Anton/Bauer TWQ User manual

Anton/Bauer

Anton/Bauer TWQ User manual

Popular Batteries Charger manuals by other brands

EVBox BusinessLine manual

EVBox

EVBox BusinessLine manual

Goobay 71808 user manual

Goobay

Goobay 71808 user manual

Kogan KACRDQIS4XA user manual

Kogan

Kogan KACRDQIS4XA user manual

Sealey WCB3 quick start guide

Sealey

Sealey WCB3 quick start guide

Vanner SP00143/181 owner's manual

Vanner

Vanner SP00143/181 owner's manual

KeyOuest KO037515 quick start guide

KeyOuest

KeyOuest KO037515 quick start guide

Enplus Silk Series user manual

Enplus

Enplus Silk Series user manual

Intermec SF51 user guide

Intermec

Intermec SF51 user guide

Colorovo PowerBox 6800 user guide

Colorovo

Colorovo PowerBox 6800 user guide

Smartech WBC-250 Operator's manual

Smartech

Smartech WBC-250 Operator's manual

PIXO C-USB instruction manual

PIXO

PIXO C-USB instruction manual

Gunson G4104 quick start guide

Gunson

Gunson G4104 quick start guide

Dometic NDS SCE320 Short Operating Manual

Dometic

Dometic NDS SCE320 Short Operating Manual

ABB HT572708 Operation manual

ABB

ABB HT572708 Operation manual

EVOline Square80 manual

EVOline

EVOline Square80 manual

Redarc SBC24025 Operating instructions and owner's manual

Redarc

Redarc SBC24025 Operating instructions and owner's manual

Absaar HV04 manual

Absaar

Absaar HV04 manual

DazeTechnology Cover Dazebox Home installation manual

DazeTechnology

DazeTechnology Cover Dazebox Home installation manual

manuals.online logo
manuals.online logoBrands
  • About & Mission
  • Contact us
  • Privacy Policy
  • Terms and Conditions

Copyright 2025 Manuals.Online. All Rights Reserved.

Important: Read all instructions before attempting Firmware Upgrade
EQUIPMENT NEEDED
1 - New Firmware IC
1 - PLCC Extraction Tool (Supplied, if ordered) **
1 - #2 Phillips Screw Driver
1 - Static Ground Strap (grounded to building ground)
INSTRUCTIONS
The Firmware IC is sensitive to static electricity. You will need to be grounded and remove power from the charger before you begin. Remove the
screws necessary to allowaccess to the inside of the charger. Locate the Firmware PLCC. The Firmware PLCC is a 44 pin IC that has a label with the Rev
level of Firmware printed on it. This IC may be in different locations on the PCB, depending on the charger. The following list will help to locate the IC.
Charger Type Location on Logic Board (PCB)
PowerCharger
®
Series QUAD 2401, 2402, 2702 Middle left side of PCB
DUAL 2400, 2401, 2402, 2700, 2701 Front middle of PCB
DUAL 2722 Front of left side PCB
T-Series TWQ (two chips) Back left and middle left of PCB
TWIN Same side as AC input connector
T2 Front of left side PCB
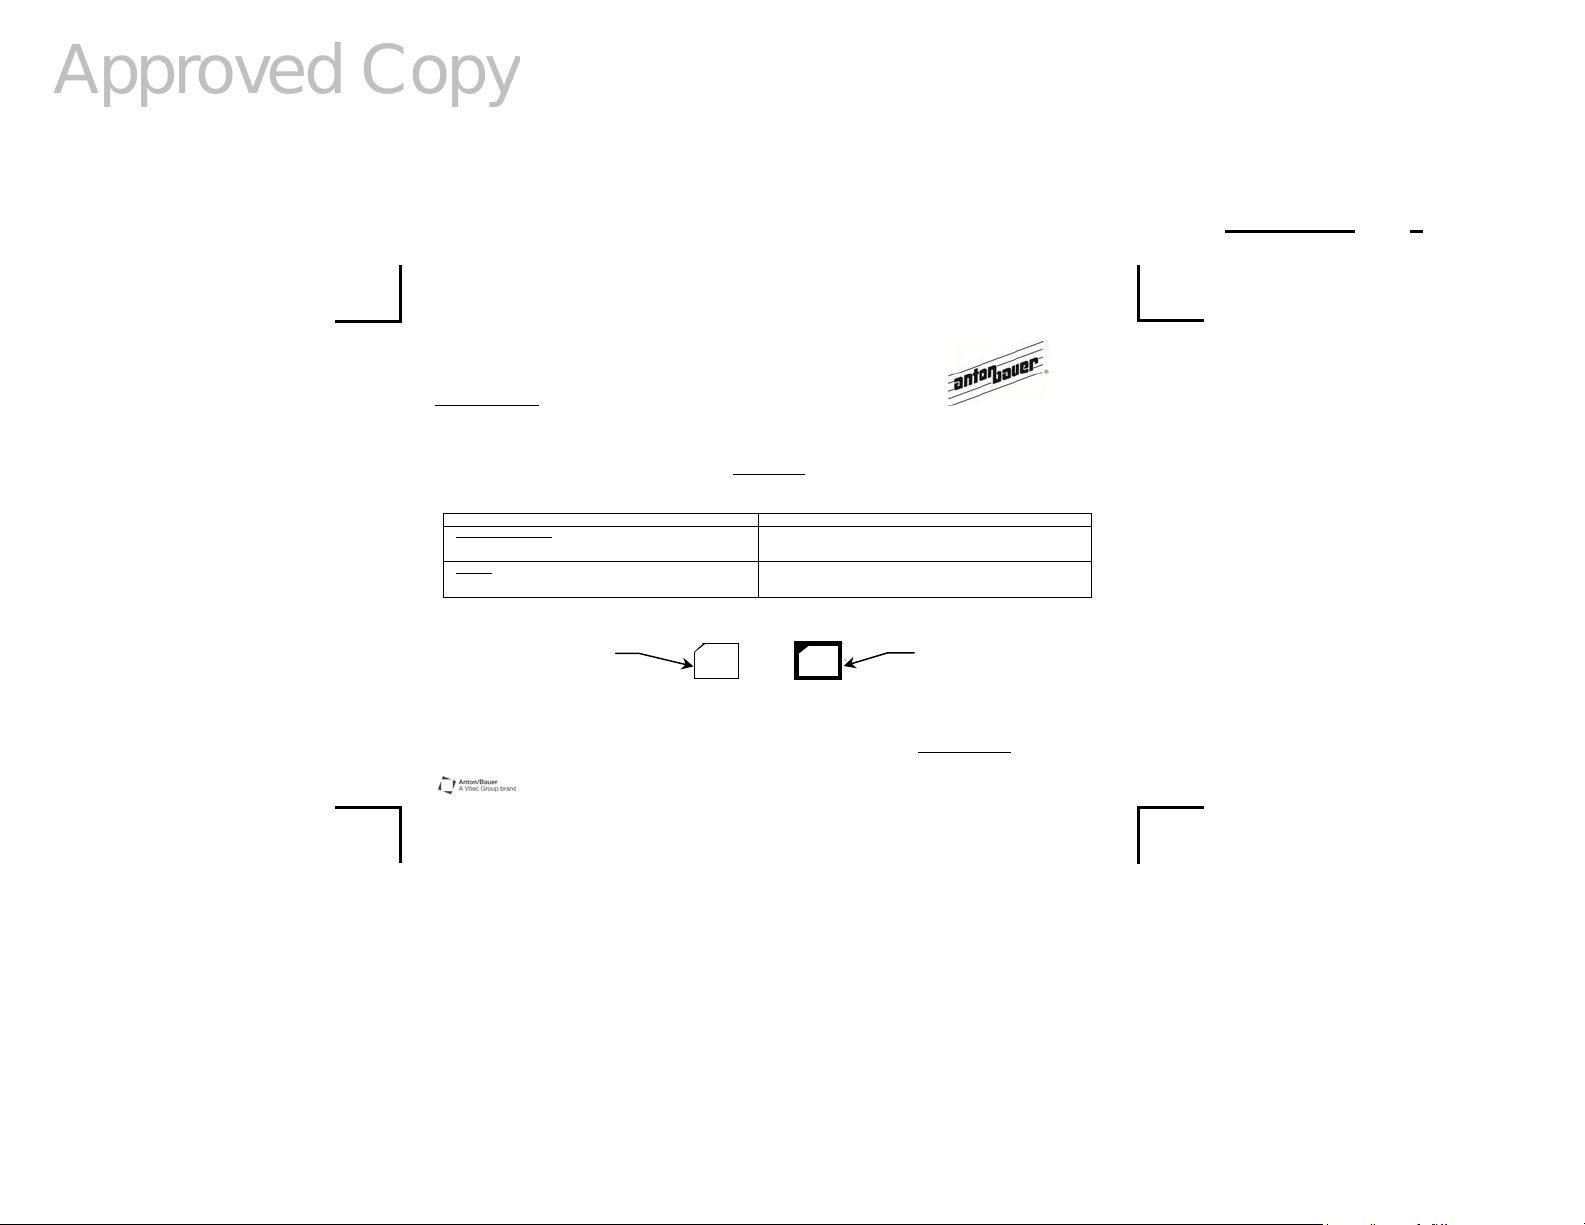
Once the IC is located, use the PLCC ExtractionTool** to remove it. Use extreme care whenremoving the IC so as not to damage the socket. If the socket is
damaged or broken, the charger will need to bereturned to the Anton/Bauer®Service Department for repair. Before replacing Firmware, notice that both the
IC and the socket have one corner cut off on a 45 degree angle. These corners must be aligned before installing Firmware.
When the 45 degree corner of the IC is lined up to the 45 degree corner of the socket, press the IC slowly into the socket until you feel it click into place. The
IC will sit flush with the top of the socket. Replace all removed screws and tighten firmly.
Firmware
IC
Anton/Bauer Inc., 14 Progress Drive, Shelton, Connecticut 06484 USA • (203) 929-1100 • Fax (203) 925-4988 • support@antonbauer.com
Europe, B.V. Eurode Business Center, Eurode-Park 1-2, 6461 KB Kerkrade, The Netherlands • (+31) 45 5639220 • Fax (+31) 45 5639222 • eurosupport@antonbauer.com
Singapore Office - Anton/Bauer, 6 New Industrial Road, # 02-02 Hoe Huat Ind. Bld., Singapore 536199 • (+65) 62975784 • Fax (+65) 62825235
www.antonbauer.com 7595-0101 Rev J
FIRMWARE UPGRADE
Instruction Sheet
A7595-0101 Rev J
DA-F006 Sht. 1 of 2
Firmware
socket
One World. One Smart Choice.TM
Approved Copy
QUAD:
- Remove the (6) six screws
from the top of the unit as
highlighted.
- Remove the (2) two screws
from the front sides of the
unit.
DUAL / DUAL 2722 / T2:
- Remove the (3) three screws
from the top of the unit as
highlighted.
- Remove the (2) screws from
the front sides of the unit.
TWIN CHARGE
R
TWQ CHARGER
Bottom View Top View
Note: After removing the screws. The top panel will come loose. Do Not pull on
the cover. There are connectors internal to the unit which must be
disconnected from the PCB before attempting to remove the top panel.
INTERACTIVE 2000 POWERCHARGER
TO REMOVE TOP PANELS
A7595-0101 Rev J
DA-F006 Sht. 2 of 2
TWQ:
- Remove the (2) two screws from the bottom side of the unit.
- Remove the (6) six screws from the top of the unit as highlighted.
TWIN:
- Remove the (2) two
screws from the top
and bottom sides of the
unit.
-Remove the labelfrom
the front side of the unit
as indicated
Approved Copy