Redarc SBC24025 Assembly instructions

8
TWO YEAR WARRANTY
REDARC Electronics warrants to the original purchaser that the product(s) on the reverse side of this sheet ("Product") will be free, under nor al
use and aintenance, fro defects in aterial and work anship for a period of TWO YEARS fro the date of purchase, subject to the condi-
tions shown below.
1. Warranty
Unless otherwise stated in this warranty, Redarc Electronics will at its sole discretion either replace or repair any of the Product that is
defective in aterial or work anship within the above entioned period without charge to the original purchaser.
2. Other Warranty
Subject to any ter s i plied by law, this warranty contains the whole of the Redarc Electronics' obligations and any distributor and the
agents, officers and e ployees of such distributor and of Redarc Electronics are not authorised to vary or extend the ter s of the war-
ranty. The benefits conferred by this warranty are in addition to the conditions and warranties i plied by applicable legislation conferring
rights upon consu ers, which apply only to the extent to which they ay not by law be excluded.
3. Exclusions
This warranty shall not apply to, or include, any of the following:
3.1 Any defect or failure due to accident, isuse, abuse, ove ent of the Product to a new site, negligence, non-observance of
any of the instructions supplied with the Product including the instructions on the reverse side of this sheet ("Operating Instruc-
tions") or local regulations on the part of any user, choice of location, i proper installation, configuration or connection, or
faulty power supply.
3.2 If the Product is installed, repaired or serviced by a person who is not a qualified auto electrician or electronics technician, or if
non-approved parts have been fitted.
3.3 Failure to obtain proper aintenance for the Product or any associated equip ent or achinery.
3.4 Failure to pay for the products in full or co ply with Redarc Electronics' Trading Ter s.
3.5 If the Product is used other than for any reasonable purpose for which it was anufactured, or is used in a way not specified by
Redarc Electronics.
3.6 If the original purchaser sells, leases or otherwise parts with possession of the Product.
3.7 Deterioration due to nor al use and exposure, including abnor al environ ental conditions such as lightning strike, flood and
extre e heat.
3.8 Any freight, packing and insurance expenses relating to transportation of the Product.
3.9 Any expenses relating to installation and/or re oval of the Product.
3.10 Any da age, indirect or incidental, of whatever nature.
4. Li itations
4.1 Redarc Electronics is not liable for any consequential, indirect or accidental loss or da age or for any service not expressly
provided herein (including without li itation liability for any loss or da age caused by a fault in the Product or its external wiring
connections) and the liability of Redarc Electronics under this warranty is li ited to the repair or replace ent of defective
aterial or work anship by a qualified auto electrician or electronics technician, provided such person and work is approved
by Redarc prior to co ence ent. Subject to clause 2, Redarc Electronics is hereby excluded to the axi u extent per it-
ted by law fro all other liability in respect of the Product.
4.2 While Redarc Electronics warrants, where applicable, that the Product is free fro defects in aterials and work anship under
nor al use at the ti e of delivery, Redarc Electronics does not warrant that the Product will eet any user specific require ents
or that the operation of the Product will be uninterrupted or error-free.
5. Owner’s Responsibilities
5.1 Maintenance of the Product and associated equip ent and/or achinery is the responsibility of the owner. The owner ust
retain evidence that proper aintenance has been perfor ed on the Product by Redarc Electronics or a qualified auto
electrician or electronics technician. Clai s ade during the warranty ter will not be accepted if resulting fro lack of
aintenance rather than faulty aterial or work anship.
5.2 The owner ust operate the Product in accordance with all of the Operating Instructions.
5.3 Upon discovery of a fault the owner ust return the Product to the distributor with full details of the nature of the fault. Re oval
of the Product ust be done by a qualified auto electrician or electronics technician to ensure that the warranty re ains valid.
A written report describing the circu stances of failure ust acco pany the returned Product with proof of purchase which
clearly shows the date of such purchase by the original purchaser.
5.4 If the Product is found to be working satisfactorily on return to Redarc Electronics a reasonable charge will be ade for the cost
of testing, packing and freight. The Product will be returned on receipt of the a ount charged.
R:\Redarc Product Spec Sheets NEW\AC Battery Chargers\SBC24025 Instruction Manual-A5-4.pub
1
SBC24025
SMART BATTERY CHARGER
24 Volt DC – 2.5 Amp
Suitable for charging Calcium, AGM, Gel or
Standard ead Acid batteries
A charger for calciu content batteries which works!
Operating Instructions
& Owners Manual
N3533
ELECTRICAL SA ETY APPROVAL NUMBER : Q041193
REE TECHNICAL ASSISTANCE, contact Redarc Electronics
Ph (08) 8322 4848, ax (08) 8387 2889
or Email [email protected]
Specifications are subject to change without notification.

2
The REDARC SMART BATTERY CHARGER (SBC) is a “set and forget” four stage charger that auto atically
brings and aintains 100% charge to Lead Acid and Calciu content batteries. Being a S art battery
charger, it is controlled by a icroprocessor, which is constantly checking the charging process. A battery
will last longer and charge faster when charged using the Four Stage process.
WARNINGS
or safe operation, please ensure compliance to the following points.
• If the power cord is da aged, it ust be replaced by the anufacturer or its service agent or a si ilarly
qualified person in order to avoid hazard.
• The charger is designed to charge batteries constructed with 6 cells only.
• The charger ust only be plugged into an earthed ains socket outlet.
• For in-vehicle charging,
1. The battery charger ust be connected first to the battery ter inal which is not connected to the
vehicle chassis. The other connection is to be ade to the chassis, re ote fro the battery and fuel
line. The battery charger is then to be connected to the supply ains.
2. After charging, disconnect the battery charger fro supply ains. Then re ove the chassis
connection and the battery connection, in this order.
• The appliance is not intended for use by young children or infir persons without supervision.
• Young children should be supervised to ensure that they do not play with the appliance.
• This appliance is not intended for per anent ounting into a vehicle.
KEY EATURES
• Charges Standard, Calciu , AGM or Gel Lead Acid batteries (User Selectable via push button switch)
• Reverse polarity connection protection, charging co ences after the battery has been connected
correctly
• Output short circuit protection
• Battery overcharge protection
• Faulty battery cell detection and safe charge ter ination
• 4-Stage Charging Pattern with ti eout protection
• Initial self test on power up
• Over te perature shut down
• Latest switch ode design
• Designed and anufactured in Australia for Australian conditions
• Safety and EMC co pliance
• Light and ultra co pact
• Recharges batteries to 100% capacity
7
6.0 CHARGING TIME AND BATTERY CAPACITY
The charging ti e is dependant on a nu ber of conditions including the a bient te perature and the
general condition or age of the battery. However it is pri arily dependant on how any A p-Hours need to
be put back into the battery to restore full charge, rather than the battery capacity itself. For exa ple, a 50%
discharged 45Ah battery requires 22.5Ah to be restored, while a 50% discharged 70Ah battery requires 35Ah
to be restored. (Note: Due to inefficiencies in the battery, approxi ately 10% ore is required to be delivered
by the charger in practice). Based on the wide variety of conditions, the charger can be expected to restore
approxi ately between 1 and 3 A p-Hours per hour of charge.
To deter ine if a charger is too big for your battery, use the rule of thu b that the axi u battery charge
current should be typically between 10% and 20% of the battery A p-Hour rating. i.e. for a 50Ah battery, the
typical axi u charging current should be less than 20% of 50Ah = 10A.
As a safety precaution, the axi u charge ti e has been li ited to 25 hours. Please refer to “Ready
indicator (Green) Flashing” in section 3.1 for a description of what happens if the charge cycle does ti e
out.
7.0 WARNING: IN CAR CHARGING
In the Calciu battery selection ode the charger can achieve a axi u voltage of 33V, the following
precautions should be taken:
• Vehicle ignition ust be OFF
• Vehicle lights ust be OFF
• Accessories ust be OFF. This includes obile telephones, radios and sound syste s, DVD players and
any other non ignition activated accessories installed.
• Be sure any caravans or boats connected to the vehicle, where the battery is being charged also have
all their electrical syste s turned off. A good precaution is to disconnect the trailer / caravan plug fro
the towed vehicle.
Most new vehicles can tolerate this voltage without da age to the vehicle electrical syste . To ensure that
your electrical syste will tolerate this axi u charging voltage, please contact your vehicle service
centre.
8.0 SPECI ICATIONS
ELECTRICAL: PHYSICAL:
AC Input Voltage: 216- 265V AC Di ensions: 165 x 140 x 60
Frequency: 50 Hz Weight: 1.55Kg
Input Fusing: 2A Slow Blow **
Output Fusing: 5A ** Storage Te perature: -10ºC to + 70ºC
EMI/RFI: AS/NZS CISPR14-1:2003 Operating Te perature: -5ºC to + 50ºC
Safety: AS/NZS 3108
Efficiency: >79%
No inal Output Voltage: 24V
Output Voltage Range: 24 - 33V
Output Current Range: 0 - 2.5A
Output Power: 80W
Output Ripple: < 1% at full load
** Not user serviceable

6
5.0 SA ETY & PRECAUTIONS
• Ensure the correct battery type has been selected before charging begins
• Before connecting or disconnecting the SBC24025 to a battery, ensure that it is disconnected fro the
240VAC supply.
• NOTE disconnecting the battery fro the vehicle will cause so e co ponents in the vehicle to lose
stored e ory or infor ation, such as ti e on your stereo.
• Ensure electrolyte levels in the battery to be charged are sufficient to cover the plates (if accessible).
• DO NOT atte pt to charge NON RECHARGEABLE batteries.
• DO NOT use the charger to charge a battery near a naked fla e. The gasses e itted by the battery
whilst charging ay ignite, causing a life threatening fire or explosion.
• Always wear eye protection if working close to a charging battery.
• Never s oke in the vicinity of a charging battery.
• Take care whilst handling a lead acid battery, as the electrolyte is acidic and ay cause per anent
da age to skin or clothing.
• The charger is designed to be used indoors and to be protected fro the ele ents. Do not expose the
battery charger to the weather, particularly rain or da pness.
• Provide adequate ventilation whilst charging lead-acid batteries. This will ensure the charger will work
at axi u efficiency and that any gasses e itted fro the battery are safely dissipated.
• Do not extend the 24V output cables supplied between the charger and the battery to be charged,
otherwise efficiency of operation will be co pro ised. Ensure the output cla ps are fir ly attached
to the battery poles.
• Incorrectly connecting the Positive (+ Red wire) and Negative (- Black wire) at the battery will switch
off the battery charger to protect it’s internal electronics. Output and consequent charging will only
reco ence when the (+) and (-) are correctly attached to the corresponding (+) and (-) poles on
the battery.
• Do not obstruct the fan. Note that the fan will run continuously during the charging cycle.
• The SBC24025 contains hazardous voltages internally and contains no user serviceable parts. Return to
supplier for any service needs.
• If the power cord is da aged, it ust be replaced by the anufacturer or its service agent or a
si ilarly qualified person in order to avoid hazard.
• The charger is designed to charge batteries or battery banks constructed with 12 cells only.
• The charger ust only be plugged into an earthed 240V ains socket outlet.
• For in-vehicle charging,
1. The battery charger ust be connected first to the battery ter inal which is not connected to the
vehicle chassis. The other connection is to be ade to the chassis, re ote fro the battery and
fuel line. The battery charger is then to be connected to the supply ains.
2. After charging, disconnect the battery charger fro supply ains. Then re ove the chassis
connection and the battery connection, in this order.
• The appliance is not intended for use by young children or infir persons without supervision.
• Young children should be supervised to ensure that they do not play with the appliance.
• This appliance is not intended for per anent ounting onto a vehicle.
3
1.0 INSTALLATION
The charger ust be placed in a well ventilated position to allow air flow to cool the charger for greater
charging efficiency. The charger is best placed on top of the air filter if charging the battery in the vehicle. If
that is not possible then find a convenient safe place where the charger is secure and not likely to fall down.
NOTE: Never place the charger on top of the battery.
Leave the vent caps closed as odern auto otive batteries have a gas reco bination design built into the
cap to allow the retention of the gassed electrolyte and its return to the battery cell. All vent caps also have a
venting syste to allow excessive gasses to escape. Coin screwed cap designs also have a “ anifold”
venting syste , which works in the sa e way as a screwed vent cap.
1.1 Connections
Ensure the connections are tight and sound. Then connect the 240VAC three pin plug to the power point and
switch on the power. Then switch on the S art Battery Charger power switch (located on the rear panel).
Once turned ON, the charger will pause o entarily, then light up all the indicators in a sequence so you
can see that they are all functional. The cooling fan will also be run up and tested during this sequence.
2.0 SELECTING A BATTERY TYPE
You will have 60 seconds fro the o ent the charger is turned on to ake the selection.
Using the Battery Type Selector button, select the battery type to be charged. The battery options are;
Flooded cell:
Standard Lead Acid
Calciu content Lead Acid
Non-flooded cell:
Gel/AGM
By default, a Gel/AGM battery type is selected (Green Indicator ON).
During the selection period, the selected battery type LED will flash. Once 60 seconds has expired, the
selection is locked in for the re ainder of the charging period and the selected battery type LED will re ain
per anently illu inated. Should an incorrect battery be selected, the battery charger should be turned off for
approxi ately 10 seconds, then turned back on. The correct battery selection can now be ade.
When the Ready indicator (GREEN) is ON, the battery has finished charging.
If the Fault indicator (RED) is flashing, a fault has caused the charging process to ter inate. The nu ber of
quick flashes, followed by a longer OFF period indicates the nature of the fault. The fault indication will be
reset when the charger is switched OFF.
NOTE: or safety reasons, always switch O the battery charger before disconnecting the battery.
Press button to select the battery type
pb
pbpb
pb ca
caca
ca
BATTERY TYPE SELECTOR
BATTERY TYPE SELECTORBATTERY TYPE SELECTOR
BATTERY TYPE SELECTOR
gl
glgl
gl
Standard Flooded
Calcium Flooded
Gel/AGM
pb
pbpb
pb
ca
caca
ca
gl
glgl
gl
Press

4
3.0 OPERATION
The SBC24025 has been designed to return a discharged battery to 100% charge through a rigorous
charging cycle. This charging cycle assu es that no load is connected to the battery during charging,
otherwise full charge ay not be achieved. It is also possible that the charger ay deter ine that the
charging characteristics with a load applied appears like a fault and ter inate the charging cycle. S all
loads such as the loads drawn by vehicle electronics with the ignition turned off do not present a proble
to nor al operation. The charging cycle consists of a nu ber of stages as described over the page, and
when co pleted re ains in a float ode indefinitely. It is safe to leave the battery connected to the
charger as the float ode will not allow over charging whilst aintaining the battery to a fully charged
state.
If the battery re ains connected to the charger and a charge cycle co pletes, the charging cycle will not
restart even if the battery beco es discharged by a load. Instead, the charger will continue in float ode.
The full charge cycle can only be restarted by turning the charger off, waiting for approxi ately 10
seconds, then turning it back on again.
4-STAGE CHARGING PROCESS
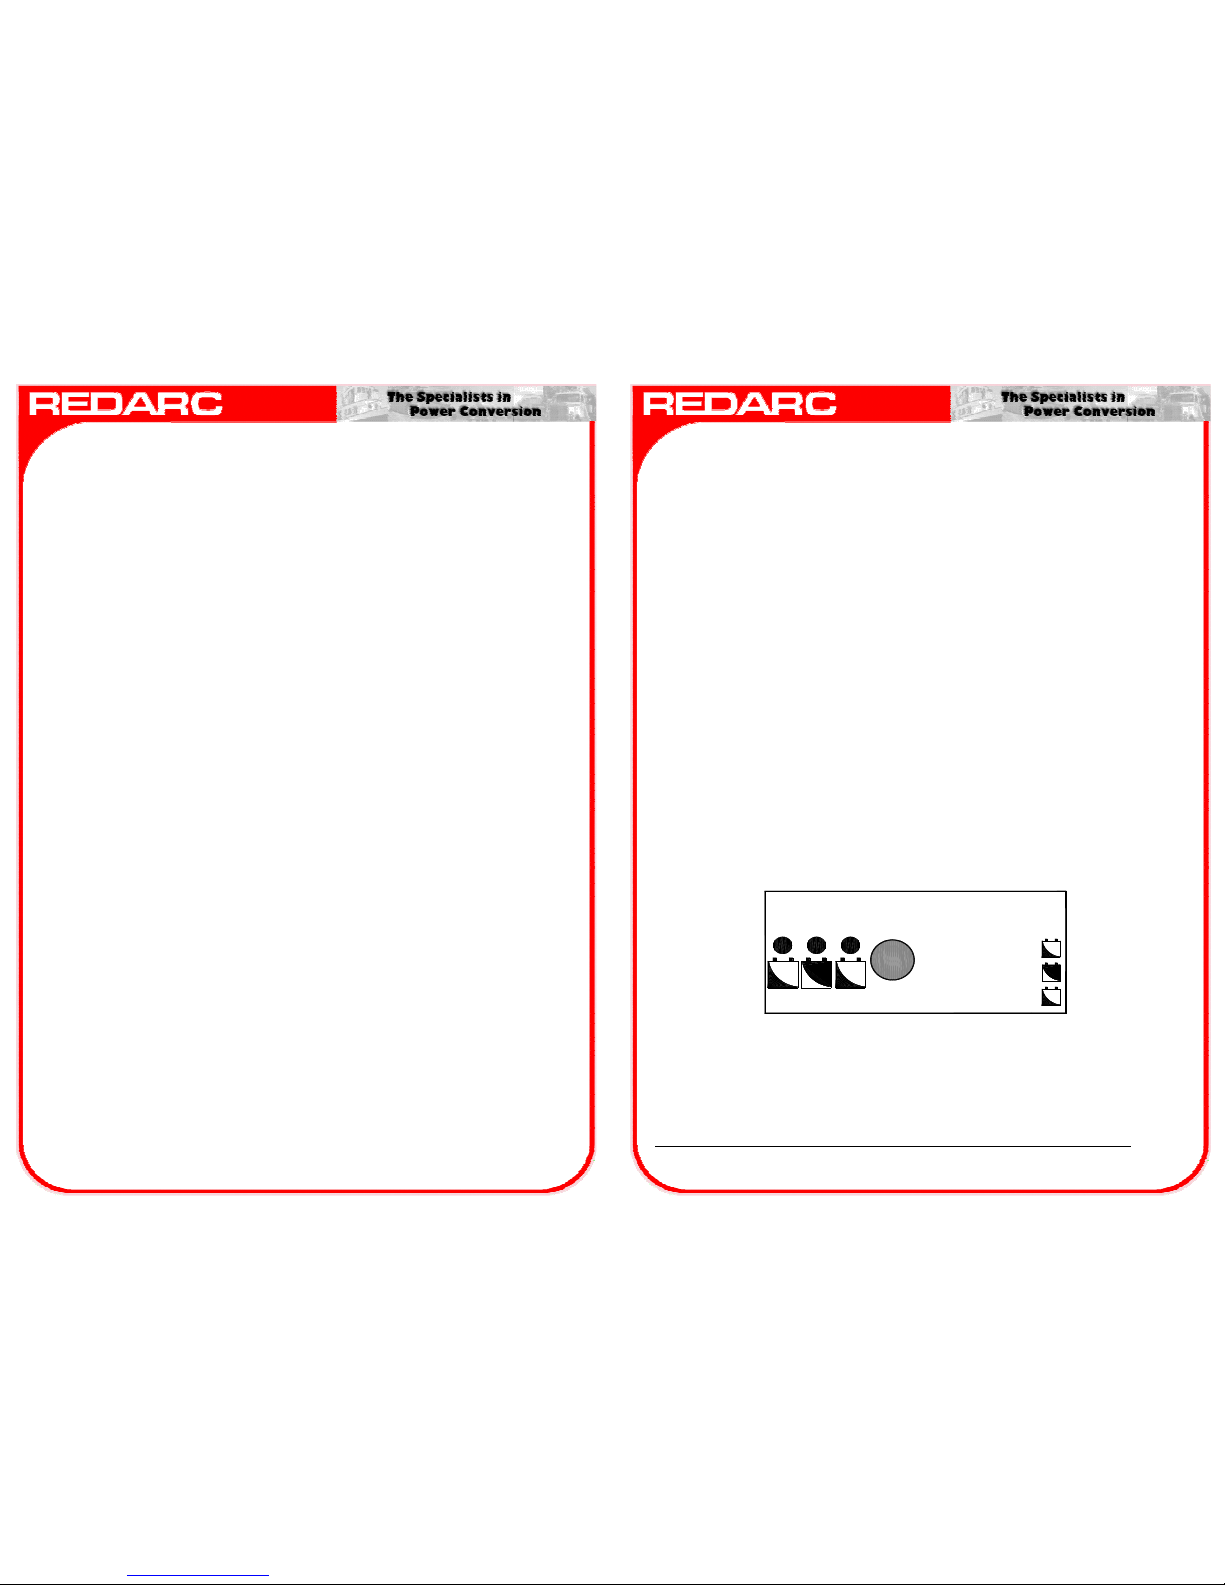
3.1 Indicators
There are three visual indicators to assist the operator during the charging process, and these are described
below.
Charging indicator (Orange)
This indicator is used during the first three stages of charging (Boost, Absorption and Equalise), and flashes at
different rates to indicate the charging ode.
Boost Mode: Orange indicator ON-single flash. This ode delivers the bulk charge to the battery by
delivering axi u constant current. This stage is ti e li ited to cater for a fully discharged 20Ah battery,
however the ti e taken in this ode does greatly depend on the condition and state of charge of the
battery.
Absorption Mode: Orange indicator ON-double flash.
This ode ust be finished before Equalise can take place. The charger aintains constant charging
voltage, while the current reduces. This voltage is close to the gassing voltage of the electrolyte.
Equalise Mode: Orange indicator ON – triple flash.
This ode brings the battery to full charge. A higher voltage is applied to induce so e gassing, which ixes
the electrolyte, bringing the cells to equal potential. In a low aintenance battery, ost of the hydrogen
and oxygen gasses will reco bine and will not dry out the battery.
Note that this ode is not run for Gel/AGM batteries.
B O O S T A B S O R P TI O N E Q U A LI S E F L O AT
C H A R G IN G
T IM E
C H A R G E
C U R R E N T ( A )
C H A R G E
VO L T A G E (V )
5
Ready indicator (Green) Continuously ON
Indicates that the battery charging process is co plete, and full charge (100%) has been achieved. The
charger is now in the aintenance ode (Float), where it will keep the battery at full charge indefinitely
without the fear of overcharging. The battery is ready for use, and can be disconnected.
Ready indicator (Green) lashing
Indicates that the battery capacity has exceeded the axi u charge ti e allowable in one charge
cycle. The battery charging process has ti ed out, the charger is now in the aintenance ode (Float),
where it will keep the battery at its current level of charge indefinitely. The charger can now be turned off
and back on again to restart the charging cycle and hence achieve full charge.
4.0 TROUBLE SHOOTING
The Redarc SBC24025 is one of the ost advanced chargers on the arket. It has been designed to detect
and advise the operator of a variety of fault conditions, and will ter inate the charging cycle i ediately
a fault is detected. This ensures that the charger does not atte pt to charge a faulty battery, which
protects the charger, battery and ost i portantly the user.
4.1 ault Detection LED (Red)
When faults are detected, the charger shuts down the charging process and displays the nature of
the fault via a Red flashing LED. Possible faults are;
Continuously on-Hardware failure detected:
The SBC2 025 failed its self-test on power up. The unit should be returned to the supplier for inspection.
One lash-Over current detected:
An excessive current will cause this fault. This will indicate a faulty battery if it occurs during a charging
cycle, but not necessarily if it happens upon connection. This fault may also be triggered by trying to
charge a lower voltage battery than specified e.g. 12V on a 2 V charger.
Two lashes-Voltage proble detected:
A battery that remains at a low voltage for too long or a battery which has a higher voltage than specified,
will cause this fault e.g. attempting to charge a 8V battery on a 2 V charger.
Three lashes-Faulty battery detected:
Charging a battery with a dead cell will result in this fault. With some batteries it might take longer to detect
the fault than in others, depending upon the initial level of charge and also how damaged the battery is. If
the battery is badly damaged, the fault may show up as over current.
our lashes- Overheat:
The charger is too hot to operate, the charging process is suspended, and will recommence once the
charger has cooled down. This can happen on a very hot day, if the charger is positioned in a very hot
place while charging or if the ventilation holes have been blocked. Also, the fan may not be functioning
properly.
4.2 Electrolyte (Not applicable for AGM/Gel battery types)
If the battery charger detects a fault it will shut down i ediately. In this case, check if connections to the
battery are tight. Is the battery sound? Check the electrolyte levels and use a Hydro eter to check for
“dead” cells. A lead-acid battery is considered to be discharged when the specific gravity of the
electrolyte is less than 1.16.
Fault
Other Redarc Batteries Charger manuals

Redarc
Redarc BCDC1212T User manual

Redarc
Redarc BCDC1225D User manual

Redarc
Redarc BCDC1220 User manual

Redarc
Redarc BCDC2420 User manual

Redarc
Redarc BCDCN1225 Manual

Redarc
Redarc BCDC1220 User manual

Redarc
Redarc BCDC-1206 User manual

Redarc
Redarc BCDC1220 User manual

Redarc
Redarc BCDC2420 User manual

Redarc
Redarc BCDC1225 User manual

Redarc
Redarc FK60 User manual

Redarc
Redarc BCDC1240-LV User manual

Redarc
Redarc BCDC1225D User manual

Redarc
Redarc BCDC2420 User manual

Redarc
Redarc LFP2420-LV User manual

Redarc
Redarc BCDCN1225 User manual

Redarc
Redarc BCDC1240D User manual

Redarc
Redarc CE25 User manual

Redarc
Redarc Manager15 User manual

Redarc
Redarc SBC1205 User manual