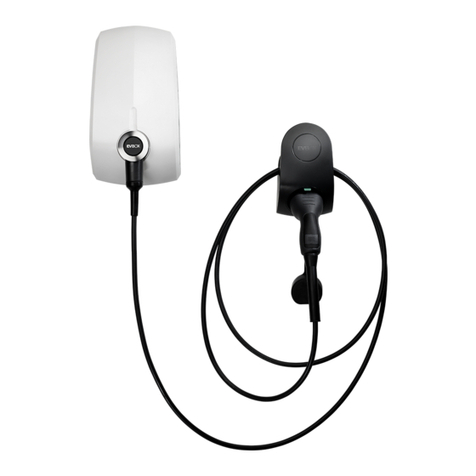
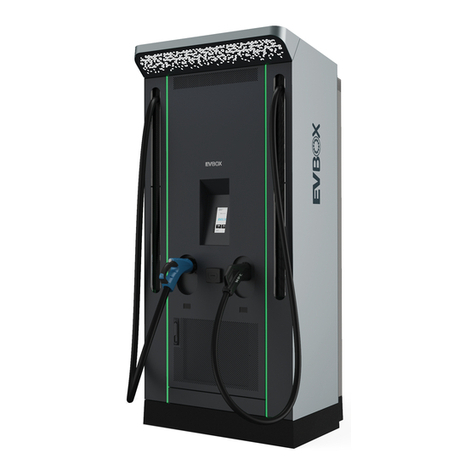
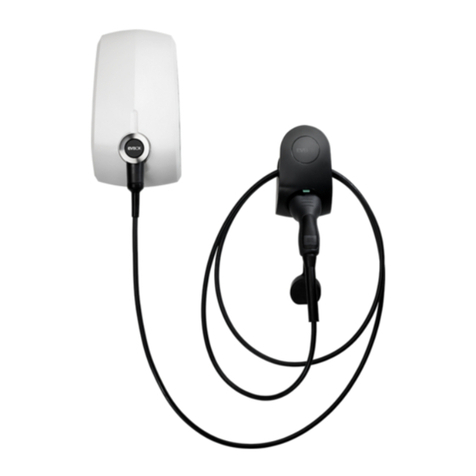
EVBox BusinessLine User manual

BusinessLine
Operation & User Manual
Nov 2021

Page 2 of 13
www.ev-hub.com.au
Contents
1 Introduction .................................................................................................................................... 3
1.1 Compatibility ........................................................................................................................... 3
1.2 Get in touch............................................................................................................................. 3
1.3 Product classification .............................................................................................................. 3
2 Safety precautions .......................................................................................................................... 3
2.1 Warning: Risk of electric shock ............................................................................................... 3
2.2 Warning: Accumulation of gasses ........................................................................................... 4
2.3 Cautions: ................................................................................................................................. 4
2.4 Transport and storage ............................................................................................................. 4
3 Product features ............................................................................................................................. 5
3.1 BusinessLine configurations .................................................................................................... 5
3.2 Connecting BusinessLine ......................................................................................................... 5
3.3 Description .............................................................................................................................. 6
4 Technical specifications .................................................................................................................. 6
5 Using BusinessLine ......................................................................................................................... 7
5.1 Start charging with BusinessLine ............................................................................................ 7
5.2 Stop charging with BusinessLine ............................................................................................. 8
5.3 LED indicator ring .................................................................................................................... 8
6 Troubleshooting ............................................................................................................................. 9
7 Disclaimer ..................................................................................................................................... 11
8 Smart Charge - App Operation ..................................................................................................... 12

Page 3 of 13
www.ev-hub.com.au
1 Introduction
Thank you for choosing the EVBox BusinessLine, our best-selling charging station with proven
technology and reliability. Built to be connected and intelligent, EVBox BusinessLine makes going
electric at your workplace or business easier than ever.
This Operation and User manual tells you how to use and fault find any potential issues with the
EVBox BusinessLine. Carefully read the safety information before you start.
These instructions are valid for several models of the charging station. It is possible that some
features and options described may not apply to your charging station.
1.1 Compatibility
Note that the EVBox BusinessLine generation 4 is not compatible with earlier generations of the
BusinessLine charging station. Each Hub-Satellite installation must consist of the same generation of
charging stations.
1.2 Get in touch
If you have any suggestions how we can improve our offer, or if you see an error, we’d love to hear
from you. You can contact us by going to https://ev-hub.com.au/
All EVBox manuals can be downloaded from evbox.com/manuals.
1.3 Product classification
This product has the following classification:
Table 1. Classification
Power supply input
EV supply equipment permanently connected
to AC supply network.
Power supply output
AC EV supply equipment
Normal environmental conditions
Outdoor use
Access
Equipment for locations with unrestricted
access.
Mounting method
Stationary equipment, surface
-
mounted on
walls, poles or brackets.
Protection agai
nst electric shock
Class 1 equipment
Charging modes
Mode 3
2 Safety precautions
Read and obey the following safety precautions before you install, service or use your charging
station. The installer must ensure that the charging station is installed in accordance with the
relevant country-specific standards and local regulations.
2.1 Warning: Risk of electric shock
• Switch off input power to your charging station before you install or service the charging
station. Keep the power off until the charging station is fully installed with its covers
installed and secured.

Page 4 of 13
www.ev-hub.com.au
• In the event of danger and/or an accident, a certified electrician must immediately
disconnect the electrical supply from the charging station.
• Do not operate the charging station if it is physically damaged or if the charging cable has
cracks, excessive wear, or other visible damage. Contact EVBox or your distributor if you
suspect that the charging station is damaged.
• Do not direct powerful jets of water toward or onto the charging station. Never operate it
with wet hands. Do not put the EV charging plug into any liquid.
• Do not put fingers or other objects inside the charging port or plug port.
• Read the user instructions delivered with your EVBox charging station and the User Manual
for your electric vehicle before charging your vehicle.
2.2 Warning: Accumulation of gasses
• Some electric vehicles require an external ventilation system to prevent the accumulation of
hazardous or explosive gasses when charging indoors. Refer to your vehicle User Manual to
check if your vehicle releases hazardous or explosive gasses when charging.
2.3 Cautions:
• Use this charging station to charge Mode 3 compatible electric vehicles only. Refer to your
vehicle User Manual to check if your vehicle is compatible.
• This charging station may affect implanted electronic medical devices. Before you charge
your vehicle, consult the supplier of the electronic medical device to determine if it can be
influenced by charging effects.
• This charging station may only be installed, serviced, relocated and repaired by qualified
persons. Incorrect installation, repairs or modification can result in danger to the user and
may void the warranty and liability.
• This charging station contains no user-serviceable parts. The user must not attempt to
service, repair or relocate the charging station. Contact EVBox or your dealer for more
information.
• Make sure that the charging cable cannot become damaged (kinked, jammed or driven over)
and that the plug(s) do not come into contact with heat sources, dirt or water.
• Only use the charging station under the specified operating conditions.
• Do not use explosives or flammable substances near the charging station.
• If you are unsure about how to use a charging station, ask for help.
• Do not allow children to operate a charging station. Adult supervision is required when
children are near a charging station that is in use.
• Make sure that the charging cable is positioned so that it will not be stepped on, tripped
over, driven over or otherwise subjected to excessive force or damage.
• While charging, the cable must be completely unwound and connected to the vehicle
without overlapping loops (this is to avoid the risk of the charging cable overheating).
• Only pull on the charging plug hand grip and never on the charging cable itself.
• Adapters, conversion adapters or cord extensions must never be used on this charging
station.
2.4 Transport and storage
• Disconnect input power before removing the charging station for storage or relocation.
• Only transport and store the charging station in its original packaging. No liability can be
accepted for damage incurred when the product is transported in non-standard packaging.

Page 5 of 13
www.ev-hub.com.au
• Store the charging station in a dry environment in the temperature range given in the
specifications.
3 Product features
The BusinessLine charging station is compatible with all Mode 3 electric vehicles and is designed for
both indoor and outdoor use. Operation of the charging station is approved at ambient
temperatures of between -25 °C and +50 °C. The charging station can be connected to a central
system for the registration of the number of kilowatt-hours (kWh) charged.
3.1 BusinessLine configurations
BusinessLine charging stations come in the following configurations:
• Single socket, communications hub.
• Single socket, satellite.
• Double socket, one communications hub and one satellite.
• Double socket, two satellites.
One BusinessLine hub can be connected to a maximum of 19 BusinessLine satellites. A smart grid
can be established over all charging stations. This optimizes power usage and lets more vehicles
charge simultaneously should power limitations exist.
3.2 Connecting BusinessLine
A charging station has an RFID card reader and a kWh meter. A communications hub is built into a
hub-type charging station. The communications hub has a cellular data connection, Wi-Fi, Bluetooth
and GPS which have the following functions:
Connection
Description
Cellular data connection (2G,
3G and 4G)
Connection to backend systems for setup,
maintenance and transactions (method 1).
Wi
-
Fi
Connection to backend systems for setup,
maintenance and transactions (method 2).
Bluetooth
Local setup and access control for the charging
stations.
GPS
Location of the charging stations.

Page 6 of 13
www.ev-hub.com.au
3.3 Description
1.
Operation
• BusinessLine is connected using either a built-
in or remote dual band Wi-Fi connection or a
cellular modem.
• To start or stop a charging session, use a
registered RFID (Smart Charge) charge card,
key fob, or the Smart Charge app.
• When used in Autostart mode, a registered
charge card, key fob, or Smart Charge app is
not required. Charging starts automatically
when the charging station is connected to a
vehicle.
2. RFID reader
• This is the area where you scan an RFID card or
key fob.
• The BusinessLine reads the data from the card
or fob to start or stop a charging session. If the
charging station is not connected to a vehicle
and is not activated by the RFID card or fob,
there is no voltage on the socket and the
charging session will not start.
3.
LED indicator ring and socket
• The LED indicator ring around the socket shows
the status and mode of the charging station at
all times. The socket lets you use your own
charging cable. The socket is a standard Type 2
with an optionally integrated shutter system.
4 Technical specifications
Feature
Description
Technical features
Charging capacity per socket
Maximum 7.4 kW, 11 kW or 22 kW, depending on
installation and set-up.
Socket type
Type 2
Number of sockets
1 or 2
Output power per socket
1
-
phase or 3
-
phase, 230 V
–
400 V, 16 A or 32 A.
Connection capacity
1
-
phase or 3
-
phase, 50 Hz, between 2.5
–
10 mm2
Residual direct current detecting device
Complies with IEC 62955, with 6 mA smooth residual
DC detection and additional 30 mA residual AC
detection
Operating temperature range
-
25 °C to +50 °C
Humidity (non
-
regulating)
Max. 95%
Communication
GPS / GSM / UMTS / LTE cellular data, Wi
-
Fi, Bluetooth
and GPS module controller with RFID reader (in hub
type)
Communication protocol
O
CPP 1.6 JSON

Page 7 of 13
www.ev-hub.com.au
Physical features
Certification and compliance
See Declaration of conformity
Protection
IP55, IK08
Housing
Polycarbonate
Max. installation altitude
2000 m above sea level
Feature
Description
Dimensions (mm)
600 x 255 x 410 mm
(double)
600 x 255 x 205 mm (single)
Weight (kg)
12 kg (double socket)
10 kg (single socket)
Mounting
Double: Combipole in or on the ground, or on a wall.
Single: Combipole in or on the ground, or on a wall.
Wall spacer for direct installation on a wall.
Standard colours
RAL 7016 (dark gray), RAL 9016 (white), RAL 5017
(blue)
5 Using BusinessLine
5.1 Start charging with BusinessLine
1.
Plug your charging cable into your car and
into the BusinessLine charging station.
The LED ring shows green.
2.
Hold your charge card (RFID card) in front of
the reader on the charging station.
The LED ring flashes green and you hear a
beep. Your card is being authorized.
3.
The charging station LED ring shows blue
when your car is charging.
4.
The charging station LED ring flashes yellow
when your car is on pause and waiting to
start charging.
5.
The charging station LED ring shows
continuous yellow when your car is charged.
Note:

Page 8 of 13
www.ev-hub.com.au
• A flashing yellow LED indicator (once every second) shows a paused charging session. This is
only possible in a hub-satellite configuration. Charging automatically resumes when power
becomes available.
• For RFID card-operated charging stations, the LED status indicator shows green in standby
mode. For Autostart charging stations that do not operate with an RFID card, the LED status
indicator is off in standby mode.
5.2 Stop charging with BusinessLine
You can stop charging your car at any time, even if it isn't fully charged.
1. Hold your charge card (RFID card) in front of the reader on the charging station. The LED
ring flashes green and you hear a beep. Your card is being authorized.
2. The charging station LED ring turns green or is off when it stops charging.
3. Unplug your charging cable from your car and the charging station.
5.3 LED indicator ring
Check Troubleshooting
on page 9 in this
manual for solutions. If
you cannot solve the
issue, contact tour EV
Hub installer for
support.

Page 9 of 13
www.ev-hub.com.au
6 Troubleshooting
Troubleshooting must only be done by a qualified electrician unless otherwise stated. Incorrect
installation, repairs or modification can result in danger to the user and may void the warranty and
liability.
This is a general troubleshooting guide listing the most common issues. If you are not able to solve
an issue, visit www.ev-hub.com for further help from our support team.
Problem
Possible cause
Solution
Charging station does not
react
No power to charging
station
•
Check that the residual current
device and circuit breaker on the
main power supply panel are on.
• Switch off the main power
supply, wait 20 seconds, then
switch on the main power supply
again.
• Check that the power supply
cable connected to the charging
station is live. The LED ring
green should show green.
Residual current device
trips constantly
Grounding error in the
charging station
•
Examine electrical wiring for
damage. Replace damaged
wiring.
• Moisture or condensation on
electrical connections. Dry the
connections where necessary. If
necessary, repair seals on
charging station
Fault in the vehicle or
defective charging cable • Replace the charging cable
Ground resistence is too
high for the vehicle type
•
Measure the ground resistance
and compare it to the resistance
required by the supplier of the
vehicle, for example Renault Zoe
< 150 Ω.

Page 10 of 13
www.ev-hub.com.au
LED ring flashes red
immediately when the
card is held against the
reader.
Charge card is not
authorized for charging at
this charging station.
•
Check that the charge card is
authorized for use on public
chargers. (Check by user)
• Check the settings of your
charging station in your online
account. (Check by user)
There is no
communication with the
backend.
•
Use the EVBox Connect App to
check that the hub station or
hub module has a connection to
the cellular network or Wi-Fi.
LED ring shows constantly
red Grounding fault
•
Check that the electrical
installation is correctly
grounded.
• If necessary, add additional
grounding closer to the
installation.
In a hub-satellite
installation, one or more
LED rings constantly flash
red.
Crossed connection in
one of the satellite RS485
connections.
• Examine RS485 cabling and
connections.
No connection with the
hub charging station.
•
Examine RS485 cabling and
connections.
LED ring always shows
yellow.
Vehicle is fully
charged.
•
Disconnect the charging cable.
Charging station is
waiting for vehicle.
•
Check that the charging cable
plug is inserted into the vehicle
correctly. (Check by user)
Vehicle is on a timer.
•
Change the setting of the timer
in the vehicle. (Done by user)
The charging cable has a
fault.
•
Replace the charging cable.
(Done by user)
Ground resistance is too
high for the vehicle type.
•
Measure the ground resistance
and compare it to the resistance
required by the supplier of the
vehicle, for example Renault Zoe
< 150 Ω.
LED ring shows blue for a
few seconds, then
changes to yellow.
Vehicle will not charge
•
Make sure that the minimum
current accepted by the car is
not higher than the minimum
current supplied by the station.
(Check by user.)
• Check the line-to-line and
neutral-to-line voltages at
various locations on the power
circuit(s).
• Check that the electrical
installation is correctly
grounded.
Charging station does not
start charging. LED ring
flashes green for 30
No response from the
backend
portal account.
•
Use the card again to start the
charging. If the problem remains,
contact your operator or service

Page 11 of 13
www.ev-hub.com.au
seconds, then flashes r
ed
10 times. LED ring
changes to green or goes
off.
provider for further support.
(Check by user.)
Plug not locked.
•
Is the plug pushed far enough
into the charging station? (Check
by user.)
• Examine the plug for damage or
bent pins. (Check by user.)
• Examine the socket to see if it is
blocked by an object. (Check by
user.)
Vehicle not connected.
•
Is the plug properly connected to
the vehicle? (Check by user.)
Charging station lock is
blocked.
•
Check if the
charging station
internal wiring harness blocks
the plug locking mechanism.
Plug cannot be removed
from charging station.
Incorrect card used to
stop charging (LED ring
flashes purple briefly).
•
Use the same card to stop
charging as to start charging.
(Check by user.)
No response from the
backend portal account.
•
Use the card again to stop the
charging. If the problem remains,
contact your operator or service
provider for further support.
(Check by user.)
Plug lock will not release.
•
Push the plug
further into the
charging station and hold the
card against the card reader
again. (Check by user.)
• Switch off the main power
supply, wait 20 seconds, then
switch on the main power supply
again.
7 Disclaimer
The present document is drawn up by way of information only and does not constitute an offer
binding upon EV Hub. EV Hub has compiled the contents of this document to the best of its
knowledge. No express or implied warranty is given for the completeness, accuracy, reliability or
fitness for particular purpose of its content and the products and services presented therein.
Specifications and performance data contain average values within existing specification tolerances
and are subject to change without prior notice. Prior to ordering, always contact EV Hub for the
latest information and specification. EV Hub explicitly rejects any liability for any direct or indirect
damage, in the broadest sense, arising from or related to the use and/or interpretation of this
document.
Smart EV Solutions Pty Ltd trading as both EV Hub and Smart Charge. ABN: 74 650 654 916
National Equipment Registration Responsible Supplier # E9093

Page 12 of 13
www.ev-hub.com.au
8 Smart Charge - App Operation
Download the App
www.smart-charge.com.au
#1.1 - Find and Install the App #1.2 - Register your Account #1.3 - Choose Pricing Plan
Find the App on your App
Store by either searching,
clicking on the links on the
website, or scanning the QR
Code above.
Hit Install.
Once downloaded, click on
‘Open’ then expand the Menu
by clicking on the three
horizontal bars found at the
top left-hand side. Click on
'Login or Register'.
Choose a Pricing Plan
-
either
'Pay as you go', or a 'Package'.
Note that Package Plans offer
discounts and carry a validity
of 18 months. Click 'Create
Profile'.
#1.4 - Complete the Form #1.5 - Add Payment #1.6 - Finish Registration
Fill out the Form with your
Name, Address, Email Address
and Mobile Number.
Please ignore 'Subscription
Code', unless you are part of a
Company Fleet Management
Program. Click 'Add Payment'.
Once you have entered your
Credit Card details, click on
'Save'.
Page 2 – Charging your Vehicle

Page 13 of 13
www.ev-hub.com.au
#2.2 - The Menu #2.3 - Wallet #2.4 - Locate your Charger
Log in.
Click on and open the 'Menu'.
Your Menu may show a
'Wallet’ if you have deposited
credit into a Package.
To locate your Charger, look
for the Green flag on the Map.
Click on the Flag
#2.4 - Connector Status #2.5 - Select the Connector #2.6 - Start & Stop
Check the green ‘Available’
icon for Connector Status.
Also, the Connector Type
available, kWh output and
Cost of Charge.
Once at the Charger, plug in
the Connector to your vehicle
and click on 'Click to Start'
under that Connector Type on
the App.
Press 'Start' to begin your
charge. Once your charge is
finished, then press 'Stop'
button.
Smart Charge 24/7 Support –1800 998 896
support@smart-charge.com.au

BusinessLine
Operation & User Manual
Nov 2021

Page 2 of 13
www.ev-hub.com.au
Contents
1 Introduction .................................................................................................................................... 3
1.1 Compatibility ........................................................................................................................... 3
1.2 Get in touch............................................................................................................................. 3
1.3 Product classification .............................................................................................................. 3
2 Safety precautions .......................................................................................................................... 3
2.1 Warning: Risk of electric shock ............................................................................................... 3
2.2 Warning: Accumulation of gasses ........................................................................................... 4
2.3 Cautions: ................................................................................................................................. 4
2.4 Transport and storage ............................................................................................................. 4
3 Product features ............................................................................................................................. 5
3.1 BusinessLine configurations .................................................................................................... 5
3.2 Connecting BusinessLine ......................................................................................................... 5
3.3 Description .............................................................................................................................. 6
4 Technical specifications .................................................................................................................. 6
5 Using BusinessLine ......................................................................................................................... 7
5.1 Start charging with BusinessLine ............................................................................................ 7
5.2 Stop charging with BusinessLine ............................................................................................. 8
5.3 LED indicator ring .................................................................................................................... 8
6 Troubleshooting ............................................................................................................................. 9
7 Disclaimer ..................................................................................................................................... 11
8 Smart Charge - App Operation ..................................................................................................... 12

Page 3 of 13
www.ev-hub.com.au
1 Introduction
Thank you for choosing the EVBox BusinessLine, our best-selling charging station with proven
technology and reliability. Built to be connected and intelligent, EVBox BusinessLine makes going
electric at your workplace or business easier than ever.
This Operation and User manual tells you how to use and fault find any potential issues with the
EVBox BusinessLine. Carefully read the safety information before you start.
These instructions are valid for several models of the charging station. It is possible that some
features and options described may not apply to your charging station.
1.1 Compatibility
Note that the EVBox BusinessLine generation 4 is not compatible with earlier generations of the
BusinessLine charging station. Each Hub-Satellite installation must consist of the same generation of
charging stations.
1.2 Get in touch
If you have any suggestions how we can improve our offer, or if you see an error, we’d love to hear
from you. You can contact us by going to https://ev-hub.com.au/
All EVBox manuals can be downloaded from evbox.com/manuals.
1.3 Product classification
This product has the following classification:
Table 1. Classification
Power supply input
EV supply equipment permanently connected
to AC supply network.
Power supply output
AC EV supply equipment
Normal environmental conditions
Outdoor use
Access
Equipment for locations with unrestricted
access.
Mounting method
Stationary equipment, surface
-
mounted on
walls, poles or brackets.
Protection agai
nst electric shock
Class 1 equipment
Charging modes
Mode 3
2 Safety precautions
Read and obey the following safety precautions before you install, service or use your charging
station. The installer must ensure that the charging station is installed in accordance with the
relevant country-specific standards and local regulations.
2.1 Warning: Risk of electric shock
• Switch off input power to your charging station before you install or service the charging
station. Keep the power off until the charging station is fully installed with its covers
installed and secured.

Page 4 of 13
www.ev-hub.com.au
• In the event of danger and/or an accident, a certified electrician must immediately
disconnect the electrical supply from the charging station.
• Do not operate the charging station if it is physically damaged or if the charging cable has
cracks, excessive wear, or other visible damage. Contact EVBox or your distributor if you
suspect that the charging station is damaged.
• Do not direct powerful jets of water toward or onto the charging station. Never operate it
with wet hands. Do not put the EV charging plug into any liquid.
• Do not put fingers or other objects inside the charging port or plug port.
• Read the user instructions delivered with your EVBox charging station and the User Manual
for your electric vehicle before charging your vehicle.
2.2 Warning: Accumulation of gasses
• Some electric vehicles require an external ventilation system to prevent the accumulation of
hazardous or explosive gasses when charging indoors. Refer to your vehicle User Manual to
check if your vehicle releases hazardous or explosive gasses when charging.
2.3 Cautions:
• Use this charging station to charge Mode 3 compatible electric vehicles only. Refer to your
vehicle User Manual to check if your vehicle is compatible.
• This charging station may affect implanted electronic medical devices. Before you charge
your vehicle, consult the supplier of the electronic medical device to determine if it can be
influenced by charging effects.
• This charging station may only be installed, serviced, relocated and repaired by qualified
persons. Incorrect installation, repairs or modification can result in danger to the user and
may void the warranty and liability.
• This charging station contains no user-serviceable parts. The user must not attempt to
service, repair or relocate the charging station. Contact EVBox or your dealer for more
information.
• Make sure that the charging cable cannot become damaged (kinked, jammed or driven over)
and that the plug(s) do not come into contact with heat sources, dirt or water.
• Only use the charging station under the specified operating conditions.
• Do not use explosives or flammable substances near the charging station.
• If you are unsure about how to use a charging station, ask for help.
• Do not allow children to operate a charging station. Adult supervision is required when
children are near a charging station that is in use.
• Make sure that the charging cable is positioned so that it will not be stepped on, tripped
over, driven over or otherwise subjected to excessive force or damage.
• While charging, the cable must be completely unwound and connected to the vehicle
without overlapping loops (this is to avoid the risk of the charging cable overheating).
• Only pull on the charging plug hand grip and never on the charging cable itself.
• Adapters, conversion adapters or cord extensions must never be used on this charging
station.
2.4 Transport and storage
• Disconnect input power before removing the charging station for storage or relocation.
• Only transport and store the charging station in its original packaging. No liability can be
accepted for damage incurred when the product is transported in non-standard packaging.
Page 5 of 13
www.ev-hub.com.au
• Store the charging station in a dry environment in the temperature range given in the
specifications.
3 Product features
The BusinessLine charging station is compatible with all Mode 3 electric vehicles and is designed for
both indoor and outdoor use. Operation of the charging station is approved at ambient
temperatures of between -25 °C and +50 °C. The charging station can be connected to a central
system for the registration of the number of kilowatt-hours (kWh) charged.
3.1 BusinessLine configurations
BusinessLine charging stations come in the following configurations:
• Single socket, communications hub.
• Single socket, satellite.
• Double socket, one communications hub and one satellite.
• Double socket, two satellites.
One BusinessLine hub can be connected to a maximum of 19 BusinessLine satellites. A smart grid
can be established over all charging stations. This optimizes power usage and lets more vehicles
charge simultaneously should power limitations exist.
3.2 Connecting BusinessLine
A charging station has an RFID card reader and a kWh meter. A communications hub is built into a
hub-type charging station. The communications hub has a cellular data connection, Wi-Fi, Bluetooth
and GPS which have the following functions:
Connection
Description
Cellular data connection (2G,
3G and 4G)
Connection to backend systems for setup,
maintenance and transactions (method 1).
Wi
-
Fi
Connection to backend systems for setup,
maintenance and transactions (method 2).
Bluetooth
Local setup and access control for the charging
stations.
GPS
Location of the charging stations.

Page 6 of 13
www.ev-hub.com.au
3.3 Description
1.
Operation
• BusinessLine is connected using either a built-
in or remote dual band Wi-Fi connection or a
cellular modem.
• To start or stop a charging session, use a
registered RFID (Smart Charge) charge card,
key fob, or the Smart Charge app.
• When used in Autostart mode, a registered
charge card, key fob, or Smart Charge app is
not required. Charging starts automatically
when the charging station is connected to a
vehicle.
2. RFID reader
• This is the area where you scan an RFID card or
key fob.
• The BusinessLine reads the data from the card
or fob to start or stop a charging session. If the
charging station is not connected to a vehicle
and is not activated by the RFID card or fob,
there is no voltage on the socket and the
charging session will not start.
3.
LED indicator ring and socket
• The LED indicator ring around the socket shows
the status and mode of the charging station at
all times. The socket lets you use your own
charging cable. The socket is a standard Type 2
with an optionally integrated shutter system.
4 Technical specifications
Feature
Description
Technical features
Charging capacity per socket
Maximum 7.4 kW, 11 kW or 22 kW, depending on
installation and set-up.
Socket type
Type 2
Number of sockets
1 or 2
Output power per socket
1
-
phase or 3
-
phase, 230 V
–
400 V, 16 A or 32 A.
Connection capacity
1
-
phase or 3
-
phase, 50 Hz, between 2.5
–
10 mm2
Residual direct current detecting device
Complies with IEC 62955, with 6 mA smooth residual
DC detection and additional 30 mA residual AC
detection
Operating temperature range
-
25 °C to +50 °C
Humidity (non
-
regulating)
Max. 95%
Communication
GPS / GSM / UMTS / LTE cellular data, Wi
-
Fi, Bluetooth
and GPS module controller with RFID reader (in hub
type)
Communication protocol
O
CPP 1.6 JSON

Page 7 of 13
www.ev-hub.com.au
Physical features
Certification and compliance
See Declaration of conformity
Protection
IP55, IK08
Housing
Polycarbonate
Max. installation altitude
2000 m above sea level
Feature
Description
Dimensions (mm)
600 x 255 x 410 mm
(double)
600 x 255 x 205 mm (single)
Weight (kg)
12 kg (double socket)
10 kg (single socket)
Mounting
Double: Combipole in or on the ground, or on a wall.
Single: Combipole in or on the ground, or on a wall.
Wall spacer for direct installation on a wall.
Standard colours
RAL 7016 (dark gray), RAL 9016 (white), RAL 5017
(blue)
5 Using BusinessLine
5.1 Start charging with BusinessLine
1.
Plug your charging cable into your car and
into the BusinessLine charging station.
The LED ring shows green.
2.
Hold your charge card (RFID card) in front of
the reader on the charging station.
The LED ring flashes green and you hear a
beep. Your card is being authorized.
3.
The charging station LED ring shows blue
when your car is charging.
4.
The charging station LED ring flashes yellow
when your car is on pause and waiting to
start charging.
5.
The charging station LED ring shows
continuous yellow when your car is charged.
Note:
Other manuals for BusinessLine
7
Table of contents
Other EVBox Batteries Charger manuals

EVBox
EVBox BusinessLine User manual

EVBox
EVBox Iqon Guide

EVBox
EVBox HomeLine User manual

EVBox
EVBox BusinessLine series User manual

EVBox
EVBox Elvi User manual

EVBox
EVBox Elvi User manual

EVBox
EVBox Smart Charging User manual

EVBox
EVBox Troniq User manual

EVBox
EVBox HomeLine User manual

EVBox
EVBox 9835662680 User manual

EVBox
EVBox Wall box Series User manual

EVBox
EVBox Elvi User manual

EVBox
EVBox 9835662780 User manual

EVBox
EVBox Elvi User manual

EVBox
EVBox Iqon Guide

EVBox
EVBox BusinessLine User manual

EVBox
EVBox Elvi V3.3 E3320-A555X-10.3 User manual

EVBox
EVBox 9835662680 User manual

EVBox
EVBox Troniq 100 User manual

EVBox
EVBox Elvi User manual