EVO2 LED LIGHTS FOR CONCRETE POOLS – INSTALLATION INSTRUCTIONS
EVO2 LED
LIGHTS FOR
CONCRETE POOLS
2
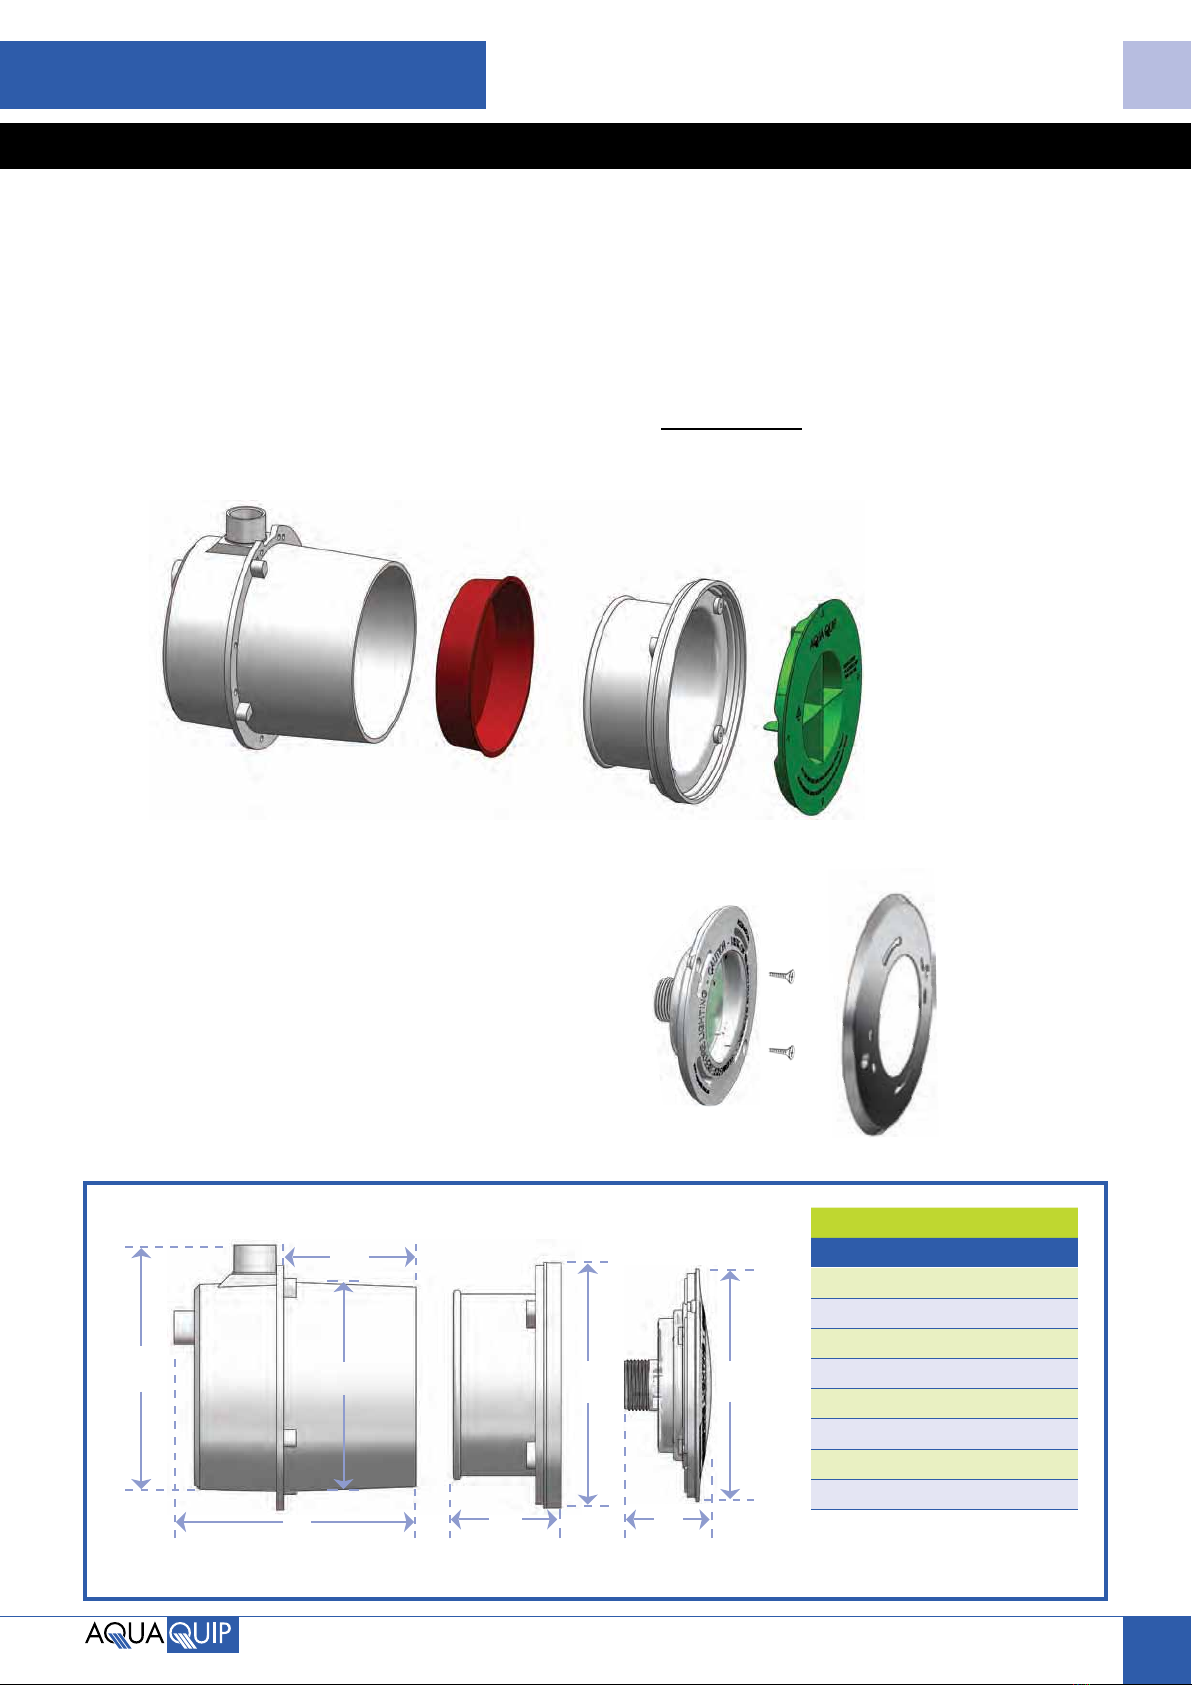
HOUSING INSTALLATION
Housing Installation – see Diagram 1
1 Evo2 Housing should be tied to the steel reinforcing, before
concreting the pool. A red Concrete Cap is supplied to fit
inside the front of the Housing prior to concreting.
2The Housing has two conduit connection points to accept
rigid PVC conduit, do not use flexible conduit. Choose
the appropriate provision for the situation and run conduit
above water level to form an anti-siphon loop. Top provision
accepts 20mm conduit or 25mm conduit fitting. This is the
most popular choice as it features a cable gland fitting on
the interior of the Housing. Rear provision accepts 20mm
coupling. If using the Rear Provision, be sure to plug the
Top Provision using a 25mm conduit cap.
3Use tie wire or cable ties through the holes on the outer
perimeter of the Housing to securely fasten it to the steel
reinforcing bars. Position the Housing so that the front will
finish level with the concrete.
4It is very important to locate Housing at a suitable location
and depth to allow for future servicing of the pool light.
Excavate sufficiently around the rear of the Housing to allow
approximately 100mm of concrete to encase it. If pool is out
of ground and fully formed, ensure the formwork allows for
concrete to encase the Housing.
5During pouring/spraying, concrete should be undercut
around the front perimeter of the Housing to allow for a
construction adhesive to be applied prior to the application
of the internal pool surface.
6Concrete should be applied to reduce the likelihood of
a void occurring on the underside of the Housing. Once
concrete has cured, construction adhesive must be applied
around the Housing to seal it to the concrete.
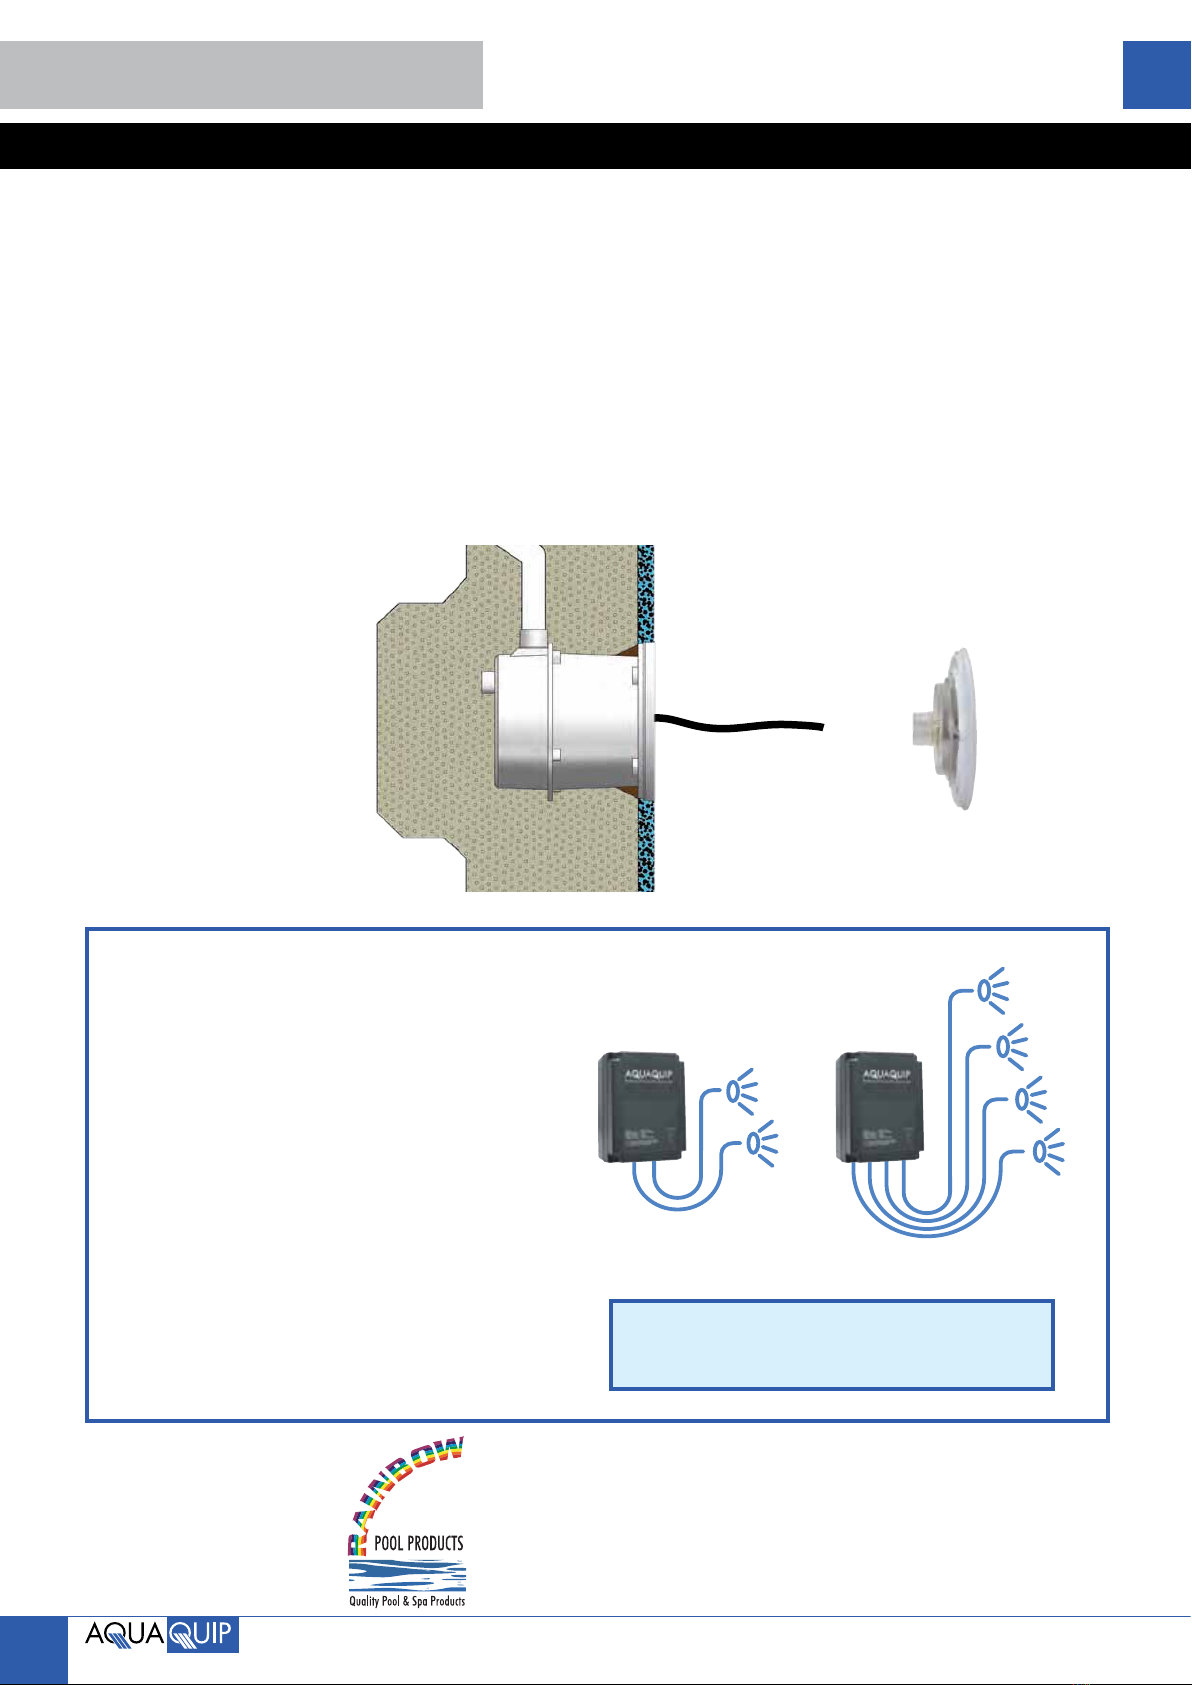
Diagram 1 – After Concreting
Concrete
Undercut
Alternative
Conduit
Provision
100mm
Concrete
Encasement
TECHNICAL SPECIFICATIONS EVO2 LED FLUSH MOUNTED POOL LIGHTS
Nominal Supply Voltage: 12V AC 50/60 Hz
Voltage Tolerance: +20%, -20%
Protection Rating: IPX8 (to 2.0m depth)
Temperature Range: -10°C ~ +40°C water temperature
Power Consumption: White, blue and green = 8 VA
Power Consumption: Spectrum III Multi Colour = 16 VA maximum
Lamp Life: >50,000 hours
Light Output (typical): White-550 lumens, blue-180 lumens, green-500 Lumens
Fault Protection: Power-cycle “run dry” thermal cut-out. Voltage transient clamping.
IEvo2 LED Lights must only be operated underwater as they are water-cooled.
Install in an accessible location, ensure that sufficient cable is wound up inside the housing to allow the light to be
floated to the deck level. If being installed facing up, ensure that there is minimum 100mm of water cover.
Evo2 LED Pool Lights can be installed on a vertical or horizontal pool surface. Up to 1.6m of cable can be wound up
inside the Evo2 Concrete Housing.