aquilar AquiTron AT-RAP-230 Installation instructions

AT-RAP-230
Remote AlarmPanel
AquiTron
INSTALLATION
& OPERATION
INSTRUCTIONS

INSTALLATION ITEMS
(NOT SUPPLIED)
• Wall fasteners for surface mounting
TOOLS REQUIRED
• Drill or hole punch for electrical conduit
entries
• Small flat-head screwdriver
STORAGE
Keep the module in a dry place prior to
installation to avoid possible damage to
FUSE RATING
T 1A H250V
TEMPERATURE
Operating: 5°C to 40°C
Humidity : 5% to 80% non-condensing
DIMENSIONS
85mm x 85mm x 33mm (WxHxD)
ALARM PANEL COMPATABILITY
All EcoLeak, AquiTron and TraceTek alarm
panels
APPROVALS
Approvals Pending
Please read these
instructions carefully
and keep them in a
safe place (preferably
close to the module)
for future reference.
These instructions
must be followed
carefully to ensure
proper operation.
Wiring of this alarm
panel should be carried
out by a suitably
qualified technicial in
accordance with the
applicable regulations
and standards in the
relevant industry/
country. This manual
is intended as a guide
and Aquilar Ltd bears
no responsibility for
damage or injury
arising from incorrect
installation of this and
any supplementary
equipment.
AT-RAP-230
Remote Alarm Panel
A. GENERAL INFORMATION
Designed to fit on a standard single gang flush or surface box (optional), the AT-RAP can be
easily mounted to a walls or other flat surfaces. Its small size makes it ideal for installation
where space is at a premium, or where an unobtrusive appearence is desired. The AT-RAP is
designed to allow a remote indication that a leak detection panel has gone into alarm. It can
be easily reset at the main alarm panel. If visual indication only is required, the sounder can be
disabled via an internal jumper.
B. PRODUCT INFORMATION
LEAK DETECTION SOLUTIONS
1
Unit 30, Lawson Hunt Industrial Park,
Broadbridge Heath, Horsham, West Sussex,
RH12 3JR
+44 (0) 1403 216100
www.aquilar.co.uk
AT-RAP
230Vac
INTERCONNECTION CABLE
Max 500m (1640ft) Twisted screened cable
POWER CONSUMPTION
50mA
AUDIBLE ALARM
90dB at 1 metre
STATUS LED
Normal - GREEN, Alarm - RED
NUMBER OF INPUTS
1
TRIGGER CIRCUIT
2 Wire

AT-RAP
Remote Alarm Panel
LEAK DETECTION SOLUTIONS
2
C. ALARM PANEL MOUNTING
WARNING:
To avoid electrical shock
all wiring must be done
with power off.
Unit 30, Lawson Hunt Industrial Park,
Broadbridge Heath, Horsham, West Sussex,
RH12 3JR
+44 (0) 1403 216100
www.aquilar.co.uk
The AT-RAP should be mounted on an internal
flat surface away from direct contact with
water.
2 x fixing holes are provided to enable fixing
to a minimum 35mm deep single gang switch/
socket box.
When making offcables for termination,
sufficient length should be left to allow
removal and easy access to the electronics
mounted on the plate.
D. POWER CONNECTION
This remote alarm panel requires its own
230Vac fused spur. This can be situated locally
or at the alarm panels location. This should be
connected to the power terminals.
E. ALARM CONNECTION
TWO WIRE ALARM TRIGGER
Any volt free contact can be used to trigger the
AT-RAP.
The contact must be normally open and close
on alarm.
The two wires should be connected into the
input terminals (not polarity sensitive).
If the AT-RAP is being used on an AquiTron
or TraceTek alarm panel these wires should
connect into the common (C) and normally
open (N/O) terminals of one of the volt free
relays.
NOTE: It is not recommended to connect
more than one trigger circuit into each
AT-RAP.
Volt free trigger input
Earth connection
Important: This unit
MUST be earthed
Live Neutral
230Vac
AT-RAP
Remote Alarm Panel
LEAK DETECTION SOLUTIONS
Important: All information, including illustrations, is believed to be reliable. Users, however,
should independently evaluate the suitability of each product for their application. Aquilar
Limited makes no warranty as to the accuracy or completeness of the information, and
disclaims any liability regarding its use. The only obligations of Aquilar Limited are those in
the Aquilar Standard Terms and Conditions of Sale for this product, and in no case will Aquilar
Limited be liable for any incidental, indirect, or consequential damages arising from the sale,
resale, use or misuse of the product. Specifications are subject to change without notice. In
addition, Aquilar Limited reserves the right to make changes – without notification to Buyer
– to processing or materials that do not affect compliance with any applicable specification.
AquiTron is a trademark of AquiTron Limited
Aquilar is a trademark of Aquilar Limited
3
V2 6.2019
Unit 30, Lawson Hunt Industrial Park,
Broadbridge Heath, Horsham, West Sussex,
RH12 3JR
+44 (0) 1403 216100
www.aquilar.co.uk
F. INSTRUCTIONS FOR USE
A volt free closed contact across the input
terminals will cause the unit to go into alarm.
The green LED push button will turn red and
an audible buzzer will sound.
Pressing the button will mute the buzzer.
This will NOT reset the LED. This can only be
reset when the master panel is reset or circuit
opened across the trigger input contacts.
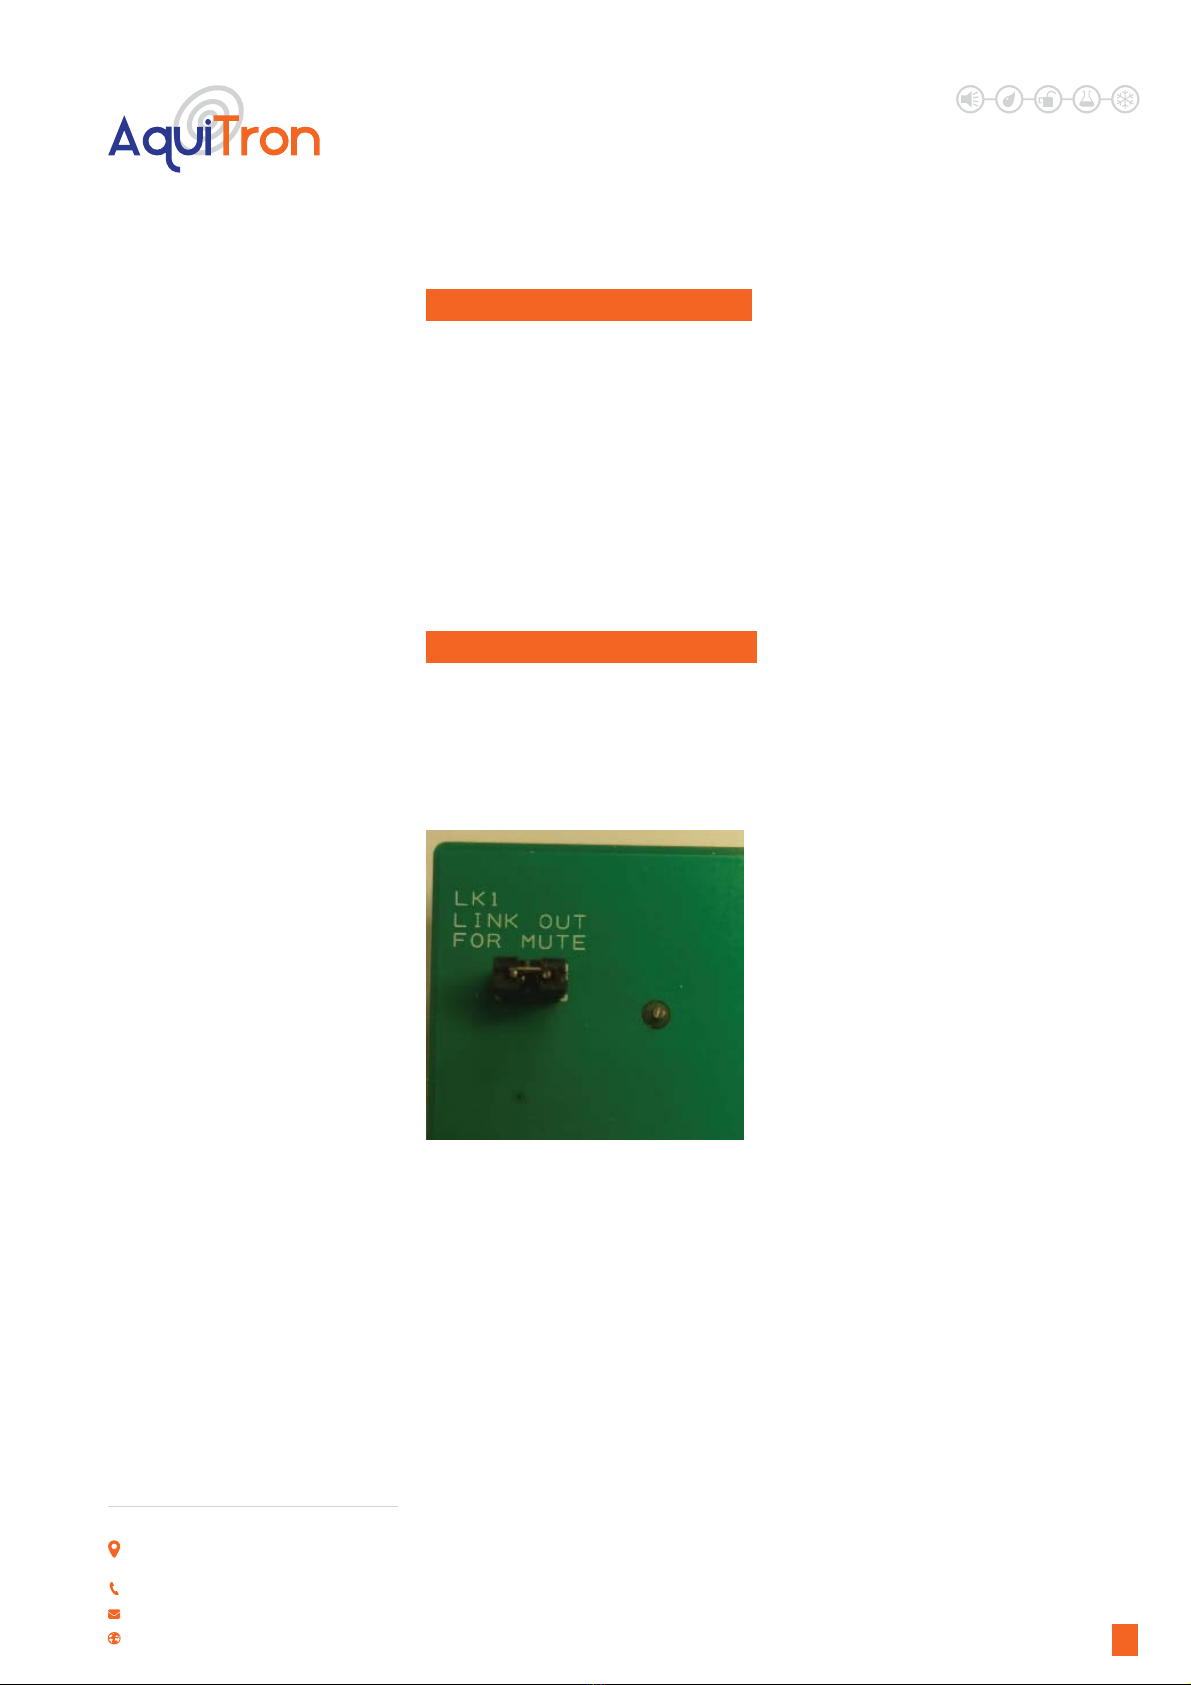
G. DISABLING THE BUZZER
Removing the jumper on LK1 will disable the
internal buzzer.
To enable the buzzer, simply replace the
jumper.
Other aquilar Security System manuals


Popular Security System manuals by other brands


Gorke Electronic
Gorke Electronic RSU KO2/2 Specification and user manual

Smartwares
Smartwares HA788GSM quick start guide

Temperange
Temperange WSE29 quick start guide

Elacompil
Elacompil FPM+ Technical and Operational Documentation

Federal Signal Corporation
Federal Signal Corporation VISION Operation and configuration instructions

JVA
JVA Z14 quick start guide


