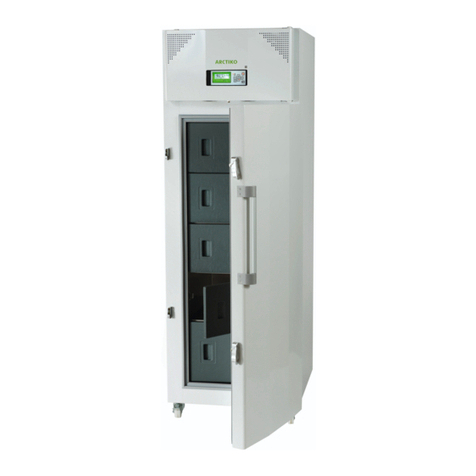
Arctiko CRYO 170 User manual

OPERATING INSTRUCTIONS
CRYO 170 / 230

*

GB
2
Notice
Please read this user manual before using this product.
Be aware of the following warnings and cautions.
Ignoring the following warnings and cautions may cause damage to the equipment and/or user
injury.
Particular care must be taken not to disassemble the product.
Warning
Ignoring this warning may cause damage to the equipment and/or personal injury.
Caution
Special attention is required when using the equipment.
Read this User Manual before use the product and use it right. Place this
book within easy reach of the freezer for reference purposes.

GB
3
Contents
Before using the appliance.............................................................................4
Warning .........................................................................................................5
Name and function of each part. ....................................................................7
Installation......................................................................................................9
Before commissioning..................................................................................10
Operation panel (Double Cooling System) ...................................................13
Alarm function ..............................................................................................15
How to change parameter in level s. et1, set2, set3, set7 ............................16
Chart Recorder ............................................................................................19
Explanation of Optional Liquide Nitrogen Backup system (LN2)...................23
Trouble shooting ..........................................................................................26
Trouble Q&A
.................................................................................................27
Maintenance ................................................................................................32
The following things do not indicate breakdown ...........................................33
Moving and Reinstalling the Freezer ............................................................34
Specifications...........................................Fejl! Bogmærke er ikke defineret.
Electric Wiring Diagram
..................................................................................36
Test data
.......................................................................................................37
The advantage of the double cooling system
...................................................37
Notes
............................................................................................................37

GB
4
Before using the appliance
The marks used in this product and this User Manual refer to the following:
Cautionary messages with these marks aim to allow correct and safe use of the
product and to prevent any risk and injury of you or other persons.
Precautions are described under the categories,‘Warning’ and ‘Caution.’ However,
a crucial result might be caused by other matters depending on circumstances.
Pleasebe sureto keepallmatters,sincetheycontainimportantdetailsaboutsafety.
Meaning of marks
Warning Caution
Caution: Electric shock
Caution: Explosion
Prohibition
Do not touch
Do not disassemble
Strict observance
Pull out Power-plug
Grounding connection required
Should the product be transferred to a new location or lent to a different user, please
ensure the continuing safe and correct use of the appliance by
placing this user manual
wherethe next user can easily find it.

GB
5
Warning
A qualified technician from the sales agency or elsewhere should only perform
installation. Imperfect installation may result in electric shocks or fire.
Install the appliance on a firm and level floor, which can hold the weight of the freezer.
Imperfect installation or lack of floor strength may cause the appliance to tilt or fall over,
leading to personal injury or damage to the freezer.
Be sure to ground the appliance. Do not earth it to a gas pipe, water pipe, lightning rod,
or phone cable. Imperfect grounding may cause electric shocks. (A class 3 grounding
work by an electrician is necessary.)
Use exclusive power outlet for the product. Do not cut and shorten the power cord by
yourself. Do not use extension cords, or any kind of electrical outlet divider. Failure to
follow these instructions may cause electric shocks, excessive heat-generation, or fire.
Do not use the appliance outdoors. Using the appliance in a place where it can get in
contact with water may cause electric leakage and electric shocks.
Do not install the appliance in a damp place or any other place where it may get into
contact with water. Failure to follow these instructions may ca use electric leakage
and/or electric shocks, due to lower electrical isolation.
Do not pour or spill water on the appliance or wash it with water. Failure to follow these
instructions may cause short circuits and electric shocks.
Do not touch the power plug, switches or any other electrical parts with wet hands.
Failure to follow these instructions may cause electric shocks.
Do not scratch, convert, bend, pull, or tie the power cord. Do not put any heavy objects
on it. Make sure not to pinch the cord. Any damage to the power cord may cause fire
or electric shocks.
Make sure to clean the power plug regularly. Make sure of correctly connection of the
plug into the socket. Dust or dirt on the power plug or incomplete insertion may cause
electric shocks or fire.
In case of activation of the circuit breaker, please consult your sales agency or other
qualified technician. Forceful power restoration may cause electric shocks or fire.
Do not hang on the door. The door may fall off the freezer or the freezer may fall over,
leading to personal injury, or electric leakage and electric shocks.
Do not place volatile substances or inflammables in the freezer. These substances may
cause explosions or fire.
GB
6
Warning
In case of malfunctioning, switch off the appliance, then pull out the power plug or turn
the power off at the source. Failure to perform these actions when the appliance
shows any signs of malfunction may cause electric shocks or fire.
When moving the appliance, please consult your sales agency or other qualified
experts. Imperfect installation may cause electric shocks or fire.
When the appliance are not in use, it should be stored away from places where
children are present. Ensure to lock the door lock. Failure to observe these instructions
may lead to people being accidentally locked-in the appliance.
Use an exclusive power
outlet separately. Do not
use an electrical outlet
divider, since this may
cause excessive heat
generation or fire.
Do not place any
inflammables in the
freezer, since they may
cause explosions.
In case of gas leakage,
do not touch the freezer.
Turn off the gas valve
and ventilate the area.
Pulling out the power
plug may cause an
explosion due to static
electricity
Keep the appliance away
Do not use any
Make sure the power cord
from water. Failure to do so
inflammables near the
is not being pressed on
may lead to electric
appliance, since they
by any other objects, such
leakage or electric shocks.
may lead to fire.
as an appliance foot, since
this may lead to electric
leakage, or damage to the
cord due to excessive
heat generation.

7
Name and function of each part.
The doorknob is a pulling type, so pull the knob and then open the door. In addition,
the knob has a cylinder padlock, the door can be locked.
Ensure to install the Sub-lids beforeoperation in order to decrease leaked chilly air
or maintain insulation.
Do variouscontrolssuchas powerON/OFF,temperaturedisplay,temperature
adjustments,alarmcontroletc.
Records the inner temperature of the freezer.
Inner sensor of the freezer: Pt1000 ohm.
Front
Right
Thermograph

8
Radiating is in the condenser of the machine room. As it radiates by absorbing
the air with an air-cooling fan, do not block the front of the ventilation gallery
and the rear of a main body with a wall etc.
A 2-pole connection is on the rear of the mainbody. From this connector,
you can connect a remote alarm system. The output is a Voltage free
connection.
There is a porthole at the center of the backside of the freezer, where you can insert
temperaturesensorsformeasurementsetc.
The inside diameter is ø20 mm, and the exterior opening is sealed with a
rubber plug.
To secure minimum space and necessary ventilation for the Compressor
room. Install this tool on the backside of the units, to keep distance to the
wall (approx. 25 cm).
To adjust the Feed, turn left to extend and turn right to contract. The
width of adjustment is approx. 15 mm. Upon installation, adjust the feed
for correct level and balance of the unit.
Stopper tool
Feed adjuster

9
Installation
A qualified technician from the sales agency or elsewhere should only perform
installation. Imperfect installation may result in water leakage, electrical leakage,
electric shocks, or fire.
Choose an area with low levels of heat and moisture.
The cooling performance of the freezer will be affected, if it is placed in direct
sunlight or near a source of high temperatures. Maximum Room Temp.is +30°C.
If moisture or water is getting in contact to the freezer, it may be a cause of poor
electrical isolation or rust.
Allowadequatespacearoundthe freezer
Lack of space may cause poor cooling performance, breakdown of the freezer, or
overuse of electricity.
Allow at least 15 cm from the back wall of the freezer, and at least 10 cm from the
sidewalls. There should be a space of at least 50 cm between the top of the
Freezer and the ceiling.
Install the freezer on a firm and level floor
To stabilize the freezer, turn the adjustable feet (front side only)clockwise until they
makefirmcontactwith the floor.
If the freezer is not stabilized correctly, it may cause unusual noises and vibrations.
Ground the freezer to prevent electric shocks
The power plug used for this appliance comes with a ground. Make sure to use an
earthedpoweroutlet.Imperfectgroundingmayleadtoelectric shocks.
If there is no existing earthed power outlet, it will be necessary to have one
installed by aqualified electrician.
Do not connect the grounding conductor to the following objects.
Water or gas pipes (This may cause explosions or fire.)
Lightning rods or phone cables (This may cause serious injury or death if lightning
strikes.)
Electric Leakage Breaker
If installation in a damp area is unavoidable, the use of an electric leakage breaker
isstronglyrequired.

10
Before commissioning
1.
Install the freezer on a flat and level floor.
The front side of the freezer should be approximately 1cm higher than the
backside.
2.
Clean the inside of the freezer and install the sub-lids.
3.
Connect the freezer to the exclusive power outlet.
Do not use extension cords.
Do not use any electric outlet divider.
4.
Before loading samples into the freezer, make sure the
inside temperature has reached the Set point.
The plastic odor will disappear once the freezer cools down.
Do not turn on the power for 30 minutes after moving, which may cause breakdown.
Warning
Do not put bagged ice packs (including those containing
ammonium nitrate and urea) in the freezer. Leakages from such
bagsmaycauserustor breakdownofthefreezer.
Do not place any form of volatilesubstance or inflammable, such
as ether,benzene,alcohol,propanegas andglue,etc.insidethe
Freezer. Failure to follow these instructions may lead to
explosions or fire.
Any type of bottles or cans containing liquid fluids with
hermetic sealed lids, can break course to higher pressure,
should never be stored in the freezer since the bottles and cans
mayexplode.Thiscouldleadtopersonalinjury.
Donottouchstoredmaterials,containers(especiallymetallicones),
or the inside of the freezer with bare or wet hands. Failure to
follow these instructions may lead to frostbite. Make sure to wear
gloves when working.

11
Make sure to read thefollowing!
Warning
If the surrounding temperature is outside
the optimum range (5°C~30°C), it may
cause breakdown
.
Do not use any inflammable spray, such as
lacquer paint, or any form of volatile
substances or inflammables near the
freezer. Sparks discharged from the
electrical components of the freezer may
ignite such substances that lead to
explosions or fire
.
Do not pour or spill water directly onto the
appliance or wash it with water Failure to
follow the instructions may lead to short
circuits or electric shocks.
Do not touch the electrical components of
the freezer, such as the power plug and the
switches, with wet hands. Failure to follow
these instructions may lead to electric
shocks.
Make sure that the power plug is cleaned
regularly. Always make sure that the plug is
completely inserted into the outlet. A dusty
or dirty plug or incomplete insertion of the
plug may cause electric shocks or fire
.
Please carry out regular checks to ensure
that the circuit breaker is functioning
correctly. If it is defective, it may lead to
electric shocks in the case of electrical
leakage.
When a circuit breaker activates, please
consult your sales agency or qualified
experts Forceful power restoration may
cause electric shocks or fire.
Do not place any objects or containers
containing water in the freezer. If they fall
over, they may cause personal injury and the
spilt water may lead to poor electrical
isolation and electric leakage
.
Do not scratch, convert, bend, pull, or tie the
power cord. Also, do not put any heavy
objects on it. Make sure the cord is not being
pinched. Any damage to the power cord
may cause fire or electric shocks.
When unplugging the freezer, pull on the
plug itself. Do not pull the power cord. You
may damage the inside wires leading to
overheating and fire.
Use the switch to turn the freezer on or off.
Inserting or unplugging the plug while the
freezer is switched on, may cause electric
shocks or short circuits
.
After switching off the appliance, wait for at
least 10 minutes before switching it on again.
Failure to do so may overload the
compressors, causing a breakdown.
However, please note that the appliance
should be switched on within 1 hour after the
power is cut. If you switch off the appliance
for more than 1 hour, please wait for at least
48 hours with the door open before
restarting it.
Do not put your hands in the mechanical
compartment as it contains high-speed fans
and heat-generating parts. Failure to follow
these instructions may lead to personal
injury.
Donothangonthedoor. Thedoormay
comeoffthefreezerorthefreezermayfall
over, leading to personal injury, electric
leakage, or electric shocks
.
Donotclimbonthefreezer.Itmayfallover
and
causepersonalinjury.
Do not insert fingers or other objects into the
air vents or air intakes. As the fan is
spinning at a high speed, it may cause
personal injury or breakdown
.
Ifyoudonotusethefreezerforalongtime, for
safety purposes, please unplugthe
appliance at the outlet. Failure to follow
these instructions may lead to dust
collecting on the power plug resulting in
fire.
Do not use the appliance on-board
vehicles or any other type of vessel
.

12
Operation panel (Double Cooling System)
You can control the temperature by setting parameters.
1.
When switching on the freezer,the initial screenwillbe displayed for 4 seconds.
2.
The controller shows the present value (PV) and set value (SV)
Changing the set value by pressing , Key to set the temperature.
The range of temperature of use is -140°C ~ -150°C.
Use inacondition other than this rangemay cause breakdown.
Do not operatethis fora purposeotherthantemperaturecontrol,since it
maycauseabreakdown.
PV
Present value, actual temperature
SV
Set point value, desired temperature in the unit
OUT 1,2
Indicator light is on when Outputs 1 or 2 are on.
AL 1,2
Indicator light is on when event outputs 1 or 2 are on.
COM
Not available
RDY
Flickering when it is getting ready
DI
Indicator light on when DI is on
MODE Key
Used to shift screen
FUNC Key
Used to run the set function
Key
Used to increase/decrease (change) the set value

13
1.
Insert main power plug in the wall socket.
2. Turn off AL-1 switch and REMOTE switch.
3.
TurnonPOWER switch. The Controller will be switch on, and showing actually temperature
and set point temperature, and the Compressor will start operation.
4.
Set the temperature for use within the range of the designated applicable temperature.
5.
When desired Set point (Temperature) has been reached, load the samples into
the freezer. For reference, start loading the samples in small amounts in steps.
6.
To enablethe alarm functions when the freezer has reached stable running temperature,
turn on AL-1 switch and REMOTE.
1. Turn off AL-1 switch and REMOTEswitch.
2.
Turn off the POWER switch. The controller will then stop the operation of the unit
3.
Pull out the Power plug from the wall socket.
Ensure to restart after min. 10 minutes after stopping the operation.
Restart right away causes the breakdown of the freezer.
This unit is for storage of samples. When loading samples into the freezer, the samples must
be precooled. If a user load plenty of the samples, which have Room temperature into the
freezer, the temperature will go up temporarily and an alarm may go off. When storing the
samples of Room temperature in a freezer, load small amount of samples several times to
prevent overheating and high temperature alarm. When a user load plenty of cold storage
packs or cold insulation material into a freezer, the same state will occur. Cold storage packs
or cold insulation material has the merit of keeping the low temperature environment for a long
time, but requires considerable amount of time in cooling, so if a user load big amount of
warm samples in the freezer, such will cause a lot of heat to the unit.
•
The battery for Power failure alarm is consumable. The life is 3 years after
installation. When the battery is out, an alarm buzzer will not sound even upon power
failure, which may affect the samples adversely. We recommend that a user should
check the battery regularly and exchange in advance. Purchase of the Battery can be
done locally.
How to check the buzzer.
A buzzer will sound when POWER switch is off while AL-1 switch is ON.

14
Alarm function
This unit alarms with a buzzer, will sound, when the inner temperature of a freezer increases or
power goes out, in order to protect stored items. Furthermore, it has the Voltage free terminal to
remote alarm system. All is equipped with On/Off switches, so use it as necessary.
The temperature increase alarm sounds under the following conditions.
•
AL-1 switch is ON
•
The inner temperature of a freezer (PV) is +15°C compared with
the set point temperature (SV)
In case of the first use, the alarm will sound, caused to the inner temperature of a
freezer is too high. After reaching stable temperature, turn on the AL-1 switch.
The Power failure alarm sounds under the following conditions.
•
AL-1 switch is ON
•
Occurrence of Power failure or equivalent incident (plug is pulled out of the wall
socket or the power switch is off)
An alarm buzzer sounds for about 48 hrs. continuously even when an electric current
is not applied. Limited to the case of sufficient charging (after operation for min. 5
days). The life of a battery is approx. 3 years.
The remote alarm signal output will be activated under the following conditions.
•
REMOTE switch is ON (output even when AL-1 switch is OFF)
•
The Alarm delay is the same as the high temperature alarm and power failure.
•
The remote alarm connector of the external alarm is Off (open) when no Alarm is
present, when there is an Alarm activated, the contact will be
closed.
Where there is an electrical anomaly in the double cooling system. Breakdown of the
Compressor, AL-2 lamp (red) turns on. In addition, where AL-1 switch is ON, a buzzer
sounds interworking with AL-2 lamp.
When only one cooling system is running, the Temperature in the Freezer can be kept
under -130°C.
The abnormal fan motor runs under the following condition.
In case of the insufficient rotation or stop of a fan motor, an alarm buzzer will sound and
AL-2 lamp (red) will be on.
Where the inner temperature of a freezer goes above -130° C and the LN2 BACKUP
SYSTEM switch is ON, an alarm buzzer will sound and simultaneously LN2 are sprayed
into the freezer.

GB
15
How to change parameter in level s. et1, set2,
set3, set7
1. Press the MODE for 2 sec.
2. Select the desired SET level by pressing the button UP or DOWN
3. Access to the SET level by pressing the MODE button.
4. Scroll between the parameter in the SET level by pressing the MODE button.
5. To change the parameters press the button up or down.
6. Accept the changed parameter by pressing the MODE button.
7. To return to the main menu press the button for 2 sec.
3
-
1
9
9
9

GB
16
-180

GB
17

GB
18
Chart Recorder
Wall Mounting Two recessed holes are provided for wall mounting screws.
Panel Mounting Two Panel Mounting sprung screw clips are provided to mount
the mini-chart in a 138mm square cut out. See below
Door Lock A quarter turn security lock and two keys are provided. See below.
Battery / Mains Powered Battery recorders have two factory fitted 3.6-volt lithium
AA cells, which provide a minimum of eighteen months operation. There is a low
battery audible alarm.
Mains powered recorders have a 2-core lead that can be connected to a 110Vac to
240Vac Supply. They also have a factory fitted re-chargeable battery that provides
a minimum of three months operation in the event of a power f a i l u r e .

GB
19
Changing the Chart
The chart is removed by first lifting the pen arm then using your thumb and fore
fingers push the retaining toggle to the open position (diagram 1). Lift the toggle
upright position (diagram2), Remove and replace the chart taking care to ensure the
chart goes behind the two chart guides. Rotate the chart anti-clockwise until the
pen nib is approximately 10mm to the left of the start point. Lock the chart by pushing
the toggle back to the center position (diagram 3) Lower the arm so that the pen
nearly touches the chart and use the chart advance button to align the pen with the
start position. Then release the pen arm.
Changing the pen
Gently lift the pen arm then pull the pen nib off in the direction of the arm taking
care not to twist the arm on its spindle. Replace with a new pen.
1.1 Pen Alignment
It is recommended that this procedure is carried out whenever the pen nib is
changed or at any time if it is suspected that the pen arm has been forced out of
position by rough handling.
1. Start with Rotation Switch set to 1 (see diagram overleaf)
2. Set S1 ON
3. Set Rotation to 0
(Sounds "dah dit dah dit" C for align)
4. Press HI until the pen is at the outer edge of chart (HI &LO to fine adjust)
5. Press ACCEPT
(Sounds "dit dah" A for Accept)
6. Press LO until the pen is at the inner edge of chart (HI &LO to fine
adjust)
7. Press ACCEPT
(Sounds "dit" E for END of alignment)
(Pen will now return to indicate temperature)
8. Return Rotation Switch to the required chart speed
9. Set S1 OFF
Note all modes timeout after 30 seconds of inactivity, if the setting mode is lost then return
Rotation SW to 1 then 0 to restart the setting procedure
This manual suits for next models
1
Table of contents
Other Arctiko Freezer manuals

Arctiko
Arctiko ULTF 80 User manual

Arctiko
Arctiko CRYO 170-0 User manual

Arctiko
Arctiko LTFE 310 User manual

Arctiko
Arctiko CRYO 170-0 User manual

Arctiko
Arctiko LRE 700 Quick start guide

Arctiko
Arctiko LTF 535 User manual

Arctiko
Arctiko Integraline ULUF P390GG User manual

Arctiko
Arctiko ULUF User manual

Arctiko
Arctiko ULTF 80 User manual

Arctiko
Arctiko LCF 100 User manual
Popular Freezer manuals by other brands

Vestfrost
Vestfrost FZ 184 Instructions for use

Proline
Proline UFZ168 instruction manual

Monogram
Monogram Monogram ZIFP360NXRH Dimensions and installation information

WC Wood
WC Wood V1813RW3 Energy guide

Beko
Beko FF6091X Installation, operation & food storage instructions

Daewoo
Daewoo RNV3810DSF user manual