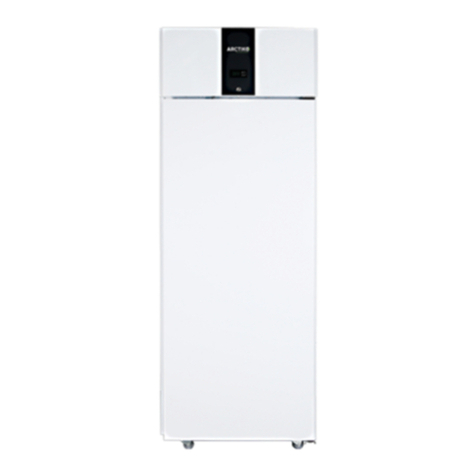
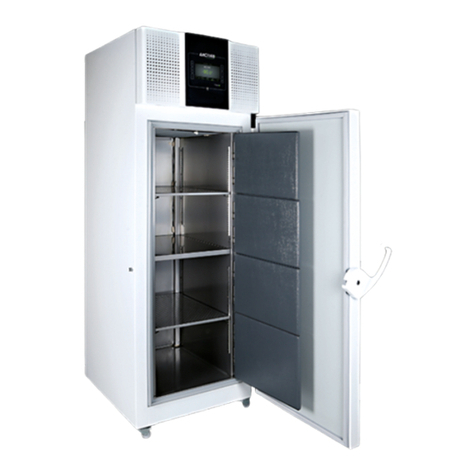
Arctiko CRYO 170-0 User manual

OPERATING INSTRUCTIONS
CRYO 170-0 / 230-0
*

GB
Notice
Please read this user manual before operating or using the product.
Be aware of the following warnings and cautions.
Ignoring the following warnings and cautions may cause damage to the equipment and/or user
injury. The appliance should only be operated after reading the manual, and with the user's due
care and discretion. Particular care should be taken not to disassemble the product.
Warning
Ignoring this warning may cause damage to the equipment and/or personal injury.
Caution
Special attention is required when using the equipment.
Read this User Manual before use the product and use it right. Place this
book within easy reach of the freezer for reference purposes.

1
GB
Contents
!Beforeusingtheappliance ……………………………………………………………
!Nameandfunctionofeachpart……………………………………………………
!Installation ……………………………………………………………………………………
!Beforecommissioning……………………………………………………………………
!Operationpanel………………………………………………………………………………
!Maintenance……………………………………………………………………………………
!Troubleshooting ……………………………………………………………………………
!MovingandReinstalling……………………………………………………………………
!Specifications…………………………………………………………………………………
!ElectricWiringDiagram …………………………………………………………………
!Powercut
!Turningofftheapplianceforlongperiods
!Repairofscratchesonthepaintedsurface
!Disposaloftheappliance
…………………………………………………………………
………………………………………………………………………………………
…………………………………………
………………………………………
02
05
07
08
13
32
26
34
34
34
34
34
35
27
!Parameterlists………………………………………………………………………………
16
!ExplanationonAutomaticCoolingAuxiliaryDevice(LN2)........................
23
!TroubleQ&A.....................................................................................................
36
!TestData........................................................................................................
37
!ConnectingtransformertoCRYO170-0&230-0………………………………
10
!ChartRecorder………………………………………………………………………………
19

2
GB
ThemarksusedinthisproductandthisUserManualrefertothefollowing:
Cautionary messages with these marks aim to allow correct and safe use of the
product and to prevent any risk and injury of you and other persons.
Precautions are described under the categories, ‘Warning’ and ‘Caution.’ However,
a crucial result might be caused by other matters depending on circumstances.
Please be sure to keep all matters since they contain important details about safety.
Should the product be transferred to a new location or lent to a different user, please
ensure the continuing safe and correct use of the appliance by placing this user manual
where it can be easily found by the next user.
Meaning of marks
Warning Caution Caution:Electric shock Caution:Explosion
Prohibition Do not touch Do not disassemble
Strict observance Pull out Power-plug
Grounding connection required
Before using the appliance

3
GB
Warning
Installationshouldonlybeperformedbyaqualifiedexpertfromthesalesagencyor
elsewhere. Imperfect installation may result in electric shocks
or fire.
Placetheapplianceonafirmandlevelfloor,whichcanholdtheweightofthefreezer.
Imperfect installation or lack of floor strength may cause the appliance to tilt or fall over,
leading to personal injury or damage to the freezer.
Besuretogroundtheappliance.Donotearthittoagaspipe,waterpipe,lightningrod,
or phone cable. Imperfect grounding may cause electric shocks. (A class 3 grounding
work by an electric business is necessary.)
Useanexclusivepoweroutletfortheproduct.Donotcutandshortenthepowercord
by yourself. Do not use extension cords, or any kind of electri cal outlet divider. Failure to
follow these instructions may cause electric shocks, excessive heat-generation, or fire.
Donotusetheapplianceoutdoors.Usingtheapplianceinaplacewhereitcancome
into contact with water may cause electric leakage and electric shoc
ks.
Do not install the appliance in a damp place or any other place where it may come into
contact with water. Failure to follow these instructions may ca use electric leakage and/or
electric shocks, due to lower electrical isolation.
Donotpourorspillwaterontheapplianceorwashitwithwater.Failuretofollowthese
instructions may cause short circuits and electric shocks.
Donottouchthepowerplug,switchesoranyotherelectricalpartswithwethands.
Failure to follow these instructions may cause electric shocks.
Donotscratch,convert,bend,pull,ortiethepowercord.Also,donotputanyheavy
objects on it. Make sure the cord is not being pinched. Any damage to the power cord
may cause fire or electric shocks.
Makesurethatthepowerplugiscleanedregularly.Makesuretheplugiscompletely
inserted into the socket. Dust or dirt on the power plug or incomplete insertion may
cause electric shocks or fire.
If acircuit breaker is activated, please consult your sales agency or other qualified
experts. Forceful power restoration may cause electric shocks o
r fire.
Donothangonthedoor.Thedoormaycomeoffthefreezerorthe freezer may fall
over, leading to personal injury, or electric leakage and elect
ric shocks.
Donotplacevolatilesubstancesorinflammablesinthefreezer.Thesesubstancesmay
cause explosions or fire.
For correct use

4
GB
Incaseofmalfunctioning,switchofftheappliance,thenpulloutthepowerplugorturn
the power off at the source. Failure to perform these actions when the appliance shows
any signs of malfunction may cause electric shocks or fire.
When moving the appliance please consult your sales agency orother qualified
experts. Imperfect installation may cause electric shocks or fire.
Whentheapplianceisnotbeingused,itshouldbestoredaway fromplaceswhere
children are present. Ensure that the door cannot be locked. Failure to observe these
instructions may lead to people being accidentally locked-in the appliance.
Warning
For correct use
In case of gas leakage,
do not touch the freezer.
Turn off the gas valve
and ventilate the area.
Pulling out the power plug
may cause an explosion
due to static electricity
Use an exclusive power
outlet separately. Do not
use an electrical outlet
divider, since this may
cause excessive heat
generation and a fire.
Do not place any
inflammables in the
freezer, since they
may cause explosions.
Make sure the power cord
is not being pressed on
by any other objects, such
as an appliance foot, since
this may lead to electric
leakage, or damage to the
cord due to excessive
heat generation.
Keep the appliance away
from water. Failure to do so
may lead to electric
leakage or electric shocks.
Do not use any
inflammables near the
appliance, since they
may lead to fire.

5
GB
Name and function of each part
Thedoorknobisapullingtype,sopulltheknobandthenopenthedoor.Alsothe
knob has a cylinder padlock, so the door can be locked.
Door - Door knob
Ensuretosetbeforeoperationinordertodecreaseleakedchillyairormaintain
insulation.
Inner cover
DovatiouscontrolssuchaspowerON/OFF,temperaturedisplay,temperature
adjustments, alarm control etc.
Control panel
Recordstheinnertemperatureofthefreezer.
Inner sensor of the freezer: Pt1000 ohm.
Thermograph
Front Right

6
GB
Radiatingisinthecondenserofthemachineroom.Asitradiatesbyabsorbing
the air with an air cooling fan, do not block the front of the ventilation gallery
and the rear of a main body with a wall etc.
Ventilstion gallery
2Pjackisontherearofthemainbody.Alarmsignalcangoofffromthisjack
with contact output.
External output jake for alarm
Thereisaholeatthecenterofthebackofthefreezer,whereyoucaninsert
temperature sensors for measurements etc.
The inside diameter is ø20 mm, and the exterior opening is sealed with a
rubber plug.
Access port
Abletosecuremin.spaceandnecessaryfortheventilationofthemachine
room by contacting this tool to the rear wall (approx. 25 cm).
Stopper tool
Turnlefttoextendandturnrighttocontract.Thewidthofadjustmentis
approx. 15 mm. Upon installation, extend an adjuster and check whether
or not a main body is firm.
Adjuster

7
GB
Installation
Installation should only be performed by a qualified expert from the sales agency or
elsewhere. Imperfect installation may result in water leakage, electrical leakage,
electric shocks, or fire.
Choose an area with low levels of both heat and moisture.
The cooling performance of the freezer may be adversely affected if it is placed in
direct sunlight or near a source of high temperatures.
If moisture or water comes into contact with the freezer, it may be a cause of poor
electrical isolation or rust.
Allow adequate space around the freezer
Lackofspacemaycausepoorcoolingperformance,breakdownofthefreezer,or
overuse of electricity.
Allowatleast15cmfromthebackwallofthefreezer,andatleast10cmfromthesidewalls.
Thereshouldbeaspaceofatleast50cmbetweenthetopofthefreezerandtheceiling.
Electric Leakage Breaker
Ifinstallationinadampareaisunavoidable,theuseofanelectricleakagebreaker
is strongly required.
Install the freezer on a firm and level floor
Tostabilizethefreezer,turntheadjustablefeet(frontsideonly)clockwiseuntilthey
make firm contact with the floor.
Ifthefreezerisnotstabilizedcorrectly,itmaycauseunusualnoisesandvibrations.
Ground the freezer to prevent electric shocks
Thepowerplugusedforthisappliancecomeswithaground.Makesuretousean
earthed power outlet. Imperfect grounding may lead to electricshocks.
If there is no existing earthed power outlet, it will be necessary to have one
installed by a qualified electrician.
Do not connect the grounding conductor to the following objects.
Waterorgaspipes(Thismaycauseexplosionsorfire.)
Lightningrodsorphonecables(Thismaycauseseriousinjuryordeathiflightning
strikes.)

8
GB
Before commissioning
Warning
Do not put bagged ice packs (including those containing
ammonium nitrate and urea) in the freezer. Leakages from such
bags may cause rust or breakdown of the freezer.
Do not place any form of volatile substance or inflammable, such
as ether, benzene, alcohol, propane gas and glue, etc. inside the
freezer. Failure to follow these instructions may lead to
explosions or fire.
Any type of bottle or can that contains liquid that can be frozen
should never be stored in the freezer since the bottles and cans
may explode. This can lead to personal injury.
Do not touch stored materials, containers (especially metallic ones),
or the inside of the freezer with bare or wet hands. Failure to
follow these instructions may lead to frostbite. Make sure to wear
gloves when working.
1. Install the freezer on a flat and level floor.
Installthefreezeronalevelfloor.
Thefrontsideofthefreezershouldbeapproximately1cmhigherthantheback
side.
2. Clean the inside of the freezer and put the sub-lids.
4. Before storing anything, make sure the inside of the freezer is
fully cooled down.
The plastic odor will disappear once the freezer cools down.
3. Connect the freezer to the exclusive power outlet.
Do not connect the power cord in the middle, or do not use extension cords, or do
not use any electric outlet divider.
Do not turn on the power for 30 minutes after moving, which may cause breakdown.

9
GB
Before commissioning
(Make sure to read the following)
Warning
If the surrounding temperature is outside
the optimum range (5°C~30°C), it may
cause breakdown.
Please carry out regular checks to ensure
that the circuit breaker is functioning
correctly If it is defective, it may lead to
electric shocks in the case of electrical
leakage.
When a circuit breaker activates, please
consult your sales agency or qualified
experts Forceful power restoration may
cause electric shocks or fire.
Do not place any objects or containers
containing water in the freezer. If they fall
over, they may cause personal injury and
the spilt water may lead to poor electrical
isolation and electric leakage.
Do not hang on the door. The door may
come off the freezer or the freezer may fall
over, leading to personal injury, electric
leakage, or electric shocks.
Do not put your hands in the mechanical
compartment as it contains high speed
fans and heat-generating parts. Failure to
follow these instructions may lead to
personal injury.
Do not climb on the freezer. It may fall over
and cause personal injury.
Do not insert fingers or other objects into
the air vents or air intakes. As the fan
is spinning at a high speed, it may cause
personal injury or breakdown.
If you do not use the freezer for a long time,
for safety purposes, please unplug the
appliance at the outlet. Failure to follow
these instructions may lead to dust collecting
on the power plug resulting in fire.
Do not use the appliance on-board
vehicles or any other type of vessel.
Do not use any inflammable spray, such as
lacquer paint, or any form of volatile
substances or inflammables near the
freezer. Sparks discharged from the
electrical components of the freezer may
ignite such substances that lead to
explosions or fire.
Do not touch the electrical components of
the freezer, such as the power plug and
the switches, with wet hands. Failure to
follow these instructions may lead to
electric shocks.
Do not scratch, convert, bend, pull, or tie
the power cord. Also, do not put any
heavy objects on it. Make sure the cord is
not being pinched. Any damage to the
power cord may cause fire or electric
shocks.
When unplugging the freezer, pull on the
plug itself. Do not pull the power cord. You
may damage the inside wires leading to
overheating and fire.
After switching off the appliance, wait for at
least 10 minutes before switching it on
again. Failure to do so may overload the
compressors, causing a breakdown.
However, please note that the appliance
should be switched on within 1 hour after
the power is cut. If you switch off the
appliance for more than 1 hour, please wait
for at least 48 hours with the door open
before restarting it.
Do not pour or spill water directly onto the
appliance or wash it with water Failure to
follow the instructions may lead to short
circuits or electric shocks.
Use the switch to turn the freezer on and
off inserting or unplugging the plug while
the freezer is switched on may cause
electric shocks or short circuits.
Make sure that the power plug is cleaned
regularly. Always make sure that the plug is
completely inserted into the outlet. A dusty
or dirty plug or incomplete insertion of the
plug may cause electric shocks or fire.

10
GB
Connecting transformer to CRYO 170-0 & 230-0
ATTENTION!!!!!
The transformer must be connected before use.
Tools to be used.
The unit is prepared for installation of transformer at the back of the unit.
Remove the screw.

11
GB
Place the holes on the transformer in front of the holes on the unit.
Mount the screw.

12
GB
Cut the strip.
Connect the cable from the unit to the transformer.
Mount the main cable from the transformer the wall socket.

13
GB
Operation panel (Double Cooling System)
The range of temperature of use is -140°C ~ -150°C.
Use in a condition other than this range may cause breakdown.
Do not operate this for a purpose other than temperature control, since it
may cause a breakdown.
Operation Panel
Youcancontrolthetemperaturebysettingparameters.
1. Once the freezer is switched on, the initial screen will be displayed for 4 seconds.
2. The controller shows the present value (PV) and set value (SV)
Changing the set value by pressing Key to set the temperature.
Te m p e r a t u r e Controller
Names & Functions of Front Display
PV
SV
OUT 1,2
AL 1,2
COM
RDY
DI
MODE Key
FUNC Key
Key
Present value, Character display on the setting mode screen
Setup value, output value, display of selected input value on the setting mode screen
The light is on when control outputs 1 and 2 are on
Light is on when event outputs 1 and 2 are on
Flickering during communication, when there are communication selection specifications
Flickering when it is getting ready
Light on when DI is on
Used to shift screen
Used to run the set function
Used to increase/decrease (change) the set value
,

14
GB
Ensure to restart after min. 10 minutes after stopping the operation.
Restart right away causes the breakdown of a cooler.
1. Insert a power lamp into a socket
2. Turn off AL-1 switch and REMOTE switch.
3. Turn on POWER switch. The display of a temperature adjuster will be on and operation starts.
4. Set the temperature for use within the range of the designated applicable temperature.
5. Store the keeping when the inner temperature of a freezer reaches the set temperature.
For reference, start storing the keeping one by one 7-8 hours after the start operation.
Store the keeping of room temperature little by little.
6. To enable the alarm function, turn on AL-1 switch and REMOTE switch after confirming that
the inner temperature of a freezer is stable..
Follow the order below when star ting the operation.
1. Turn off AL-1 switch and REMOTE switch.
2.Turn off POWER switch. The display of a temperature adjuster will be off and operation will stop.
3. Pull the power plug from the socket.
Follow the or der below when stopping the operation.
A little at a time when storing the keeping of room temperature
This product is for cold reserving (consecutive cooling of what has been cooled already). If a
user puts plenty of the keeping of room temperature into a freezer, the temperature will go up
temporarily and an alarm may go off. When storing the keeping of room temperature in a
freezer, store it a little by a little several times after checking such is cooled enough. Also,
where a user puts plenty of cold storage packs or cold insulati on material into a freezer, the
same state will occur. cold storage packs or cold insulation material has the merit of keeping
the low temperature environment for a long time, but requires considerable amount of time in
cooling, so if a user puts them a lot in a freezer, such will cause a lot of load to the product.
As such, a user shall refrain from storing cold storage packs or cold insulation material. If it's
unavoidable to store them, ensure to put only a little of them.
"Thebatteryforblackoutalarmisconsumable.Thelifeis3yearsafterinstallation.
When the battery is out, an alarm buzzer won't sound even upon blackout, which may
affect the keeping adversely. We recommend that a user should check the battery
regularly and exchange in advance. Inquire of a store a user purchased the product or
the local company about battery exchange.
Battery change
How to check a buzzer
A buzzer will sound when POWER switch is off while AL-1 switch is ON.

15
GB
Alarmfunction
The temperature increase alarm sounds under the following condi tions.
"AL-1switchisON
"Theinnertemperatureofafreezer(PV)is+15°C compared with the set temperature
(SV)
In case of the first use, the alarm will sound because the inn er temperature of a
freezer is high. After confirming sufficient cooling, turn on the AL-1 switch.
This product alarms with a buzzer sounding when the inner temperature of a freezer increases or
power goes out, in order to protect stored items. Furthermore,it has the zero voltage terminal to
output such an alarm signal outside. All is equipped with On/Off switches, so use it as necessary.
Te m p e ra t u r e increase alarm
The alarm signal output to outside runs under the following conditions.
"REMOTEswitchisON(outputevenwhenAL-1switchisOFF)
"Theoutputtimingissameasthatoftemperatureincreasealarmandblackoutalarm.
The contact output of the external alarm is Off (open) when「A contact」is normal,
and On (close) when it's not normal.
Alarm signal output to outside
Where there's an electrical anomaly in the double cooling system (where it doesn't run
because of the breakdown of a freezer), AL-2 lamp (red) turns on. Also, where AL-1
switch is ON, a buzzer sounds interworking with AL-2 lamp.
Where only one cooling system runs as either one has system anomaly, the inner
temperature of a freezer maintains approx. -130°C.
Anomaly alarm of double cooling system
Where the inner temperature of a freezer becomes -130°CorhigherwhentheBACKUP
SYSTEM switch is ON, an alarm buzzer will sound and simultaneously LN2 is sprayed
into the freezer.
Star
t of automatic cooling auxiliary device
The blackout alarm sounds under the following conditions.
"AL-1switchisON
"Occurrenceofblackoutandequivalentincident(plugispulledoutorthepowerswitch
is off)
An alarm buzzer sounds for about 48 hrs continuously even whenan electric current
is not applied. Limited to the case of sufficient charging (after operation for min. 5
days). The life of a battery is approx. 3 years.
Blackout alarm
The abnormal fan motor runs under the following condition.
In case of the insufficient rotation or stop of a fan motor, an alarm buzzer will sound and
AL-2 lamp (red) will be on.
Fan motor anomaly

16
GB
How to change parameter in level set1, set2, set3, set7.
1. Press the MODE for 2 sec.
2. Select the desired SET level by pressing the button UP or DOWN
3. Access to the SET level by pressing the MODE button.
4. Scroll between the parameter in the SET level by pressing the MODE button.
5. To change the parameters press the button up or down.
6. Accept the changed parameter by pressing the MODE button.
7. To return to the main menu press the button for 2 sec.
3

17
GB
-180

18
GB
Other manuals for CRYO 170-0
1
This manual suits for next models
1
Table of contents
Other Arctiko Freezer manuals

Arctiko
Arctiko Integraline ULUF P10 User manual

Arctiko
Arctiko LTF 535 User manual

Arctiko
Arctiko LTFE 310 User manual

Arctiko
Arctiko Integraline ULUF P390GG User manual

Arctiko
Arctiko ULUF P390 User manual

Arctiko
Arctiko ULUF 120 User manual

Arctiko
Arctiko SF SERIES User manual

Arctiko
Arctiko LTFE 140 User manual

Arctiko
Arctiko SUF 100 User manual

Arctiko
Arctiko LCF 100 User manual