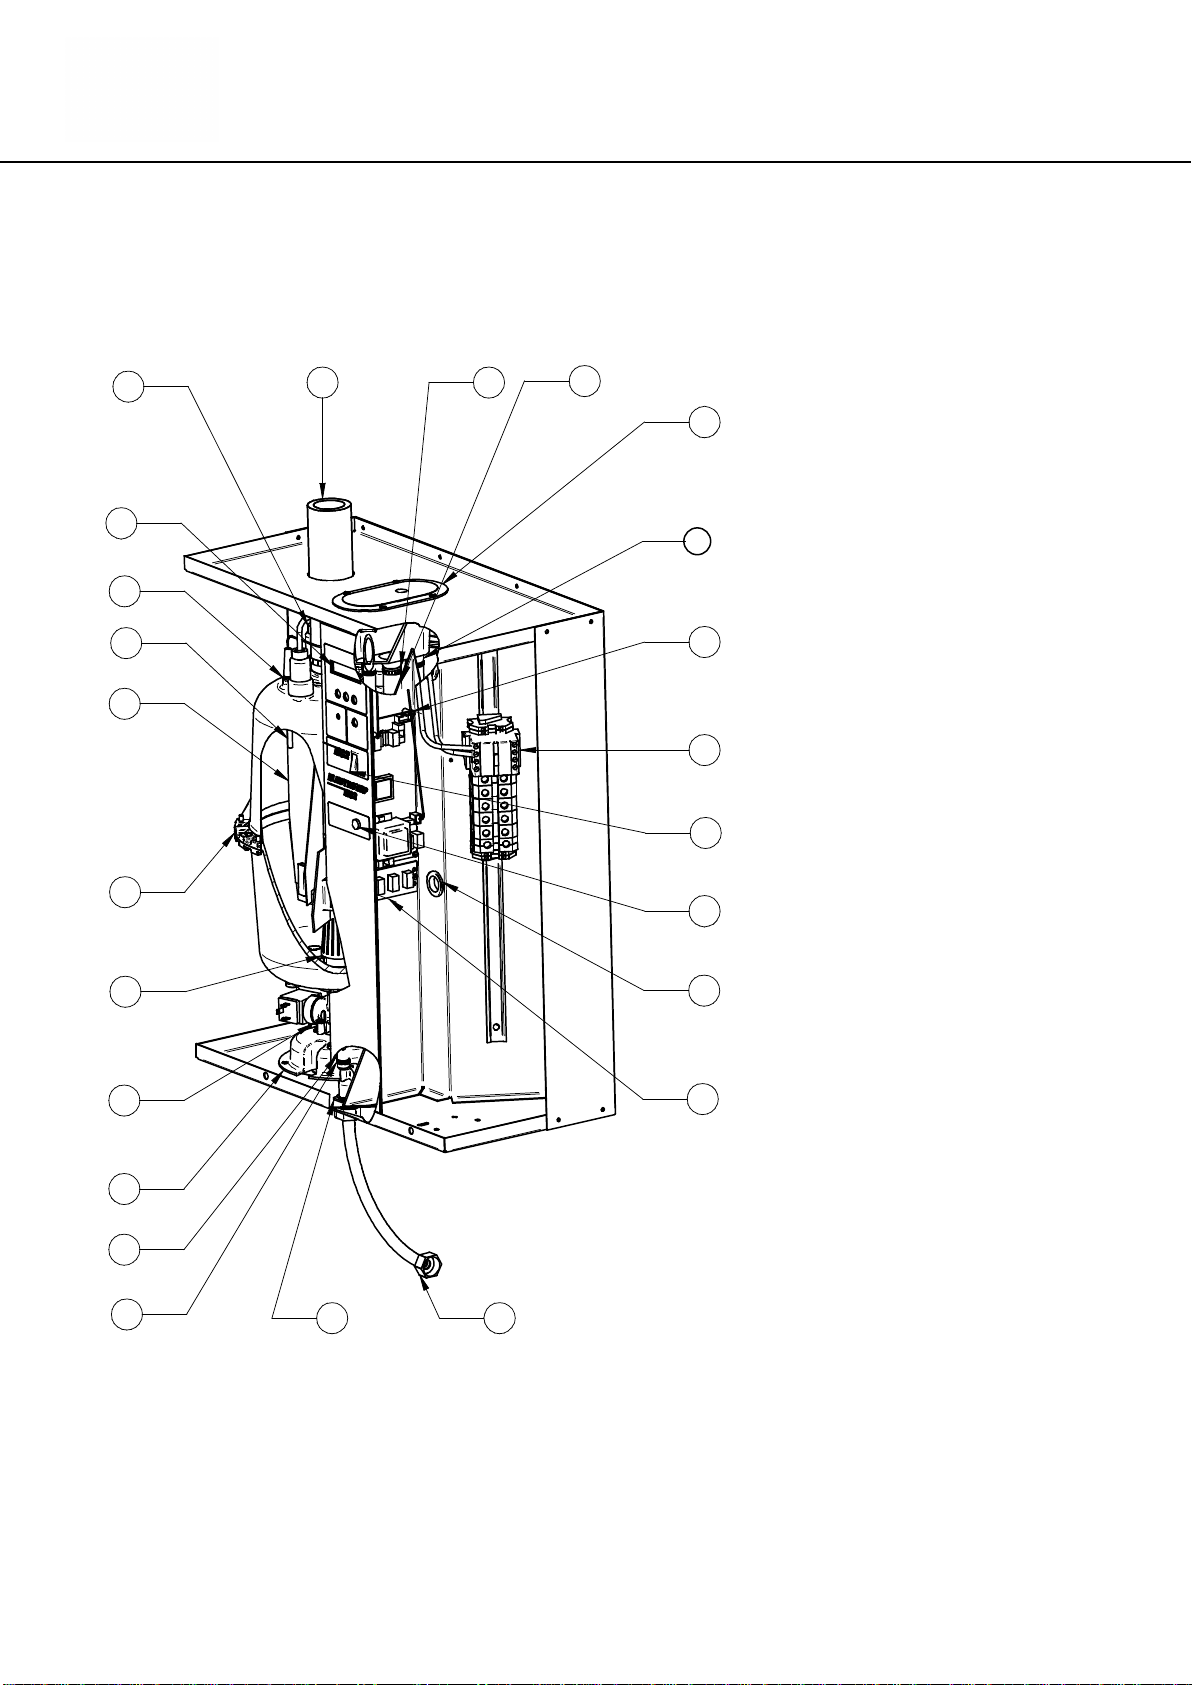
4 Pictures for illustrating purposes only
SERIES EHU-750 HUMIDIFIER
Safety information
GENERAL
This manual contains all details necessary for the planning and installation of the EHU-750
humidifier. In addition commissioning and maintenance details are included.
The manual is intended for use by engineers and properly trained technical personnel.
Maintenance, servicing or repair work must only be carried out by suitable skilled and
qualified personnel, the customer must be responsible for ensuring their suitability.
Any risks or hazards, especially when working from ladders or towers should be identified by
a skilled and Health and Safety representative and effective control measure put in place.
No liability will attach to the Distributor if any damage, injury or accident is attributable to
inattentive, inappropriate, negligent or incorrect operation of the machinery whether or not
caused deliberately. Always isolate all electrical and water supplies before commencing any
maintenance.
Every effort has been made to ensure details contained in this manual are correct, however,
in view of the wide range of conditions experienced in air handling systems, the information
provided should only be used as a guide. Please contact your Agent if any doubt.
Correctuse
EHU-750 humidifiers are ONLY intended for use with air handling systems or direct air
humidification. ANY OTHER APPLICATION IS NOT CONSIDERED USE FOR THE
INTENDED PURPOSE. THE MANUFACTURER CANNOT BE MADE LIABLE FOR ANY
DAMAGE RESULTING FROM INCORRECT USE.
Water
Series EHU-750 humidifiers are designed to be used with mains, demineralized R/O or
softened water. On no account attempt to introduce any other fluid or chemical into the
system. Water supply should not exceed 6.0 bar and installation should comply with local
regulations. If the water pressure exceeds 6.0 bar, a water regulator valve must be used.
Electricity
All work concerned with electrical installation MUST only be performed by skilled and
qualified technical personnel (eg electrician or technicians with appropriate training). The
customer MUST be responsible for ensuring their suitability.
It is the duty of the installer to ensure that suitable sized cables and MCB protection is
provided. Please observe the local regulations concerning the provision of electrical
installations.
Warranty
A one year warranty term—cost and labor—is applicable to the parts of the EHU-750 to the
exception of the usual consumable parts (valves, cylinders or parts of cylinders) provided our
recommendations of use & maintenance have been adhered to. Failure to specify and fit
original parts and accessories will invalidate our warranty.
NOTE
The manufacturer’s policy is one of continuous research and development. He therefore
reserves the right to amend without notice the specifications given in this document.
The photographs are for illustrating purposes only.