12.
Note:
· Breads high in sugar
and/or egg will naturally
have a darker crust
color. For breads high
in these ingredients, we
recommend using the
"light" baking color. Be
sure to also check your
bread during the baking
phase to ensure that it is
not getting burnt on top.
· When using the Time
buttons, time will
increase/decrease by
1 min, 5 min, or 10 min
with each press. To
rapidly adjust the time,
press and hold down
the button.
· While using either of the
Ultra Fast functions,
water added should be
heated to around 118-
120°F to ensure proper
dough fermentation.
13.
Note:
· Always add the yeast
last when adding
ingredients to the
baking pan. Yeast that
comes into contact with
the wet ingredients will
not ferment properly.
· Refer to "Recipe Charts"
on pages 18-24 for
specific function notes
and ingredients.
O G O (CONT.
1. Read all instructions and important safeguards.
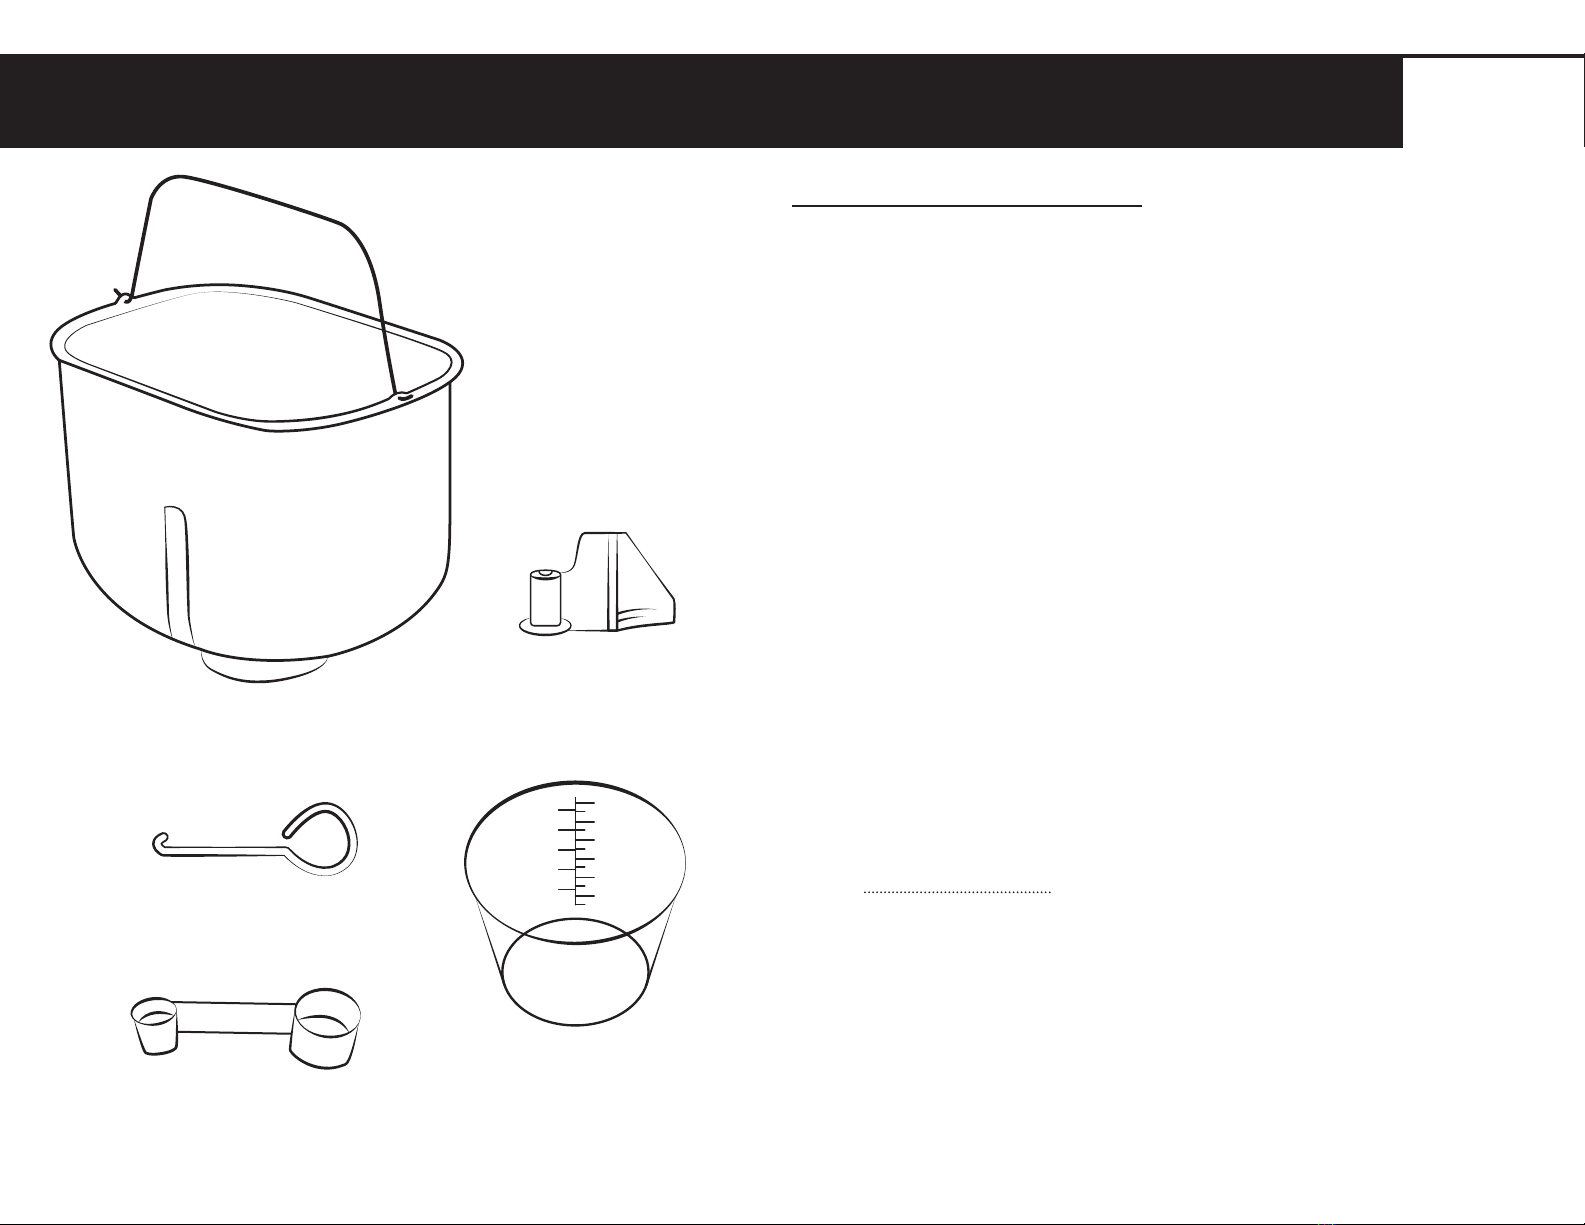
2. Follow the instructions in "Before First Use" on
page 10 to clean and prepare your bread maker
and accessories.
3. Remove the baking pan from the baking cavity
and secure the stirring paddle in place.
To remove the baking pan, hold the handle and
turn counterclockwise to release, then pull up.
For correct stirring paddle placement, see the
guidelines on page 9.
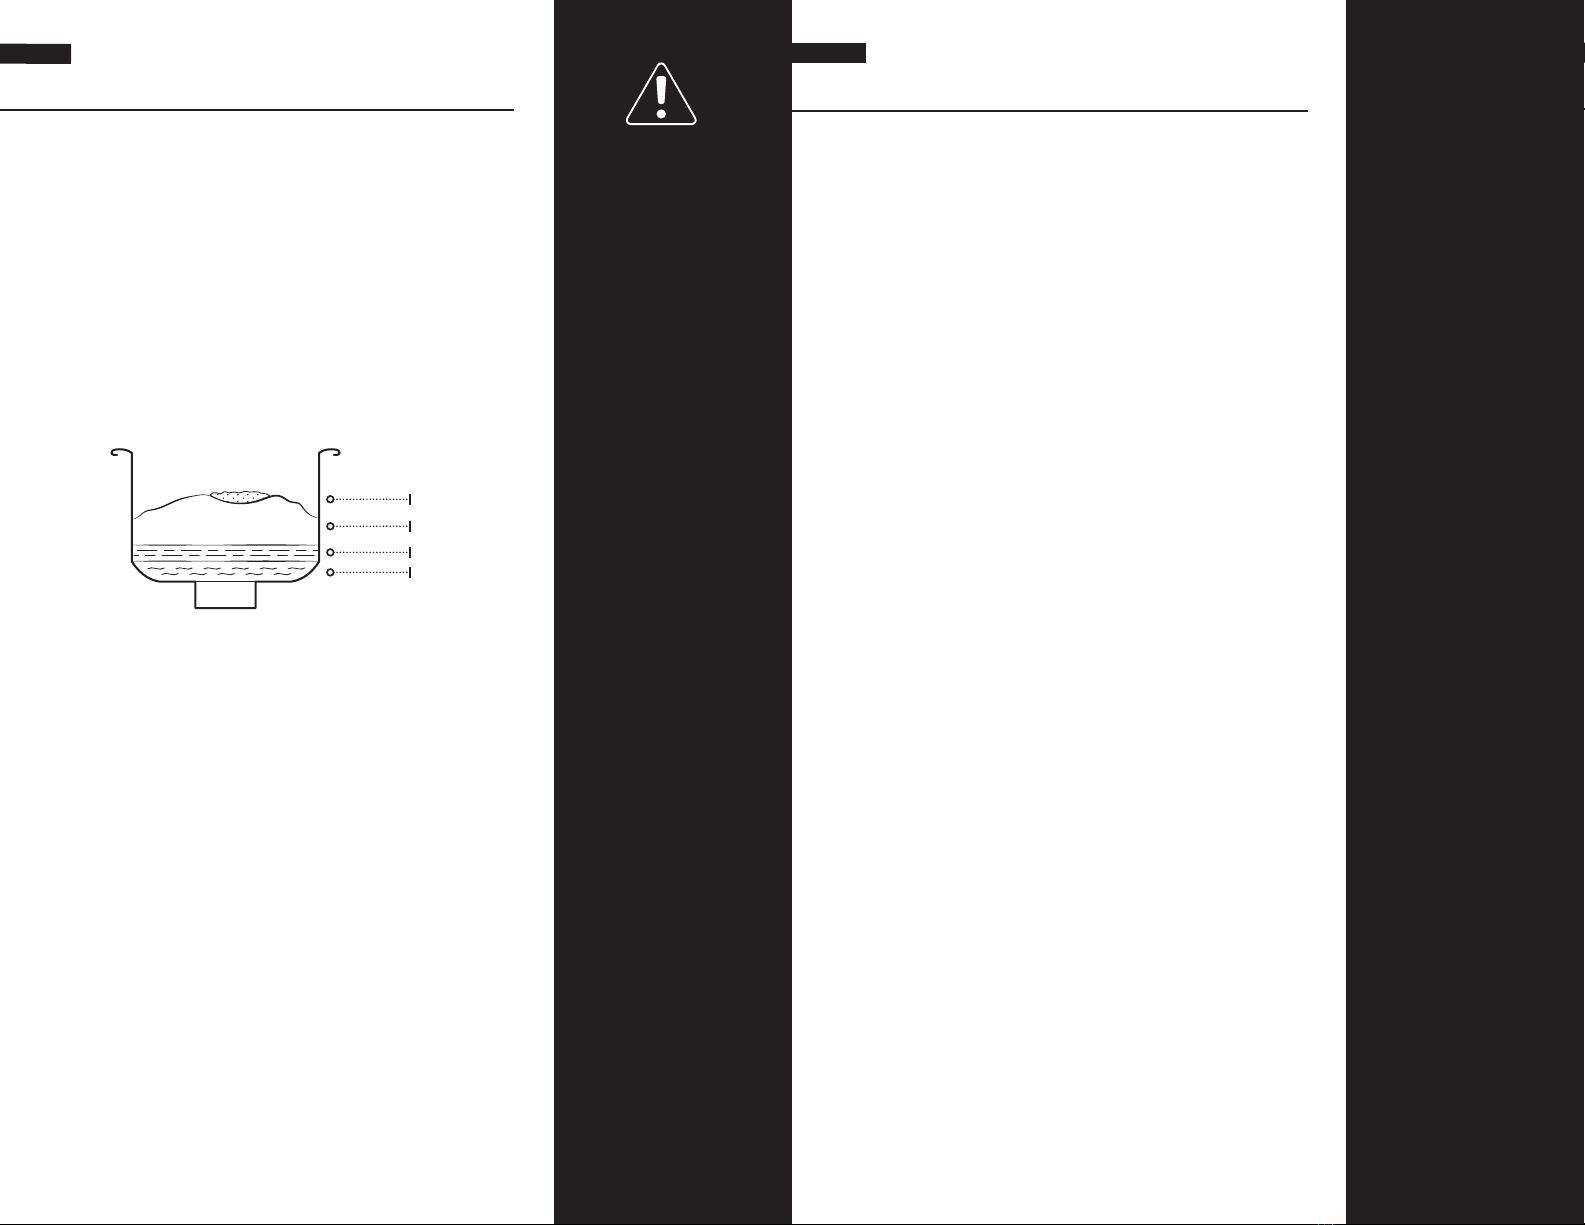
4. Add all ingredients to the baking pan.
To ensure proper baking and rising ingredients
should always be added in the following order:
When measuring dry ingredients,such as salt,
sugar,or flour,be sure not to over-pack the
measuring cup.Instead,gently shake the cup
from side to side until the ingredients are level
with the top of the cup.Over-packing will affect
the ingredient balance and dry out the dough.
For more information on ingredients,see
"Ingredient Guide" on page 15.
5. Place the baking pan inside the baking cavity,
ensuring that it is securely in place.
To place the baking pan inside the baking
cavity, hold by the handle and slighly rotate the
baking pan counterclockwise until it settles into
place. Rotate the handle clockwise until snug.
6. Lower the lid and plug the power cord into an
available 120V AC wall outlet.
The alert will sound and the default menu
settings will be shown on the digital display.
7. First, use the Menu button to select your desired
bake function. Then, select the loaf size, crust
color, and time (optional) using the Size, Color,
and Time buttons.
Caution:
To avoid spilling
ingredients onto the
bread maker’s heating
element, always remove
the baking pan from
the baking cavity before
filling.
Do not use perishable
ingredients when
setting a delay start
for your bread, as the
ingredients may spoil.
Instead, use powdered
alternatives.
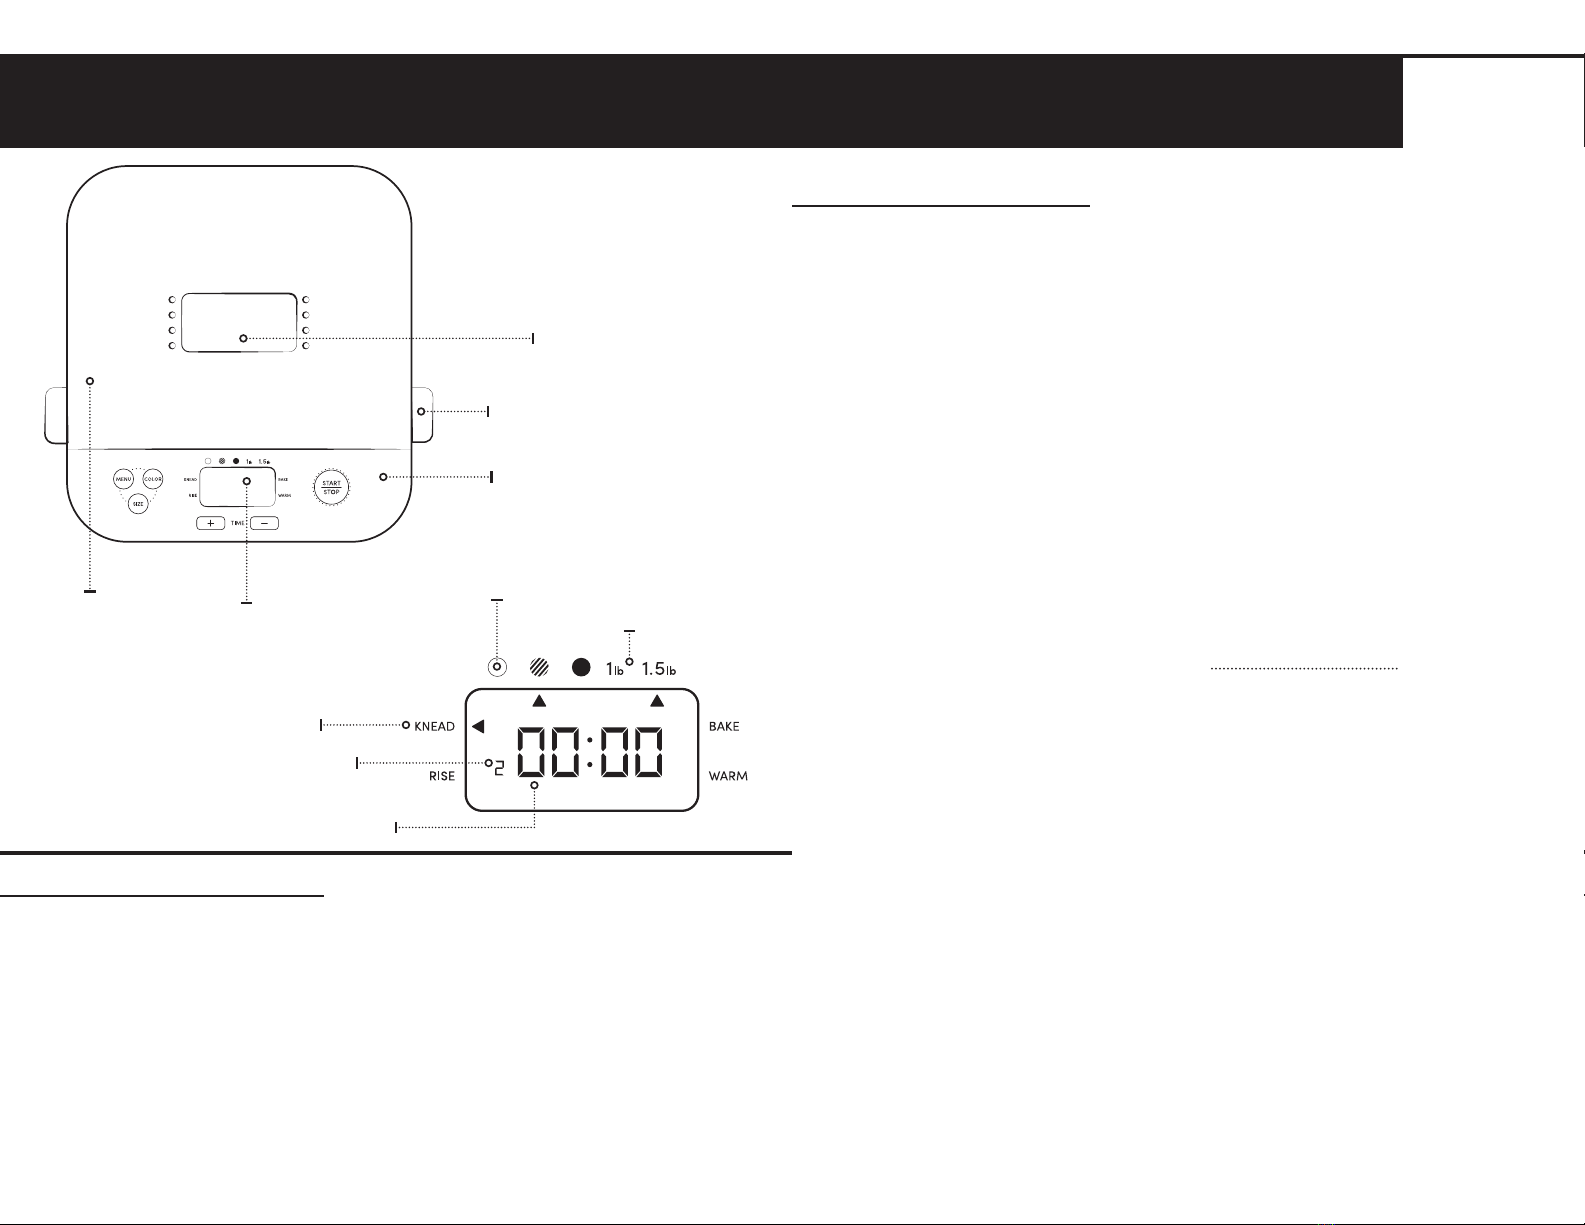
Bake Function
For a detailed description of available
baking functions and uses,see page 7.
Loaf Size
You may set the loaf size to 1 lb or 1.5 lbs.
Selecting the 1.5 lb loaf size will produce the
most uniform, traditional loaf.
The loaf size option is only adjustable for
functions 1-3, 5, and 11.
Crust Color
You may set the baking color to light, medium
or dark. See Note.
The crust color option is only adjustable for
functions 1-7 and 12.
Time
After selecting your desired bake function,
the digital display will automatically set
to the standard bake time for that function.
You can delay the start time if desired by
increasing the total bake time using the Time
buttons. For example, if you would like the
bread maker to begin in 3 hours, add 3
additional hours to the displayed bake time.
For functions 6, 7, 9 and 10, there is no delay
start, and the bake time is not adjustable.
Once you press Start|Stop, the bread maker
will begin.
For functions 12 and 13, there is also no delay
start, but the bake time is adjustable. Simply
select your total bake time, and press Start|Stop
to confirm. The digital display will stop flashing,
indicating that the bake time is set.
8. Press the Start|Stop button to begin the
breadmaking process. The unit will beep and the
digital display will begin to count down.
To pause the bread maker,press Start|Stop at
any point during operation. Press again
to restart. To stop the bread maker and cancel
the function, press and hold Start|Stop until the
unit beeps.
Baking Phases
All functions (except 12 and 13) cycle through
several phases: "Knead", "Rise" and "Bake".
See "Recipe Charts" on page 18 for the exact
durations of each baking cycle per function.
Helpful
Hints:
Check your bread
maker after 5 minutes
of mixing. Dough
should not be too
dry or too runny, but
well combined into a
solid mass. If dough
is too dry, add more
liquid (one teaspoon
at a time). If too runny,
add more flour (one
teaspoon at a time).
Yeast
Dry Ingredients
Fats
Water
continued on the next page >>