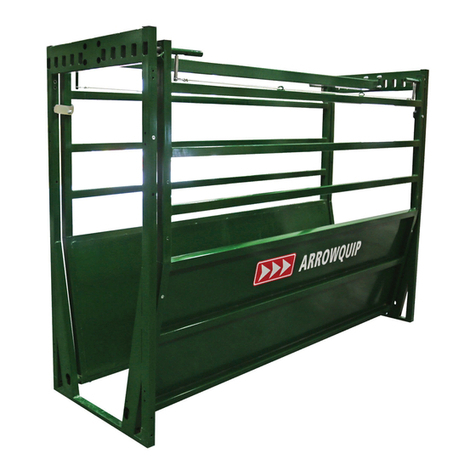
Arrowquip EASY FLOW User manual


CONTENTS
Safety Precautions 1
Risk Assessment 2
Before Installing 2
Assembly Instructions
Assembling a Single Easy Flow Race 3
Kicker Panel Installation 7
Anti-Backing Bar Installation 10
Rolling Race Gate Installation 12
Between Two Races 12
Between a Race and a Kicker Panel 13
Between a Race and a Forcing Pen 15
Between a Race and a Vet Cage 16
Other Products 17
Adjusting the Easy Flow Cattle Race 17
Emergency Exit 17
Using the Removable Side Panels 18
Recommended Maintenance 18
Bill of Materials 19
Warranty 20

PLEASE FOLLOW ALL SAFETY INSTRUCTIONS PROVIDED IN THIS MANUAL
BEFORE OPERATION. ARROWQUIP DOES NOT ACCEPT RESPONSIBILITY
FOR ANY ACCIDENTS OR INJURY WHEN THIS SAFETY MANUAL HAS
NOT BEEN READ IN FULL AND KEPT WITH THE PRODUCT AT ALL TIMES.
OPERATORS OF THIS PRODUCT TAKE AND ACCEPT RESPONSIBILTY FOR
ANY HARM OR INJURY TO THE ANIMAL OR OPERATOR WHEN IT PERTAINS
TO HOW THE EQUIPMENT IS USED AND MAINTAINED.
Please keep this manual for frequent reference and to pass on to new users or owners.
SAFETY PRECAUTIONS
PLEASE FOLLOW ALL SAFETY PRECAUTIONS OUTLINED HEREIN. ANY
HARM TO THE ANIMAL OR INJURY TO THE OPERATOR WHICH OCCURS
DUE TO HOW THE PRODUCT IS OPERATED, OR RESULTING FROM A LACK
OF SAFETY PRECAUTIONS ARE THE SOLE RESPONSIBILITY OF THE
OPERATOR.
All farm machinery and equipment is potentially dangerous. Careless use of any Arrowquip
livestock equipment may cause injury or damage to persons, cattle, or property. Arrowquip
has taken precautions in the design and manufacturing of this product to ensure that it is safe
and user-friendly. Therefore, user must assume all responsibility and risk associated with the
possession and use of the equipment.
WARNING: READ BELOW BEFORE OPERATION.
DANGER:
PANELS ARE VERY HEAVY AND WILL DROP WITH EXCESSIVE
PRESSURE WHEN AN ANIMAL IS CONTAINED IN THE RACE.
FAILURE TO OPERATE THE EMERGENCY EXIT PROPERLY
MAY RESULT IN DAMAGE OR INJURY/DEATH.
SAFETY LATCHES MUST BE IN PLACE WHEN ADJUSTING THE
SIDES OF THE EASY FLOW CATTLE RACE. FAILURE TO USE
THE SAFETY LATCHES MAY CAUSE THE PANELS TO DROP,
RESULTING IN DAMAGE TO PERSONS OR PROPERTY.
1 | SAFETY PRECAUTIONS

1. Ensure the operator understands the contents of this manual before using the
equipment.
2. Donotwearloose-ttedclothing.
3. Ensuretheequipmentisonarm,level,drysurfacethatisfreeofrocksandothertrip
hazards.
4. DO NOT ALLOW CHILDREN UNDER THE AGE OF 18 NEAR AN OPERATING
MACHINE.
5. Follow safe cattle handling procedures in other areas of the yard so that cattle are more
docile.
6. DonotmakeanymodicationstoArrowquipequipment.Non-factorymodicationsto
the equipment can reduce the safety for the operator and livestock.
RISK ASSESSMENT
Conduct a risk assessment on procedures for which the equipment is used and establish a
safe work procedure.
1. Ensure all users of the equipment have been inducted and comply with safe working
procedure.
2. Please ensure that there are NO large or hazardous objects inside the equipment that
may cause injury to the animal or operator, or may cause the equipment to malfunction.
3. Make sure that your equipment has been cleared of ALL livestock after use.
4. Some chemicals and medicines can damage powder coat. Take all precautions and
wash after use.
Level Ground HEAVY
Partner Lift
Forklift Required
BEFORE INSTALLING
RISK ASSESSMENT | 2

PACKING LIST: 8´ EASY FLOW RACE
7002337
A
x4
7001812
B
x8
7002062
C
x8
2004618
D
x2
WING HEAD BOLT
2004619
E
x1
2004616
F
x2
1/2" FLANGE NUT
PACKING LIST: 10´ EASY FLOW RACE
2003908
G
x2
1/2" x 3" HEX BOLT
7002337
A
x4
7001812
B
x8
7002062
C
x8
2003891
D
x2
WING HEAD BOLT
2004949
E
x1
2003890
F
x2
1/2" FLANGE NUT
2003908
G
x2
1/2" x 3" HEX BOLT
ASSEMBLY INSTRUCTIONS
ASSEMBLING A SINGLE EASY FLOW RACE
REQUIRED TOOLS
- 3/4" Wrench
- 3/4" Socket
- 9/16" Wrench
- 9/16" Socket
- Ratchet
3 | ASSEMBLING A SINGLE EASY FLOW RACE

ASSEMBLY
1 Lay two race bows on the ground horizontally.
2 Install the top post in the race. Keep nuts loose.
x2
B x 8 C x 8 E x 1
ASSEMBLING A SINGLE EASY FLOW RACE | 4
G x 2

3 Stand the race frame up, and position one panel on each side.
4 Insert the bottom pins on the panel into the frame on one side.
x2
5 | ASSEMBLING A SINGLE EASY FLOW RACE

5 Insert the bottom pins on the panel into the frame on the opposite side.
x2
6 Lift the panels up and latch into the frame. Tighten all fasteners to secure.
x2
ASSEMBLING A SINGLE EASY FLOW RACE | 6
7Connect to crush, race or other equipment using the provided panel pins.

CONNECTING TO ADDITIONAL PRODUCTS
KICKER PANEL INSTALLATION
REQUIRED TOOLS
- 9/16" Wrench
- Alignment bar
PACKING LIST
7 | KICKER PANEL INSTALLATION
7002294
A
x8
2004382
B
x1
3/8" x 2 3/4"
CARRIAGE BOLT
7001811
C
x8
3/8" FLANGE NUT
ASSEMBLY
1 Start with two assembled Easy Flow Races.
2008775
D
x2

2 Switch the standard Panel Clips on Easy Flow Races to the No-Gap Panel Clips
included with your Kicker Panel.
a. 4 panel clips on each race bow, 8 total.
KICKER PANEL INSTALLATION | 8
3 Connect the two races together on the side that you want to form the inside of the curve
using 2 panel pins.
x2
x8

x4
x4
4 Move the Panel Clips on the Kicker Panel into the correct position.
9 | KICKER PANEL INSTALLATION
5 Connect the Kicker Panel to the Easy Flow Cattle Races to form the outside of the
curve.

CONNECTING TO ADDITIONAL PRODUCTS
ANTI-BACKING BAR INSTALLATION
If you opted for an anti-backing bar, see the below instructions to install. The anti-backing
bar should be placed at the entry side of the race with the bar facing in the direction of
cattleow,andyouwillusethechainforadjustmentsbasedoncattlesize.
REQUIRED TOOLS
- 3/4" Wrench (x2)
Race STOP
A
x1
7002008
B
x5
2000080
C
x1
2002529
E
x1
7002084
D
x5
2000020
F
x1
PACKING LIST
1/2" x 4" HEX BOLT
1/2" HEX NUT
1 InstallRaceStopwiththebarfacinginthedirectionofcattleownearthepointofentry
into the race.
ASSEMBLY
B x 2 C x 1 D x 2

2 Install the chain latch.
NOTE:Thenotchonthelatchmustfacethedirectionofcattleow.
B x 3
D x 3
11 | ANTI-BACKING BAR INSTALLATION
C x 1
3 Install the chain clip and secure to the centre bar on the Race Stop.

4 Install the chain into the chain latch and adjust to the proper height for livestock.
CONNECTING TO ADDITIONAL PRODUCTS
DOUBLE RACE MERGE SECTION INSTALLATION
Reference the Double Cattle Race Merge Section installation instructions, available at
https://arrowquip.co.uk/resources/manuals.
CONNECTING TO ADDITIONAL PRODUCTS
ROLLING RACE GATE INSTALLATION
REQUIRED TOOLS
- 9/16" Wrench
1. BETWEEN TWO RACES
2000093
A
x1
7002318
B
x8
7001811
C
x12
PACKING LIST
3/8" FLANGE NUT3/8" x 4 1/2" CARRIAGE BOLT
DOUBLE RACE MERGE SECTION INSTALLATION | 12

ASSEMBLY
1. Remove panel clips from the Rolling Race Gate frame.
2. Place the Race Gate between two races.
3. Extend Rolling Race Gate to the far side with Off-Side Operation Handle.
4. Connect Rolling Race Gate Frame to the Race Bow with bolts and secure.
x2
x2
13 | ROLLING RACE GATE INSTALLATION - BETWEEN A RACE AND A KICKER PANEL
2. BETWEEN A RACE AND A KICKER PANEL
PACKING LIST
7001812
D
x2
1/2" FLANGE NUT
2000093
A
x1
7002318
B
x8
3/8" x 4 1/2"
CARRIAGE BOLT
7002295
F
x2
2000037
G
x1
1/2" x 3"
CARRIAGE BOLT
7002294
E
x8
3/8" x 2 3/4"
CARRIAGE BOLT
7001811
C
x16
3/8" FLANGE NUT

x2
x2
D x 2 F x 2
ROLLING RACE GATE INSTALLATION - BETWEEN RACE AND A KICKER PANEL | 14
ASSEMBLY
1. Remove panel clips from the Rolling Race Gate frame.
2. Place the Rolling Race Gate between the Race and Kicker Panel.
3. Extend Rolling Race Gate to the far side with Off-Side Operation Handle.
4. Connect the Rolling Race Gate Frame to the Race Bow and the Kicker Panel with bolts,
and secure.

3. BETWEEN A RACE AND A FORCING PEN
1. Remove panel clips from the Rolling Race Gate frame on the Race Side only.
2. Place the Rolling Race Gate between the Race and Forcing pen Exit.
3. Extend Rolling Race Gate to the far side with Off-Side Operation Handle.
4. Connect the Rolling Race Gate Frame to the Race Bow with bolts, and secure.
5. Use panel pins to connect the Rolling Race Gate to the Forcing Pen.
x2 C x 8 E x 8
PACKING LIST
ASSEMBLY
15 | ROLLING RACE GATE INSTALLATION - BETWEEN A RACE AND A FORCING PEN
2000093
A
x1
7002318
B
x8
7001811
C
x8
3/8" FLANGE NUT3/8" x 4 1/2" CARRIAGE BOLT

x4
x4
B x 8 C x 8
4. BETWEEN A RACE AND A VET CAGE
1. Follow the same steps for connecting a Rolling Race Gate between a Race and a
ForcingPen.Replace‘ForcingPen’with‘VetCage’.
ROLLING RACE GATE INSTALLATION - BETWEEN A RACE AND A VET CAGE | 16

SAFETY LATCHES MUST BE IN PLACE WHEN ADJUSTING THE
SIDES OF THE EASY FLOW CATTLE RACE. FAILURE TO USE
THE SAFETY LATCHES MAY CAUSE THE PANELS TO DROP,
RESULTING IN DAMAGE TO PERSONS OR PROPERTY.
DANGER:
PANELS ARE VERY HEAVY AND WILL DROP WITH EXCESSIVE
PRESSURE WHEN AN ANIMAL IS CONTAINED IN THE RACE.
FAILURE TO OPERATE THE EMERGENCY EXIT PROPERLY
MAY RESULT IN DAMAGE OR INJURY/DEATH.
OTHER PRODUCTS
To connect your Easy Flow Cattle Race to other products in the Arrowquip line, use panel
clips and pins to secure products.
ADJUSTING THE EASY FLOW CATTLE RACE
1. Pull the connection cable between the slam latches to release the panel.
2. Adjust panel into the desired position.
3. Lock the panel into position with slam latches, ensuring both latches are securely
fastened in parallel adjustment slots.
EMERGENCY EXIT
In the event of a downed animal or other emergency, you can use the emergency exit to
release livestock from the raceway. Exercise caution when releasing livestock, as they may
act in unpredictable and/or uncharacteristic ways while distressed.
NOTE: You will need two people to accomplish this safely.
1. Ensure all persons and property are out of the way of the panel.
2. Tie a minimum 17´ long rope on the top bar of the panel.
3. Wrap the rope around the center post on the race twice.
4. Lift the safety latches to allow the emergency exit to be used.
5. Release the slam latches on the panel to allow it to be lowered.
6. While standing on the opposite side of the race from the panel you are releasing, lower
the panel to the ground slowly with the rope.
7. Assist the animal to exit the race and provide care, as necessary.
8. Once the animal is free of the race, lift the panel back into position and secure the slam
latches.
17 | OTHER PRODUCTS
Table of contents
Other Arrowquip Farm Equipment manuals
Arrowquip
Arrowquip EASY FLOW CATTLE ALLEY User manual
Arrowquip
Arrowquip Q-CATCH 5400 User manual

Arrowquip
Arrowquip Q-CATCH 86 Series User manual

Arrowquip
Arrowquip Q-POWER 106 SERIES User manual

Arrowquip
Arrowquip 1040 User manual

Arrowquip
Arrowquip PORTABLE Q-CATCH 74 Series User manual

Arrowquip
Arrowquip Q-CATCH QC920 User manual

Arrowquip
Arrowquip THE MAJOR User manual

Arrowquip
Arrowquip Q-POWER 107 Series User manual
Arrowquip
Arrowquip PORTABLE Q-CATCH 74 Series User manual