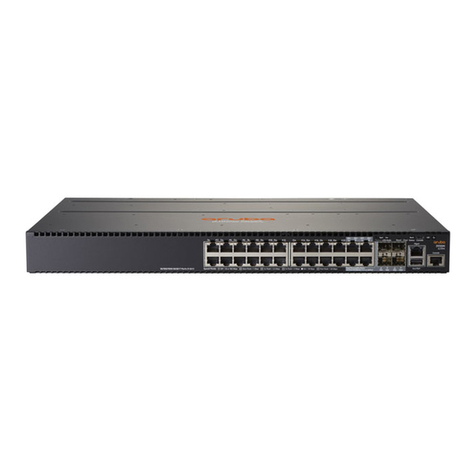
Aruba 3810M User manual

Aruba 3810M Switch Quick Setup Guide
and Safety/Regulatory Information
*5200-4434*
Part Number: 5200-4434
Published: October 2017
Edition: 1

© Copyright 2017 Hewlett Packard Enterprise Development LP
Notices
The information contained herein is subject to change without notice. The only warranties for Hewlett Packard
Enterprise products and services are set forth in the express warranty statements accompanying such products
and services. Nothing herein should be construed as constituting an additional warranty. Hewlett Packard
Enterprise shall not be liable for technical or editorial errors or omissions contained herein.
Confidential computer software. Valid license from Hewlett Packard Enterprise required for possession, use, or
copying. Consistent with FAR 12.211 and 12.212, Commercial Computer Software, Computer Software
Documentation, and Technical Data for Commercial Items are licensed to the U.S. Government under vendor's
standard commercial license.
Links to third-party websites take you outside the Hewlett Packard Enterprise website. Hewlett Packard Enterprise
has no control over and is not responsible for information outside the Hewlett Packard Enterprise website.

The switch drawings in this document are for illustration only and may not match your particular switch model.
1. Unpack and check included parts:
• Switch
• Accessory kit (installation hardware)
• Power cord
• Documentation kit
2. Prepare for installation.
To avoid personal injury or product damage, review the Installation Precautions.
3. Power on and verify that self-test completes normally.
1 Port LEDs
2 Locator or Unit Identification LED
3 Global Status LED
4. (Optional) Install mounting hardware (included) for use in a two-post rack.
Chapter 1
Aruba 3810M Switch Quick Setup Guide and Safety/Regulatory Information
Chapter 1 Aruba 3810M Switch Quick Setup Guide and Safety/Regulatory Information 3

5. (Optional) Connect console cable, RJ-45 and/or micro-USB.
6. (Optional) Insert FlexPort Module.
4Aruba 3810M Switch Quick Setup Guide and Safety/Regulatory Information

7. (Optional) Insert transceivers.
8. Connect network cables.
Chapter 1 Aruba 3810M Switch Quick Setup Guide and Safety/Regulatory Information 5

9. (Optional) Installing the Stacking Module.
6Aruba 3810M Switch Quick Setup Guide and Safety/Regulatory Information

10. (Optional) Installing the Stacking Cables.
Installation Guidelines
To avoid personal injury or product damage when installing your switch, read the installation precautions and
guidelines below.
Installation Precautions
• The rack or cabinet should be adequately secured to prevent it from becoming unstable and/or
falling over.
• Devices installed in a rack or cabinet should be mounted as low as possible, with the heaviest
devices at the bottom and progressively lighter devices installed above.
Chapter 1 Aruba 3810M Switch Quick Setup Guide and Safety/Regulatory Information 7

• Do not ship any switch in a rack without checking for restrictions in the Aruba 3810M Switch
Series Installation and Getting Started Guide. Otherwise, you may void the switch warranty.
• Ensure the power source circuits are properly grounded, then use the power cord supplied with
the switch to connect it to the power source.
• If your installation requires a different power cord than the one supplied with the switch and power
supply, be sure the cord is adequately sized for the switch’s current requirements. In addition, be
sure to use a power cord displaying the mark of the safety agency that defines the regulations for
power cords in your country. The mark is your assurance that the power cord can be used safely
with the switch and power supply.
• When installing the switch, the AC outlet should be near the switch and should be easily
accessible in case the switch must be powered off.
• Do not install the switch in an environment where the operating ambient temperature exceeds its
specification.
• Ensure the switch does not overload the power circuits, wiring, and over-current protection. To
determine the possibility of overloading the supply circuits, add together the ampere ratings of all
devices installed on the same circuit as the switch and compare the total with the rating limit for
the circuit. The maximum ampere ratings are usually printed on the devices near the AC power
connectors.
• Ensure the air flow around the switch is not restricted. Leave at least 3 inches (7.6 cm) for
cooling. For the air flow direction, see the Installation and Getting Started Guide for your product,
located on the Hewlett Packard Enterprise Information Library at www.hpe.com/networking/
ResourceCenter
.
Switch Operating System Software
For the latest software version supported by your switch, visit http://www.hpe.com/networking/support.
For software installation and management, the Basic Operation Guide and other software documentation for your
switch at www.hpe.com/networking/ResourceCenter.
Do not wall-mount Aruba 3810M switches.
If a power supply must be removed and then reinstalled, wait at least 5 seconds before reinstallation.
Otherwise, damage to the switch may occur. The power supply needs this time to bleed off any
retained power.
Install cover plates on any slot that is not in use.
Regulatory information
For important safety, environmental, and regulatory information, see Safety and Compliance Information for
Server, Storage, Power, Networking, and Rack Products, available at http://www.hpe.com/support/Safety-
Compliance-EnterpriseProducts.
8Aruba 3810M Switch Quick Setup Guide and Safety/Regulatory Information

Aruba 3810M Switch Safety and Regulatory Information
Aruba 3810M Switches
Environmental
Operating Temperature:
0°C to 45°C (32°F to 131°F)
Relative Humidity: 15% to 95% at 40°C (104°F) non-condensing
Non-Operating Temperature: -40°C to 70°C (-40°F to 158°F)
Non-Operating Relative Humidity: 15% to 90% at 65°C (149°F)
Maximum Operating Altitude: 3.0 km (10,000 ft)
Non-Operating Altitude: 4.6 km (15,000 ft)
Safety-EU EN 60950-1:2006 +A11:2009 +A1:2010
+A12:2011+A2:2013
EN62368-1, Ed. 2
Safety- World Wide IEC60950-1:2005 Ed.2; Am 1:2009+A2:2013
IEC62368-1, Ed. 2
IEC60825:2007 (Applies to products with lasers)
North American UL60950-1, CSA 22.2 No 60950-1
UL62368-1 Ed.2
Lasers EN60825-1:2007 / IEC 60825-1: 2007 Class1
Class 1 Laser Products / Laser Klasse 1
Chapter 1 Aruba 3810M Switch Quick Setup Guide and Safety/Regulatory Information 9

Aruba 3810M PoE+
Switches JL073A, JL074A,
and JL076A
Aruba 3810M Non-PoE+ Switches
JL071A, JL072A, and JL075A
Electrical
• AC voltage:
• Maximum current:
• Frequency range:
Per JL086A power supply:
100V-240V
8A- 3.5A
50 -60 Hz
Per JL085A power supply:
100 - 240 VAC
3A -1.2A
50 - 60 Hz
Per JL087A power supply:
110V-240V
12A- 5A
50 -60 Hz
Acoustics
Aruba 3810M 24G 1-slot Switch (JL071A) Sound Power (LWAd) 3.9 Bel
Sound Pressure (LpAm) (Bystander) 22.8 dB
Aruba 3810M 48G 1-slot Switch (JL072A) Sound Power (LWAd) 3.8 Bel
Sound Pressure (LpAm) (Bystander) 21.8 dB
Aruba 3810M 24G PoE+ 1-slot Switch (JL073A) Sound Power (LWAd) 4.8 Bel
Sound Pressure (LpAm) (Bystander) 30.7 dB
Aruba 3810M 48G PoE+ 1-slot Switch (JL074A) Sound Power (LWAd) 4.2 Bel
Sound Pressure (LpAm) (Bystander) 26.0 dB
Aruba 3810M 16SFP+ 2-slot Switch (JL075A) Sound Power (LWAd) 3.9 Bel
Sound Pressure (LpAm) (Bystander) 22.3 dB
Aruba 3810M 40G 8 HPE Smart Rate PoE+ 1-slot
Switch (JL076A)
Sound Power (LWAd) 4.5 Bel
Sound Pressure (LpAm) (Bystander) 27.9 dB
Power cord, one of the following:
Aruba 3810M PoE+ Switches
North America 8121-0973 Australia 8121-0857
North America high line 8121-0941 Brazil 8121-1265
South Africa/India 8121-1483 Europe/South Korea 8120-5336
Israel 8121-1009 China 8121-1034
Table Continued
10 Aruba 3810M Switch Quick Setup Guide and Safety/Regulatory Information

Aruba 3810M PoE+ Switches
United Kingdom/Hong Kong/
Singapore/Malaysia
8120-5334 Argentina 8121-1481
Switzerland 8120-5339 Chile 8120-8389
Danish 8120-5340 Thailand/Philippines 8121-0671
Japan high line 8120-5338
(JL086A, JL087A)
Taiwan 15A 8121-1511
(JL086A, JL087A)
Japan low line 8120-5342
(JL086A)
Taiwan 10A 8121-0967
(JL086A)
Power cord, one of the following:
Aruba 3810M Non-PoE+ Switches
Argentina 8120-6869 Japan 8120-4753
Australia/New Zealand 8121-0834 Switzerland 8120-6815
Brazil 8121-1069 South Africa 8120-6813
Chile 8120-6980 Taiwan 8121-0974
China 8120-8707 Philippines/Thailand 8121-0668
Continental Europe/South
Korea
8120-6811 UK/Hong Kong/Singapore/
Malaysia
8120-6809
Denmark 8120-6814 US/Canada/Mexico 8121-0973
India 8121-0780 North America high line 8121-0941
Israel 8121-1035
Table 1: Japan power cord warning
Japan Power Cord Warning
Table 2: China Altitude Warning
China Altitude Warning
Chapter 1 Aruba 3810M Switch Quick Setup Guide and Safety/Regulatory Information 11

Russia/Belarus/Kazakhstan/CEE Safety:
Power supply instructions
During the installation, ensure that AC power is NOT connected to the Power Supply.
Shock hazard
To completely remove power from the switch,
disconnect all power cords.
For more information, see the Power over Ethernet (PoE/PoE+) Planning and Implementation Guide on the
Hewlett Packard Enterprise Information Library at http://www.hpe.com/support/manuals.
Interior Wiring
Warning
Brazil Statement Este equipamento deve ser conectado obrigatoriamente em tomada de rede de energia
elétrica que possua aterramento (três pinos), conforme a Norma NBR ABNT 5410,
visando a segurança dos usuários contra choques elétricos.)
Battery Statements:
The only indicator of battery failure is the failure of the switch internal clock to keep the correct time
across a reboot or power cycle. If a battery failure occurs, contact your authorized Aruba
representative for assistance. Batteries are not customer-serviceable and battery failures should be
referred only to service personnel authorized by Aruba.
For important safety, environmental, and regulatory information, see Safety and Compliance
Information for Server, Storage, Power, Networking, and Rack Products, available at
http://www.hpe.com/support/Safety-Compliance-EnterpriseProducts
ATTENTION ll y a danger d'explosion s'il y a remplacement incorrect de la batterie.
Remplacer uniquement avec une batterie du même type ou d'un type équivalent
recommandé par le constructeur.Mettre au rebut les batteries usagées conformément
aux instructions du fabricant.
12 Aruba 3810M Switch Quick Setup Guide and Safety/Regulatory Information

ATTENTION The battery supplied with this product may contain perchlorate material. Special
handling may apply in California and certain other states. See http://www.dtsc.ca.gov/
hazardouswaste/perchlorate Web site for more information.
Risk of explosion if battery is replaced by an incorrect type. Dispose of used batteries according to
the instructions.
Japan VCCI Class A
Korea EMC Class A Statement
Chapter 1 Aruba 3810M Switch Quick Setup Guide and Safety/Regulatory Information 13

European Community
DECLARATION OF CONFORMITY
according to ISO/IEC 17050-1 and EN 17050-1
DoC #: RSVLC-1407 10122015
Supplier's Name:
Hewlett Packard Enterprise
Supplier's Address:
declares, that the product
8000 Foothills Blvd, Roseville, CA 95747, USA
Product Name and Model: 2) Aruba 3810M 24G PoE+ 1-slot Switch (JL073A),
Aruba 3810M 48G PoE+ 1-slot Switch (JL074A),
Aruba 3810M 40G 8 HPE Smart Rate PoE+ 1-slot Switch (JL076A)
Regulatory Model Number:1) RSVLC-1407
Product Options: JL078A, JL079A, JL083A, JL084A, JL086A, JL087A
conforms to the following Product Specifications and Regulations:
EMC: Class A
EN 55022: 2010, Class A
EN55024:2010
EN 61000-3-2: 2006 +A1:2009 +A2:2009, Class A
EN 61000-3-3:2008
FCC CFR 47 Part 15: 2010, Class A
Safety:
EN 60950-1:2006 +A11:2009 + A1:2010 +A12:2011 +A2:2013
IEC 60950-1:2005 +A1:2009 + A2:2013
EN 62368-1, Ed.2
EN 60825-1:2007 /IEC60825-1:2007 Class 1
EN 62479:2010
RoHS:
EN 50581:2012
This device complies with part 15 of the FCC Rules. Operation is subject to the following two conditions: (1) This device
may not cause harmful interference, and (2) this device must accept any interference received, including interference that
may cause undesired operation.
The product herewith complies with the requirements of the Low Voltage Directive 2006/95/EC, the EMC Directive
2004/108/EC, the RoHS Directive 2011/65/EU and carries the CE-marking accordingly.
Additional Information:
1) This product is assigned a Regulatory Model Number which stays with the regulatory aspects of the design. The
Regulatory Model Number is the main product identifier in the regulatory documentation and test reports, this number
should not be confused with the marketing name or the product numbers.
2) This product was tested in a typical HP environment in conjunction with an HP host system.
Roseville,
12-Oct -2015
Brent Ford, Regulations Manager
HPE Networking
Local contact for regulatory topics only:
EU: Hewlett Packard Enterprise, HQ-TRE, Herrenberger Strasse 140, 71029 Boeblingen, Germany
U.S.: Hewlett Packard Enterprise, 3000 Hanover St., Palo Alto 94304, U.S.A. 650-857-1501?
DECLARATION OF CONFORMITY
according to ISO/IEC 17050-1 and EN 17050-1
DoC #: RSVLC-1408 10122015
Supplier's Name:
Hewlett Packard Enterprise
Supplier's Address:
declares, that the product
8000 Foothills Blvd, Roseville, CA 95747, USA
Product Name and Model: 2) Aruba 3810M 24G 1-slot Switch (JL071A),
Aruba 3810M 48G 1-slot Switch (JL072A),
Aruba 3810M 16SFP+ 2-slot Switch (JL075A)
Regulatory Model Number:1) RSVLC-1408
Product Options: JL078A, JL079A, JL083A, JL084A, JL086A
conforms to the following Product Specifications and Regulations:
EMC: Class A
EN 55022: 2010, Class A
EN 55024:2010
EN 61000-3-2: 2006 +A1:2009 +A2:2009, Class A
EN 61000-3-3:2008
FCC CFR 47 Part 15: 2010, Class A
Safety:
EN 60950-1:2006 +A11:2009 + A1:2010 +A12:2011+A2:2013
IEC 60950-1:2005 +A1:2009 + A2:2013
EN 62368-1, Ed. 2
EN 60825-1:2007 /IEC60825-1:2007 Class 1
EN62479:2010
RoHS:
EN 50581:2012
This device complies with part 15 of the FCC Rules. Operation is subject to the following two conditions: (1) This device
may not cause harmful interference, and (2) this device must accept any interference received, including interference that
may cause undesired operation.
The product herewith complies with the requirements of the Low Voltage Directive 2006/95/EC, the EMC Directive
2004/108/EC, the RoHS Directive 2011/65/EU and carries the CE-marking accordingly.
Additional Information:
1) This product is assigned a Regulatory Model Number which stays with the regulatory aspects of the design. The
Regulatory Model Number is the main product identifier in the regulatory documentation and test reports, this number
should not be confused with the marketing name or the product numbers.
2) This product was tested in a typical HP environment in conjunction with an HP host system.
Roseville,
12-Oct -2015
Brent Ford, Regulations Manager
HPE Networking
Local contact for regulatory topics only:
EU: Hewlett-Packard Enterprise, HQ-TRE, Herrenberger Strasse 140, 71029 Boeblingen, Germany
U.S.: Hewlett Packard Enterprise, 3000 Hanover St., Palo Alto 94304, U.S.A. 650-857-1501?
For Conducted and Radiated Immunity in accordance with EN55024, the following switch products
are limited to Performance Criteria A with shielded cable (Cat 6/6A):
• Aruba 3810M 24G 1-slot Switch (JL071A)
• Aruba 3810M 48G 1-slot Switch (JL072A)
• Aruba 3810M 24G PoE+ 1-slot Switch (JL073A)
• Aruba 3810M 48G PoE+ 1-slot Switch (JL074A)
• Aruba 3810M 16SFP+ 2-slot Switch (JL075A)
• Aruba 3810M 40G 8 HPE Smart Rate PoE+ 1-slot Switch (JL076A)
Documentation feedback
Hewlett Packard Enterprise is committed to providing documentation that meets your needs. To help us improve
the documentation, send any errors, suggestions, or comments to Documentation Feedback
([email protected]). When submitting your feedback, include the document title, part number, edition, and
publication date located on the front cover of the document. For online help content, include the product name,
product version, help edition, and publication date located on the legal notices page.
14 Aruba 3810M Switch Quick Setup Guide and Safety/Regulatory Information

TOs desenhos neste documento são apenas para fins ilustrativos e podem não corresponder ao seu switch em
particular.
1. Abra a embalagem e confira as peças incluídas:
• Switch
• Kit de acessórios (para instalação)
• Cabo de alimentação
• Kit de documentação
2. Prepare-se para a instalação.
TPara evitar ferimentos pessoais ou danos ao produto, consulte Diretrizes de Instalação.
3. Ligue o switch e verifique se o autoteste é realizado normalmente.
1 LEDs de porta
2 LED localizador ou de identificação da unidade
3 LED de status geral
4. (Opcional) Instale o hardware de montagem (incluído) para uso em um rack de dois postes.
Chapter 2
Guia de Instalação Rápida e Informações Regulamentares e de Segurança do Switch
Aruba 3810M
Chapter 2 Guia de Instalação Rápida e Informações Regulamentares e de Segurança do Switch
Aruba 3810M
15

5. (Opcional) Conecte o cabo da console, RJ-45 e/ou micro-USB.
6. (Opcional) Insira o módulo FlexPort.
16 Aruba 3810M Switch Quick Setup Guide and Safety/Regulatory Information

7. (Opcional) Insira transceptores.
8. Conecte os cabos de rede.
Chapter 2 Guia de Instalação Rápida e Informações Regulamentares e de Segurança do Switch
Aruba 3810M
17

9. (Opcional) Instalação do módulo de empilhamento.
18 Aruba 3810M Switch Quick Setup Guide and Safety/Regulatory Information

10. (Opcional) Instalando os cabos de empilhamento.
Diretrizes de Instalação
Para evitar ferimentos pessoais ou danos ao produto durante a instalação do switch, leia as precauções e
diretrizes de instalação abaixo.
Precauções de instalação
• O rack ou gabinete deve estar adequadamente fixado, evitando instabilidade e/ou queda.
• Dispositivos instalados em racks ou gabinetes devem ser montados o mais baixo possível, com
os dispositivos mais pesados embaixo, e dispositivos gradualmente mais leves sendo instalados
acima.
Chapter 2 Guia de Instalação Rápida e Informações Regulamentares e de Segurança do Switch
Aruba 3810M
19

• Não instale um switch em um rack sem conferir as restrições no Guia de Instalação e Introdução
dos switches Aruba 3810M. Do contrário, você pode anular a garantia do switch
• Certifique-se de que os circuitos da fonte de energia estejam devidamente aterrados, e use o
cabo de alimentação que acompanha o switch para conectá-lo à fonte de energia.
• Se sua instalação exigir um cabo de alimentação diferente do fornecido com o comutador e a
fonte de alimentação, certifique-se de que o cabo tenha a corrente adequada aos requisitos do
switch’. Certifique-se também de usar um cabo de alimentação com a marca da agência de
segurança que determina a regulamentação dos cabos de alimentação em seu país. A marca é
sua garantia de que o cabo de alimentação pode ser usado de forma segura com o comutador e
a fonte de alimentação.
• Ao instalar o switch, a tomada CA deve estar próxima ao switch e deve ser de fácil acesso, caso
o switch precise ser desligado.
• Não instale o switch em locais nos quais a temperatura ambiente de operação exceda sua
especificação.
• Certifique-se de que o comutador não sobrecarregue os circuitos elétricos, a fiação e a proteção
de sobrecorrente. Para determinar a possibilidade de sobrecarga dos circuitos de alimentação,
some a amperagem nominal de todos os dispositivos instalados no mesmo circuito que o
comutador e compare o total ao limite nominal do circuito. A amperagem nominal máxima
geralmente vem impressa nos dispositivos, próxima aos conectores de alimentação CA.
• Certifique-se de que o fluxo de ar em volta do switch não seja restrito. Reserve ao menos 7,6 cm
(3 polegadas ) para a refrigeração. Para informações sobre a direção do fluxo de ar, consulte o
Guia de Instalação e Introdução de seu produto, localizado na Biblioteca de Informações da
Hewlett Packard Enterprise em www.hpe.com/networking/ResourceCenter
.
Switch do software do sistema operacional
Para a versão mais recente do software suportada por seu switch, acesse http://www.hpe.com/networking/
support.
Para instalação do software e gerenciamento, o Guia Básico de Operação e outra documentação de software
para o seu switch se encontram em www.hpe.com/networking/ResourceCenter.
Não instale os switches Aruba 3810M na parede.
Se uma fonte de alimentação precisar ser retirada e depois reinstalada, aguarde pelo menos cinco
segundos antes da reinstalação.
Caso contrário, pode ocorrer algum dano no switch. A fonte de alimentação precisa desse tempo
para descarregar a energia retida.
Instale tampas para cobrir os slots que não estiverem em uso.
20 Aruba 3810M Switch Quick Setup Guide and Safety/Regulatory Information
Table of contents
Languages:
Other Aruba Switch manuals

Aruba
Aruba 8360 Series User manual

Aruba
Aruba S3500-24P User manual

Aruba
Aruba 8325 Series User manual

Aruba
Aruba JL253A User manual

Aruba
Aruba 8400 Series User manual

Aruba
Aruba 8320 User manual

Aruba
Aruba 2930F 24G 4SFP Plus User manual

Aruba
Aruba Instant On 1930 Series Owner's manual

Aruba
Aruba JL320A User manual

Aruba
Aruba Instant On 1430 User manual
Aruba
Aruba 6300F Series User manual

Aruba
Aruba 6300F Series Owner's manual
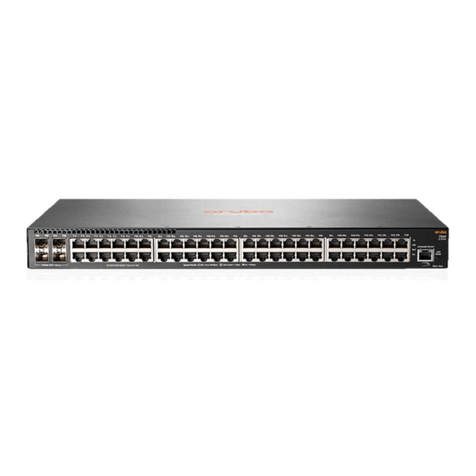
Aruba
Aruba 4100i Series User manual

Aruba
Aruba 2930M Owner's manual

Aruba
Aruba 6400 Series User manual
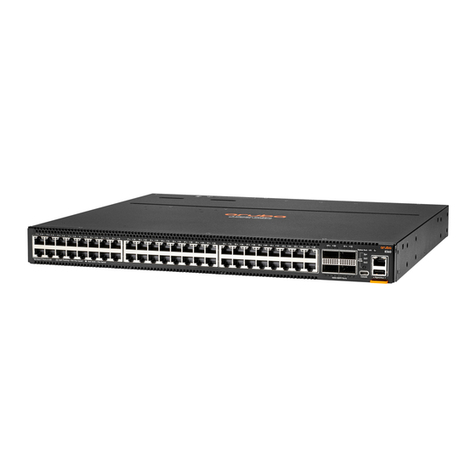
Aruba
Aruba 8400 Series User manual

Aruba
Aruba CX 10000 Series User manual

Aruba
Aruba AT-8400 SERIES User manual
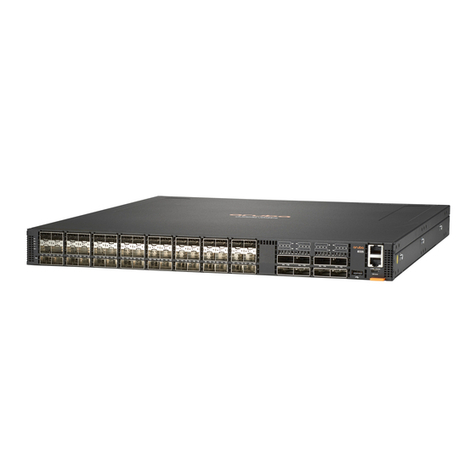
Aruba
Aruba 2930M User manual

Aruba
Aruba S1500 Series User manual