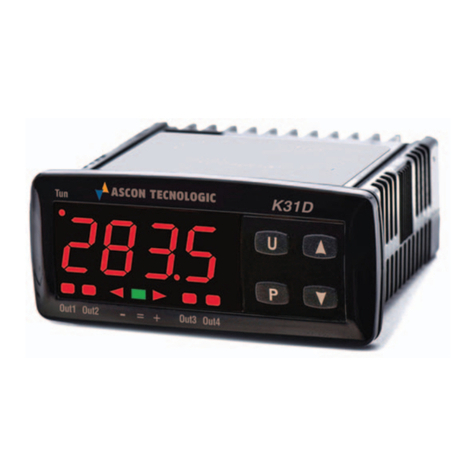
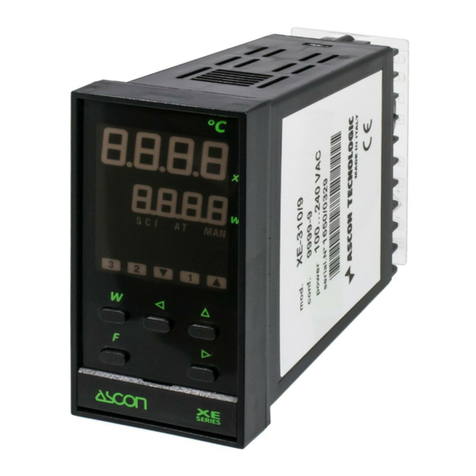
ascon X34S User manual

X34- X34S
DIGITAL ELECTRONIC
REFRIGERATION UNITS
CONTROLLER
OPERATING INSTRUCTIONS
Vr. 01 (ENG) - 11/12 - cod.: ISTR-MX34-ENG02
ASCON TECNOLOGIC S.r.l.
VIA INDIPENDENZA 56
27029 VIGEVANO (PV) ITALY
TEL.: +39 0381 69871
FAX: +39 0381 698730
http:\\www.ascontecnologic.com
e-mail: info@ascontecnologic.com
FOREWORD
This manual contains the information
necessary for the product to be installed
correctly and also instructions for its
maintenance and use; we therefore recommend
that the utmost attention is paid to the following
instructions and to save it.
This document is the exclusive property of ASCON
TECNOLOGIC which forbids any reproduction and divulgation
, even in part, of the document, unless expressly authorized.
ASCONT ECNOLOGIC reserves the right to make any formal or
functional changes at any moment and without any notice.
Whenever a failure or a malfunction of the device may cause
dangerous situations for persons, thing or animals, please
remember that the plant has to be equipped with additional
devices which will guarantee safety.
ASCON TECNOLOGIC and its legal representatives do not
assume any responsibility for any damage to people, things or
animals deriving from violation, wrong or improper use or in
any case not in compliance with the instrument’s features .
INDEX
INSTRUMENT ORDERING COD
E
7.5
FUNCTIONAL DATA7.4
MECHANICAL DIMENSIONS, PANEL CUT-OUT AND
MOUNTING
7.3
MECHANICAL DAT
A
7.2
ELECTRICAL DATA7.1
TECHNICAL DATA7
GUARANTEE AND REPAIR
S
6.3
CLEANING6.2
SIGNALLING6.1
PROBLEMS , MAINTENANCE AND GUARANTE
E
6
PROGRAMMABLE PARAMETERS TABLE5
TVR Y” REMOTE DISPLAY4.15.2
PARAMETERS CONFIGURATION BY “A01”4.15.1
ACCESSORIES4.15
RS 485 SERIAL INTERFAC
E
4.14
EVENTS THAT CAN BE PROGRAMMED TO OCCUR A
T
DEFINED TIMES
4.13
FUNCTION OF KEYS “U” AND “DOWN/AUX”4.12
HACC
P
A
LARM
S
FROM DIGITAL INPUTS4.11.3
HACCP POWER FAILURE (BLACK-OUT) ALARMS4.11.2
HACC
P
TEMPERATURE
A
LARM
S
4.11.1
HACCP FUNCTION (ALARM RECORDING)4.11
OPEN DOOR
A
LARM4.10.3
EXTERNAL ALARMS (DIGITAL INPUTS)4.10.2
TEMPERATURE
A
LARM
S
4.10.1
ALARM FUNCTIONS4.10
EVAPORATO
R
FANS CONTROL4.9
DEFROST DISPLAY LOCK4.8.5
DEFROSTS IN EVENT OF EVAPORATOR PROBE
ERRO
R
4.8.4
END DEFROS
T
4.8.3
MANUAL DEFROST4.8.2
A
UTOMATI
C
DEFROS
T
STARTS4.8.1
DEFROST CONTROL4.8
COMPRESSOR PROTECTION FUNCTION AND DELA
Y
A
T POWER-ON
4.7
TEMPERATU
R
E CONTROL4.6
OUTPUTS AND BUZZER CONFIGURATION4.5
DIGITAL INPU
T
S4.4
MEASURING AND DISPLAY4.3
“NORMAL”MODE, “ECONOMIC” MODE AND “TURBO
”
MODE
4.2
ON / STAND-B
Y
FUNCTION4.1
FUNCTIONS4
ELECTRICAL WIRING DIAGRAM3.4
ELECTRICAL CONNECTION
S
3.3
MECHANICAL MOUNTING3.2
PERMITTED US
E
3.1
INFORMATION ON INSTALLATION AND USE3
DISPLAYING HACCP ALARMS2.9
PROGRAMMING EVENTS TO OCCUR AT DEFINE
D
TIMES
2.8
SETTING THE CURREN
T
TIME AND DATE2.7
KEYBOARD LOCK FUNCTION2.6
RESET PARAMETE
R
S TO DEFAULT VALUE
/
LEVEL2.5
CUSTOMIZED MODE PARAMETER PROGRAMMING
(PARAMETERS PROGRAMMING LEVEL)
2.4
PARAMETER PROTECTION USING THE PASSWORD2.3
STANDAR
D
MODE PARAMETERS PROGRAMMIN
G
2.2
FAST PROGRAMMING OF SET POINT2.1
PROGRAMMING2
FRONT PANEL DESCRIPTION1.2
GENERAL DESCRIPTION1.1
INSTRUMENT DESCRIPTION1
1 - INSTRUMENT DESCRIPTION
1.1 - GENERAL DESCRIPTION
The X34 model is a digital electronic microprocessor controller that
can be used typically for refrigeration applications. It has
temperature control with ON/OFF regulation and control of
ASCON TECNOLOGIC - X34- -OPERATING INSTRUCTIONS - Vr. 02 - 11/12 - ISTR-MX34-ENG02 - PAG. 1

defrosting at defined times (Real Time Clock Defrosting), at time
intervals, by arrival at temperature or by length of time of
continuous compressor operation through stopping the
compressor, electric heating or hot gas/cycle inversion. The
appliance has special defrosting optimisation functions and
functions to reduce the amount of energy used by the controlled
system.
The instrument has up to 4 relay outputs, up to 4 inputs
configurable for PTC, NTC and Pt1000 temperature probes, and 2
digital inputs. It can also be equipped with an internal buzzer for
acoustic notification of alarms; an RS485 serial communication
interface with MODBUS-RTU communication protocol; and a
calendar clock.
The clock allows you to define the times of defrosting events,
auxiliary output switching, switching of the regulating set point,
instrument on/off, etc. (max 14 daily and 98 weekly events)
Another feature of the calendar clock version of the instrument is
that it has the HACCP function which can store the last 10 alarms
that have occurred (alarm type, start, duration and temperature
peaks)
The 4 outputs can be used to control the compressor or the
temperature control device, the defroster, the evaporator fans and
a configurable auxiliary device (Light, Alarm, second evaporator,
etc.)
The 4 temperature probe inputs can be used to regulate cell
temperature, measure evaporator temperature, and measure two
auxiliary temperatures (e.g. product temperature, condenser
temperature, temperature of a second evaporator, etc.).
Two digital inputs are always available and, as an alternative to the
Pr3 and Pr4 temperature probe inputs, two other digital inputs can
be configured.
The 4 digital inputs can be configured to execute various functions
such as cell door signal, defrost commands, selecting a different
temperature-regulating set point, reporting an external alarm,
activating a continuous cycle, activating the auxiliary output, etc.
The model X34S have the “S-touch” capacitive sensor keyboard
system.
1.2 - FRONT PANEL DESCRIPTION
3
1
5
2
4
Aux
96
10
12
13
7
11
8
1 - Key P : Used for setting the Set point (press and release) and
for programming the function parameters (hold pressed for 5 sec.)
In programming mode is used to enter in parameters edit mode
and confirm the values. In programming mode it can be used
together with the UP key to change the programming level of the
parameters.
When the keyboard is locked it can be used together with the UP
(hold pressed for 5 sec.) key to unlock the keyboard.
2 - Key DOWN/Aux : In programming mode is used for decreasing
the values to be set and for selecting the parameters. In normal
mode it can also be programmed via the parameter “t.Fb” to carry
out other functions (hold pressed for 1 sec.) such as activating the
Aux output, starting up the continuous cycle, etc. (see functions of
keys U and Down).
3 - Key UP/DEFROST : In normal mode can be used to start/stop
manual defrosting (hold pressed for 5 sec.). In programming mode
is used for increasing the values to be set and for selecting the
parameters. In programming mode can be used togetherwith key
P to change parameters level. Pressed together with the key P for
5 sec. allow the keyboard unlock
4 - Key U : Used (press and release) for visualising the instrument
variables (measured temperatures etc.). In programming mode can
be used to come back in normal mode (hold for 2 sec.). In normal
mode it can also be programmed via the parameter “t.UF” to carry
out other functions (hold pressed for 1 sec.) such as turning on
and off (stand-by) the device, activating the Aux output, starting up
the continuous cycle, etc. (see functions of keys U and Down).
5 - Led SET : In normal mode it serves to indicate when a key is
pressed. In programming mode indicates the programming level of
the parameters.
6 - Led OUT - COOL : Indicates the output status (compressor or
temperature control device) when the istrument is programmed for
cooling operation; on (on), off (off) or inhibited (flashing).
7 - Led OUT - HEAT : Indicates the output status (compressor or
temperature control device) when the istrument is programmed for
heating operation; on (on), off (off) or inhibited (flashing).
8 - Led DEFROST : Indicates defrosting in progress (on) or
drainage time in progress (flashing)
9 - Led FAN : Indicates fan output status on (on), off (off) or
delayed after defrosting (flashing)
10 - Led ALARM : Indicates the alarm status (on), off (off) and
silenced or memorized (flashing)
11 - Led AUX : Indicates AUX output status on (on), off (off) or
inhibited (flashing)
12 - CLOCK LED : Indicates that the internal clock is running. If
flashing slowly, it means that there is a clock error (clock chip not
working). If flashing rapidly, it means the clock battery is drained.
13 - Led Stand-By: Indicate the Stand-by status.
2 - PROGRAMMING
2.1 -FAST PROGRAMMING OF SET POINT
Press the key P then release it and the display will show “SP” (or
“SPE”) alternating with the set value.
To change it press the UP key to increase the value or DOWN to
decrease it.
These keys increase or decrease the value one digit at a time, but
if the button is pressed for more than one second the value
increase or decreases rapidly, and after two seconds pressed, the
speed increases even more to all the desired valued to be reached
rapidly.
However, through par. "t.Ed” is possible to determine whether and
which Sets are set with the fast mode bybutton P.
The parameter is programmable with a value between oF and 4
which means that:
oF = Nothing is set with the key P (the P pressed and released
has no effect)
1 = can be adjusted only SP (normal)
2 = can be adjusted only SPE (economic)
3 = can be adjusted both SP and SPE
4 = can be adjusted the active set (SP or or SPE)
5 = can be adjusted SP and SPH (“Turbo” or ind. “Heating”)
6 = can be adjusted SP, SPE and SPH
For example, if the parameter "t.Ed" = 1 or 3, the procedure is as
follows:
Press key P then release it and the display will show "SP"
alternate value.
To modify press key UP or DOWN to increase the value to
decrease.
If there is only the Set Point 1 ("t.Ed" = 1) once the desired value by
pressing the P button to exit the Set programming mode.
If is also programmable the EconomicSet Point ("t.Ed" = 3) by
pressing and releasing the P key again the display will show "SPE"
alternate to the set value.
To modify press key UP or DOWN like Set “SP”.
When the desired value is set press the key P to exit from Set
Point programming mode.
Exiting the Set mode is achieved by pressing the P key or
automatically if no key is pressed for 10 seconds. After that time
the display returns to the normal function mode.
2.2 - STANDARD MODE PARAMETERS PROGRAMMING
To access the instrument’s function parameters when password
protection is disable, press the key Pand keep it pressed for about
5 seconds, after which the display will visualised the code that
identifies the first group of parameters (“
]
SP “).
ASCON TECNOLOGIC - X34- -OPERATING INSTRUCTIONS - Vr. 02 - 11/12 - ISTR-MX34-ENG02 - PAG. 2

Using the UP and DOWN keys, the desired group of parameters
can be selected and pressing the P key, the display will show the
first parameter code of the group.
Using the UP and DOWN keys, the desired parameter can be
selected and pressing the P key, the display will alternately show
the parameter code and its setting that can be changed with the UP
and DOWN keys.
Once the desired value has been set, press the key P again: the
new value will be memorised and the display will show only the
code of the selected parameter.
Pressing the UP and DOWN keys, it is possible to select another
parameter and change it as described.
To come back at the group selection mode keep the U key pressed
for 1 sec. until will sho w the code group.
Pressing the UP and DOWN keys, it is possible to select another
group of parameters, another parameter and change it as
described.
To exit the programming mode, do not press any key for about 30
seconds, or keep the U key pressed for 2 sec. until it exits the
programming mode.
2 sec.
Hold for
Hold for
5 sec.
Hold for
2 sec.
2.3 - PARAMETER PROTECTION USING THE PASSWORD
The instrument has a parameter protection function using a
password that can be personalised, through the “t.PP” parameter.
If one wishes to have this protection, set the password number
desired in the parameter “t.PP”. When the protection is activate,
press the P key to access the parameters and keep it press for
about 5 seconds, after which the display will show “r.P” .
At this point press P, the display show “0”, using the UP and
DOWN keys, set the password number programmed and press
the key P.
If the password is correct, the display will visualise the code that
identifies the first group of parameters and it will be possible to
program the instrument in the same ways described in the previous
section.
Protection using a password can be disabled by setting the
parameter “t.PP” = oF.
Note: If the Password gets lost, just swith off and on the instrument
supply, push P key during the initial test and keeping the key
pressed for 5 seconds.
In this way it’s possible to have access to all the parameters, verify
and modify the par. “t.PP”.
2 sec.
Hold for
5 sec.
Hold for
2.4 - CUSTOMIZED MODE PARAMETER PROGRAMMING
(PARAMETERS PROGRAMMING LEVEL)
The password protection hides all the configuration parameters
behind a factory set password to avoid unwanted changes being
made to the programming of the controller.
To make a parameter accessible without having to enter the
password when “t.PP” password protection is activate follows this
procedure.
Enter the programming using the Password “t.PP” and select the
parameter which is desired to be accessible with no password
protection.
Once the parameter has been selected, if the SET led is blinking,
this means that the parameter is programmable by entering the
password (it’s then “protected”) if it’s instead on, this means the
parameter is programmable without password (not protected).
If you want to change the accessibility of the parameter push P
key, keep it pressed and press together also the key UP.
The led SET will change its state indicating the new access level of
the parameter (on = not protected; blinking = protected by
password).
In case some parameters are not protected, when one tries to have
access at the programming, the display will show all the
parameters not protected and the par. “r.P” (through which will be
possible to have access to the “protected” parameters.)
5 sec.
Hold for
2 sec.
Hold for
With regard to setting unprotected parameters, an exception is
HACCP alarm-related parameters (“H.01”, “H.02”, etc. which are
visible only when there are alarms stored in memory) whose
display level can be set via the “t.HA” parameter.
If “t.HA” = 1, parameters relating to stored HACCP alarms are
visible only within the
]
HA group (which can be displayed like all
other groups without a password if t.PP=oF or by entering the set
t.PP password).
If “t.HA” = 2, parameters relating to stored HACCP alarms are
visible both within the "
]
HA" group (which can be displayed like all
other groups without a password if t.PP=oF or by entering the set
t.PP password) and as unprotected parameters if the t.PP
parameter is given a password.
2.5 - RESET PARAMETERS TO DEFAULT VALUE/LEVEL
The instrument allows the reset of the parameters to values
programmed in factory as default.
To restore to the values of default the parameters set the value -48
to “r.P” password request.
Once confirmed the password with the key P the display it shows
"---" for 2 sec. therefore the instrument effects the parameters
reset..
2.6 - KEYBOARD LOCK FUNCTION
On the instrument it’s possibile to lock completely the keyboard.
This function is particularly useful when the regulator is reachable
by the users and it’s desired to avoid any modification.
To activate the keyboard lock it’s enough program the par. “t.Lo”
to a different value to oF.
The value program to this parameter it is the time of inactivity of the
keys afterwhich the keyboard will be locked.
Insofar not pressing any key for the time "t.Lo" the instrument
automatically disable the normal functions of the keys.
ASCON TECNOLOGIC - X34- -OPERATING INSTRUCTIONS - Vr. 02 - 11/12 - ISTR-MX34-ENG02 - PAG. 3

When the keyboard is lock, if any of the key is pushed, on the
display will appear “Ln” to indicate the active lock.
To unlock the keyboard it’s enough to contemporarily push key P
and UP and keep them pushed for 5 sec., afterwhich the label “LF”
will appear on the display and all the keys functions will be availab-
le again .
2.7 - SETTING THE CURRENT TIME AND DATE
If the instrument is supplied with the internal calendar/clock, this
must be enabled and programmed to the current time and day of
the week using the “c.CL” parameter, and to the current date
using the “c.dt” parameter.
After selecting the “c.CL” parameter, press the P key repeatedly to
cycle through the following in the order shown:
“h.” and the hours (e.g. “h.14”)
“n.” and the minutes (e.g. “n.52”)
“d.” and the day of the week (e.g. “d.1”)
The days are numbered as follows:
d. 1 = Monday
d. 2 = Tuesday
d. 3 = Wednesday
d. 4 = Thursday
d. 5 = Friday
d. 6 = Saturday
d. 7 = Sunday
+ the option oF which considers the clock to be disabled.
After selecting the “c.CL” parameter, press the P key repeatedly to
cycle through the following in the order shown:
“y” and current year (ex. “y.10)
“M” and current month (ex. “M.05”)
“d” and current date (ex. “d.31”)
When the internal clock is running, the Clock LED will come on.
If it is on and steady, this indicates that, since the time the clock
was enabled, the power supply to the instrument has never failed
and therefore the current time is presumably correct.
If it is flashing, this indicates that at some point since the clock was
enabled the power supply has certainly failed and therefore the
current time may not be correct.
In this condition, pressing any key cancels the signal and the LED
returns to solid (on and not flashing).
2.8 - PROGRAMMING EVENTS TO OCCUR AT DEFINED TIMES
All events are programmable through the 14 parameters “c.01” ...
“c.14” contained in the “
]
cE” group.
Exactly as for current time, because the parameters for
time-related functions require multiple values to be input, these
parameters are programmed in the following way:
After selecting the desired parameter, press the P key repeatedly
to cycle through the following:
“h.” and the hours (e.g. “h.13”)
“n.” and the minutes (e.g. “n.40”)
“d.” and the day of the week (e.g. “d.1”)
“t.” and the type of event to be executed at the programmed time
(e.g. t.1).
The days are numbered as follows:
d. 1 = Monday
d. 2 = Tuesday
d. 3 = Wednesday
d. 4 = Thursday
d. 5 = Friday
d. 6 = Saturday
d. 7 = Sunday
d. 8 = every day
d. 9 = Monday, Tuesday, Wednesday, Thursday, Friday
d. 10 = Monday, Tuesday, Wednesday, Thursday, Friday, Saturday
d.11 = Saturday and Sunday
d.oF = no day (event disabled)
The instrument offers 14 event programming parameters, allowing
a maximum of 14 x 7 = 98 weekly events to be scheduled (using
d.8).
For the types of events that can be programmed, see the relevant
section.
2.9 - DISPLAYING HACCP ALARMS
The so-called HACCP (Hazard Analysis and Critical Control Points)
function causes the instrument to record the last 10 alarms that
have occurred together with information that is useful for
determining the criticality of the alarm.
The function is available only for instruments that have the
calendar clock.
The following HACCP alarms can be stored in memory:
Alarm from digital input
AL
Power failure alarm (black-out)
bo
Minimum temperature alarm L2
L2
Maximum temperature alarm H2
H2
Minimum temperature alarm L1
L1
Maximum temperature alarm H1
H1
AlarmHACC
P
alarm
code
These alarms are displayed by the same display procedure as for
the programming parameters by accessing parameters “H.01” ...
“H.10” contained in the
]
HA group.
Exactly as for current time and events, because the parameters
relating to time-related functions require multiple values to be input,
these parameters are programmed in the following way:
After selecting the desired parameter, press the P key repeatedly
to cycle through the following:
- Alarm type (A. = see HACCP alarm codes)
- Alarm start time HACCP ( y. =year, M. =month, d. =day, h.
=hours, n. =minutes)
- HACCP alarm duration ( E. = hours, e. = minutes)
- Critical temp. (max. peak if Hi alarm or min. peak if Lo or other
alarm)
ASCON TECNOLOGIC - X34- -OPERATING INSTRUCTIONS - Vr. 02 - 11/12 - ISTR-MX34-ENG02 - PAG. 4

The instrument automatically sorts these parameters from most
recent (H.01) to oldest (H.10) whenever an alarm is recorded or
deleted.
If more than 10 alarms occur, the instrument deletes the
information about the oldest alarm by overwriting it with the most
recent alarm.
When this occurs the instrument increments by one the value of
the “H.dL” parameter by which it is possible to display the number
of alarms the instrument has been forced to delete when these
exceeded the permitted memory.
After selecting the parameter for the alarm which the user wishes
to display, if the label flashes this indicates that the alarm has
never been displayed (and therefore not recognised).
To recognise it, simply access the parameter via the P key and
display it.
The next time the parameter label is displayed it will be shown solid
(not flashing).
If the alarm is still ongoing at the time of its display, the data are
displayed but the alarm is not recognised.
In the event of unrecognised (and therefore still ongoing) HACCP
alarms, the instrument displays the message “HAC” alternating
with the normal display.
Within the parameter the data will be displayed sequentially as the
P key is repeatedly pressed.
The alarm is deleted by holding down the Down key for more than
5 seconds while one of the data of the alarm is displayed.
Similarly the value of the “H.dL” parameter can be reset by holding
down the Down key for more than 5 seconds while the value is
being displayed)
For HACCP alarm configuration and operation, see the relevant
section.
3 - INFORMATION ON INSTALLATION AND US
E
3.1 - PERMITTED USE
The instrument has been projected and
manufactured as a measuring and control device to
be used according to EN60730-1 for the altitudes
operation until 2000 ms. The use of the instrument
for applications not expressly permitted by the
above mentioned rule must adopt all the necessary protective
measures.
The instrument CANNOT be used in dangerous environments
(flammable or explosive) without adequate protection.
The instrument used with NTC 103AT11 probe (identifiable by the
printed code “103AT-11” visible on the sensor part) or Pt1000 is
compliant with standard EN 13485 ("Thermometers for measuring
the air and product temperature for the transport,storage and
distribution of chilled, frozen, deep-frozen/quick-frozen food and ice
cream”) with the following classification: [EN13485 air, S, A, 1,-
50°C +90°C]
Remember that the end user must periodically checks and verify
the thermometers in compliance with standard EN 13486.
The installer must ensure that EMC rules are respected, also after
the instrument installation, if necessary using proper filters.
Whenever a failure or a malfunction of the device may cause
dangerous situations for persons, thing or animals, please
remember that the plant has to be equipped with additional devices
which will guarantee safety.
3.2 - MECHANICAL MOUNTING
The instrument, in case 78 x 35 mm, is designed for flush-in panel
mounting. Make a hole 71 x 29 mm and insert the instrument, fixing
it with the provided special brackets. We recommend that the
gasket is mounted in order to obtain the front protection degree as
declared. Avoid placing the instrument in environments with very
high humidity levels or dirt that may create condensation or
introduction of conductive substances into the instrument. Ensure
adequate ventilation to the instrument and avoid installation in
containers that house devices which may overheat or which may
cause the instrument to function at a higher temperature than the
one permitted and declared. Connect the instrument as far away as
possible from sources of electromagnetic disturbances such as
motors, power relays, relays, solenoid valves, etc.
3.3 - ELECTRICAL CONNECTION
Carry out the electrical wiring by connecting only one wire to each
terminal, according to the following diagram, checking that the
power supply is the same as that indicated on the instrument and
that the load current absorption is no higher than the maximum
electricity current permitted. As the instrument is built-in equipment
with permanent connection inside housing, it is not equipped with
either switches or internal devices to protect against overload of
current: the installation will include an overload protection and a
two-phase circuit-breaker, placed as near as possible to the
instrument, and located in a position that can easily be reached by
the user and marked as instrument disconnecting device which
interrupts the power supply to the equipment. It is also
recommended that the supply of all the electrical circuits connected
to the instrument must be protect properly, using devices (ex.
fuses) proportionate to the circulating currents. It is strongly
recommended that cables with proper insulation, according to the
working voltages and temperatures, be used. Furthermore, the
input cable of the probe has to be kept separate from line voltage
wiring. If the input cable of the probe is screened, it has to be
connected to the ground with only one side. We recommend that a
check should be made that the parameters are those desired and
that the application functions correctly before connecting the
outputs to the actuators so as to avoid malfunctioning that may
cause irregularities in the plant that could cause damage to people,
things or animals.
3.4 - ELECTRICAL WIRING DIAGRAM
8
2 A Gen.Use
10 A Res.
12 A Res. 30 LRA / 5 FLA
UL
22
Out2
Out1
X34
2118 19 2017
NCCNO
Out2:
Out1:
Out3,4:
8 (3) A
16 (9) A 10 (4) A
4 (4) A
2 (1) A5 (1) A
EN
61810
EN
60730
4321 75 6
INPUTS
Out4Out3
BUZZER
24 25 26 282723
SUPPLY
15
INTERNAL
10E5 cycles, 0 T 50 °C
111091412 13 16
Pr1 Pr2 Pr3 Pr4
di3 di4
RS485
di1 di2 D-D+ GND
4 - FUNCTIONS
4.1 - ON / STAND-BY FUNCTION
The instrument, once powered up, can assume 2 different
conditions:
- ON : means that the controller uses the control functions.
- STAND-BY : means that the controller does not use any control
function and the display is turned off except for the Stand-by led.
If there is no power, and then power returns, the system always
sets itself in the condition it was in before the black-out.
The ON/Stand-by function can be selected:
- Pressing the key U for at least 1 sec. if the parameter "t.UF" = 3
or 5
-Pressing the key DOWN/AUX for at least 1 sec. if the parameter
"t.Fb" = 3 or 5
- using the digital input if the parameter “i.xF” = 7 or 15
- by programming a programmable event through the clock (if
present)
4.2 - "NORMAL", "ECONOMICAL" AND "TURBO" OPERATING
MODES
The instrument can be used to enter up to 3 different regulating set
points: Normal - “SP”; Economical - “SPE”; and “Turbo” - “SPH”.
ASCON TECNOLOGIC - X34- -OPERATING INSTRUCTIONS - Vr. 02 - 11/12 - ISTR-MX34-ENG02 - PAG. 5

Associated with each of these is the corresponding differential
(hysteresis): normal - “r.d”; Economical - “r.Ed”; and “Turbo” -
“r.Hd”.
Switching between the various modes can be automatic or manual
"NORMAL-ECONOMICAL" MODE OPERATION
Can be used where it is necessary to switch between two different
operating temperatures (e.g. day/night or working days/holidays)
NORMAL/ECONOMICAL mode can be selected manually:
– by pressing the U key if parameter "t.UF" = 2
– by pressing the DOWN/AUX key if parameter "t.Fb" = 2
– by a digital input if parameter “i.xF” = 6
NORMAL/ECONOMICAL mode can be selected automatically:
– after the door has been closed for time “i.Et” (switching from
Norm. to Eco)
– when the door is opened if the SPE set point is active from
parameter “i.Et” (switching from Eco to Norm.)
- after the door has been closed for time “i.tt” since activation of
the SPE set point from parameter “i.Et” (switching from Eco to
Norm.)
- at times defined through the clock by programming events t.6
(switch to Eco mode) and t.7 (switch to normal mode). For further
information see the section on programming events through the
clock.
r.Ed
SPE
SP
r.d
Pr1
Temp.
"ECO"
i.Et
"Norm." time
DOOR
"Norm."
DAY (shop open) NIGHT(shop close) DAY (shop open)
Example of automatic switching between Eco mode and normal
mode. During working hours the door is frequently opened and the
controller stays in normal mode. When the door has not been
opened for time “i.Et”, the controller switches to Eco mode. As soon
as the door is opened again, the controller reverts to normal mode.
This function requires use of a digital input configured as “i.xF” =
1, 2 or 3 (door open input)
If “i.Et” = oF, selection of Eco/Norm. mode via the digital input
configured as door, is deactivated.
If “i.tt” = oF, switching the mode from Eco to Normal due to time-out
is deactivated.
r.d
SPE
SP
Pr1
Temp.
"ECO""Norm."
i.Et (1) i.tt (2)
"Norm."
i.Et
r.Ed
time
(1) – The time i.Et is reset every time the door is opened. In the
case shown, the door is always closed.
(2) – The time i.tt stops when the door is opened and the
instrument immediately switches to "normal" mode. In the case
shown, the door is always closed.
When in economical mode, the label “Eco” is displayed.
If “i.dS”= Ec, in economical mode the instrument displays “Eco” all
the time. Otherwise the label "Eco" appears approx. every 10
seconds alternating with the normal display set by the “i.dS”
parameter.
Selection of Eco mode is always also combined with the function of
turning off the Auxiliary output if used as a window light (“o.Fo”= 3).
"TURBO – NORMAL – ECONOMICAL" MODE OPERATION
"Turbo" mode can be selected manually:
– by pressing the U key if parameter "t.UF" = 4
– by pressing the DOWN/AUX key if parameter "t.Fb" = 4
– by a digital input if parameter “i.xF” = 8
"Turbo" mode can be selected automatically:
- on leaving Eco mode (only if “r.HC” = C3)
- every time the instrument is switched on (only if “r.HC” = C3 and
Pr1 > SPE+r.Ed)
The instrument quits "turbo" mode automatically at the end of time
“r.tC” or manually using the programmed command (key or digital
input) and the instrument always returns to normal mode.
"Turbo" mode can be applied manually, for example when the user
wishes to lower the temperature of the products quickly after
loading the refrigerator.
However, "Turbo" mode is applied automatically to restore product
temperature at the end of economical mode.
Setting “r.HC” = C3 gives the following operating cycle:
SPH
Temp.
r.Hd
time
Pr1
r.tC
SP
r.d
SPE
r.Ed
r.tC
"Turbo" "Norm." "ECO"
i.Et (1) i.tt (2)
"Turbo"
r.HC = C3
(1) - The time i.Et is reset every time the door is opened and in the
case shown the door is always closed.
(2) – The time i.tt stops when the door is opened and the
instrument immediately switches to "Turbo" mode. In the case
shown, the door is always closed.
When switched on, the instrument starts in the mode it was in
when it was switched off ("Normal" or “Eco”) unless the
temperature at switch-on is > SPE+r.Ed. In this case (see fig.) a
"Turbo" cycle is automatically initiated.
After time “r.tC” the instrument automatically enters "Normal"
mode.
If the door is opened frequently the instrument stays in "Normal"
mode. If however it is not opened for time “i.Et” it automatically
switches to "Eco" mode.
The instrument remains in "Eco" mode until the door is opened
again or, if set, until the time-out “i.tt”.
On leaving "Eco" mode the instrument therefore runs a "Turbo"
cycle to allow product temperature to be restored, after which it
reverts to "Normal" mode and so on.
When “turbo” mode is on, this is indicated by the characters “trb”
shown on the display, alternating with the normal display.
The Set point "SP" can be set with a value between the
programmed value in parameter. “S.LS” and the programmed
value in parameter “S.HS”.
The Set point "SPE" can be set with a value between the
programmed value in parameter. “SP” and the programmed value
in parameter “S.HS”.
The Set point "SPH" can be set with a value between the
programmed value in parameter. “S.LS” and the programmed
value in parameter “SP”.
Note: in the examples that follow, the Set point is generally
indicated as "SP" and the histeresis as “r.d”, how when operating
the instrument will work according to the Set point and histeresis
selected as actives.
4.3 - MEASURING AND DISPLAY
All the parameters concerning measuring are contained in the
group “
]
In”.
ASCON TECNOLOGIC - X34- -OPERATING INSTRUCTIONS - Vr. 02 - 11/12 - ISTR-MX34-ENG02 - PAG. 6

Via the parameter “i.SE” it is possible to select the type of probes
that one wishes to use and which can be: thermistores PTC
KTY81-121 (Pt), NTC 103AT-2 (nt) or Pt1000 (P1).
Via the parameter “i.uP”, it is possible to select the temperature
unit of measurement the desired measurement resolution (C0=°C /
1° ; C1=°C / 0.1° ; F0= °F / 1°; F1= °F / 0.1°).
The instrument allows the measuring to be calibrated, that can be
used for re-calibrating the instrument according to application
needs, through the parameters “i.C1” (for the input Pr1),“i.C2” (for
the input Pr2) ,“i.C3” (for the input Pr3) ,“i.C4” (for the input Pr4).
The functions carried out by Pr2, Pr3 and Pr4 probes is defined by
the parameters “i.P2”, “i.P3” and “i.P4”
This parameters can be configured for the following functions:
= EP - Evaporator probe: used to managing the defrost and the
evaporator fans (see relative functions)
= Au - Auxiliary Probe: can be used as a display-only probe but it is
also possible to assign temperature alarms to it (possible uses:
product probe, anti-freeze probe, etc.)
= cd - Condenser Probe: can be used as a display-only probe but it
is also possible to assign temperature alarms to it in order to give
alarms relating to condenser malfunction (e.g. dirty/clogged
condenser).
= 2E - Evaporator Probe 2: the probe performs the functions
described later for controlling defrosts in the second evaporator in
twin-evaporator plants.
= dG - Digital input (see digital inputs functions)
If probe Pr2 and/or Pr3 and/or Pr4 is/are not used, set the relative
parameter “i.P2”and/or “i.P3” and/or “i.P4” = oF.
It is not possible to program more parameters for the same function
(priority goes to lowest input).
Using the parameter “i.Ft”, it is possible to set the time constant
for the software filter for measuring the input values to be able to
reduce the sensitivity to measurement disturbances (increasing the
time).
Through the parameter “i.dS”, it is possible to fix the normal
visualisation on the display that can be the measurement of the
probe Pr1 (P1), the measurement of the probe Pr2 (P2), the
measurement of the probe Pr3 (P3), the measurement of the probe
Pr4 (P4), the active set point value (SP), the label “Eco” when the
instrument is in Eco mode (Ec) or it can have the numerical display
switched off (oF).
Through the parameter “i.CU”, it is possible to program an measu-
re offset that will be applied to the temperature show on the display
(only if i.dS”= P1, P2, P3, P4, Ec).
The normal visualisation on the display is established by par.
“i.dS”, but it is possible to visualise all the variables and the highest
and lowest Pr1 peak measurement values in rotation by quickly
pressing and releasing key U.
The display will alternately show the code that identifies the
variable and its value.
The variable are:
“Pr1” - Pr1 temperature
“Pr2” - Pr2 temperature
“Pr3” - Pr3 temperature ( on/oF state if is progr. as digital input )
“Pr4” - Pr4 temperature ( on/oF state if is progr. as digital input )
“Lt” and the lowest Pr1 peak temperature
“Ht” and the highest Pr1 peak temperature
and , if real time clock is enable:
“h.” - current hour
“n.” - current minutes
“d.” - current day of the week
When the instrument is switched off, peak values are always
re-set. However, it is also possible to reset these values if the
instrument is switched on by using the DOWN key hold for 3 sec.
during peak visualization.
The display will show “---” and peak memory will be reset.
The exit of this visualisation mode occurs automatically 15 seconds
after the last pressing on the key U.
Please remember that visualisation of the Pr1 probe can be
changed by the defrosting display lock function, by using the
parameter “d.dL” (see defrost function).
4.4 - DIGITAL INPUTS
All the parameters concerning digital inputs are contained in the
group “
]
In”.
The instrument has 2 digital inputs for voltage-free contacts whose
function is defined by the parameters “i.1F” and “i.2F” and whose
action can be delayed by the time period set in the parameters
“i.1t” and “i.2t”.
In addition, the instrument may have 2 further digital inputs for
voltage-free contacts as an alternative to the measurement inputs
Pr3 and Pr4.
In order to use these inputs digitally, the user must set the relevant
parameter “i.P3” or “i.P4” = dG.
The function performed by these digitally configured inputs is
defined by the parameters “i.3F” and “i.4F” while the action is
instantaneous and cannot be delayed.
The parameters “i.1F” , “i.2F”, “i.3F”, “i.4F” can be configured
for the following functions:
= 0 - No function
= 1 -Cell door opening by contact normally open: on closing the
digital input the instrument visualises oP and the variable set in
parameter “i.dS” alternately on the display. With this function mode,
the action of the digital input also activates the time that can be set
in parameter "A.oA" after which the alarm is activated to signal that
the door has been left open.
= 2 -Cell door opening with fan stop by contact normally open: on
closing the digital input the fans are stopped and the instrument
visualises oP and the variable set in parameter “i.dS” alternately on
the display. With this function mode, the action of the digital input
also activates the time that can be set in parameter "A.oA" after
which the alarm is activated to signal that the door has been left
open and the fan restart.
= 3 - Cell door opening with compressor and fan stop by contact
normally open: similar to “i.Fi” = 5 but with fan and compressor
stop. At the intervention of the door open alarm alarm compressor
and fan restarts.
= 4 - External alarm signal by contact normally open: on closing
the digital input the alarm is activated and the instrument visualises
AL and the variable set in parameter “i.dS” alternately on the
display.
= 5 - Signalling of external alarm with disablement of all the control
outputs by contact normally open: on closing the digital input all
the control outputs are disabled, the alarm is activated and the
instrument visualises AL and the variable set in parameter “i.dS”
alternately on the display.
= 6 - Selecting the active set point (SP/SPE) with contact normally
open: on closing the digital input the temperature set point “SPE”
is activated. When instead the input is open the set point “SP” is
active.
= 7 - Switching on/switching off (Stand-by) of instrument by contact
normally open: on closing the digital input the instrument is
switched on while it is placed in Stand-by when opened.
= 8 - "Turbo" cycle activation command with normally-open contact:
closing the input starts a "turbo" cycle.
= 9 - Remote command of auxiliary output AUX with normally-open
contact: closing the input activates the auxiliary output as
described in the "o.Fo" = 2 operating mode of the auxiliary output.
= 10 - Disable recording of HACCP alarms: closing the input
disables the recording of HACCP alarms.
= 11 - Reset recording of HACCP alarms: closing the input deletes
all recorded HACCP alarms.
= 12 - External "PrA" alarm notified and "ot" output deactivated by
normally-open contact: closing the input deactivates the output
configured as "ot" and activates the alarm, and the instrument
display shows PrA alternating with the variable defined by the
“i.dS” parameter.
= 13 - External “HP” alarm notified and “ot” output deactivated by
normally-open contact: closing the input deactivates the output
configured as “ot” and activates the alarm, and the instrument
display shows HP alternating with the variable defined by the “i.dS”
parameter.
= 14 - External “LP” alarm notified and “ot” output deactivated by
normally-open contact: closing the input deactivates the output
configured as “ot” and activates the alarm, and the instrument
ASCON TECNOLOGIC - X34- -OPERATING INSTRUCTIONS - Vr. 02 - 11/12 - ISTR-MX34-ENG02 - PAG. 7
display shows LP alternating with the variable defined by the “i.dS”
parameter.
= 15 - Forcing a programmed Switch-on/Switch-off (Stand-by)
event - closing the input switches the instrument from the ON state
to the Stand-by state and vice versa, until the next event.
Therefore, if switch-on/stand-by events are programmed using the
clock, action by this mode forces the state until the next event.
= 16 - Defrosting start command with contact normally open: on
closing the digital input 1 (and after the “i.ti” time) a defrosting cycle
is activated.
= 17 - Defrosting end command with contact normally open: on
closing the digital input 1 (and after the “i.ti” time) a defrosting cycle
is ended if in progress or defrosting is inhibited.
= -1, -2, -3, etc. - Like function with positive values but with
function logic reversed (contact normally closed)
Note: Where multiple digital inputs are configured for the same
function, the instrument will treat the contacts as if they were
parallel (and consequently regard the result as an OR function).
4.5 - OUTPUTS AND BUZZER CONFIGURATION
All the parameters concerning outputs configuration are contained
in the group “
]
Ou”.
The instrument outputs can be configured by the relative
parameters “o.o1” , “o.o2”, “o.o3”, “o.o4”.
The outputs can be configured for the following functions:
= ot - to control the compressor or however, the temperature
control device
= dF - to control the defrosting device (1)
= Fn - to control the evaporator fans
= Au - to control the auxiliary device
= At - to control a silenceable alarm device through a contact that
is normally open, and then closed when the alarm sounds
= AL - to control an alarm that cannot be silenced through a
contact that is normally open and closed when the alarm sounds.
= An - to control an alarm with a memory function through a
contact that is normally open and closed when the alarm sounds.
= -t - to control a silenceable alarm device through a contact that is
normally closed, and then open when the alarm sounds.
= -L - control an alarm that cannot be silenced through a contact
that is normally closed and open when the alarm sounds.
= -n - to control an alarm with a memory function through a contact
that is normally closed and open when the alarm sounds.
= on - Output on when the instrument is in on state. This mode can
be used to control lights, non-misting resistance on room door or
other utilities
= HE - to control an heating device in neutral zone control mode
(“r.HC” = nr).
= 2d - to control the defrosting device n. 2
= L1 - Light output managed by Normal / Economy mode.
This output will be on in Normal mode and off in Economy mode
operation.
= L2 - Internal Light output managed by digital input. This output
will be on when door is opened (only if “i.xF”= 1, 2, 3).
= oF - Disabled output
The function carried out for auxiliary output (par. desired output =
Au) is defined by the parameter “o.Fo” and the function is
conditioned by the time set in parameter “o.tu”.
The parameter “o.Fo” can be configured for the following functions:
= oF - Auxiliary output not active
= 1 - Temperature control output delayed with contact normally
open: the auxiliary output is activated with delay that can be set on
the parameter "o.tu" compared to the output configured as ot. The
output is then turned off at the same time as the ot output is
disabled. This function mode can be used as a command for a
second compressor or for all other working utilities according to the
same ot output conditions, but which must be delayed after the
start up of the compressor to avoid excess electricity absorption.
= 2 - Activation by front key (U or DOWN/AUX) or by digital input
or by Real Time Clock : the output is activated by pressing the keys
U or DOWN/AUX suitably configured (“t.UF” or “t.Fb” = 1), by a
digital input suitably configured (“i.xF” = 9) or by Real Time Clock
event. The commands by keys or digital inputs have a bi-stable
function. Which means that when first pressed, the output is
activated while the second is disabled. In this mode, the AUX
output can be turned off automatically after a certain time that can
be set on the parameter "o.tu". With "o.tu" = oF the output is
activated and deactivated only manually, using the key (U or
DOWN/AUX). Differently, the output, once activated, is turned off
automatically after the set time. This function can be used, for
example, as a cell light command, for non-misting resistance or
other utilities.
If are programmed activation / deactivation events of the auxiliary
output by Real Time Clock the action of the keys or digital input
mode force output status until the next event.
The internal buzzer (if present) can be configured by par. “o.bu”
for the following functions:
oF = Buzzer always disable
1= Buzzer signal active alarms only
2= Buzzer signal key pressed only (no alarm)
3= Buzzer signal active alarms and key pressed
4.6 - TEMPERATURE CONTROL
Most of the parameters for temperature control functions are found
in the “
]
rE” group.
The instrument's method of regulation is of ON/OFF type acting on
the "ot"- and "HE"-configured outputs in response to: the reading of
the Pr1 probe; the active set point(s) “SP” (or “SPE” and/or
“SPH”); the intervention differential “r.d” (or “r.Ed” and/or
“r.Hd”); and the operating mode “r.HC”.
Via the parameter “r.HC” the following functions can be obtained:
= C (Cooling) or = H (Heating)
ON
r.HC=C
(ot)
Out
Pr 1
Temp.
SP
off
ON ON
off
r . HC=H
ONON
Out
(ot)
time
r.d
SP
of f
Temp.
Pr1
off
ON
time
r.d
As regards the operating mode programmed in the "r.HC"
parameter, the regulator automatically assumes that the differential
has positive values for a Refrigeration control (“r.HC”=C), negative
values for the Heating control (“r.HC”=H).
= nr (Neutral Zone or Cooling and Heating a single set point)
off
Out
Out
(ot)
(HE)
off
0N
SP
Pr1
Temp.
off
0N
r.d
r.d
time
0N
off
If the parameter “r.HC” is programmed such that “r.HC” = nr the
output configured as “ot” operates with a cooling action (as “r.HC” =
C) whereas the output configured as “HE” operates with a heating
action. In this case the regulating set point for both outputs is
whichever of SP, SPE and SPH is active, and the intervention
differential (“r.d” or “r.Ed” or “r.Hd”) is automatically assumed by the
regulator to have positive values for the cooling action, negative
values for the heating action.
= HC (Cooling and Heating with two independent set points)
ASCON TECNOLOGIC - X34- -OPERATING INSTRUCTIONS - Vr. 02 - 11/12 - ISTR-MX34-ENG02 - PAG. 8
i.1t or i.2t, the digital input has to be active
for i.1t or i.2t in order to activate defrost

SP
(ot)
Out
(HE)
Out
ON
off off
Pr1
Temp.
time
r.d
r.HC=HC
SPH
r.H
d
off
off
ON ON
ON ON
off off
Similarly, if the parameter “r.HC” is programmed such that “r.HC” =
HC, the output configured as “ot” operates with a cooling action (as
“r.HC” = C) whereas the output configured as “HE” operates with a
heating action.
In this case the regulating set point for the "ot" output is whichever
of SP, SPE and SPH is active, whereas for the output "HE" the set
point is SPH.
The intervention differential for the “ot” output will be whichever is
active (“r.d” or “r.Ed” or “r.Hd”) and the regulator will automatically
assume it has positive values (in the case of Cooling) whereas for
the output "HE" it will be "r.HD" with values assumed to be negative
(in the case of Heating).
In this mode, activating the "turbo" cycle causes the instrument to
operate with neutral-zone regulation with set point SPH.
= C3 (Cooling with three automatic modes)
The instrument still cools but this selection activates automatic
switching between the three modes, Normal, Eco and Turbo, as
already described in the section on operating modes.
All time protections described in the next paragraph (P.P1, P.P2,
P.P3) always act only on the output configured as “ot”.
In the event of probe error, it is possible to set the instrument so
that that the output “ot”continues to work in cycles according to the
times programmed in the parameter “r.t1” (activation time) and
“r.t2” (deactivation time).
If an error occurs on the probe the instrument activates the output
for the time “r.t1”, then deactivates it for the time “r.t2” and so on
whilst the error remains.
Programming “r.t1” = oF the output in probe error condition will
remain switched off.
Programming instead “r.t1” to any value and “r.t2” = oF the output
in probe error condition will remain switched on.
Remember that the temperature regulation function can be
conditioned by the “Compressor Protection and output delay at
power-on”, “Defrost”, “Door open” and “external alarm with outputs
disable” functions.
4.7 - COMPRESSOR PROTECTION FUNCTION AND DELAY AT
POWER-ON
All the parameters concerning compressor protection functions are
contained in the group “
]
Pr”.
The function “Compressor Protection” aims to avoid close start ups
of the compressor controlled by the instrument in cooling
applications.
This function foresees 3 time controls on the switching on of the
output configured as “ot” associated with the temperature
regulation request.
The protection consists of preventing the output being switched on
during the times set in the parameters “P.P1”, “P.P2” and “P.P3”
and therefore that any activation occurs only after all the times has
finished.
First control (par. “P.P1” ) foresees a delay to the output activation
(switching-on delay).
Temp.
off
ON
SP
time
r.d
off off off
ON ON
Pr1
Out
(ot)
Second control (par. “P.P2” ) foresees an inhibition to the
activation of the output by a time delay that starts when the output
is turning off (delay after switching-off).
ON
off
P.P2 P.P2 P.P2
SP
Temp.
time
r.d
ON ON
off off
Pr1
Out
(ot)
Third control (par. “P.P3” ) foresees an inhibition to the activation
of the output "Out" by a time delay that starts when the output was
turning on last time (delay between switching-on).
P.P3
off
SP
ON
Temp.
P.P3 P.P3
time
r.d
off off
ON ON
Pr1
(ot)
Out
During the output inhibition the led OUT (Cool o Heat) blinking.
It is also possible to prevent activation of the output after the
instrument is turned on, for the time set in the parameter “P.od”.
During the power on delay phase, the display shows the indication
od, alternating with the normal visualisation.
All the functions are disabled by relative parameters = oF.
4.8 - DEFROST CONTROL
The defrosting control acts on the outputs configured as “ot” and
“dF”.
All the parameters concerning defrost control are contained in the
group “
]
dF”.
The type of defrosting that the instrument must carry out is set by
the parameter “d.dt” that can be programmed:
= EL - WITH ELECTRICAL HEATING (or BY STOPPING
COMPRESSOR): during defrosting, the output “ot” is deactivated
while the output “dF” is enabled.
The defrost will be by Stopping compressor if not using the “dF”
output
= in - WITH HOT GAS or INVERSION OF CYCLE:
during defrosting the outputs “ot” and “dF” are enabled
= no - WITHOUT COMPRESSOR OUTPUT CONDITIONING:
during defrosting, the output “ot” continuous to operate in order to
temperature controller while the output “dF” is enabled.
= Et - WITH ELECTRICAL HEATING AND DEFROSTING
TEMPERATURE CONTROL: during defrosting, the output “ot” is
deactivated while the output “dF” operate as evaporator
temperature control. In this mode the defrost lenght is by time-out
(time "d.dE"). During the defrost "dF" output it behaves as an
heating mode temperature control with Set = "d.tE" and fixed
differential at 1°C and operate in order to evaporator probe (EP).
ASCON TECNOLOGIC - X34- -OPERATING INSTRUCTIONS - Vr. 02 - 11/12 - ISTR-MX34-ENG02 - PAG. 9

4.8.1 - STARTING AUTOMATIC DEFROSTS
The automatic control of defrost occours:
- Defrosting at defined times – “Real Time Clock Defrosting”
- By interval times (regular or dynamic)
- By Evaporator temperature
- By continuous compressor running time
In order to avoid pointless defrosting the parameter “d.tS” in
“d.dC” = rt, ct, cS mode is foreseen that sets the enablement
temperature for defrosting
If the temperature measured by the probe is higher than set in the
parameter “d.tS” the defrosting is inhibited.
- Defrosting at defined times – “Real Time Clock Defrosting”
Setting the parameter “d.dC” = cL disables defrosting at intervals
(parameters “d.di” and “d.Sd”) and enables any defrosting events
programmed for defined times by means of the parameters “c.01”,
“c.02”, “c.03”, “c.04”, “c.05”, “c.06”, “c.07”, “c.08”, “c.09”,
“c.10”, “c.11”, “c.12”, “c.13” and “c.14”.
In this mode the instrument can therefore manage up to a
maximum of 14 daily defrosting events (14x7 = 98 weekly defrosts
with d.8).
The events are programmable at will, including daily, using the
following settings:
d.1 = Monday ... d.7 = Sunday
d. 8 = every day
d. 9 = Mon, Tue, Wed, Thur, Fri
d.10 = Mon, Tue, Wed, Thur, Fri, Sat
d.11 = Sat and Sun
d.oF = none
These options make it possible to control the starting of differing
defrosts for working days and non-working days to suit one's own
requirements.
For further detailed information and programming examples, see
the section on programmable events.
Note: Remember that for “Real Time Clock Defrosting” the user
must set “d.dC” = cL and the internal clock must be present and
enabled.
- Defrost by regular interval time
Counting mode interval and automatic defrost starts is set through
the parameter "d.dC" that can be programmed:
= rt - intervals with counts the total function time (instrument on)
This mode results that currently used in the refrigerators systems.
= ct - intervals with counts only the compressor function time
(output “ot” switched on)
Mode typically used in the positive temperature refrigerators
system with defrost by stopping compressor.
= cS - the instrument carries out a defrosting cycle at each
compressor stop (i.e. at each deactivation of the output “ot”) or
however at defrost interval end with counts the total function time
(instrument on).
If "d.di" = oF the defrost happens only to the compressor stop.
This mode is used only on particular refrigerator system in which is
desired to always have the evaporator to the maximum efficiency
conditions every compressor cycle.
The automatic defrost function is activate when at the parameter
“d.di” is set the defrost interval time.
The first defrost after swiching on can be set by par. “d.Sd”
This allows to perform the first defrost to a different interval from
"d.di." time.
If it is desired that to every instrument power on a defrost cycle is
realized (as long as the conditions set in the parameters “d.tS” and
"d.tE" apply) program the par. "d.Sd" = oF.
This allows the evaporator to be permanently defrosted, even when
frequent interruptions to power supply occur that may cause the
cancellation of the various defrosting cycles.
Instead if is desired all defrost to the same interval program "d.Sd"
= "d.di."
Automatic defrost function by interval is disable when “d.di” = oF.
“Dynamic Defrost Intervals System”.
If “d.dd” = 0 the Dynamic defrost is disable.
Note: For this function is necessary to use the evaporator probe,
program “d.dC” = rt, ct or cS and set “d.dd” = any value (not 0)
This mode allows to dynamically reduce in progress the defrost
interval counting ("d.di" or "d.Sd" if is the first defrost), anticipating
so the execution of a defrost when it was necessary, in order to an
algorithm that allows to notice a decrease performances of
refrigerator thermal exchange.
Besides it maintains activates the defrost by evaporator temperatu-
re mode that it allows a further possibility of control of the defrost in
order to notice a decrease performances of refrigerator thermal
exchange.
The algorithm allows to esteem a reduction of thermal exchange in
base to the increase of the difference of temperature between Pr1
(controlled temperature) and evaporator (“EP” probe) that is memo-
rized by the instrument in proximity of the Set Point.
The advantage of the “Dynamic Defrost Interval” is the possibility to
program a defrost interval time more longer than normal.
The instrument will have the possibility to anticipate the defrost if
necessary or to start the cycle after the programmed time.
If the system results set correctly is possible to to avoid many non
necessary defrosting cycles (and therefore to obtain an energy sa-
ving) that could instead happens in the normal operation when, to
guarantee with greater certainty the system efficency , the defrost
interval is programmed at a too low time.
Pr1
Temp.
time
EP
SP
r.d
off
ON
Cool
(ot)
SP+r. d
DT0 DT1
1 °
DT2 DT3
ON ON ON
off off
d.tE
d.di / d.Sd
Defrost
(dF)
Phase 01 2 3
time to defrost Ph. 0, 1
time to defrost Ph. 2
time to defrost Ph. 3
Defrost
d.tS
Example “dynamic defrost intervals system” with a reduction “d.dd”
= 40 % and end defrost by temperature.
By par.: “d.dd” - DEFROST INTERVAL PERCENTAGE
REDUCTION is possible to establish the percentage of reduction of
the remaining time to start defrost when the conditions for the
reduction happen.
If par. "d.dd" = 100% at the first increase of the memorized
difference of temperature between cell (Pr1) and evaporator (> 1 °)
a defrost start immediately
For correct functioning the instrument needs a first reference value
of the temperature difference between cell and evaporator.
Every variation of the value of the Active Set Point, of the
differential "r.d", the start of a continuous cycle or the a defrost
execution delete this reference value and any reduction will be
performed until the acquisition of a new reference value.
- Defrost by evaporator temperature
The instrument starts a defrost cycle when the evaporator
temperature (“EP” probe) goes below the “d.tF” programmed
temperature for “d.St” programmed time.
This system can be used in heat pump defrost system (in this case
the defrosting intervals are usually disabled) or to guarantee a
defrost if the evaporator reaches very low temperatures that
normally result symptomatic of a bad thermal exchange in
comparison to the normal working conditions.
If “d.tF” = -99.9 the function is disable.
The function is active in all modes of defrost operation ("d.dC" = cL,
rt, ct, cS).
- Defrost by continuous compressor running time
The instrument start a defrost cycle when the compressor is turned
on continuously for the time "d.cd”.
This function is used because the continuous operation of the com-
pressor for an extended period is usually symptomatic of a bad
thermal exchange in comparison to the normal working conditions.
If "d.cd" = oF the function is disabled.
ASCON TECNOLOGIC - X34- -OPERATING INSTRUCTIONS - Vr. 02 - 11/12 - ISTR-MX34-ENG02 - PAG. 10

The function is active in all modes of defrost operation ("d.dC" = cL,
rt, ct, cS).
4.8.2- MANUAL DEFROST
To start up a manual defrosting cycle, press the key UP/DEFROST
when it is not in programming mode and keep it pressed for about
5 seconds after which, if the conditions are correct, the led Defrost
will light up and the instrument will carry out a defrosting cycle.
To stop a defrosting cycle, press the key UP/DEFROST during a
defrost cycle and keep it pressed for about 5 sec.
4.8.3 - DEFROST ENDS
With 1 evaporator
The automatic defrosting cycle can be ended by time or, if an
evaporator probe is used (“EP” probe), when a temperature on the
evaporator is reached.
If the evaporator probe is not used the duration cycle is set by the
parameter “d.dE”.
If instead the evaporator probe is used the defrost cycle end when
the temperature measured by the evaporator probe exceeds the
temperature set in the parameter “d.tE”.
If this temperature is not reached in the time set in the parameter
“d.dE”, defrosting is interrupted.
If the temperature measured by the probe is higher than the
temperature set in the parameter "d.tS" and “d.tE” the defrosting is
inhibited.
d.di
Temp.
dF
d.di
off
d.tS
d.tE
ON
A
off
EP
d.di
ON
d.dE
B
(NO defrost)
d.di
off
C
time
Examples: defrosting A ends due to reaching of temperature “dtE”,
defrosting B ends at the end of the “d.dE” time as the temperature
“d.tE” is not reached, defrosting C does not take place as the
temperature is higher than “d.tS”.
d.di
d.tE
d.tS
dF
off
ON
off
Temp.
EP
1°
tim e
d.dE d.di
ON ON
Example of electric defrost with evaporator temperature control:
The defrost end after "d.dE" programmed time. During defrost the
“dF” output switch on/off to control evaporator temperature in
heating mode with set point “d.tE” and 1° differential (Hysteresis).
With 2 evaporators
The instrument can also be used to control defrosts in
twin-evaporator systems (and in single evaporators large enough to
require two defrost control areas) by means of two defrost outputs
and two probe inputs for the two evaporators.
Defrosts are always launched simultaneously for both evaporators
and therefore the output configured as “2d” is always activated
jointly with the output configured as “dF”.
If the two evaporator probes are not used, the end of a defrost, in
the sense of deactivation of the defrosting outputs, happens
separately at the end of the times defined individually in the
parameters "d.dE" (for output "dF" which controls evaporator 1
defroster) and "d.d2" (for output "2d" which controls evaporator 2
defroster). The instrument can also be used to control defrosts in
twin-evaporator systems (and in single evaporators large enough to
require two defrost control areas) by means of two defrost outputs
and two probe inputs for the two evaporators.
T
Evap. 1
Evap. 2
"dF"
"EP"
"2P"
T
"2d"
Schematic example of plant with two evaporators with electric
defrosting.
However, the end of a defrost as a controller phase always occurs
when both times come to an end.
If the user wishes each of the two evaporators to have a probe, one
input must be configured as evaporator 1 probe (“i.Px” = EP) and
one input as evaporator 2 probe (“i.Px” = 2E).
In this case the instrument controls defrosting using the following
criteria:
– defrosting is enabled when at least one of the two readings is
below the temperature set in parameter “d.tS”
– defrosting by temperature starts when at least one of the two
readings remains below the temperature set in parameter “d.tF” for
time “d.St”
– the end of defrosting, in the sense of deactivation of the defroster
command outputs "dF" and "2d" in modes "d.dt" = EL, in, does not
occur separately for the two evaporators when their respective
temperatures sensed by the probes rise above the values set in
parameter “d.tE” (evaporator 1 with probe EP) and “d.t2”
(evaporator 2 with probe 2E).
If these temperatures are not reached within the times set in
parameters “d.dE” and “d.d2” their respective defrosting actions are
interrupted.
However, the end of defrosting as a controller phase occurs when
both readings exceed the intended values (or, if the temperatures
are not reached, when their maximum durations are reached).
If the selected defrosting mode is of the type employing electric
heating and thermostatting (“d.dt” = Et), the two defrosting outputs
“dF” e “2d” behave as temperature regulators with heating function
with the respective set points = “d.tE” (evaporator 1) and “dt2”
(evaporator 2), both with hysteresis fixed at 1°C and with reference
to the respective temperatures read at both evaporators.
If one of the two evaporator probes is not enabled or has an error,
its defrosting behaves as with selection EL (so the defrosting
output during defrosting must remain activated throughout).
Notes: The "Dynamic Defrost" function and the thermostatting
function of the fans operate always and only as a function of the
probe configured as EP (evaporator 1). If the control with the twin
evaporator is not used, it is recommended to set “d.d2 = oF in
order to avoid undesirable influences on total defrost duration.
The active defrost is shown on the instrument display with the
lighting up of the DEFROST led
At the end of defrosting, it is possible to delay the new start up of
the compressor (output “ot”) at the time set in parameter “d.td” to
allow the evaporator to drain.
During this delay, the led Defrost flashes to indicate the draining
state.
4.8.4 - DEFROSTS IN EVENT OF EVAPORATOR PROBE
ERROR
In event of evaporator probe error the defrosts occur at intervals
"d.Ei" and duration "d.EE”.
In case an error occurs when the time remaining to the start or the
end of defrost it’s lower than that normally set the parameters
related to error conditions probe, the start or the end take place
with the shortest time.
The functions are provided because when the evaporator probe is
used the defrost endurance time is usually set longer than
necessary (the time “d.dE” is a security time-out) and in case is
ASCON TECNOLOGIC - X34- -OPERATING INSTRUCTIONS - Vr. 02 - 11/12 - ISTR-MX34-ENG02 - PAG. 11

used the "Dynamic Intervals Defrost System” the interval is usually
set more longer than what is normally programmed into
instruments that do not have the function.
Notes: If the control with the twin evaporator is used, in case of
error probe 2P the time “d.d2” not switch and remain operative at
programmed value)
4.8.5 - DEFROST DISPLAY LOCK
Through par. “d.dL” and “A.dA” it’s possible to define the display
behaviour during defrost.
The “d.dL” parameter pemits the display visualization lock on the
last Pr1 emperature reading (“d.dL” = on) during all the defrost
cycle until, at the end of defrost, the temperature has not reached
the lock value or the value [”SP” + “r.d”] or is elapsed the time
setted on par. "A.dA".
Or it permits only the visualization of label “dEF” (“d.dL” = Lb)
during the defrost cycle and, after the defrost, of label “PdF” until,
at the end of defrost, the Pr1 temperature has not reached the lock
value or the value [”SP” + “r.d”] or is elapsed the time setted on
par. "A.dA".
The display will otherwise (“d.dL”= oF) continue to visualize the
Pr1 temperature measured by the probe during the defrost cycle.
4.9 - EVAPORATOR FANS CONTROL
All the parameters concerning fans control are contained in the
group “
]
Fn”.
The control of the fans on the output configured as “Fn” depending
on determined control statuses of the instrument and the
temperature measured by the evaporator probe (EP).
In the case that the evaporator probe is not used or in error , the
output Fn is activated only depending on the parameters “F.tn”,
“F.tF” and “F.FE”.
The parameters “F.tn” e “F.tF” decides the funs functioning when
the output configured as “ot” (compressor) is off.
When output “ot” is off , it is possible to set the instrument so that
that the output “Fn”continues to work in cycles according to the
times programmed in the parameter “F.tn” (fan activation time)
and “F.tF” (fan deactivation time).
When output “ot” is switched off the instrument activates the output
“Fn for the time “F.tn”, then deactivates it for the time “F.tF” and so
on whilst the otuput “ot” remains off.
Programming “F.tn” = oF the output “Fn” in “ot” off condition will
remain switched off.
Programming instead “F.tn” to any value and “F.tF” = oF the output
“Fn” in “ot” off condition will remain switched on.
The parameter “F.FE” instead decides whether the fans must
always be switched on independently of the defrosting status
(“F.FE”=on) or switched off during defrosting (“F.FE”=oF).
In this later case, it is possible to delay the start up of the fans even
after the end of the defrosting of the time set in the parameter
“F.Fd”.
When this delay is active the led FAN flashing to signal the delay in
progress.
When the evaporator probe is used the fans, as well as being
conditioned by the parameters “F.tn”, “F.tF and “F.FE”, are also
conditioned by a temperature control.
It is possible to set the disablement of the fans when the
temperature measured by the evaporator probe is higher than the
one set in the parameter “F.FL” (temperature too hot) or when it is
lower than the one set in the parameter “F.LF” (temperature too
cold).
F.dF
F.dF
time
Fn
off
ON
F.LF
EP
Temp.
F.FL
off off
ON
Notes: I
t
i
s
necessar
y
to
p
a
y
attention to the correc
t
use o
f
thi
s
fans
temperature control functions because in the typical application of
refrigeration the stop of the fans evaporator stops thermal
exchange.
The relative differential that can be set in parameter “F.dF” is also
associated with these parameters.
Remember that the fans functioning can be conditioned by the
“Door open” function by the digital input.
4.10 - ALARM FUNCTIONS
The alarm conditions of the instrument are:
- Probe errors : “E1”, “-E1”, “E2, “-E2”, “E3”, “-E3”, “E4, “-E4”
- temperature alarms: “H1”, “L1”, “H2”, “L2”
- External alarm: “AL”, “PrA”, “HP”, LP”
- Open door alarm: “oP”
The alarm functions of the instrument work on the ALARM led, on
internal buzzer (if present and programmed by par. “o.bu”) and on
output desired, if configured by the parameters “o.o1”, “o.o2”,
“o.o3” ,“o.o4”,, depending on what is set on the said parameters.
Any active alarm is shown on the instrument display with the
lighting up of the ALARM led, the silenced or memorized alarm
status is shown by the ALARM led flashing .
The buzzer (if “o.bu” = 1 or 3) is activated in alarm and can be
disabled (alarm silencing) manually by pressing any key of the
instrument.
The possible selections of output parameters for the alarm
signalling function are:
= At - when one wants the output to be activated in alarm and can
be disabled (alarm silencing) manually by pressing any key of the
instrument (typical application for sound signal).
= AL - when one wants the output to be activated in alarm status
but cannot be disabled manually and are therefore only disabled
when the alarm status ceases (typical application for a light signal).
= An - when one wants the output to be activated in alarm status
and that they remain activated even when the alarm has ceased
(Alarm memory). Disablement (recognition of memorised alarm)
can only be carried out manually by pressing any key when the
alarm has ended (typical application for light signal).
= -t - when one wants the function described as At but with an
inverse function (output activated in normal condition and disabled
in alarm status).
= -L - when one wants the function described as AL but with
inverse logic (output activated in normal conditions and disabled in
alarm status).
= -n - when one wants the function described as An but with
inverse working logic (output activated in normal conditions and
disabled in alarm status).
4.10.1 - TEMPERATURE ALARMS
The instrument has two fully configurable temperature alarms, each
with a maximum and minimum threshold.
The temperature alarm functions act in response to the readings of
the probes set in parameters “A.y1” e“A.y2”, alarm thresholds set
in parameters “A.H1”, “A.H2” (maxima alarms), “A.L1”, “A.L2”
(minima alarms) and the differentials for these, “A.d1”, “A.d2”
Via the parameters “A.y1” and “A.y2” it is also possible to define
whether the alarm thresholds “A.H1”, “A.H2 “, “A.L1”, “A.L2” are
absolute or relative to the set point.
Depending on the desired operation, parameters “A.y1” and “A.y2”
can be given the following values:
= 1: Absolute values based on Pr1 with display of label (H – L)
= 2: Relative values based on Pr1 with display of label (H – L)
= 3: Absolute values based on probe Au with display of label (H –
L)
= 4: Relative values based on probe Au with display of label (H – L)
= 5: Absolute values based on probe cd with display of label (H –
L)
= 6: Absolute values based on Pr1 without display of label
= 7: Relative values based on Pr1 without display of label
= 8: Absolute values based on probe Au without display of label
= 9: Relative values based on probe Au without display of label
= 10: Absolute values based on probe cd without display of label
Certain parameters also allow the user to delay the enabling and
intervention of these alarms. These parameters are:
ASCON TECNOLOGIC - X34- -OPERATING INSTRUCTIONS - Vr. 02 - 11/12 - ISTR-MX34-ENG02 - PAG. 12

“A.P1” and “A.P2”- these are the time periods during which
temperature alarms are disabled beginning with instrument start-up
if the instrument is in an alarm condition on start-up.
If there are no alarm conditions on start-up, the time period “A.Px”
is ignored.
“A.dA” - this is the time period during which temperature alarms 1
are disabled following the end of a defrost.
Note: During defrosts, and for time period “A.dA” after defrosts,
alarm 1 is disabled, whereas during defrosts alarm 2 is always
enabled.
“A.t1”, “A.t2” - these are the actuation delay times for temperature
alarms 1 and 2.
Temperature alarms 1 and 2 are enabled at the end of the
alarm-disabled time periods and activated after time periods “A.t1”
and “A.t2” when the temperature measured by the probe
configured for the alarm rises above or drops below the respective
maximum and minimum alarm thresholds.
Via the parameters “A.A1” and “A.A2” it is also possible to define
at will the action of the alarms on the regulating output and on the
alarm outputs (including buzzer).
This means for example that it is possible to change the regulating
output directly, deactivating it if there are temperature alarms on
the probes configured as “Au” (e.g. “antifreeze” function) or as “cd”
(e.g. condenser “dirty” function).
If both alarms are configured with reference to the same probe, the
instrument also allows the user to control pre-alarm notifications
(e.g. notifications that do not activate the alarm output and/or the
buzzer) and alarm notifications (which do activate the alarm output
and/or the buzzer).
The alarm thresholds will be the same as those set in parameters
“A.Hx” and “A.Lx” if the alarms absolute (“A.yx” = 1, 3, 5, 7, 9, 10),
A.d1
A.d1
tim e
AL
off
ON
A.L1
H1
A.H1
Temp.
L1
off off
ON
or will be the values [”SP”+”A.Hx”] and [”SP”+”A.Lx”] if the alarms
are relative (“A.yx” = 2, 4, 6, 8).
tim e
A.d1
A.d1
AL
off
ON
H1
A.L1
SP
A.H1
Temp.
L1
off off
ON
The maxima and minima temperature alarms can be disabled by
setting the relevant parameters "A.Hx" and "A.Lx" = oF.
Triggering of the temperature alarms causes the AL alarm signal
LED to light up, activates outputs configured with an alarm function,
and activates the internal buzzer if configured.
4.10.2 - EXTERNAL ALARMS (DIGITAL INPUTS)
The instrument can notify alarms external to the instrument by
activating one or more digital inputs configured with functions
programmed as “i.xF” = 4, 5, 12, 13, 14.
Simultaneously with the configured alarm notification (buzzer
and/or output), the instrument notifies the alarm by iluminating the
ALARM led and displaying on the display the label defined for the
alarm (AL, PrA , HP, LP) alternating with the variable defined in
parameter “i.dS”.
The “i.xF”= 4 mode produces no action on the control outputs
whereas the other modes deactivate the “ot” output or deactivate
all control outputs when the digital input intervenes.
LP
unchangedOFF
HP
unchangedOFF
Pr
A
OFF
A
L (5)
unchanged
AL (4)
other control outputs
(“Fn”, “dF”, “Au”, “HE”).
“ot” output (compr.)Alarm
4.10.3 - OPEN DOOR ALARM
The instrument can signal an open door alarm by activating the
digital input with the function programmed as “i.xF” = 1, 2 or 3.
When the digital input is activated the instrument show oP and
after the delay programmed in parameter “A.oA”, the instrument
signals the alarm via the activation of the configured alarm output
(buzzer/ouput).
At the intervention of the open door alarm the inhibited output will
reactivated (fans or fans + compressor).
4.11 - HACCP FUNCTION (ALARM RECORDING)
The HACCP (Hazard Analysis and Critical Control Points) function
causes the instrument to record the last 10 alarms that have
occurred together with information that is useful for determining the
criticality of the alarm.
The function is available only for instruments that have the
calendar clock.
The parameters associated with displaying HACCP alarms are
contained in the “
]
HA” group, while those associated with the
configuration are contained in the “
]
AL” group.
The following HACCP alarms can be stored in memory:
Alarm from digital input
AL
Power failure (black-out) alarm
bo
Minimum temperature alarm L2
L2
Maximum temperature alarm H2
H2
Minimum temperature alarm L1
L1
Maximum temperature alarm H1
H1
AlarmHACC
P
alarm code
HACCP alarms are stored provided the associated enabling
parameters are configured and the preset time configured in the
same parameter has lapsed.
It is also possible to disable alarm recording by using a suitably
configured digital input (i.xF=13) or by using the U or DOWN/AUX
keys, suitably configured (“t.UF” or “t.Fb” = 7).
These alarms are displayed by the same display procedure as for
the programming parameters by accessing parameters “H.01” ...
“H.10” contained in the
]
HA group.
Note: see section on HACCP alarm display in chapter 2
The instrument automatically sorts these parameters from most
recent (H.01) to oldest (H.10) whenever an alarm is recorded or
deleted.
If more than 10 alarms occur, the instrument deletes the
information about the oldest alarm by overwriting it with the most
recent alarm.
When this occurs the instrument increments by one the value of
the “H.dL” parameter by which it is possible to display the number
of alarms the instrument has been forced to delete when these
exceeded the permitted memory.
After selecting the parameter for the alarm which the user wishes
to display, if the label flashes this indicates that the alarm has
never been displayed (therefore not recognised).
To recognise it, simply access the parameter via the P key and
display it.
The next time it is displayed, the parameter label will be shown
solid (not flashing).
If the alarm is still ongoing at the time of its display, the data are
displayed but the alarm is not recognised and cannot be cancelled.
In the event of unrecognised (and therefore still ongoing) HACCP
alarms, the instrument displays the message “HAC” alternating
with the normal display.
ASCON TECNOLOGIC - X34- -OPERATING INSTRUCTIONS - Vr. 02 - 11/12 - ISTR-MX34-ENG02 - PAG. 13

Within the parameter the data will be displayed sequentially as the
P key is repeatedly pressed.
The alarm can be deleted by holding down the Down key for more
than 5 seconds while one of the data of the alarm is displayed.
Its deletion is confirmed by the display indicating “---” for approx. 1
sec.
Similarly the value of the “H.dL” parameter can be reset by holding
down the Down key for more than 5 seconds while the value is
displayed.
However, if desired, all alarms can be deleted immediately by:
– holding down the U key for 5 sec if parameter “t.UF” = 6
– holding down the DOWN key for 5 sec if parameter “t.Fb” = 6
– by a digital input if the relevant parameter “i.xF” = 11
– by the parameter reset function (at the password prompt r.P enter
-48).
4.11.1 - HACCP TEMPERATURE ALARMS
Via the parameters “A.r1” (for alarms H1 and L1) and “Ar.2” (for
alarms H2 and L2) it is possible to enable recording of temperature
alarms as HACCP alarms.
The same parameters can also be used to define the minimum
alarm duration that will cause the alarm to be recorded as an
HACCP alarm.
If the alarm duration is shorter than the programmed duration, the
alarm is not recorded.
If the parameters are set as = oF , recording is disabled.
For each recorded temperature alarm, the following data are
stored:
- Alarm type (A. = H1 or L1 or H2 or L2)
- Alarm start time HACCP ( y. =year, M. =month, d. =day, h.
=hours, n. =minutes)
- HACCP alarm duration ( E. = hours, e. = minutes)
- Critical temp. reached (max. peak if Hi alarm or min. peak if Lo
alarm)
A.r1
A.H1
Temp.
H1 time
A.d1
Max
E.e.tim e
12 3
Temp.
Example of HACCP maximum temperature alarm H1
1 = configured alarm start (in this case with A.t1 = oF)
2 = HACCP alarm recording start
3 = alarm end
Note: If there is a power failure during a temperature alarm, the
instrument records the duration of the alarm up until the moment
the power failure began.
In order to capture correct information on the temperature
conditions which the user wishes to monitor, it is recommended to
set a black-out alarm and if necessary disable the on-startup alarm
delays (parameters A.P1 and A.P2) so that if the alarm is still
ongoing when the power returns it is recorded as a new alarm on
the return of power.
4.11.2 - HACCP POWER FAILURE (BLACK-OUT) ALARMS
Is recorded only if the power failure exceeds the value set in
parameter “A.bo”.
If “A.bo” = oF the black-out alarm is never recorded.
For each recorded black-out alarm, the following data are stored:
- Alarm type (A. = bo)
- Start time ( y. =year, M. =month, d. =day, h. =hours, n. =minutes)
- Black-out duration ( E. = hours, e. = minutes)
– Temp. relative to the probe configured for temperature alarm 1
(see parameter “A.y1”) measured at end of black-out (if available; if
unavailable the display shows “---”).
E.e.tim e
A.bo
1
2
Black
PW on
Temp.
time
3
Out
Temp.
Example of HACCP black-out alarm
1 = power failure
2 = min. power failure duration that will enable HACCP black-out
alarm recording
3 = return of power (alarm end)
4.11.3 - HACCP ALARMS FROM DIGITAL INPUTS
This is recorded only if the generic alarm (AL) from a digital input
configured in modes 4 or 5 continues for longer than the time set in
parameter “A.di”.
If “A.di” = oF, an alarm from a digital input is never recorded.
For each recorded alarm from a digital input, the following data are
stored:
- Alarm type (A. = AL)
- Start time ( y. =year, M. =month, d. =day, h. =hours, n. =minutes)
- Alarm duration ( E. = hours, e. = minutes)
– Temp. relative to the probe configured for temperature alarm 1
(see parameter “A.y1”) measured at end of black-out (if available; if
unavailable the display shows “---”).
E.e.timeA.di
12 3
AL end
AL
time
Temp.
Temp.
Note: If the power fails during an alarm from a digital input, the
instrument records the duration of the alarm up until the moment
the power failure began.
4.12 - FUNCTIONING OF KEYS “U” AND “DOWN/AUX”
All the parameters concerning keyboard functions are contained in
the group “
]
tS”.
Two of the instrument keys, in addition to their normal functions,
can be configured to operate other commands.
The U key function can be defined by the parameter “t.UF” while
the DOWN/AUX key function can be defined by the parameter
“t.Fb”
Both the parameters have the same possibilities and can be
configured for the following functions:
=oF - The key carries out no function.
= 1 - Pressing the key for at least 1 second, it is possible to
enable/disable the auxiliary output if configured (“o.Fo”=2).
If are programmed activation / deactivation events of the auxiliary
output by Real Time Clock the action of the keys force output
status until the next event.
= 2 - Pressing the key for at least 1 second, it is possible to select
the mode Economic/Normal in rotation. Once selection has been
made, the display will flash the active set point code for about 1
sec. (SP, Eco).
If are programmed switch mode events by Real Time Clock the
action of the keys force status until the next event.
ASCON TECNOLOGIC - X34- -OPERATING INSTRUCTIONS - Vr. 02 - 11/12 - ISTR-MX34-ENG02 - PAG. 14

= 3 - Pressing the key for at least 1 second, it is possible to switch
the instrument from the ON status to Stand-by status and vice
versa. If switch-on/stand-by events are programmed using the
clock, action by this mode has priority over the event.
= 4 - Pressing the key for at least 1 sec activates/deactivates a
“Turbo” cycle.
= 5 - Forcing a programmed Switch-on/Switch-off (Stand-by)
event - Pressing the key for at least 1 sec switches the instrument
from the ON state to the Stand-by state and vice versa, until the
next event. Therefore, if switch-on/stand-by events are
programmed using the clock, action by this mode forces the state
until the next event.
= 6 - HACCP Alarm Reset -Pressing the key for at least 1 sec
resets stored HACCP alarms. The reset is confirmed by the display
indicating “---” for approx. 1 sec.
= 7 - HACCP Alarm Recording Disabled -Pressing the key for at
least 1 sec disables/enables recording of stored HACCP alarms.
After the selection is made the display will flash “Hon” (HACCP
alarms enabled) or “HoF” ( HACCP alarms disabled) for approx. 1
sec.
4.13 - EVENTS THAT CAN BE PROGRAMMED TO OCCUR AT
DEFINED TIMES
All events are programmable using the 14 parameters “c.01” ...
“c.14” contained in the “
]
cE” group.
After selecting the desired parameter, press the P key repeatedly
to cycle through the following:
“h.” and the hours (e.g. “h.13”)
“n.” and the minutes (e.g. “n.45”)
“d.” and the day of the week (e.g. “d.1”)
“t.” and the type of event to be performed at the programmed time
(e.g. t.1).
Note: see section on programming event-related parameters in
chapter 2
The days are numbered as follows:
d. 1 = Monday
d. 2 = Tuesday
d. 3 = Wednesday
d. 4 = Thursday
d. 5 = Friday
d. 6 = Saturday
d. 7 = Sunday
d. 8 = every day
d. 9 = Monday, Tuesday, Wednesday, Thursday, Friday
d. 10 = Monday, Tuesday, Wednesday, Thursday, Friday, Saturday
d.11 = Saturday and Sunday
d.oF = no day (event disabled)
The 14 event-programming parameters allow a maximum of 14 x 7
= 98 weekly events to be scheduled (using d.8).
The following events can be programmed:
t.1 = switch instrument ON
t.2 = put instrument in Stand-by
t.3 = switch auxiliary output ON
t.4 = switch auxiliary output OFF
t.5 = Start defrost (to enable scheduled defrosting, also program
“d.dC” = cL)
t.6 = Switch to Eco mode (SPE)
t.7 = Switch to normal mode (SP)
A manual intervention, e.g. to change the mode (eco or normal) or
activate/deactivate the auxiliary output, is effective only until the
next scheduled event.
For example, if the instrument is in economical mode and is forced
manually to normal mode it will stay in normal mode until the next
event that switches it to economical mode.
Programming example
The user wishes to set the following:
– 4 defrosts every working day at 7.00, 12.00, 17.00 and 22.00
– 2 defrosts every Sunday at 7.00 and 19.00
(also program “d.dC” = cL)
– 1 switch every working day from normal to economical mode at
20.00 and 1 switch from economical to normal mode at 6.00.
– no switches on Sundays
– 1 switch of the auxiliary output to ON every working day at 8.00
and 1 switch every day to OFF at 21.00.
– no switches on Sundays.
t.oFd.oFn.00h.00c.11...
c.14
t.4d.10n.00h.21c.10
Aux off
t.3d.10n.00h.08c.09
Aux on
t.7d.10n.00h.06c.08
nomal mode
t.6d.10n.00h.20c.07
ECO mode
t.5d.7n.00h.19c.06
sunday
defrost 2
t.5d.7n.00h.07c.05
sunday
defrost 1
t.5d.10n.00h.22c.04
work day
defrost. 4
t.5d.10n.00h.17c.03
work day
de
f
r
ost. 3
t.5d.10n.00h.12c.02
work day
de
f
r
ost. 2
t.5d.10n.00h.07c.01
work day
defrost. 1
eventda
y
smin.hou
r
Par.Event
4.14 - RS 485 SERIAL INTERFACE
The instrument can be equipped with a RS 485 serial
communication interface, by means of which it is possible to
connect the regulator with a net to which other instruments
(regulators of PLC) are connected, all depending typically on a
personal computer used as plant supervisor.
Using a personal computer it is possible to acquire all the function
information and to program all the instrument’s configuration
parameters. The software protocol adopted is a MODBUS-RTU
type, widely used in several PLC and supervision programs
available on the market (X34 series protocol manual is available on
request).
The instrument is equipped with two terminals called D+ and D-
which have to be connected with all the namesake terminals of the
net. For the wiring operation it is advisable to adopt a screened
cable wired as in the drawing.
X34 n.2X34 n.1
14
GND
15
D+ D-
16
D+ D-
X34 n.N
GND D+ GNDD-
shield
D+
Interface
RS485
GND
D-
HOST
(PC/PLC)
120 ohm
Rt
14 15 16 14 15 16
The interface circuit allows the connection of up to 32 instruments
on the same line.
To maintain the line in rest conditions a 120 Ohm resistance (Rt)
must be connected to the end of the line.
If the instrument is equipped with a serial interface, the parameter
to be programmed are the following present in the parameters
group “
]
tS” :
"t.AS" : Address of the station. Set a different number for each
station, from 1 to 255.
Note: The baud-rate are fixed at 9600 baud.
4.15 - ACCESSORIES
The instrument is equipped with a connector that allows the
connection of some accessories described as follow.
4.15.1 - PARAMETERS CONFIGURATION BY “A01”
ASCON TECNOLOGIC - X34- -OPERATING INSTRUCTIONS - Vr. 02 - 11/12 - ISTR-MX34-ENG02 - PAG. 15

It is possible the transfer from and toward the instrument of the
functioning parameters through the device A01 with 5 poles
connector.
This device A01 it’s mainly useable for the serial programming of
the instruments which need to have the same parameters
configuration or to keep a copy of the programming of an
instrument and allow its rapid retransmission.
SUPPLY
USB
SUPPLY ADAPTER
12 VDC AC SUPPLY
USB
The same device can connect the instrument via USB to a PC and
through the proper configuration software tools "TECNOLOGIC
UniversalConf”, it’s possible to configure the operating parameters.
To use the device A01 it’s necessary that the device or instrument
are being supplied.
For additional info, please have a look at the A01 instruction
manual.
4.15.2 - “TVRY” REMOTE DISPLAY
To the instrument it is possible to connect the remote display TVR
Ythrough the special cable that can have a maximum length of 10
m. The device TVR Y, directly supplied by the instrument, it allows
to visualize the temperature measured by the probe Pr1 through a
2 ½ digit display.
SUPPLY
TVR Y
cable 10 m MAX.
For additional info, please have a look at the TVR Y instruction
manual.
5 - PROGRAMMABLE PARAMETERS TABLE
Here below is a description of all the parameters available on the
instrument. Some of them may not be present because depend
on the model/type of instrument.
C1C0 / F0 / C1 /Unit of measurement
i.uP
7
ntPt / nt / P1Probes Type
Pt = PTC
nt = NTC
P1 = Pt1000
i.SE
6
i. -parameters relative to inputs]In
-2.0S.LS ÷ SP“Turbo” Set Point (or
ind. Heating Set Point
mod. HC )
SPH
5
2.0SP ÷ S.HSEco Set Point
SPE
4
0.0S.LS ÷ S.HSSet Point
SP
3
99.9S.LS ÷ 999Maximum Set Point
S.HS
2
-50.0-99.9 ÷ S.HSMinimum Set Point
S.LS
1
S. - parameters relative to Set Point]SP
NoteDef.RangeDescriptionPar.
0-17 ... 0 ... 17Function and function
i.2F
19
oFoF/ 0.01 ÷ 9.59
(min.sec ) ÷
99.5
(min.sec.x10)
Delay in acquiring
digital input di1
i.1t
18
0-17 / -16/ -15 /
-14 / -13 / -12 /
-11 / -10 / -9 /
-8 / -7 / -6 / -5 /
-4 / -3 / -2 / -1 /
0 / 1 / 2 / 3 / 4 /
5 / 6 / 7 / 8 / 9 /
10 / 11 / 12 / 13
/ 14 / 15 /16 /17
Function and function
logic of digital input
di1:
0 = No function
1= Door open
2= Door open with fan
stop
3= Door open with fan
and compressor stop
4= External “AL” alarm
5= External “AL” alarm
with deactivation of
control outputs
6=Selection of active
Set Point (SP-SPE)
7= Switch on/ off
(Stand - by)
8= “Turbo" cycle
activation
9= Remote command
of AUX output
10= Disable recording
of HACCP alarms
11= Reset of HACCP
alarms
12= External "PrA"
alarm
13= External “HP”
alarm
14= External “LP”
alarm
15= Forcing events
Switch on/ off (Stand -
by)
16= Start Defrost
17= Stop Defrost
i.1F
17
oFoF / EP / Au /
cd / 2E / dG
Pr3 input function:
see i.P3
i.P4
16
oFoF / EP / Au /
cd / 2E / dG
Pr3 input function:
oF = No function
EP = Evaporator (1)
Au = Aux
cd = condenser
2E = Evaporator 2
dG = digital input
i.P3
15
EPoF / EP / Au /
cd / 2E
Pr2 input function:
oF = No function
EP = Evaporator (1)
Au = Aux
cd = condenser
2E = Evaporato
r
2
i.P2
14
0.0-30.0 ÷ 30.0
°C/°F
Measure offset on the
display
i.CU
13
0.0-30.0 ÷ 30.0
°C/°F
Pr4 Probe Calibration
i.C4
12
0.0-30.0 ÷ 30.0
°C/°F
Pr3 Probe Calibration
i.C3
11
0.0-30.0 ÷ 30.0
°C/°F
Pr2 Probe Calibration
i.C2
10
0.0-30.0 ÷ 30.0
°C/°F
Pr1 Probe Calibration
i.C1
9
2.0oF ÷ 20.0
sec
Measurement filter
i.Ft
8
F1and resolution
(decimal point)
C0 = °C with 1° res.
F0 = °F with 1° res.
C1 =°C with 0,1° res.
F1 = °F with 0,1° res.
ASCON TECNOLOGIC - X34- -OPERATING INSTRUCTIONS - Vr. 02 - 11/12 - ISTR-MX34-ENG02 - PAG. 16

oFoF - on - LbDefrost display Lock
oF= display free
d.dL
32
20.0oF/ 0.01 ÷ 9.59
(min.sec ) ÷
99.5
(min.sec.x10)
Lenght (max.) of
defrost cycle (evap. 1)
d.dE
31
00 ÷ 100 %Dynamic Defrost
Percentag
e
reduction
d.dd
30
6.00oF/ 0.01 ÷ 9.59
(hrs.min. ) ÷
99.5
(hrs.min.x10)
Delay first defrost after
power-on
(oF = Defrost at
power-on)
d.Sd
29
6.00oF/ 0.01 ÷ 9.59
(hrs.min. ) ÷
99.5
(hrs.min.x10)
Defrosting interval
d.di
28
rtrt / ct / cS / cLDefrosting starting
mode:
rt = real time intervals
ct = “ot” output on time
intervals
cS = defrost every “ot”
switching off (+ rt
intervals)
cL = by real time clock
d.dC
27
ELEL / in / no / EtDefrosting Type:
EL= Electrical
heating/stop. compr.
in= hot gas/reverse
cycle
no= without compr.
output condictioning
Et= Electrical heating
with evaporator tempe-
rature control
d.dt
26
d. - parameters relative to defrosting control]dF
P1P1 / P2 / P3 /
P4 / Ec / SP /
rE / oF
Variable visualized
normally on display:
P1 = meas. probe Pr1
P2 = meas. probe Pr2
P3 = meas. probe Pr3
P4 = meas. probe Pr4
Ec = Pr1 in normal
mode, Eco in Eco
mode
SP= Active Set Point
rE = No function
oF = Display off
i.dS
25
oFoF/ 0.01 ÷ 9.59
(hrs.min. ) ÷
99.5
(hrs.min.x10)
Time-out ECO mode.
oF = No function
i.tt
24
oFoF/ 0.01 ÷ 9.59
(hrs.min. ) ÷
99.5
(hrs.min.x10)
Delay to Eco mode
with door closed
oF = No function
i.Et
23
0-17 ... 0 ... 17Function and function
logic of digital input
Pr4 :
se
e
i.1F
i.4F
22
0-17 ... 0 ... 17Function and function
logic of digital input
Pr3 :
se
e
i.1F
i.3F
21
oFoF/ 0.01 ÷ 9.59
(min.sec ) ÷
99.5
(min.sec.x10)
Delay in acquiring
digital input di2
i.2t
20
logic of digital input
di2:
see i.1F
F. parameters relative to evaporator fans control]Fn
oFoF/ 0.01 ÷ 9.59
(hrs.min. ) ÷
99.5
(hrs.min.x10)
Lengh of “turbo” cycle
r.tC
49
CH / C / nr / HC /
C3
Output operating
mode:
H= Heating
C= Cooling
nr = Neutral Zone
HC =Neutral Zone with
ind. Set point
C3 = Cooling with 3
aut. switch modes
r.HC
48
oFoF/ 0.01 ÷ 9.59
(min.sec ) ÷
99.5
(min.sec.x10)
Output deactivation
time for probe error
r.t2
47
oFoF/ 0.01 ÷ 9.59
(min.sec ) ÷
99.5
(min.sec.x10)
Output activation time
for probe error
r.t1
46
1.00.0 ÷ 30.0
°C/°F
Differential
(Hysteresis) in Eco
mode in “turbo” mode
or Heating HC mode.
r.Hd
45
4.00.0 ÷ 30.0
°C/°F
Differential
(Hysteresis) in Eco
mode
r.Ed
44
2.00.0 ÷ 30.0
°C/°F
Differential
(Hysteresis)
r.d
43
r. - parameters relative to temperature control]rE
8.0- 99.9 ÷ 999
°C/°F
Defrost stop
temperature
evaporator 2
d.t2
42
oFoF/ 0.01 ÷ 9.59
(min.sec ) ÷
99.5
(min.sec.x10)
Lenght (max.) of
defrost cycle
evaporator 2
d.d2
41
oFoF/ 0.01 ÷ 9.59
(min.sec ) ÷
99.5
(min.sec.x10)
Compressor delay
after defrost (drainage
time)
d.td
40
oFoF/ 0.01 ÷ 9.59
(hrs.min. ) ÷
99.5
(hrs.min.x10)
Delay start Defrost by
continuous
compressor running
time
d.cd
39
1.00oF/ 0.01 ÷ 9.59
(min.sec ) ÷
99.5
(min.sec.x10)
Ritardo avvio
sbrinamento per
temperatura
evaporatore
d.St
38
-99.9- 99.9 ÷ 999
°C/°F
Defrost start
temperature
d.tF
37
2.0- 99.9 ÷ 999
°C/°F
Defrost enable
temperature
d.tS
36
10.0oF/ 0.01 ÷ 9.59
(min.sec ) ÷
99.5
(min.sec.x10)
Lengh of defrost cycle
for evaporator probe
error
d.EE
35
6.00oF/ 0.01 ÷ 9.59
(hrs.min. ) ÷
99.5
(hrs.min.x10)
Defrosting interval for
evaporator probe error
d.Ei
34
8.0- 99.9 ÷ 999
°C/°F
Defrost stop
temperature (evap. 1)
d.tE
33
on= Lock on
temperature Pr1
before defrost
Lb= Lock on label
“dEF” (during
defrosting) and “PdF”
(during
post-defrosting)
ASCON TECNOLOGIC - X34- -OPERATING INSTRUCTIONS - Vr. 02 - 11/12 - ISTR-MX34-ENG02 - PAG. 17

oFoF/ 0.01 ÷ 9.59
(min.sec ) ÷
99.5
(min.sec.x10)
Alarms A.H1 and A.L1
delay
A.t1
65
1.00.0 ÷ 30.0
°C/°F
Alarms A.H1 and A.L1
Hysteresis)
A.d1
64
oFoF / -99.9 ÷
999 °C/°F
Low temperature
A
larm 1 threshold
A.L1
63
oFoF / -99.9 ÷
999 °C/°F
High temperature
A
larm 1 threshold
A.H1
62
11 / 2 / 3 / 4 / 5 /
6 / 7 / 8 / 9 / 10
Temperature alarms 1
Type:
1 =Pr1 absolute with
label (H - L)
2 =Pr1 Relative with la-
bel (H - L)
3 = “Au” absolute with
label (H - L)
4 =“Au” Relative with
label (H - L)
5 = “cd” absolute with
label (H - L)
6 = Pr1 absolute wit-
hout label
7 = Pr1 relative without
label
8 = “Au” absolute wit-
hout label
9 = “Au” relative wit-
hout label
10 = “cd” absolute wit-
hout label
A.y1
61
A. - parameters relative to alarms]AL
oFoF/ 0.01 ÷ 9.59
(min.sec ) ÷
99.5
(min.sec.x10)
Delay outputs at power
on
P.od
60
oFoF/ 0.01 ÷ 9.59
(min.sec ) ÷
99.5
(min.sec.x10)
Output “ot” delay
between switching-on
P.P3
59
oFoF/ 0.01 ÷ 9.59
(min.sec ) ÷
99.5
(min.sec.x10)
Output “ot” delay after
switch off
P.P2
58
oFoF/ 0.01 ÷ 9.59
(min.sec ) ÷
99.5
(min.sec.x10)
Output “ot” delay at
switch on
P.P1
57
P. parameters relative to compressor protection
and power on delay
]P
r
oFoF/ 0.01 ÷ 9.59
(min.sec ) ÷
99.5
(min.sec.x10)
Fan delay after defrost
F.Fd
56
oFoF - onFan status during
defrost
F.FE
55
1.00.0 ÷ 30.0
°C/°F
Differential fan control
F.dF
54
-99.9- 99.9 ÷ 999
°C/°F
Low temperature fan
deactivation
F.LF
53
10.0- 99.9 ÷ 999
°C/°F
High temperature fan
deactivation
F.FL
52
oFoF/ 0.01 ÷ 9.59
(min.sec ) ÷
99.5
(min.sec.x10)
Fan time deactivation
with ot output
(compressor) off
F.tF
51
5.00oF/ 0.01 ÷ 9.59
(min.sec ) ÷
99.5
(min.sec.x10)
Fan time activation
with ot output
(compressor) off
F.tn
50
oFoF/ 0.01 ÷ 9.59
(min.sec ) ÷
99.5
(min.sec.x10)
Digital input alarm AL
delay to be recorded
as an HACCP alarm
A.di
(#)
80
oFoF/ 0.01 ÷ 9.59
(min.sec ) ÷
99.5
(min.sec.x10)
Black out alarm delay
to be recorded as an
HACCP alarm
( =oF HACCP rec.
disable)
A
.bo
(#)
79
oFoF/ 0.01 ÷ 9.59
(min.sec ) ÷
99.5
(min.sec.x10)
A.H2 and A.L2 delay to
be recorded as an
HACCP alarm
( =oF HACCP rec.
disable)
A.r2
(#)
78
oFoF/ 0.01 ÷ 9.59
(min.sec ) ÷
99.5
(min.sec.x10)
A.H1 and A.L1 delay to
be recorded as an
HACCP alarm
(se =oF gli allarmi non
sono mai registrati
come HACCP)
A
.r1
(#)
77
3.00oF/ 0.01 ÷ 9.59
(min.sec ) ÷
99.5
(min.sec.x10)
Alarm delay with door
open
A
.o
A
76
1.00oF/ 0.01 ÷ 9.59
(hrs.min. ) ÷
99.5
(hrs.min.x10)
Temperature Alarms 1
delay after defrost, and
unlock display delay
after defrost
A
.d
A
75
10 / 1 / 2 / 3Alarms H2 e L2
actions
0 = no actions
1 = activate alarm
outputs
2 = disable control
outputs (ot e HE) but
not activate alarm
outputs
3 = disable control
outputs (ot e HE) and
activate alarm outputs
A
.A2
74
2.00oF/ 0.01 ÷ 9.59
(hrs.min. ) ÷
99.5
(hrs.min.x10)
Temperature Alarms 2
delay at power on
A
.P2
73
oFoF/ 0.01 ÷ 9.59
(min.sec ) ÷
99.5
(min.sec.x10)
Alarms A.H2 and A.L2
delay
A
.t2
72
1.00.0 ÷ 30.0
°C/°F
Alarms A.H2 and A.L2
Hysteresis)
A.d2
71
oFoF / -99.9 ÷
999 °C/°F
Low temperature
A
larm 2 threshold
A.L2
70
oFoF / -99.9 ÷
999 °C/°F
High temperature
A
larm 2 threshold
A.H2
69
31 / 2 / 3 / 4 / 5 /
6 / 7 / 8 / 9 / 10
Temperature alarms 2
Type:
se
e
“A.y1”
A
.y2
68
10 / 1 / 2 / 3Alarms H1 e L1
actions
0 = no actions
1 = activate alarm
outputs
2 = disable control
outputs (ot e HE) but
not activate alarm
outputs
3 = disable control
outputs (ot e HE) and
activate alarm outputs
A
.A1
67
2.00oF/ 0.01 ÷ 9.59
(hrs.min. ) ÷
99.5
(hrs.min.x10)
Temperature Alarms 1
delay at power on
A
.P1
66
ASCON TECNOLOGIC - X34- -OPERATING INSTRUCTIONS - Vr. 02 - 11/12 - ISTR-MX34-ENG02 - PAG. 18

oFoF / 1 / 2 / 3 / 4
/ 5 / 6 / 7
Function mode key U:
oF= No function
1= Auxiliary output
command
2= Norm. / Eco mode
Selection
3= Switch on/off
(Stand-by)
4= “Turbo” cycle
command
t.UF
88
t. -parameters relative to configuration of the
keyboard and serial communication
]tS
oFoF/ 0.01 ÷ 9.59
(min.sec ) ÷
99.5
(min.sec.x10)
Time relative to auxil-
iary output
o.tu
87
oFoF / 1 / 2Function mode auxil-
iary output:
oF= No Function
1= control output “ot”
delayed
2= manual activation
by key or digital input.
o.Fo
86
3oF / 1 / 2 / 3Buzzer function mode
oF = disable
1 = active alarms only
2 = key pressed only
3 = active alarms and
key pressed
o.bu
85
AuoF/ot/dF/
Fn/Au/At/
AL/An/ -t/ -L/
-n/on/HE/2d/
L1/L2
OUT4 function:
see “o.o1”
o.o4
84
FnoF/ot/dF/
Fn/Au/At/
AL/An/ -t/ -L/
-n/on/HE/2d/
L1/L2
OUT3 function:
see “o.o1”
o.o3
83
dFoF/ot/dF/
Fn/Au/At/
AL/An/ -t/ -L/
-n/on/HE/2d/
L1/L2
OUT2 function:
see “o.o1”
o.o2
82
otoF/ot/dF/
Fn/Au/At/
AL/An/ -t/ -L/
-n/on/HE/2d/
L1/L2
OUT1 function:
oF= No function
ot= Temperature
control (compressor)
dF=Defrosting(1)
Fn= fan
Au= Auxiliary
At/-t= Silenceable
alarm
AL/-L= Not silenceable
Alarm
An/-n= Memorised
alarm
on = on when
instrument switch on
HE= Heating (Neutral
zone control)
2d = Defrosting 2
L1 = light with
economy mode (on
with “SP” and off with
“SPE”)
L2 = internal light (off
with door closed and
on with doo
r
opened)
o.o1
81
o. - parameters relative to configuration of
outputs and buzzer
]Ou
( =oF HACCP rec.
disable)
h.0
n.0
d.oF
t.oF
h. = 0 ÷ 23
n. = 0 ÷ 50
d. = oF-1 ÷ 11
t. = oF-1 ÷ 10
Event 1
h = hour
n = min.
d = day of the week
(d.1 = Monday ... d.7 =
Sunday
d. 8 = every day
d. 9 = from Monday to
Friday
d.10 = from Monday to
Saturday
d.11 = Sat. and Sun.
d.oF = no day (event
disabled)
t = event type
t.1 = Switch on
t.2 = Stand-by
t.3 = Switch on Aux
output
t.4 = Switch off Aux
output
t.5 = Start defrost
t.6 = Switch to Eco mo-
de (SPE)
c.01
(#)
97
c. parameters relative to events occour at defined
times
]cE
y. = 10 ÷ 99
n. = 1 ÷ 12
d. = 1 ÷ 31
Current date:
y = year
M = month
d = date
c.dt
(#)
96
h. = 0 ÷ 23
n. = 0 ÷ 59
d. = oF-1 ÷ 7
Current time and
current day of the
week:
h = hour
n = min.
d = day of the week
(d.1 = Monday ... d.7 =
Sunday)
d.oF = clock disable
c.CL
(#)
95
c. - parameters relative to clock setting]cL
10 ÷ 255MODBUS Station
address (for serial
communication)
t.AS
94
11 / 2HACCP Alarms Para-
meters level
1 = protected
parameters
2 = unprotected
parameters
t.HA
(#)
93
oFoF ÷ 999Access Password to
parameter functions
t.PP
92
4oF / 1 / 2 / 3 / 5
/ 6
Set Visibility with fast
procedure by key P:
oF = None
1 = SP
2 = SPE
3 = SP e SPE
4 = Active SP
5 = SP and SPH
6 = SP, SPE and SPH
t.Ed
91
oFoF/ 0.01 ÷ 9.59
(min.sec ) ÷
30.0
(min.sec.x10)
Keyboard lock function
delay
t.Lo
90
oFoF / 1 / 2 / 3 / 4
/ 5 / 6 / 7
Function mode key
Down/Aux: see “t.UF”
t.Fb
89
5 = Manual Switch
on/off (Stand-by) when
set by clock
6= HACCP Alarms
Reset
7= HACCP Alarms rec.
disable/enable
ASCON TECNOLOGIC - X34- -OPERATING INSTRUCTIONS - Vr. 02 - 11/12 - ISTR-MX34-ENG02 - PAG. 19

00 ÷ 100Number of HACCP
alarms deleted
because exceeded
H.dL
(#)
121
Stored Alarm n. 10
H.10
(#)
120
Stored Alarm n. 9
H.09
(#)
119
Stored Alarm n. 8
H.08
(#)
118
Stored Alarm n. 7
H.07
(#)
117
Stored Alarm n. 6
H.06
(#)
116
Stored Alarm n. 5
H.05
(#)
115
Stored Alarm n. 4
H.04
(#)
114
Stored Alarm n. 3
H.03
(#)
113
Stored Alarm n. 2
H.02
(#)
112
A. = H1/ L1/
H2/ L2/ bo/ AL
y. = 10 ÷ 99
M. = 1 ÷ 12
d. = 1 ÷ 31
h. = 0 ÷ 23
n. = 0 ÷ 59
E. = 0 ÷ 99
e. = 0 ÷ 59
_ = - 99.9 ÷
999
Stored Alarm n. 1:
A. = Alarm type
y.= start year
M.= start month
d.= start date
h. = start hour
n. = start min.
E. = duration(hrs)
e. = duration (min.)
_= peak max./min.
(critical temp.) °C/°F
H.01
(#)
111
H. - parameters relative HACC
P
stored alarms
(read only parameters)
]H
A
Event 14
c.14
(#)
110
Event 13
c.13
(#)
109
Event 12
c.12
(#)
108
Event 11
c.11
(#)
107
Event 10
c.10
(#)
106
Event 9
c.09
(#)
105
Event 8
c.08
(#)
104
Event 7
c.07
(#)
103
Event 6
c.06
(#)
102
Event 5
c.05
(#)
101
Event 4
c.04
(#)
100
Event 3
c.03
(#)
99
Event 2
c.02
(#)
98
t.
7
= Switch to norma
l
mode (SP)
(#) : Only in models with Real Time Clock
6 - PROBLEMS, MAINTENANCE AND GUARANTE
E
6.1 - SIGNALLING
Replace the instrument
or ship to factory for
repair
Fatal memory error
Err
Press key PInternal EEPROM
memory error
EP
r
Check the correct
connection of the probe
with the instrument and
check the probe works
correctly
The probe may be
interrupted (E) or in
short circuit (-E), or may
measure a value outside
the range allowed
E1 -E1
E2 -E2
E3 -E3
E4 -E4
A
ctionReasonErro
r
Other Signalling:
HACCP Alarms rec. disable
HoF
HACCP Alarms rec. enable
Hon
Reset/delete peak values and HACCP alarms
---
As-yet unrecognised HACCP alarms occurring
HAC
“turbo” mode active
trb
Eco mode active
Eco
Post-defrosting in progress with “d.dL”=Lb
PdF
Defrosting in progress with “d.dL”=Lb
dEF
Door opened
oP
Digital input alarm LP in progress
LP
Digital input alarm HP in progress
HP
Digital input alarm PrA in progress
PrA
Digital input alarm in progress
A
L
Minimum temperature alarm 2 in progress
L2
Maximum temperature alarm 2 in progress
H2
Minimum temperature alarm 1 in progress
L1
Maximum temperature alarm 1 in progress
H1
Keyboard lock
Ln
Delay at power-on in progress
od
ReasonMessage
6.2 - CLEANING
We recommend cleaning of the instrument only with a slightly wet
cloth using water and not abrasive cleaners or solvents.
6.3 - GUARANTEE AND REPAIRS
The instrument is under warranty against manufacturing flaws or
faulty material, that are found within 12 months from delivery date.
The guarantee is limited to repairs or to the replacement of the
instrument.
The eventual opening of the housing, the violation of the instrument
or the improper use and installation of the product will bring about
the immediate withdrawal of the warranty’s effects.
In the event of a faulty instrument, either within the period of
warranty, or further to its expiry, please contact our sales
department to obtain authorisation for sending the instrument to
our company.
The faulty product must be shipped to ASCON TECNOLOGIC with
a detailed description of the faults found, without any fees or
charge for ASCON TECNOLOGIC, except in the event of
alternative agreements.
7 - TECHNICAL DATA
7.1 - ELECTRICAL DATA
Power supply: 100...240 VAC +/- 10%
Frequency AC: 50/60 Hz
Power consumption: 6 VA approx.
Input/s: 4 inputs for temperature probes: PTC (KTY 81-121, 990 Ω
@ 25 °C) or NTC (103AT-2, 10KΩ@ 25 °C) or Pt1000 (1000 Ω@
0° C); 2 digital inputs for free voltage contacts
Output/s: up to 4 relay outputs (Out1 and Out2 are always present)
ASCON TECNOLOGIC - X34- -OPERATING INSTRUCTIONS - Vr. 02 - 11/12 - ISTR-MX34-ENG02 - PAG. 20
This manual suits for next models
1
Table of contents
Other ascon Controllers manuals

ascon
ascon M4 series User manual

ascon
ascon e33 User manual

ascon
ascon Z31 User manual

ascon
ascon K31D User manual

ascon
ascon KX6 Installation and operation manual

ascon
ascon XE Series User manual

ascon
ascon G2 Series User manual

ascon
ascon TLK72 B User manual

ascon
ascon S2 Series User manual

ascon
ascon QP Series User manual