EN 8
DESCRIPTION AND USE
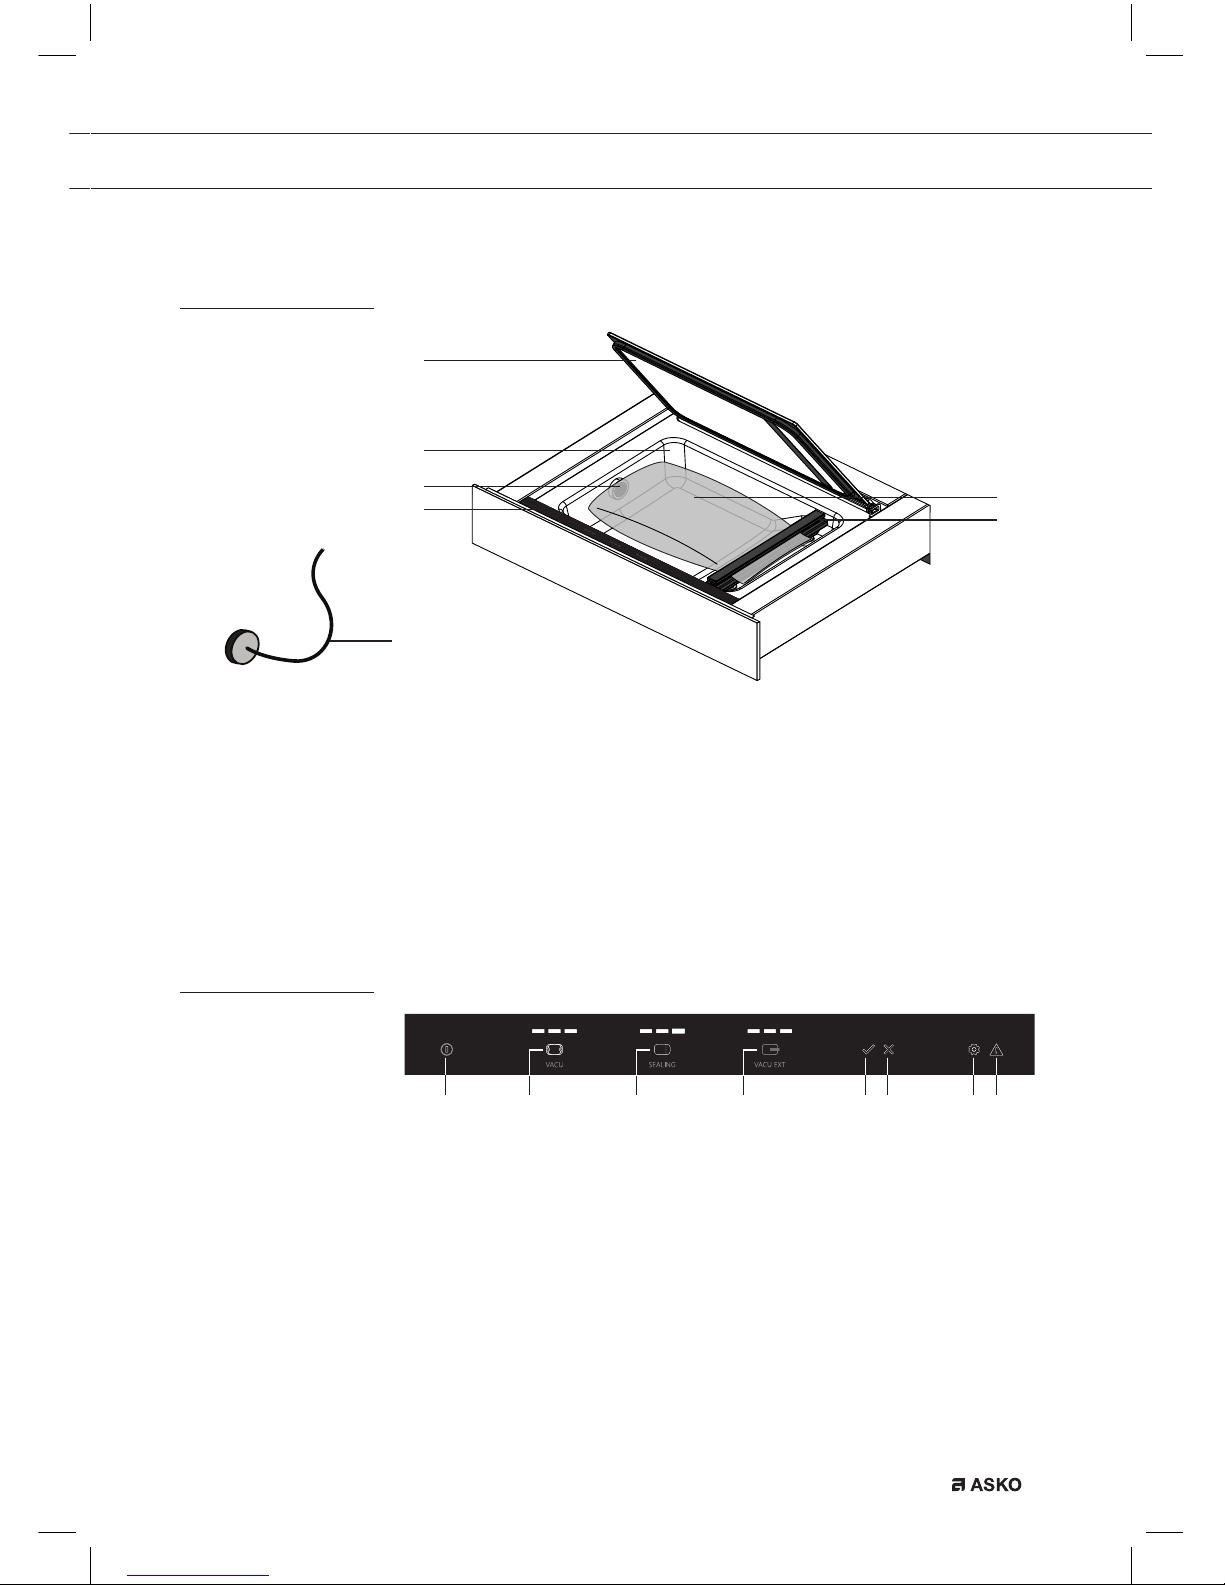
External vacuuming
1. Press the On/Off touch key until the device is switched on.
2. Use the included hose to connect the external vacuuming
accessory with the connection point in the vacuum chamber.
3. Use the External Vacuum Level touch key to select a low, middle or
high level.
4. Press the Start touch key to start the vacuuming process.
Vacuuming stops automatically when the vacuum level has been
reached.
Note! Fittings to connect external vacuuming accessories to the hose
for use in external vacuuming are not included with the vacuum drawer.
These are dependent on the type of vacuuming accessory.
Vacuuming failure
If the vacuum drawer cannot vacuum the vacuum chamber, this can be
caused by the following issues:
yThe lid is not or insufficiently pushed in when starting vacuuming.
The Vacuuming Failure indicator lights up.
▷Push the lid on the front into the rubber gasket properly.
yThe oil of the vacuum pump necessary for vacuuming contains
moisture.
The Vacuuming Failure indicator and the Dry Run Function indicator
light up.
▷Start the Dry Run Function*.
yA failure has occurred.
▷Call a service organisation.
* If the vacuuming fails a number of times, then the Vacuuming Failure
indicator and the Dry Run Function indicator light up. It is then advised
to perform the Dry Run Function.
Note! If the Vacuum Failure indicator and Dry Run Function indicator are
ignored, the drawer can no longer be operated after a certain number of
warnings (except the Dry Run Function). It is then necessary to start the
Dry Run Function to be able to use the drawer again.