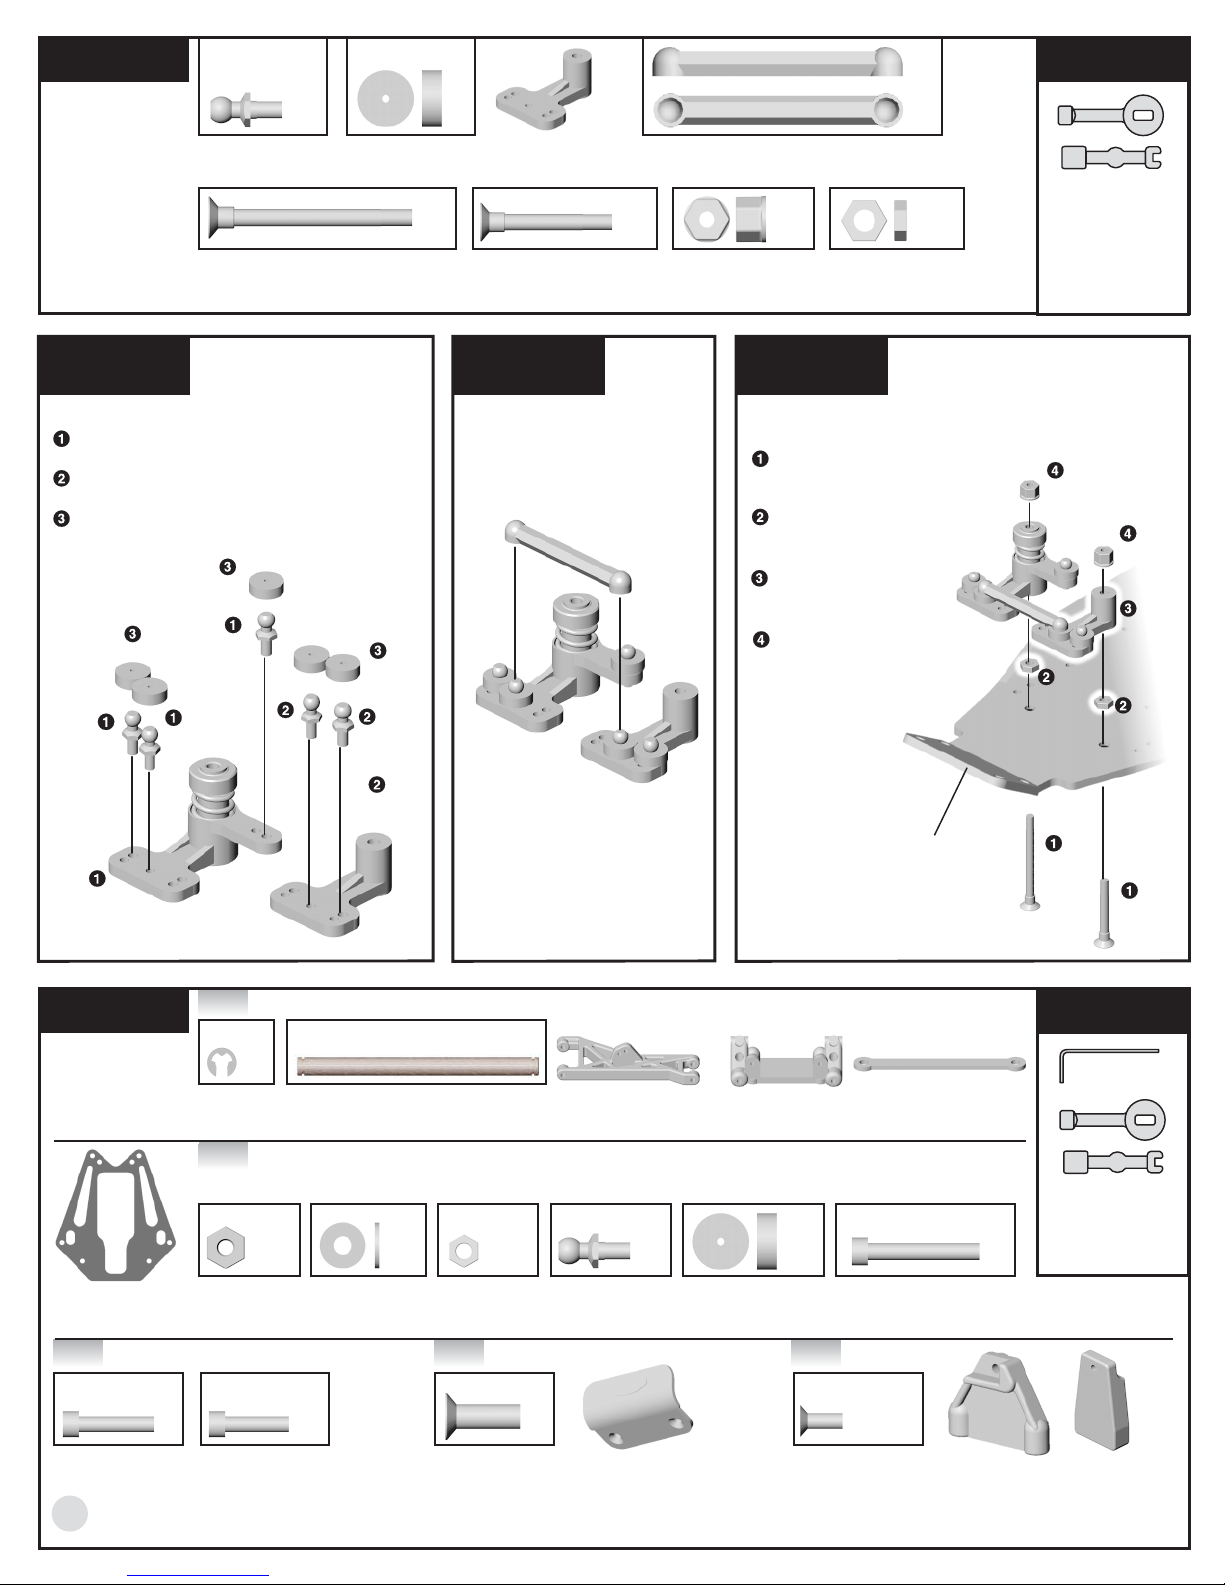
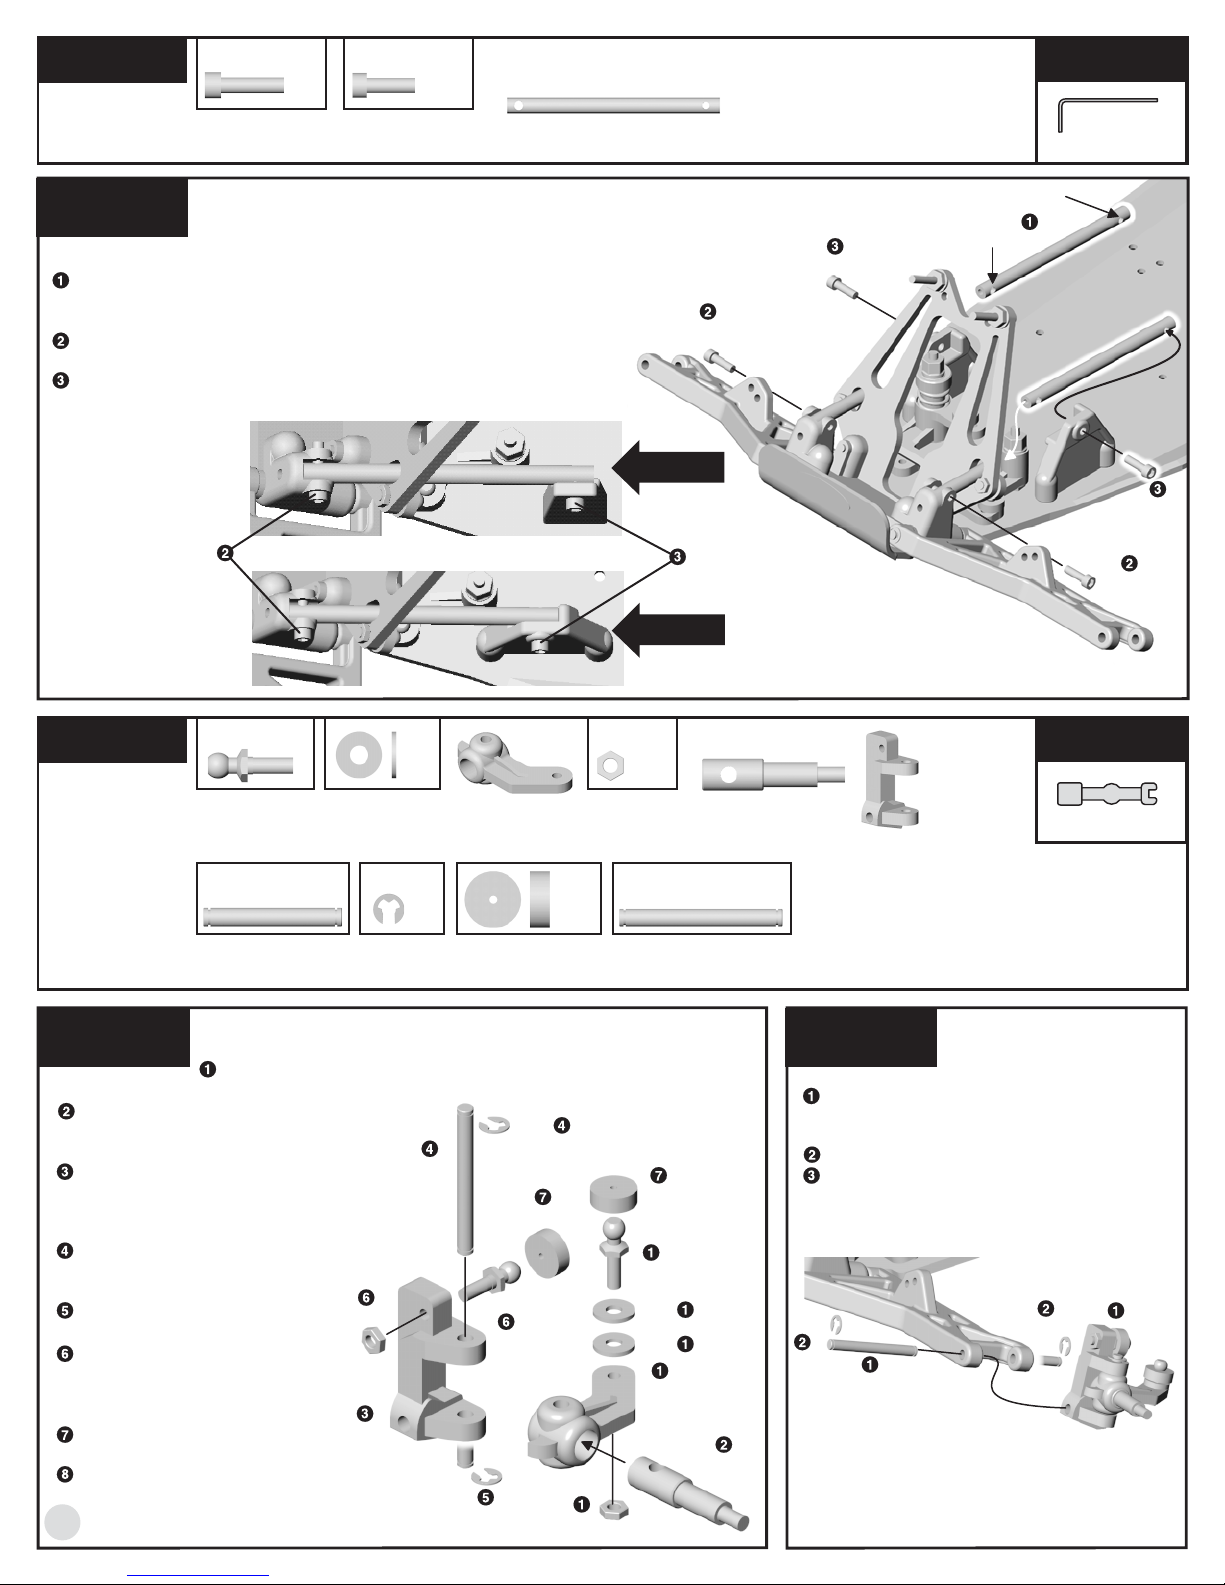
SERVO SAVER ASSEMBLY
Slide the two #7531 saver arms onto the #9158 tube.
Orient the servo arm as shown.
Slide the #9157 spring and the #9158 (9156*) adjusting
nut on the tube. Tighten the nut until it is even with the
top.
Push the #7531 small flanged bushing into the top of
the #9158 (9156*) tube.
Push the #7531 large flanged bushing into the bottom
of the #9158 (9156*) tube.
* Asterix denotes Factory Team part number. Use this
part number if you have the Factory Team kit #7060 or
#7067.
Also use this part number if you wish to upgrade your
Team kit or RTR truck with titanium, graphite
or lightweight aluminum parts.
B A G A
REMOVE THESE
PARTS FOR:
Step 1
1:1
R E A D T H I S B E F O R E B U I D I N G
READ THE MANUAL!
This manual is for three different GT kits and will help you
assemble and set up each one. Read the manual before
starting your kit and before contacting us for help.
"Hello,
Associated, I need some help." "Did you read the manual?"
OPEN THE BAGS IN ORDER
The assembly is arranged so that you will open and finish that
bag before you go on to the next bag. Sometimes you will
have parts remaining at the end of a bag. These will
become part of the next bag. Some bags may have a large
amount of small parts. To make it easier to find the parts, we
recommend using a partitioned paper plate for spreading out
the parts so they will be easier to find.
SUPPLEMENTAL SHEETS
We are constantly updating parts to improve our kits. These
changes, if any, will be noted in supplementary sheets located
in a parts bag or inside the kit box. Check the kit box before
you start and each bag as it is opened. When a supplement is
found, attach it to the appropriate section of the manual.
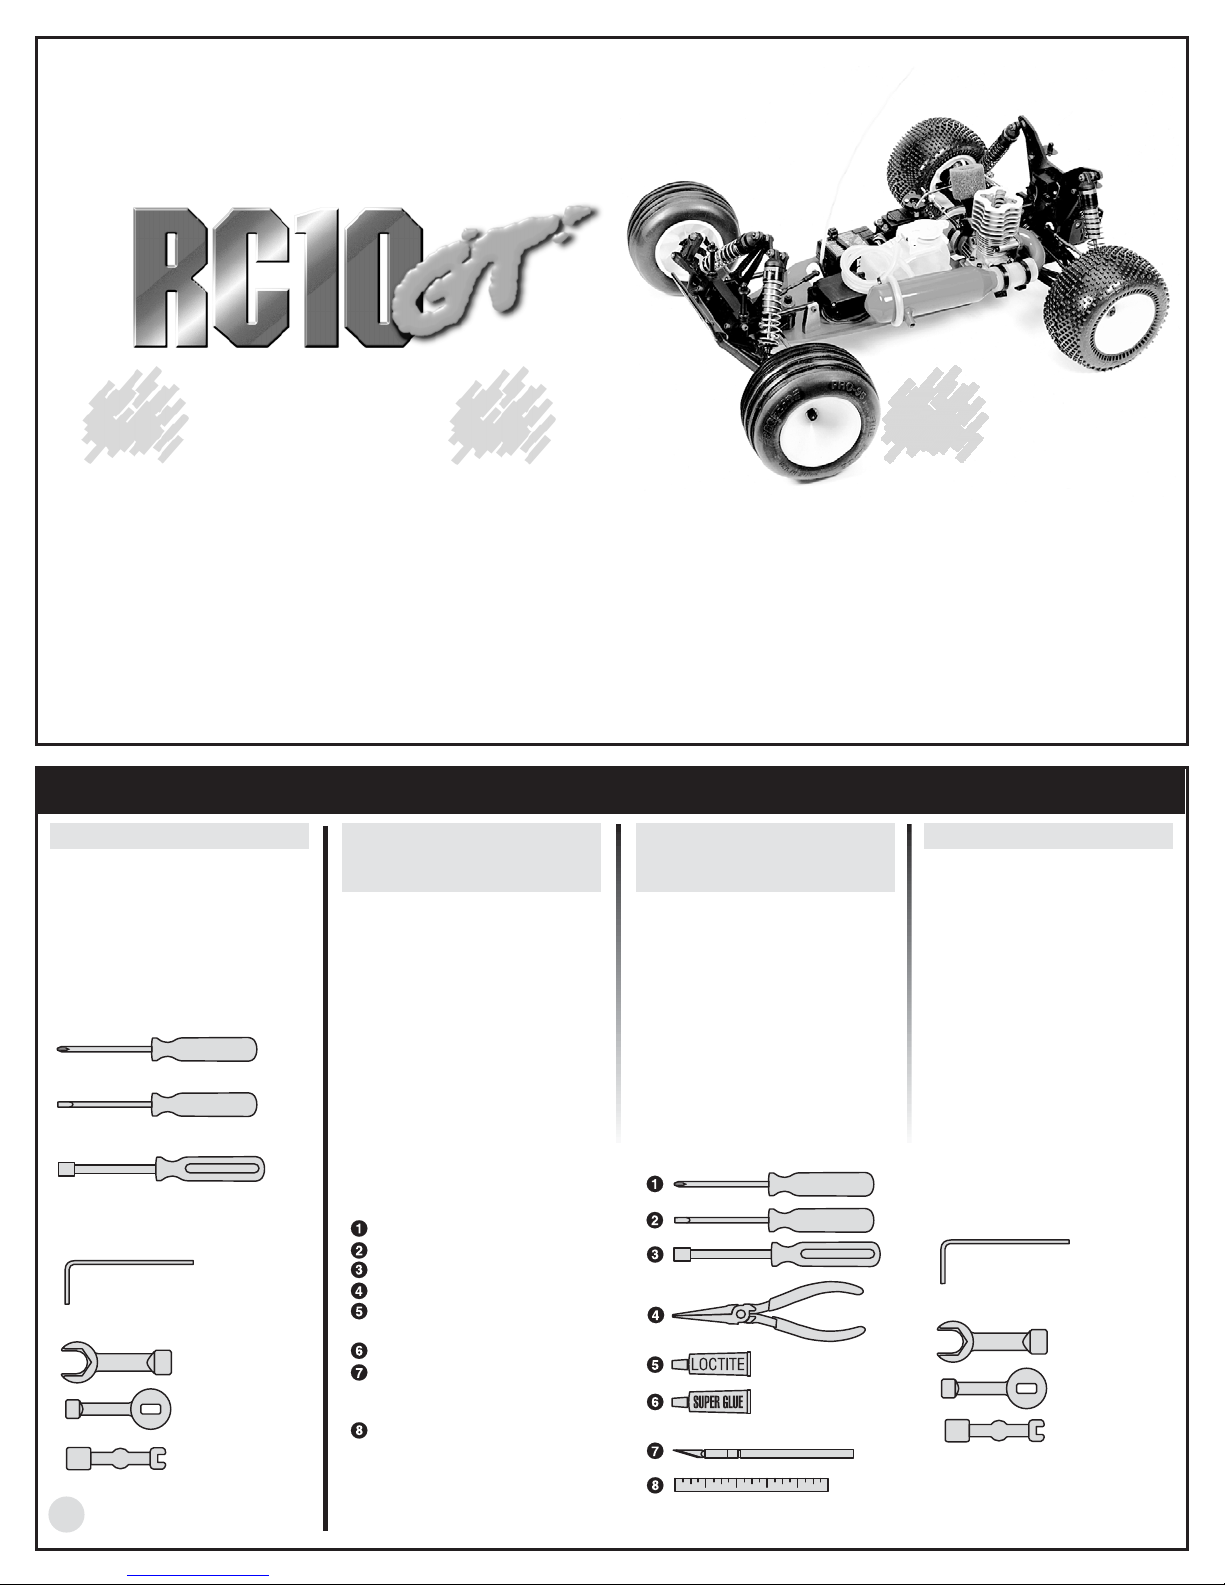
MANUAL FORMAT
The following explains the format of these instructions.
The beginning of each section indicates:
1Which bag to open ("BAG A") and which steps you'll be using
those parts for ("FOR STEPS 1-3").
2Which parts you will use for those steps. Remove only the
parts shown. "1:1" indicates an actual size drawing; place your
part on top and compare it so it does not get confused with a
similar part.
3Which tools you should have handy for that section.
4An asterix ( * ) next to a part number indicates the part used in
the Factory Team kits *7060 & 7067. (You can use those
numbers to upgrade your Team kit and RTR.)
5The instructions in each step are ordered in the order you
complete them, so read the words AND follow the pictures. The
numbers in circles are also in the drawing to help you locate
them faster.
6When we refer to left and right sides of the truck, we are
referring to the driver's point of view inside the car.
R E A C H I N G U S
ASSOCIATED ELECTRICS, INC.
3585 Cadillac Ave.
Costa Mesa, CA 92626-1401
USA
©2000 Associated Electrics, Inc.
CUSTOMER SUPPORT
(714) 850-9342
FAX (714) 850-1744
web site: http://www.rc10.com,
http://www.rc10.com/rtr
3
Match this number
to the text to find
your way faster
7531
7531, qty 1
small flanged
bushing
s t e p 1
7531
9158, 9156B*
9158
9158,
9156B*
7531
small flanged bushing
7531
large flanged bushing
1:1
9158, 9156B*, qty 1
servo saver
adjusting nut
9158, qty 1
servo saver
spring
7531, qty 1
servo saver arm
7531, qty 1
large flanged
bushing
7531, qty 1
servo saver arm
9158, 9156B*, qty 1
servo saver tube
To further clarify the manual, we have used the following designations:
RTR = Part or step is unique to #7090 Ready To Run.
Team/FT = Part or step is unique to Team and Factory Team kits