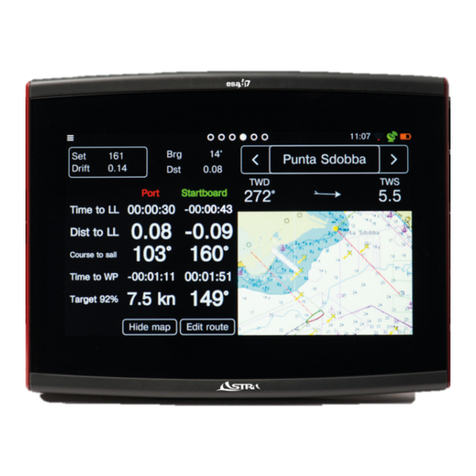
Astra Esa DINGHY User manual

User Manual
1.2 – 12/2015
Esa DINGHY

pag. 2
Introduction page 3
Functionalities esa Dinghy page 4
Main Screen page 6
Starting Procedure page 10
Others: setting page 12
Attachment: log file page 13
Attachment: pc connection page 14
Attachment: update app page 19
pag. 2
INDEX

pag. 3
INITIAL SET UP PROCEDURE FOR THE APP
At THE FIRST BOOT of the app is useful to follow all the onscreen instructions.
In particular please remind to write with your reference email at the address displayed below, :
By this, Astra will be able to freely send to you all esa Dinghy upgrades via email through .apk files to be installed on
your esa Watch

pag. 4
esa Dinghy app is specifically designed to be a simple and effective tool for sailing right at your wrist.
Through the use of built-in GPS high precision esa Dinghy is the most intuitive way to navigate.
Distance from the Start Line
Dedicated to the sailors, buoys positioned easily, the app shows the instantaneous distance from the starting line,
make no mistake at the start; use countdown to always know when to burn the time.
Speed, direction, location
The most important data of navigation at your fingertips
Gain and loss on wind
Simple and clear graphic indications in real time
Recording outputs
Possibility of further analysis of your exits
pag. 4
FUNCTIONALITIES

pag. 5
Navigate in two touches
From notification menu, select Wi-Fi and GPS on. The icons will turn
blue.
IMPORTANT. Witchout activating the wifi and gps antennas, the app
won’t work properly
Launch the app
Press Start

pag. 6pag.. 6
THE 3 MAIN SCREENS
1. Latitude e Longitude
2. COG e SOG
Boat Speed and direction
3. Star procedure: time and distance
from the line
All different screen are reachable by swiping left or right the finger on the screen.

pag. 7pag.. 7
BROWSE THE PAGES
All different screen are reachable by swiping left or right the finger on the screen.

pag. 8
The navigation screen displays the direction (in compass degrees) and speed (in knots) of the vessel, based ong
GPS data (refers to the movement over ground)
Next to speed data, one arrow appears to indicate the trend to the speed itself (increasing or decreasing)
pag. 8
MAIN SCREENS: NAVIGATION DATA
Direction:
Left or right arrow allows to see if you are moving from the previous
route.
Is it possible to “lock” the direction of the route by clicking on the grey
rectangular for better understand the gain and loss on wind (SEE
NEXT PAGE)
Speed:
The data shows the instantaneous speed coming from GPS sensor.
Whenever there an increase or a decrease, on the left an arrow
compares respectively indicating top or bottom.

pag. 9
“Lock” direction function (best for regatta purposes)
pag. 9
Direction:
Pressing on the gray area of the screen (see left), the
program will save the current direction (indicated on
square brackets)
The arrow on the left or right lets you see if we have
moved from the route that was being held at the
moment of pressing the rectangle.
Depending on whether you change to starboard or left
respectively the rectangle will become red or green.
This function is useful to maximize gains and poor while
browsing race.
This makes it possible to obtain the deviation (negative
or positive) from the direction set effectively and
immediately visible.
MAIN SCREENS: NAVIGATION DATA/2

pag. 10
SET STARTING LINE
pag. 10
MAIN SCREEN: START PROCEDURE (1/2)
Bring the boat near the left side of the starting line, with a little pressure on the left flag (initially blue) the firts
side is fixed. The left flag becomes red. On the same way proceed with the right side (the flag becomes
green)
• The positioning has to be made at low
speed, evaluating the point on the bow of
the boat, in order to prevent unalignment
between GPS and bow.
• It is possible to replace the points by
keeping pressed the flag where desired.
Once set the starting line, the app
provides all data automatically.
The starting procedure page is on the right by swiping the finger on the screen from right to left from navigation screen.

pag. 11
START/STOP
Timer 5 minutes
pag. 11
MAIN SCREEN: START PROCEDURE (2/2)
SIZES HIGHLIGHTED IN STARTING PROCEDURE
Positioned the ends of the line (green flag and red), the system provides, on a single page, the data necessary for a
proper setting of the start
Meter distance of the boat from right
(green) or left (red) end of the line.
DISTANCE TO LINE: distance to the line
measured perpendicularly to line itself:
Positive value: In
Negative value: out

pag. 12pag. 12
SETTING Damping
For access to this screen, is necessary to press SETTINGS button on the starting page.
With this setting you can set the level of damping (oscillation) of the data displayed.
In particular, the Damping indicates the value of attenuation of fluctuations in data visualization. You can go from a
minimum of 1s (data instable) to a maximum of 9s
The data that can be set independently one from anotehr and are:
BS (speed); HDG (direction); Coord (Coordinate); Dist (distance from the starting line)
Nb. Start with AT LEAST a value of 3 for damping, then modify on your preferences.

pag. 13pag. 13
Attachment 1: log file, saved data and PC connection
Every time of usage esa Dinghy, is
automatically saved a file that records
every second navigation data, you
can save the file on your PC by
connecting esa Watch and copying
the chosen file (marked by date and
start time of recording) on your PC at
this point the data is available for your
processing
To learn how to connect your PC or Mac to esa Watch, consult see next pages.

pag. 14
Is it possible to connect esa Watch to a pc or a
MAC, this will allow to upload or download file
directly through the local storage.
esa Watch connection to a pc:
- Windows: connect esa Watch through usb directly
to the pc. Select from notification tent (go home,
swipe down the finger) connect as “usb storage” (1)
Press then “Turn on USB storage” (2).
The Log files produced by esa Dinghy are available
in the folder “esa GPS” or “esa Dinghy” (depending
on app version.
pag. 14
Attachment 1: Connection to PC (1/2)
1 2

pag. 15
- MAC system: connect esa Watch through usb directly to the
pc. Select from notification tent (go home, swipe down the
finger) connect as media device MTP.
- N.B. if you find difficults to connect the device to your Mac
esa Smartwatch you must have previously downloaded and
installed the program "File Transfer Android" available at:
www.android.com/filetransfer
pag. 15
Attachment 1: Connection to PC (2/2)

pag. 16
Attachment 2
The log file is in the format of 4
columns, indicating respectively at
the time of measurement:
• latitude
• longitude
• speed
• direction
You can use this file to create a
simple analysis of Excel data, to
check the progress of their
performance during the navigation
performed.

pag. 17
Attachment 3: how to upload and install the .apk to update application.
1
In case of file update if you followed the pag3 indications, you will receive from Astra Yacht, for free, the new apk file version on your email.
Connect the smartwatch to your computer as indicated also in pg 13
Copy the file in the space of storage of the phone (1) , see ever next page
MORE IN DETAIL HOW TO DO
- Connect the Esa Watch to the PC
- Turn on the USB storage (at this point you will find you Esa Watch like removable Disk)
- Copy the new .apk on the storage of the removable Disk "Esa Watch"
- Open the "File Manager App"
- Click on "Phone Storage" on File Manager
- At the list bottom you will find the new .apk, click on
- Click over install button
- Now you have the new version installed
- Go again in "Phone Storage" on File Manager and long press over the file .apk, then will appear the recycle bin icon, click over
to remove .apk file

pag. 18pag. 18
Attachment 3: upload and install the .apk to update application.
Proceed to the installation by clicking on the file in
the File Manager app (2) after making sure to
authorize the installation of "applications of
unknown origin" (3)
Follow the procedures on screen (4) pressing
installed to complete the upgrade
3
2
4

ASTRA YACHT SRL - PIAZZA DELLA REPUBBLICA 15 - 34074 MONFALCONE (GO) ITALY - TEL. +39 0403757680 - [email protected] -
WWW.ASTRAYACHT.COM
EASY HIGH TECHNOLOGY
Table of contents
Other Astra Marine Equipment manuals
Popular Marine Equipment manuals by other brands

Garmin
Garmin GMI 10 Digital Marine Instrument Display Quick start manual

Whisper Tech
Whisper Tech WhisperGen 3000 Series Installation and commissioning manual

Tritech
Tritech Micron Modem product manual

Lofrans
Lofrans PROJECT 1500-USA instruction manual

JRC
JRC Alphatron Marine Mode Switch 3 Pos Operation manual

iXBlue
iXBlue GAPS II quick start guide