Dear Customer,
Congratulations, you have made a great choice in purchasing a RolaChem controller by AstralPool. Your RolaChem dosing
system will monitor and control the pH and/or ORP level in your swimming pool to give you the most crystal clear water
possible. These instructions cover the following models:
RC 9 pH and ORP (acid and sanitiser sensing and dosing)
RP 9 pH only (acid sensing and dosing only)
RO 9 ORP (sanitiser sensing and dosing only)
Please ignore reference to pH or ORP if it is not fitted to your unit.
Swimming pool chemistry is quite interesting and dynamic. There is no one setting that is right for every swimming pool or
spa. After installation, let the Rola Chem machine settle down over a couple of days and then if necessary alter the setting
to suit your pool or spa.
In the automatic models, the chlorine level is controlled using the ORP principle (which is a better measure of the sanitising
ability of chlorine).
•ORP (Redox) measures ACTIVITY in millivolts (mV) of all oxidising chemicals. Test Kits and strips measure the
QUANTITY of Chlorine/Bromine in PPM only.
•ORP of 650mV or above means water is clean and safe, regardless of qty. of chlorine/bromine, provided ORP
sensor is clean, calibrated and functioning OK.
•ORP readings can vary depending upon water chemistry like pH, TDS. T.A. and stabiliser levels. Ensure that these
levels are correct. Consult your shop/technician.
If large quantities of chemicals are dumped in the pool water, this excess quantity should be circulated well and then,
allowed to settle down before this machine starts to give true readings.
If you have any questions please contact your AstralPool Supplier or us directly.
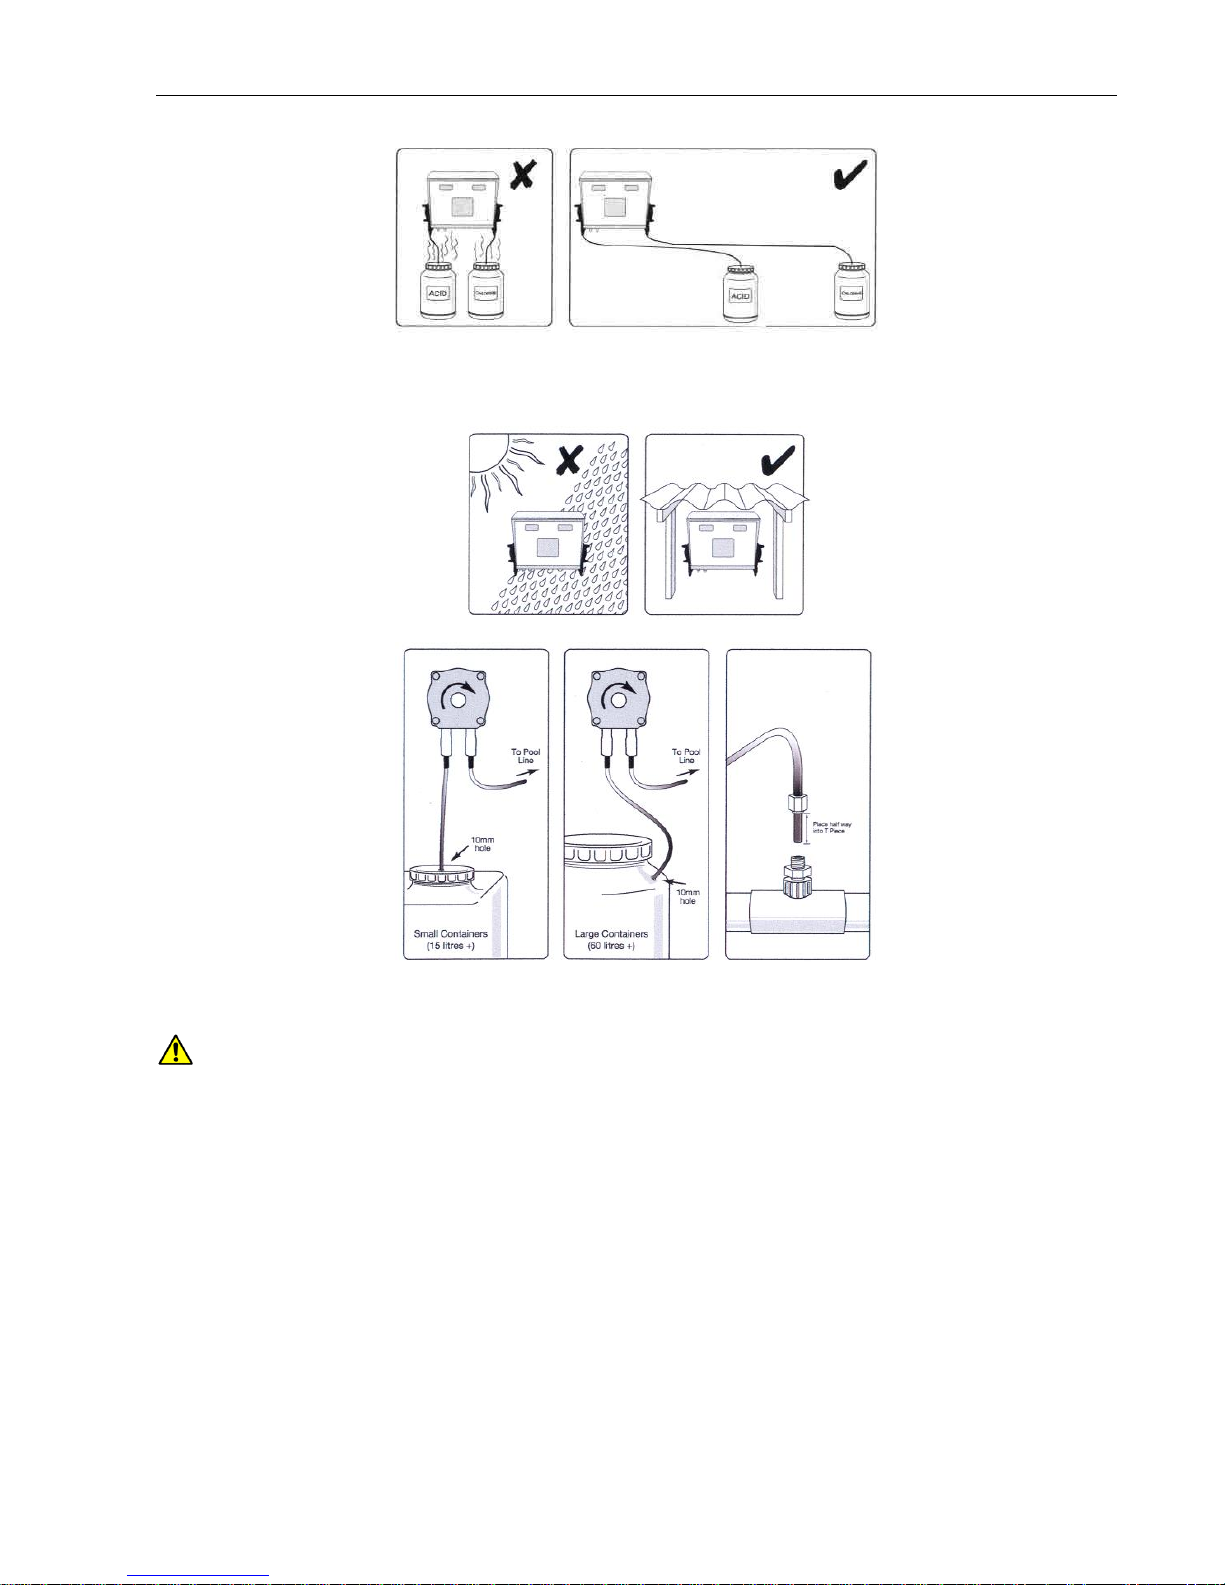
Product is designed to run with ACID diluted to water to acid ratio of 2:1 should always be followed as the
machines dosing rate is formulated around the diluted solution. Using neat acid can lead to overdosing the pH level.
Note: The RolaChem dosing unit is not intended for use by young children or infirm persons without supervision. Please
ensure that young children are supervised to ensure that they do not play with the Chlorinator.
INDEX
RC9 –INTRODUCTION............................................................................................................................ 3
RC9 –PLACEMENT OF CHEMICALS, ROLACHEM AND CONNECTIONS..................................... 4
RC9 –INSTALLATION SET UP............................................................................................................... 5
RC9 –TIMER SET UP (ONLY IF TIMER SELECTED).......................................................................... 9
RC9 –ORP AND/OR PH SET POINT ADJUSTMENT.......................................................................... 10
RC9 –ORP AND/OR PH MANUAL DOSING ....................................................................................... 10
RC9 –ORP AND/OR PH PROBE CALIBRATION................................................................................ 12
RC9 –ORP AND/OR PH FAULT WARNING INDICATORS............................................................... 12
RC9 –MAINTENANCE........................................................................................................................... 13
RC9 - TROUBLE SHOOTING GUIDE.................................................................................................... 13
RC9 –MAINTENANCE SCHEDULE..................................................................................................... 14
WARRANTY................................................................................................................................. 15INDEX