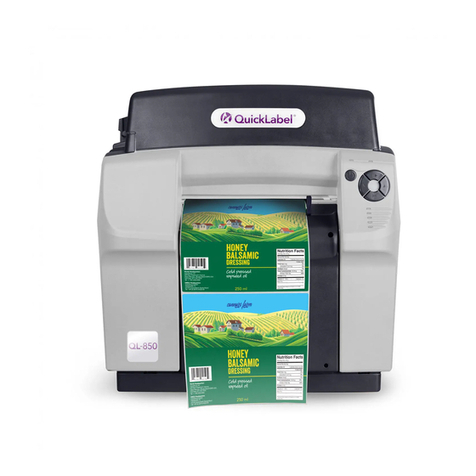
AstroNova QuickLabel QL-850 User manual

Guía de inicio rápido de la QL-850
Guide de prise en main rapide QL-850
QL-850 Kurzanleitung
QL-850 快速入门指南
QUICK START GUIDE
9006-0000007 (1.1)


English
QL-850 Quick Start Guide 1
QL-850 Quick Start Guide
Use the instructions in this guide to quickly set up your new QL-850 printer. For detailed
information about printer operation, please refer to the QL-850 User Guide.
After installing the printer driver, you can access the QL-850 User Guide by choosing Start >
All Programs > QuickLabel QL-850 > User Guide.
Unpacking the Printer
1. Remove the packing straps from the shipping carton. Cut the tape securing the top of the
carton. Then open the top of the carton.
2. Remove the accessory box and packing materials from the shipping carton.
3. Lift the shipping carton off the printer and shipping pallet.
4. With help from another person, lift the printer off the shipping pallet.
The printer is heavy and moving it requires two people. One person should lift the
front by the indicated lift point, while the other person should lift the back by the
indicated lift point. Do not lift the printer by the mandrel. Lift the front of the printer by
the recessed handle. Lift the rear of the printer by the flat area of the plastic frame
above the mandrel. Keep the printer level while lifting it.
5. Place the printer on a sturdy, flat horizontal surface that can support at least 100 pounds
(45.4 kilograms).
6. Remove all packing tape from the printer exterior. This tape is used to secure the doors and
covers in place.
There is also tape holding the maintenance cartridge in place. Open the main side door and
lower side door to access and remove this tape.

2QL-850 Quick Start Guide
English
7. With the main side door open, remove the yellow transport unit shipping lock by rotating it
counterclockwise approximately 45 degrees, aligning it, and then pulling it straight out.
Save the lock for future shipping purposes.
Note: The printer will function with the transport shipping lock installed. However, the
transport unit cannot be removed while the lock is in place.
8. Grasp the transport unit handle and pull the transport unit straight out of the printer.
An absorbent pad is positioned above the transport unit for shipping. Remove this pad.
9. Reinstall the transport unit. Ensure it is fully inserted in the printer.
10. Close the main side door but leave the lower side door open.

English
QL-850 Quick Start Guide 3
11. Grasp the maintenance cartridge and pull it straight out of the printer. Then reinstall the
maintenance cartridge. Ensure it is fully inserted in the printer.
12. Close the lower side door.
Included Parts
• Power cable
• USB cable (do not connect until prompted during driver installation)
• Printhead
• Four ink cartridges (one for each color)
System Requirements
• Windows® 10/8/7
• Microsoft .NET Framework 4.0
• 350 MB free hard drive space
• Internet connection for software download
• One available USB 2.0 port for USB installation or network connectivity for network
installation
Powering On
1. Connect the power cable to the printer power inlet [1]. Connect the other end of the power
cable to the power source. Then turn on the power via the power inlet switch [2].

4QL-850 Quick Start Guide
English
2. Press and hold the power key [3] for one second to turn the printer on.
The printer will begin the power-up process, including opening the printhead latch, and the
green LED will flash momentarily. When the green LED stops flashing and remains on, the
printer will be ready to use.
Note: The red error LED will be on until you use the After Shipping wizard later in this
guide.
Installing the Printer Driver
1. Ensure the QL-850 is powered on but not connected to your PC via the USB cable.
2. Power on your PC and download the QL-850 installer program from
www.QuickLabel.com/downloads. Run the “Setup.exe” file. The Installer wizard will open.
Choose Install Driver.
3. Choose Install Printer Software. The software installation wizard will start.
Note: If the Windows logo testing or publisher verification warning messages appear
during installation, choose to continue the installation.
4. When prompted to select a printer connection method, choose Configure to print using
USB. Then choose Next.
Note: A USB configuration is required for the initial installation. You can later install the
printer as a network printer by following the instructions in the QL-850 User Guide.
5. When prompted, connect the QL-850 to your PC with a USB cable. The installation will
continue once the USB connection is made.
6. When prompted, select whether the QL-850 will be set as the default printer.
7. Choose Finish.
Using the After Shipping Wizard
1. Launch the QL-850 Maintenance Utility.
From the Windows Start Menu, choose Start > All Programs > QuickLabel QL-850 >
QL-850 Maintenance Utility. A language and printer prompt will open.
Select a display language and the QL-850 printer you want to connect to. Choose OK.
2. Choose the Cleaning tab.
English
QL-850 Quick Start Guide 5
3. Choose After Shipping. Follow the on-screen instructions to complete this procedure. This
wizard will guide you through the following actions.
• Preparing the Maintenance Roller
• Installing Ink Cartridges
• Installing the Printhead
These procedures are detailed in the following sections.
Preparing the Maintenance Roller
1. Open the top cover and remove the cinch strap [1].
2. Remove the foam support block [2] from the printer. Use caution when removing the block
to avoid dislodging the maintenance roller assembly.
Save the foam support block and strap for future shipping purposes.
3. Verify that the maintenance roller assembly is level and installed properly. Make sure both
ends of the roller are snapped into place.

6QL-850 Quick Start Guide
English
Installing Ink Cartridges
For safety, keep ink cartridges out of the reach of children. If ink is accidentally ingested,
contact a physician immediately.
1. Open the main side door. Open both ink cartridge latches [1]. Each latch can be opened by
pressing down on the top of the locking mechanism and pulling outward.
The ink cartridge latches have labels showing where each ink color will be installed.
2. Remove the four absorbent pads [2] from the ink cartridge slots. Save the pads for future
shipping purposes.
3. Slide in the ink cartridge, nozzle end first, label side up. Push the cartridge in all the way.
You will feel slight resistance near the end of this process as the nozzle engages the ink
needles inside the printer. Repeat this step for each color.
There are sharp needles in the ink cartridge slot. Never put your fingers in this area.
The printer is designed so that ink cartridges cannot be inserted in the wrong slots.
Do not attempt to insert ink cartridges in the wrong slots.
4. Make sure the ink cartridges are fully inserted. Push the ink cartridges in as far as they will
go.
5. Close the ink cartridge latches. Then close the main side door.

English
QL-850 Quick Start Guide 7
Installing the Printhead
The printhead is sensitive to electrostatic discharge (ESD). Use ESD protection when
handling the printhead.
Do not touch the printhead cartridge ink couplings, nozzle surface, or the electrical
contacts when installing the printhead cartridge. Hold the printhead cartridge ONLY by
the handles.
To avoid drying out the printhead, do not open the printhead packaging until you are
ready to use it.
Open the printhead packaging over an appropriate receptacle to safely capture any
excess shipping fluid.
1. Ensure the printer is powered on and the ink cartridges have been installed.
2. Open the top cover.
3. Make sure the printhead latch [1] is in the open (vertical) position. Remove the cap
protectors [2] from the two fluidic couplings.
Note: The printhead latch will be in the open position. Do not close the latch before
installing the printhead. If the latch is accidentally closed, do not pry it open. Turn the printer
off and back on again. The latch automatically opens during power up if no printhead is
installed.
4. Remove the printhead from the packaging.
Note: If the foil packing is damaged, report the issue to Technical Support or your reseller.
Do not place the unprotected printhead cartridge on any surface. Protect the
printhead cartridge at all times from contamination such as dust or fibers.
5. Wipe any excess shipping fluid from the printhead cartridge with a clean, lint-free cloth.

8QL-850 Quick Start Guide
English
6. Remove the orange protective plastic cover from the printhead cartridge, holding the
printhead by the handle.
• Remove the flaps covering the ink ports.
• Remove the clip holding the cover near the center of the printhead cartridge.
• Carefully remove the protective cover. Do not touch any of the ink ports or nozzle plate
after the orange cover is removed.
7. Hold the printhead cartridge by the handle with one hand. Carefully remove the protective
plastic strips with the other hand.
• Grasp the pull tab and slowly peel back the plastic strip covering the electrical
contacts.
• Grasp the pull tab and slowly peel back the plastic strip covering the printhead
nozzles. Maintain an angle of no less than 45 degrees with the printhead surface when
pulling on the strip.
Dispose of the removed strips immediately and do not allow the removed strips to
touch the electrical contacts or printhead nozzles.
8. Carefully remove the plastic bracket from the printhead cartridge.
9. Point the ink ports away from the front (label exit side) of the printer.
10. Align the printhead cartridge with the printhead slot.

English
QL-850 Quick Start Guide 9
11. Tilt the top of the printhead cartridge toward the back of the printer, about 20 degrees. Then
gently place the back of the printhead cartridge into the print engine.
Avoid touching the printhead connector circuit board inside the printer.
12. When the back of the printhead is firmly in place, gently rotate the printhead cartridge
forward into position against the stops on the printhead connector circuit board.
If the printhead will not rotate into position, do not force it. Remove the printhead and
try again.
13. Slowly close the printhead latch. The fluidic couplings should advance and seal to the
printhead cartridge.
If the latch will not close, do not force it. Remove the printhead and try again.
14. Close the top cover.
15. Finish the After Shipping wizard in the QL-850 Maintenance Utility.

10 QL-850 Quick Start Guide
English
16. Open the top cover and verify that ink has filled all of the five tubes shown below.
If ink is not visible in all of the indicated tubes, contact Technical Support. Do not run
the After Shipping Wizard in the QL-850 Maintenance Utility again or an ink overflow
may occur.
17. Close the top cover.
Loading Media
1. Turn the wing nut [1] on the end of the mandrel counterclockwise to loosen the mandrel.
2. Loosen the fastener on the outer flange [4]. Then remove the outer flange from the
mandrel.
3. Orient the media roll [2] as illustrated and put it on the mandrel. Make sure the roll makes
contact with the inner flange [3].
4. Turn the wing nut [1] on the end of the mandrel clockwise until you feel resistance. This
secures the roll in place.
5. Put the outer flange [4] on the mandrel. Make sure the outer flange makes contact with the
roll [2].
6. Tighten the fastener on the outer flange [4] until you feel resistance. This secures the outer
flange in place.
7. On the front of the printer, slide the media exit guide [5] all the way to the right toward the
control panel. You can adjust this guide before printing.
8. Place the media near the entry slot.

English
QL-850 Quick Start Guide 11
9. Loosen the thumbscrew on the adjustable media guide [6] and slide the guide to the width
of the media. The edges of the media should lightly contact the edges of the fixed media
guide [7] and the adjustable media guide [6]. Tighten the thumbscrew on the adjustable
media guide [6].
10. Slowly guide the media into the printer as illustrated. You will feel slight resistance as the
media enters the roller area. Make sure there is no excessive slack in the media during this
process.
11. The printer will beep three times to indicate the media has been detected. Release the
media when the printer starts automatically feeding it into the printer. The printer will feed
media and the loading process will be complete.
Note: If the automatic media feeding process fails, the media will be ejected back out of the
printer. If you experience multiple loading failures, use the alternate manual feed method
described in the QL-850 User Guide.
Next Steps
You have finished setting up the printer. Please refer to the QL-850 User Guide to set up the
printer driver, configure optional QuickLabel software, and begin printing labels.
Visit www.QuickLabel.com for video tutorials on setting up and using the QL-850 printer.

12 QL-850 Quick Start Guide
English

Español
Guía de inicio rápido de la QL-850 13
Guía de inicio rápido de la QL-850
Use las instrucciones de esta guía para configurar rápidamente su nueva impresora QL-850.
Para obtener información más detallada sobre el funcionamiento de la impresora, consulte la
Guía de usuario de la QL-850.
Después de instalar el controlador de la impresora, tendrá acceso a la Guía de usuario de la
QL-850 a través del menú Inicio> Todos los programas > QuickLabel QL-850 > Guía de
usuario.
Cómo desempacar la impresora
1. Retire las cintas de embalaje de la caja de envío. Corte la cinta adhesiva que asegura la
parte superior de la caja. Después abra la parte superior de la caja.
2. Extraiga la caja de accesorios y los materiales de empaque de la caja de envío.
3. Saque la impresora y la tarima de envío de la caja de envío.
4. Con ayuda de otra persona, levante la impresora de la tarima de envío.
La impresora es pesada y se necesitan dos personas para poder moverla. Una
persona debe levantar la parte delantera por el punto de elevación indicado,
mientras que la otra debe levantar la parte trasera por el punto de elevación
indicado. No levante la impresora agarrándola por el mandril. Levante la parte
delantera de la impresora por la manija empotrada. Levante la parte trasera de la
impresora por la zona plana del marco de plástico encima del mandril. Mantenga la
impresora nivelada mientras la levanta.
5. Coloque la impresora sobre una superficie plana, horizontal y resistente que pueda
soportar por lo menos 100 lb (45.4 kg).
6. Retire toda la cinta de embalaje del exterior de la impresora. Esta cinta se utiliza para
mantener las puertas y las cubiertas en su lugar.

14 Guía de inicio rápido de la QL-850
Español
También hay una cinta que mantiene el cartucho de mantenimiento en su lugar. Abra las
puertas laterales principal e inferior para acceder a esta cinta y retirarla.
7. Con la puerta lateral principal abierta, extraiga el bloqueo de envío amarillo de la unidad de
transporte girándolo hacia la izquierda, aproximadamente 45º hasta que quede alineado y
después jale hacia afuera en línea recta. Guarde el elemento de bloqueo para futuros
envíos.
Nota: La impresora funcionará con el bloqueo de envío de la unidad de transporte
instalado. Sin embargo, no se puede retirar la unidad de transporte mientras esté instalado
el bloqueo.
8. Sujete la manija de la unidad de transporte y extraiga la unidad de transporte jalando en
línea recta hacia fuera de la impresora.

Español
Guía de inicio rápido de la QL-850 15
Para el envío se coloca una almohadilla absorbente encima de la unidad de transporte.
Retire esta almohadilla.
9. Vuelva a instalar la unidad de transporte. Asegúrese de que está bien insertada en la
impresora.
10. Cierre la puerta lateral principal, pero deje abierta la puerta lateral inferior.
11. Sujete el cartucho de mantenimiento y extráigalo directamente de la impresora. Después
reinstale el cartucho de mantenimiento. Asegúrese de que está bien insertado en la
impresora.
12. Cierre la puerta lateral inferior.
Piezas incluidas
• Cable de alimentación
• Cable USB (no lo conecte hasta que se le solicite durante la instalación del controlador)
• Cabezal de impresión
• Cuatro cartuchos de tinta (uno de cada color)
Requisitos del sistema
• Windows® 10/8/7
• Microsoft .NET Framework 4.0
• 350 MB de espacio libre en el disco duro
• Conexión a Internet para descargar el software
• Un puerto USB 2.0 libre para la instalación por USB o conexión de red para la instalación
en red

16 Guía de inicio rápido de la QL-850
Español
Encendido
1. Conecte el cable de alimentación a la entrada de energía de la impresora [1]. Conecte el
otro extremo del cable de alimentación a la fuente de alimentación. A continuación,
encienda la alimentación presionando el interruptor de entrada de energía [2].
2. Mantenga presionada la tecla de encendido [3] durante un segundo para encender la
impresora.
La impresora comenzará el proceso de encendido, se abrirá el pestillo del cabezal de
impresión y el LED verde parpadeará momentáneamente. Cuando el LED verde deje de
parpadear y permanezca encendido, la impresora estará lista para usarse.
Nota: El LED rojo de error se iluminará hasta que ejecute el asistente Procedimiento
posterior al envío que aparece más adelante en esta guía.
Cómo instalar el controlador de la impresora
1. Asegúrese de que la QL-850 esté encendida pero no conectada a su computadora a
través del cable USB.
2. Encienda su computadora y descargue el programa de instalación de la QL-850 en
www.QuickLabel.com/downloads. Ejecute el archivo «Setup.exe». Se abrirá el asistente de
instalación. Elija Instalar el controlador.
3. Elija Instalar el software de la impresora. Se iniciará el asistente de instalación del
software.
Nota: Si durante la instalación aparecen mensajes de advertencia de la prueba del
logotipo de Windows o de la verificación del editor, elija continuar con la instalación.
4. Cuando se le solicite que seleccione un método de conexión para la impresora, elija
Configurar para imprimir mediante USB. Después elija Siguiente.
Nota: Se requiere una configuración USB para realizar la instalación inicial. Más adelante
puede instalar la impresora como una impresora de red siguiendo las instrucciones de la
Guía de usuario de la QL-850.

Español
Guía de inicio rápido de la QL-850 17
5. Cuando se le solicite, conecte la QL-850 a su computadora con un cable USB. La
instalación continuará una vez que se realice la conexión USB.
6. Cuando se le solicite, seleccione si la QL-850 será la impresora predeterminada.
7. Elija Finalizar.
Cómo usar el asistente Procedimiento posterior al envío
1. Inicie QL-850 Maintenance Utility.
En el menú de Inicio de Windows, seleccione Inicio > Todos los programas >
QuickLabel QL-850 > QL-850 Maintenance Utility. Aparecerá la opción de elegir un
idioma y una impresora.
Seleccione un idioma y la impresora QL-850 que desee conectar. Elija Aceptar.
2. Elija la pestaña Limpieza.
3. Escoja Procedimiento posterior al envío. Siga las instrucciones de la pantalla para
completar este procedimiento. Este asistente lo guiará a lo largo de las siguientes
acciones:
• Preparación del rodillo de mantenimiento
• Cómo instalar los cartuchos de tinta
• Cómo instalar el cabezal de impresión
Estos procedimientos se detallan en las siguientes secciones.
Preparación del rodillo de mantenimiento
1. Abra la cubierta superior y retire la correa de sujeción [1].
2. Retire el bloque del soporte de espuma [2] de la impresora. Tenga cuidado al quitar el
bloque para evitar desplazar el conjunto del rodillo de mantenimiento.
Guarde el bloque de soporte de espuma y la correa para futuros envíos.

18 Guía de inicio rápido de la QL-850
Español
3. Compruebe que el conjunto del rodillo de mantenimiento esté nivelado e instalado
correctamente. Asegúrese de que ambos extremos del rodillo estén encajados en su lugar.
Cómo instalar los cartuchos de tinta
Para su seguridad, mantenga los cartuchos de tinta fuera del alcance de los niños. Si se
ingiere la tinta por accidente, llame a un médico de inmediato.
1. Abra la puerta lateral principal. Abra ambos pestillos de los cartuchos de tinta [1]. Cada
pestillo se puede abrir presionando hacia abajo la parte superior del mecanismo de
bloqueo y jalando hacia afuera.
Los pestillos de los cartuchos de tinta tienen etiquetas que indican dónde se debe instalar
cada color de tinta.
2. Retire las cuatro almohadillas absorbentes [2] de las ranuras de los cartuchos de tinta.
Guarde las almohadillas para futuros envíos.
3. Deslice el cartucho de tinta, primero deslice el extremo de la boquilla, con la etiqueta hacia
arriba. Empuje el cartucho hasta el final.
Sentirá una ligera resistencia casi al final de este proceso cuando la boquilla se enganche
en las agujas de tinta que hay dentro de la impresora. Repita este paso con cada color.
En la ranura del cartucho de tinta hay agujas filosas. Nunca ponga los dedos en
este lugar.
Other manuals for QuickLabel QL-850
1
Table of contents
Languages:
Other AstroNova Label Maker manuals

AstroNova
AstroNova QuickLabel QL800 User manual

AstroNova
AstroNova QuickLabel QL-900 User manual

AstroNova
AstroNova QuickLabel QL800 User manual

AstroNova
AstroNova QuickLabel QL-240 User manual

AstroNova
AstroNova Trojanlabel Trojan T2-C User manual

AstroNova
AstroNova QuickLabel Kiaro! QL-120 User manual

AstroNova
AstroNova QuickLabel QL-E100 User manual

AstroNova
AstroNova QuickLabel QL-850 User manual